ubuntu部署supersor
1、安装pip
$ sudo apt-get install python-pip –y

$ sudo pip install  - -upgrade pip          //升级pip
2、安装supervisor
$ sudo pip install supervisor
3、建立配置文件存放目录
$ sudo mkdir –p /etc/supervisor/conf.d
4、 将默认配置导入supervisor.conf文件里,以下命令需用root执行
$ sudo -i                                //切换到用户root

# echo_supervisord_conf > /etc/supervisor/supervisor.conf
5、 修改配置文件
$ sudo vim /etc/supervisor/supervisor.conf
----------------------------------------------------------------->
#开启web连接,并设置用户和密码,0.0.0.0表示放行所有IP

[inet_http_server]       ; inet (TCP) server disabled by default

port=0.0.0.0:9001       ; ip_address:port specifier, *:port for all iface

username=admin       ; default is no username (open server)

password=123456       ; default is no password (open server)

#修改配置文件路径与类型

[include]

files = conf.d/*.conf
6、 新建一个java配置
$ sudo vim /etc/supervisor/conf.d/java.conf
--------------------------------------------------------------------->
[program:java]

command=/usr/bin/java -jar /data/www/room/devshixin.jar              ; the program (relative uses PATH, can take args)

;process_name=%(program_name)s         ; process_name expr (default %(program_name)s)

;numprocs=1                            ; number of processes copies to start (def 1)

;directory=/tmp                        ; directory to cwd to before exec (def no cwd)

;umask=022                             ; umask for process (default None)

;priority=999                          ; the relative start priority (default 999)

autostart=true                         ; start at supervisord start (default: true)

;startsecs=1                           ; # of secs prog must stay up to be running (def. 1)

;startretries=3                        ; max # of serial start failures when starting (default 3)

autorestart=unexpected                 ; when to restart if exited after running (def: unexpected)

;exitcodes=0,2                          ; 'expected' exit codes used with autorestart (default 0,2)

;stopsignal=QUIT                        ; signal used to kill process (default TERM)

;stopwaitsecs=10                       ; max num secs to wait b4 SIGKILL (default 10)

;stopasgroup=false                      ; send stop signal to the UNIX process group (default false)

;killasgroup=false                     ; SIGKILL the UNIX process group (def false)

;user=chrism                            ; setuid to this UNIX account to run the program

;redirect_stderr=true                   ; redirect proc stderr to stdout (default false)

stdout_logfile=/var/log/dev_room.log        ; stdout log path, NONE for none; default AUTO

stdout_logfile_maxbytes=1MB             ; max # logfile bytes b4 rotation (default 50MB)

stdout_logfile_backups=10             ; # of stdout logfile backups (0 means none, default 10)

;stdout_capture_maxbytes=1MB            ; number of bytes in 'capturemode' (default 0)

;stdout_events_enabled=false           ; emit events on stdout writes (default false)

stderr_logfile=/var/log/err_dev_room.log    ; stderr log path, NONE for none; default AUTO

stderr_logfile_maxbytes=1MB           ; max # logfile bytes b4 rotation (default 50MB)

stderr_logfile_backups=10              ; # of stderr logfile backups (0 means none, default 10)

;stderr_capture_maxbytes=1MB           ; number of bytes in 'capturemode' (default 0)

;stderr_events_enabled=false           ; emit events on stderr writes (default false)

;environment=A="1",B="2"               ; process environment additions (def no adds)

;serverurl=AUTO                        ; override serverurl computation (childutils)
7、 启动supervisor
$ supervisor –c /etc/supervisor/supervisor.conf
8、 启动服务并添加开机启动
#启动服务

$ /usr/local/bin/supervisord -c /etc/supervisor/supervisor.conf

#添加开机启动

$ sudo vim /etc/rc.local
---------------------------------->

/usr/local/bin/supervisord –c /etc/supervisor/supervisor.conf
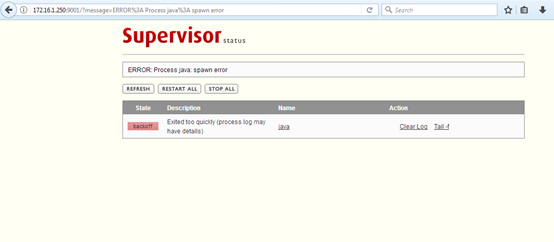
9、 网页访问supervisor

ubuntu部署supersor的更多相关文章
- Ubuntu部署python3.5的开发和运行环境
Ubuntu部署python3.5的开发和运行环境 1 概述 由于最近项目全部由python2.x转向 python3.x(使用目前最新的 python3.5.1) ,之前的云主机的的默认python ...
- Ubuntu部署python3.7的开发和运行环境
Ubuntu部署python3.7的开发和运行环境 1 概述 由于最近项目全部由python2.x转向 python3.x(使用 python3.7.1) ,之前的云主机的的默认python版本都面临 ...
- Ubuntu 部署 nginx
Ubuntu 部署 nginx apt-get install nginx
- 阿里云Ubuntu部署java web - 文件夹
文件夹(点击章节标题阅读): 阿里云Ubuntu部署java web(1) - 系统配置 ssh链接server(使用终端远程链接) 加入用户 给用户赋予运 ...
- Ubuntu部署jmeter
一:ubuntu部署jdk 1:先下载jdk-8u74-linux-x64.tar.gz,上传到服务器,这里上传文件用到了ubuntu 下的 lrzsz. ubuntu下直接执行 sudo apt-g ...
- ubuntu部署django详细教程
教程使用的软件版本:Ubuntu 18.04.1 LTS,django2.0,Python 3.6.5.nginx-1.13.7.uWSGI (2.0.17.1),Ubuntu是纯净的,全新的.下面我 ...
- ubuntu部署.Net Core3.1(Nginx+pm2)
前言 虽然.NetCore已经出来很久了,但是很多初学者还是不会在linux部署.所以写一篇初学者在ubuntu下部署Core的全过程,大佬请无视. 环境搭建 ubuntu18.04 NetCore3 ...
- python3.6 ubuntu部署nginx、 uwsgi、 django
ubuntu部署nginx. uwsgi. django 将项目上传到服务器 python manager.py runserver 0:80 在浏览器输入服务器的域名或者ip地址,访问成功. 安装u ...
- 写给新手看的Flask+uwsgi+Nginx+Ubuntu部署教程
学习 Flask,写完一个 Flask 应用需要部署的时候,就想着折腾自己的服务器.根据搜索的教程照做,对于原理一知半解,磕磕碰碰,只要运行起来了,谢天谢地然后不再折腾了,到下一次还需要部署时,这样的 ...
随机推荐
- C#实例,熟练使用泛型数组等,课程选择小软件
CourseItem.cs using System; using System.Collections.Generic; using System.Linq; using System.Text; ...
- mysql复制表结构和内容
许多时候我们想复制一张表部分或者全部内容,或者只复制一张表的框架,这种需求应该说我们很常见. 其实想要实现这种需求十分简单. 表一: mysql> select * from student_i ...
- 图片加载控件glide
基本用法 //(1)加载网络图片 tvGlide1.setText("(1)加载网络图片"); Glide.with(this).load("http://img1.im ...
- [原创]java WEB学习笔记13:JSP介绍(背景,特点,原理)
JSP介绍:(理解) 1)JSP背景 ①在很多动态网页中,绝大部分内容都是固定不变的,只有局部内容需要动态产生和改变: ②如果使用Servlet程序来输出只有局部内容需要动态改变的网页,其中所有的静态 ...
- 【leetcode刷题笔记】Decode Ways
A message containing letters from A-Z is being encoded to numbers using the following mapping: 'A' - ...
- Spark Structured Streaming框架(3)之数据输出源详解
Spark Structured streaming API支持的输出源有:Console.Memory.File和Foreach.其中Console在前两篇博文中已有详述,而Memory使用非常简单 ...
- poj 2251 Dungeon Master-搜索进阶-暑假集训
普及一下知识 s.empty() 如果栈为空返回true,否则返回falses.size() 返回栈中元素的个数s.pop() 删除栈顶元素但不返回其值s.top() 返回栈顶的元素,但不删除该元素s ...
- cocos2dx 中 string 转json
string jsonData = warriors.toStyledString().c_str(); Json::Value parseData; Json::Reader reader; rea ...
- ajax页面中的前进与后台的实现
具体效果参考:http://www.zhangxinxu.com/study/201306/ajax-page-html5-history-api.html? //以下是自己的部分理解<!DOC ...
- 十九 Django框架,发送邮件
全局配置settings.py EMAIL_BACKEND = 'django.core.mail.backends.smtp.EmailBackend' #发送邮件引擎 EMAIL_USE_TLS ...