利用SharedPreferences完成记住账号密码的功能
利用SharedPreferences完成记住账号密码的功能
效果图:
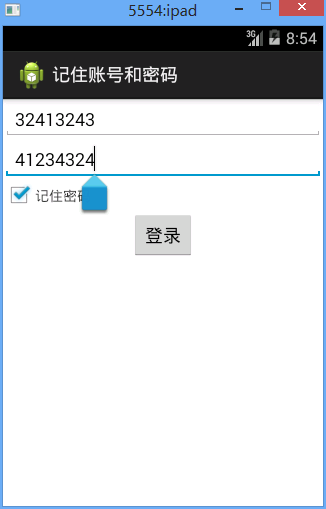
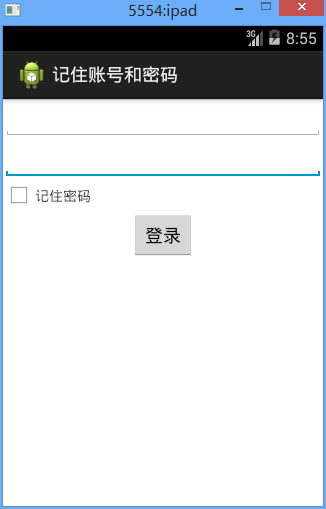
记住密码后,再次登录就会出现账号密码,否则没有。
分析:
SharedPreferences可将数据存储到本地的配置文件中
SharedPreferences会记录CheckBox的状态,如果CheckBox被选,则将配置文件中记录的账号密码信息回馈给账号密码控件,否则清空。
SharedPreferences使用方法:
1、创建名为config的配置文件,并且私有
private SharedPreferences config;
config=getSharedPreferences("config", MODE_PRIVATE);
2、添加编辑器
Editor edit=config.edit();
3、向内存中写入数据
String username=et_username.getText().toString();
String password=et_password.getText().toString();
edit.putString("username", username).putString("password", password);
4、提交到本地
edit.commit();
代码:
fry.Activity01
 package fry;

 import com.example.rememberUserAndPassword.R;

 import android.app.Activity;

 import android.content.SharedPreferences;

 import android.content.SharedPreferences.Editor;

 import android.os.Bundle;

 import android.view.View;

 import android.widget.Button;

 import android.widget.CheckBox;

 import android.widget.TextView;

 import android.widget.Toast;

 public class Activity01 extends Activity{

     private Button btn_login;

     private TextView et_username;

     private TextView et_password;

     private CheckBox cb_choose;

     private SharedPreferences config;

     @Override

     protected void onCreate(Bundle savedInstanceState) {

         // TODO Auto-generated method stub

         super.onCreate(savedInstanceState);

         setContentView(R.layout.activity01);

         config=getSharedPreferences("config", MODE_PRIVATE);

         btn_login=(Button) findViewById(R.id.btn_login);

         et_username=(TextView) findViewById(R.id.et_username);

         et_password=(TextView) findViewById(R.id.et_password);

         cb_choose=(CheckBox) findViewById(R.id.cb_choose);

         //是否记住了密码,初始化为false

         boolean isCheck=config.getBoolean("isCheck", false);

         //Toast.makeText(this, isCheck+" ", Toast.LENGTH_SHORT).show();

         if(isCheck){

             et_username.setText(config.getString("username", ""));

             et_password.setText(config.getString("password", ""));

             cb_choose.setChecked(isCheck);

         }

     }

     //权限要是public,要不然访问不到

     //因为在button控件中设置了android:onClick="onClick"

     public void onClick(View view){

         Toast.makeText(this, "登录成功", Toast.LENGTH_SHORT).show();

         Editor edit=config.edit();

         String username=et_username.getText().toString();

         String password=et_password.getText().toString();

         boolean isCheck=cb_choose.isChecked();

         //Toast.makeText(this, isCheck+" ", Toast.LENGTH_SHORT).show();

         //存储CheckBox的状态

         edit.putBoolean("isCheck", isCheck);

         if(isCheck){

             edit.putString("username", username).putString("password", password);

         }else{

             edit.remove("username").remove("password");

         }

         //提交到本地

         edit.commit();

     }

 }
代码逻辑部分
/记住账号和密码/res/layout/activity01.xml
 <?xml version="1.0" encoding="utf-8"?>

 <LinearLayout xmlns:android="http://schemas.android.com/apk/res/android"

     android:layout_width="match_parent"

     android:layout_height="match_parent"

     android:orientation="vertical" >

     <EditText

         android:id="@+id/et_username"

         android:layout_width="match_parent"

         android:layout_height="wrap_content"

         />

     <EditText

         android:id="@+id/et_password"

         android:layout_width="match_parent"

         android:layout_height="wrap_content"

         android:ems="10" >

         <requestFocus />

     </EditText>

     <LinearLayout

         android:layout_width="wrap_content"

         android:layout_height="wrap_content"

         >

         <CheckBox

                 android:id="@+id/cb_choose"

             android:layout_width="wrap_content"

             android:layout_height="wrap_content"

             />

         <TextView

             android:layout_width="wrap_content"

             android:layout_height="wrap_content"

             android:text="记住密码"

             />

     </LinearLayout>

     <!-- android:onClick="onClick" 点击时去class中调用onClick方法,权限要为public -->

     <Button

         android:id="@+id/btn_login"

         android:layout_width="wrap_content"

         android:layout_height="wrap_content"

         android:text="登录"

         android:layout_gravity="center_horizontal"

         android:onClick="onClick"

         />

 </LinearLayout>
界面设计部分
利用SharedPreferences完成记住账号密码的功能的更多相关文章
- css 修改placeholder字体颜色字体大小 修改input记住账号密码后的默认背景色
壹 ❀ 引 本来这个阶段的项目页面都是给实习生妹子做的,我只用写写功能接接数据,但这两天妹子要忙翻译,这个工作阶段也快结束了导致有点慌,只能自己把剩余的几个小页面给写了. 那么做页面的过程中,UI也 ...
- struts2的记住账号密码的登录设计
一个简单的基于struts2的登录功能,实现的额外功能有记住账号密码,登录错误提示.这里写上我在设计时的思路流程,希望大家能给点建设性的意见,帮助我改善设计. 登录功能的制作,首先将jsp界面搭建出来 ...
- 基于struts2的记住账号密码的登录设计
一个简单的基于struts2的登录功能,实现的额外功能有记住账号密码,登录错误提示.这里写上我在设计时的思路流程,希望大家能给点建设性的意见,帮助我改善设计. 登录功能的制作,首先将jsp界面搭建出来 ...
- C# ASP.NET MVC:使用Cookie记住账号密码
MVC记住账号密码 使用cookie操作 前端: <div> 用户名:<input type="text" id="UserName" val ...
- Linux让git记住账号密码
Linux让git记住账号密码 ——IT唐伯虎 摘要: Linux让git记住账号密码. 1.进入根目录,指令:cd / 2.创建记录账号密码的文件,指令:touch .git-credentials ...
- Git设置记住账号密码
Git设置记住账号密码 添加如下配置 [credential] helper = store
- cocos2d JS 本地缓存存储登陆记住账号密码->相当于C++中的UserDefault
在cocos-js 3.0以上的版本中,当我们用到本地存储的时候,发现以前用到的UserDefault在JS中并没有导出,而是换成了LocalStorage. 在LocalStorage.h文件中我们 ...
- OpenVPN记住账号密码自动连接
说明:在增加了证书+账号密码之后,安全性确实提高了,但是面临的问题也有,每次重启时必须输入账号密码才能连接,这也造成了无人值守的问题. 解决: 1.在Client的client.ovpn末尾添加一行a ...
- 利用python破解sqlserver账号密码
一.编写密码测试函数 在用python连接mssql数据库的时候,通常会使用pymssql模板中的connect函数,格式如下: connect(server,user,password,databa ...
随机推荐
- Java接口中的成员变量为什么必须声明为public static final?
我想对于每个Java程序员来说,接口都不陌生,接口中的方法也经常使用.而接口中的成员变量,就显得用得少一点,而对于成员变量为什么必须声明为public static final,可能就更不清楚了,而且 ...
- PHP获得文件的大小并转换格式
利用filesize($filename)函数获得一个文件的大小 参数$filename为文件的绝对路径,返回的值是文件的大小字节数. 文件较大的时候看起来不方便,下面是一个格式化方法 functio ...
- SLAM:ORB-SLAM 位姿优化描述
只知道算法描述和代码,而不知道原理是比较扯的事情,还是把原理转载一下. 原文链接: http://www.cnblogs.com/luyb/p/5447497.html ORB-SLAM作为单目SLA ...
- POJ_2411_Mondriaan's Dream_状态压缩dp
Mondriaan's Dream Time Limit: 3000MS Memory Limit: 65536K Total Submissions: 15407 Accepted: 888 ...
- 进行https通信时服务器端下发的是一个证书链
进行https通信时服务器端下发的是一个证书链,否则无法验证证书的有效性.
- jq 禁用复选框 和输入框
$('input').attr("readonly", ""); $('input').attr("disabled", "fal ...
- [vuejs短文]使用vue-transition制作小小轮播图
提示 本文是个人的一点小笔记,用来记录开发中遇到的轮播图问题和vue-transition问题. 会不断学习各种轮播图添加到本文当中 也有可能会上线,方便看效果 开始制作 超简易呼吸轮播 简单粗暴的使 ...
- poj 2763(LCA + dfs序 +树状数组)
算是模板题了 可以用dfs序维护点到根的距离 注意些LCA的时候遇到MAXM,要-1 #include<cstdio> #include<algorithm> #include ...
- 第一个GTK程序
/*我已经把代码写在此处 希望借鉴和完善!一起加油奥(PS:我的QQ是1693672542欢迎加我一起进行探讨学习奥!!!)*/#include <stdio.h>#include< ...
- 【codeforces 793B】Igor and his way to work
[题目链接]:http://codeforces.com/contest/793/problem/B [题意] 给一个n*m大小的方格; 有一些方格可以走,一些不能走; 然后问你从起点到终点,能不能在 ...