Android:ServiceDemo
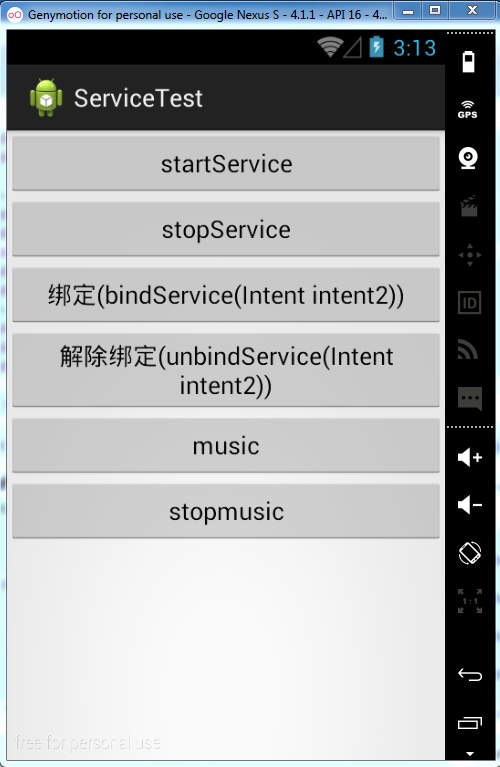
效果图:
layout的main.xml:
<?xml version="1.0" encoding="utf-8"?>

<LinearLayout xmlns:android="http://schemas.android.com/apk/res/android"

    android:layout_width="match_parent"

    android:layout_height="match_parent"

    android:orientation="vertical" >

    <Button

        android:id="@+id/start"

        android:onClick="onClick"

        android:layout_width="match_parent"

        android:layout_height="wrap_content"

        android:text="startService" />

    <Button

        android:id="@+id/stop"

        android:onClick="onClick"

        android:layout_width="match_parent"

        android:layout_height="wrap_content"

        android:text="stopService" />

    <Button

        android:id="@+id/bind"

        android:onClick="onClick"

        android:layout_width="match_parent"

        android:layout_height="wrap_content"

        android:text="绑定(bindService(Intent intent2))" />

    <Button

        android:id="@+id/unbind"

        android:onClick="onClick"

        android:layout_width="match_parent"

        android:layout_height="wrap_content"

        android:text="解除绑定(unbindService(Intent intent2))" />

	<Button

        android:id="@+id/music"

        android:onClick="onClick"

        android:layout_width="match_parent"

        android:layout_height="wrap_content"

        android:text="music" />

	<Button

        android:id="@+id/stopmusic"

        android:onClick="onClick"

        android:layout_width="match_parent"

        android:layout_height="wrap_content"

        android:text="stopmusic" />

</LinearLayout>
MainActivity:
package com.wyl.servicedemo;

import com.wyl.servicedemo.MyBindService.MyBinder;

import android.app.Activity;

import android.app.Service;

import android.content.ComponentName;

import android.content.Intent;

import android.content.ServiceConnection;

import android.os.Bundle;

import android.os.IBinder;

import android.view.View;

import android.widget.Button;

import android.widget.Toast;

public class MainActivity extends Activity {

	Intent intent ;

	Intent intent2;

	MyBindService service;//定义一个类型为继承了Service类的MyBindService类的成员变量,

	/*

	 * 使用bindService(intent2, conn, Service.BIND_AUTO_CREATE);方式开启一个

	 * Service服务必须实例化一个ServiceConnection用来接收extends Service的MyBindService里

	 * 回传的数据

	 */

	ServiceConnection conn = new ServiceConnection() {

		/**

		 * 当启动源跟Service的连接意外丢失的时候会调用这个方法

		 * 比如当Service崩溃了或者被强行kill了。

		 */

		@Override

		public void onServiceDisconnected(ComponentName arg0) {

			// TODO Auto-generated method stub

			int s = service.SIZE;

//			Toast.makeText(this, "onServiceConnected()方法所在线程为:"+Thread.currentThread().getName(), 100).show();

			System.out.println("SIZE:"+s+",onServiceDisconnected()方法所在线程为:"+Thread.currentThread().getName());

		}

		@Override

		public void onServiceConnected(ComponentName arg0, IBinder binder) {

			//接收会传来的数据,根据这个service我们可以获取一些数据

			service = ((MyBinder)binder).getService();

			int s = service.SIZE;

//			Toast.makeText(this, "onServiceConnected()方法所在线程为:"+Thread.currentThread().getName(), 100).show();

			System.out.println("SIZE:"+s+",onServiceConnected()方法所在线程为:"+Thread.currentThread().getName());

		}

	};

	@Override

	protected void onCreate(Bundle savedInstanceState) {

		super.onCreate(savedInstanceState);

		setContentView(R.layout.main);

	}

	public void onClick(View view) {

		switch (view.getId()) {

		case R.id.start:

			intent = new Intent(MainActivity.this,MyService.class);

			System.out.println("onClick.startService()");

			Toast.makeText(this, "开启线程startService", 500).show();

			startService(intent);

			break;

		case R.id.stop:

			System.out.println("onClick.stopService()");

			Toast.makeText(this, "关闭线程stopService", 500).show();

			stopService(intent);

			break;

		case R.id.bind://绑定

			intent2 = new Intent(MainActivity.this,MyBindService.class);

			//第三个参数是自动开启服务的作用,第二个参数不能够为空,且为ServiceConnection conn类型,

			bindService(intent2, conn, Service.BIND_AUTO_CREATE);

			System.out.println("onClick.bindService()");

			Toast.makeText(this, "开启绑定", 500).show();

			break;

		case R.id.unbind://解除绑定

			stopService(intent2);

			unbindService(conn);//解除绑定,这个参数一个不能够为空,unbindService(ServiceConnection conn);

			System.out.println("onClick.unbindService()");

			Toast.makeText(this, "解除绑定", 500).show();

			break;

		case R.id.music://播放音乐

			service.Play();

			Toast.makeText(this, "播放音乐", 500).show();

			break;

		case R.id.stopmusic://暂停音乐

			service.Play();

			Toast.makeText(this, "暂停音乐", 500).show();

			break;

		}

	}

}
MyService.java (这个service只是用来普通的stopService(),和startService()):
package com.wyl.servicedemo;

import android.app.Service;

import android.content.Intent;

import android.os.IBinder;

public class MyService extends Service{

	@Override

	/*

	 * Parameters

		intent  The Intent that was used to bind to this service,

		as given to Context.bindService. Note that any extras

		that were included with the Intent at that point will

		 not be seen here.

	   Returns

	   Return an IBinder through which clients can call on to the service.

	 */

	public void onCreate() {

		System.out.println("BindService.onCreate()");

		super.onCreate();

	};

	public IBinder onBind(Intent arg0) {

		// TODO Auto-generated method stub

		System.out.println("BindService.onBind");

		return null;

	}

	@Override

	public int onStartCommand(Intent intent, int flags, int startId) {

		// TODO Auto-generated method stub

		System.out.println("onStartCommand()方法。。。。");

		return super.onStartCommand(intent, flags, startId);

	}

	@Override

	public void onDestroy() {

		// TODO Auto-generated method stub

		System.out.println("myServie.ondestroy()....");

		super.onDestroy();

	}

}
MyBindService.java :用bind的方式来绑定service,
package com.wyl.servicedemo;

import android.app.Service;

import android.content.Intent;

import android.content.ServiceConnection;

import android.os.Binder;

import android.os.IBinder;

public class MyBindService extends Service{

	public static int SIZE = 3;

	@Override

	public void onCreate() {

		System.out.println("onCreate()方法。。。");

		super.onCreate();

	}

	/**

	 * bind方式开启service,必须写一个类继承Binder,

	 * 然后再IBinder onBind(Intent arg0)方法中返回所需要返回的值

	 * @author wyl

	 *

	 */

	public class MyBinder extends Binder{

		public MyBindService getService(){

			System.out.println("MyBinder extends Binder的MyBindService getService()方法。。。");

			return MyBindService.this;

		}

	}

	@Override

	public IBinder onBind(Intent arg0) {

		System.out.println("public IBinder onBind(Intent arg0) 方法。。。");

		/*

		 * onBind(Intent arg0),想回传数据,

		 * 必须写上面的public class MyBinder extends Binder

		 */

		return new MyBinder();

	}

	@Override

	public boolean onUnbind(Intent intent) {

		System.out.println("onUnbind(Intent intent)方法。。。");

		return super.onUnbind(intent);

	}

	@Override

	public void unbindService(ServiceConnection conn) {

		System.out.println("unbindService(ServiceConnection conn)方法。。。");

		super.unbindService(conn);

	}

	@Override

	public void onDestroy() {

		System.out.println("onDestroy()方法。。。");

		super.onDestroy();

	}

	public void Play(){

		System.out.println("MyBindService.Play()方法,播放音乐");

	}

	public void Pause(){

		System.out.println("MyBindService.Pause()方法,暂停");

	}

}
有一点要说明:写service或者自己定义了一个新的activity等,这些都需要在清单文件里进行注册。
否则不能够生效,有的时候程序还不报错,页面上还只是空白,所以不好找原因。要牢记一定在在清单文件里注册。
Android:ServiceDemo的更多相关文章
- Android四大组件之—— 使用服务进行后台操作
什么是服务 服务是一个没有可视化界面的组件,它可以在后台长期运行并进行各种操作. 服务的创建 我们只需要继承Service类并实现相应的方法即可创建服务 要想启动服务,还得在AndroidManife ...
- Android入门(十八)服务
原文链接:http://www.orlion.ga/674/ 一.定义一个服务 创建一个项目ServiceDemo,然后在这个项目中新增一个名为 MyService的类,并让它继承自 Service, ...
- 一个帖子学会Android开发四大组件
来自:http://www.cnblogs.com/pepcod/archive/2013/02/11/2937403.html 这个文章主要是讲Android开发的四大组件,本文主要分为 一.Act ...
- Android 保持Service不被Kill掉的方法--双Service守护 && Android实现双进程守护
本文分为两个部分,第一部分为双Service守护,第二部分为双进程守护 第一部分: 一.Service简介:Java.lang.Object ↳Android.content.Context ↳an ...
- Android Service学习之本地服务
Service是在一段不定的时间运行在后台,不和用户交互应用组件.每个Service必须在manifest中 通过来声明.可以通过contect.startservice和contect.bindse ...
- Android开发之Service的写法以及与Activity的通信
Service的总结: 1.按运行地点分类: 类别 区别 优点 缺点 应用 本地服务(Local) 该服务依附在主进程上, 服务依附在主进程上而不是独立的进程,这样在一定程度上节约了资源,另外 ...
- 保持Service不被Kill掉的方法--双Service守护 && Android实现双进程守护
本文分为两个部分,第一部分为双Service守护,第二部分为双进程守护 第一部分: 一.Service简介:Java.lang.Object ↳Android.content.Context ↳an ...
- Android Service生命周期及用法
Service概念及用途:Android中的服务,它与Activity不同,它是不能与用户交互的,不能自己启动的,运行在后台的程序,如果我们退出应用时,Service进程并没有结束,它仍然在后台运行, ...
- Android 之Service
service是运行在后台的服务,你可以启动一个服务Service来播放音乐,或者记录你地理信息位置的改变,或者启动一个服务来运行并一直监听某种动作. 接下来分析一下service 的生命周期: 1: ...
随机推荐
- A Byte of Python 笔记(7)数据结构:列表、元组、字典,序列
第9章 数据结构 数据结构,即可以处理一些数据的结构.或者说,它们是用来存储一组相关数据的. python 有三种内建的数据结构--列表.元组和字典. list = ['item1', 'item2' ...
- @Transactional失效的问题
spring事物配置一般没有问题, 优先检查mysql的引擎是否是innodb, 是的话检查包的扫描是否有问题. 我就是因为包的扫描导致@Transactional失效. 具体情况如下, 在sprin ...
- MVC-04 视图(1)
不可否认的,View应该是整个ASP.NET MVC项目开发过程中最花时间的部分,因为与显示逻辑相关的技术五花八门,你可能要学习的有HTML.CSS.JavaScript.DOM.JQuery.JSO ...
- 从51跳新唐cortex学习3——细说新唐两种定时器
的定时器我们已经是相当熟悉啦.但是,对于第一次接触新唐,第一次接触cortex的定时器一样,都是加1计数,但是功能和容量变大了),包括4个32位定时器(里面放24位的数据),还有分频功能.TMER0到 ...
- Spring-data-redis: 分布式队列
Redis中list数据结构,具有"双端队列"的特性,同时redis具有持久数据的能力,因此redis实现分布式队列是非常安全可靠的.它类似于JMS中的"Queue&qu ...
- [置顶] Asp.Net底层原理(一、浏览器和服务器的交互原理)
…… 一.浏览器和服务器的交互原理 二.写自己的"迷你"Asp.net框架 三.Asp.Net的请求与响应过程 1.在此之前,首先简单的模拟一下我们去请求一个网址的时候,浏览器和服 ...
- SharePoint 2010 BCS - 简单实例(一)数据源加入
博客地址 http://blog.csdn.net/foxdave 本篇基于SharePoint 2010 Foundation. 我的数据库中有一个病人信息表Patient,如今我就想把这个表中的数 ...
- js 字符串为空
content.replace(/(^\s)|(\s$)/g, "")
- js 获取单项复选的值
html: 单选框-----> 25岁以下 25~35岁 35~50岁 50岁以上 获值 var question1 = $('input:radio[name="radio" ...
- python切片练习
这块儿没什么难的,细心一点就好 L = [] n = 1 while n <= 99: L.append(n) n = n + 2 print(L) #但是在Python中,代码不是越多越好,而 ...