Spring Security 初学
Spring Security 初学
声明:本篇文章无源码解析,属于初学范围,本文采用SpringBoot+thymeleaf的项目。
实现 SpringSecurity 分三步走
继承 WebSecurityConfigurerAdapter 类
Override configure
- configure(HttpSecurity http) (权限控制)
- configure(AuthenticationManagerBuilder auth) (认证)
@EnableWebSecurity:开启WebSecurity模式
使用内存账号密码登录
环境准备
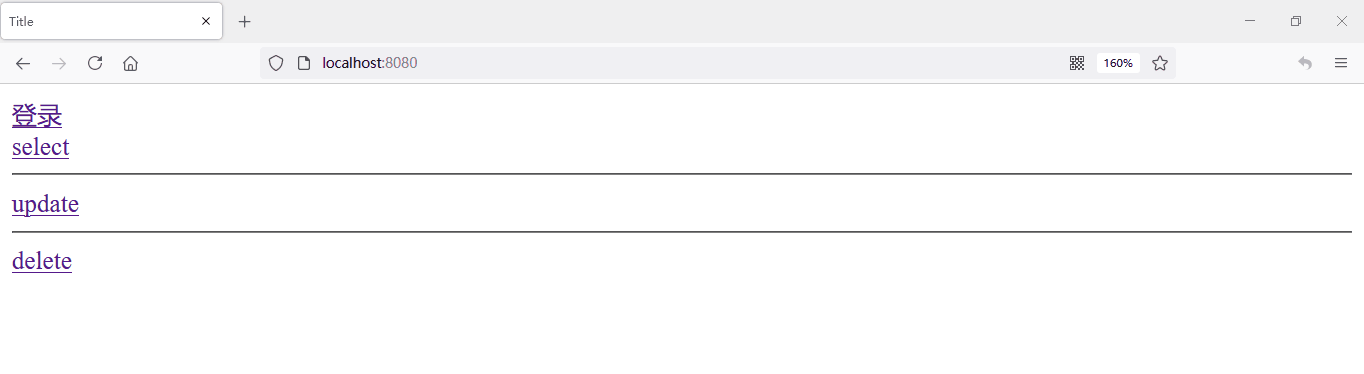
编写几个页面,首页用作跳转,跳转select、update、delete页面,编写对应controller,此时先别添加security的maven依赖
controller
MyController
@Controller
public class MyController { @GetMapping({"/","/index"})
public String toIndex(){
return "index";
} @GetMapping("/select")
public String select(){
return "user/select";
} @GetMapping("/delete")
public String delete(){
return "user/delete";
} @GetMapping("/update")
public String update(){
return "user/update";
}}
目录结构如下
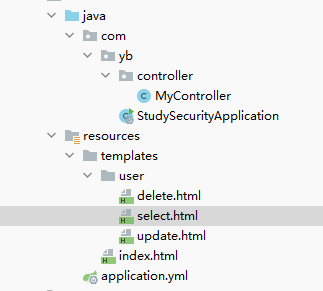
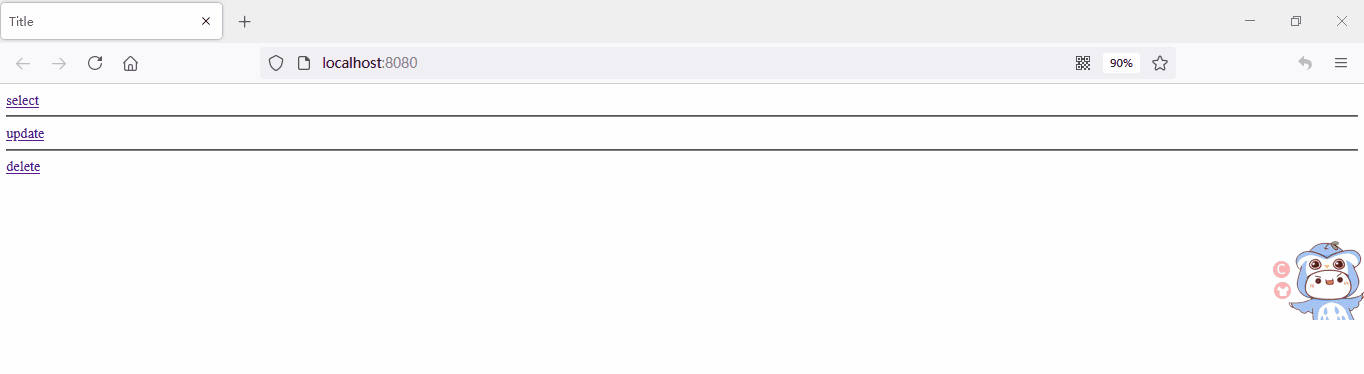
启动项目试一下正常能否跳转。
使用内存账号密码来进行登录操作
添加 security maven依赖
<dependency>

    <groupId>org.springframework.boot</groupId>

    <artifactId>spring-boot-starter-security</artifactId>

</dependency>
- 继承 WebSecurityConfigurerAdapter 类,
- 重写俩个 configure方法
- @EnableWebSecurity 启用 WebSecurity
@EnableWebSecurity

public class MyWebSecurityConfigurerAdapter extends WebSecurityConfigurerAdapter {

    //权限控制

    @Override

    protected void configure(HttpSecurity http) throws Exception {

        super.configure(http);

    }

	//认证(登录认证)

    @Override

    protected void configure(AuthenticationManagerBuilder auth) throws Exception {

        super.configure(auth);

    }

}
此时直接启动项目,会发现需要登录,账号为 user,密码在启动项目中输出了
Using generated security password:
自动生成的密码肯定不符合我们正常需求,Spring Security提供了不使用数据库就可以配置账号密码的方法,修改认证方法即可。
在此之前,先配置访问 首页 、 select 、 delete 、update 的权限,修改 权限控制 的方法即可。
@Override

protected void configure(HttpSecurity http) throws Exception {

    //配置登录

    http.formLogin();

    //配置权限

    http.authorizeRequests()

        // 首页都可以访问

        .antMatchers("/","/index").permitAll()

        // 访问 /select 需要登录才能访问

        .antMatchers("/select").authenticated()

        // 访问 /delete 需要拥有 delete权限

        .antMatchers("/delete").hasAuthority("delete")

        // 访问 /update 需要拥有 role_update 角色权限

        .antMatchers("/update").hasRole("update");

}
配置用户账号密码及权限(暂时未使用数据库)
@Override

protected void configure(AuthenticationManagerBuilder auth) throws Exception {

    // 使用内存来设置账号密码

    auth.inMemoryAuthentication()

        // 密码加密工具,使用的是 security 中的

        .passwordEncoder(new BCryptPasswordEncoder())

        // 账号密码,密码使用的是加密后的密码,如果你知道加密后密码多少,也可以 .password("xx") //xx为加密后的密码

        .withUser("root").password(new BCryptPasswordEncoder().encode("1"))

        //给予权限,role其实也是Authority,角色就是权限前加一个 ROLE_

        .authorities("delete","ROLE_update")

        // and拼接多个用户

        .and()

        .withUser("test").password(new BCryptPasswordEncoder().encode("1"))

        .authorities("delete");

}
启动项目
由于我们对三个页面都配置了权限,所以访问三个都需要登录操作,
对于select我们登录即可访问,delete需要delete权限,update需要update角色权限
我们登录root,三个都可以访问,登录test,只能访问select和delete,访问update会报403forbidden,
我们配置一下报错页面
新增一个error.html页面,配置对应的controller
@GetMapping("/error")

public String errorPage(){

    //跳转对应页面

    return "error";

}
修改 权限控制 方法,htpp是链式编程,可以接着上方formLogin或者添加角色的地方写,例如 http.formLogin().and().exceptionHandling().accessDeniedPage("/error");
@Override

protected void configure(HttpSecurity http) throws Exception {

    //配置登录

    http.formLogin();

    http.authorizeRequests()

            // 首页都可以访问

            .antMatchers("/","/index").permitAll()

            // 访问 /select 需要登录

            .antMatchers("/select").authenticated()

            // 访问 /delete 需要拥有 delete权限

            .antMatchers("/delete").hasAuthority("delete")

            // 访问 /update 需要拥有 role_update 角色权限

            .antMatchers("/update").hasRole("update");

    //新增错误页面跳转,跳转到接口

    http.exceptionHandling().accessDeniedPage("/error");

}
使用test账号登录,update页面就变成了配置的 error.html 页面
配置登录页面
使用Spring Security的登录页总归是不好的,自己写一个!
首先新建login.html页面
login.html
    Title

用户名:

密码:
编写配置跳转的controller
@GetMapping("/toLogin")

public String toLogin(){

    return "login";

}
修改 权限控制 方法
@Override

protected void configure(HttpSecurity http) throws Exception {

    //配置登录

    http.formLogin()

            //登录页面跳转接口

            .loginPage("/toLogin")

            //登录页面提交时的方法名,注意是页面提交 action 的方法名

            .loginProcessingUrl("/login")

        	//账号密码,登录页面 input 的 name 值,注意需要对应

        	.usernameParameter("username").passwordParameter("pwd");

    http.authorizeRequests()

            // 首页都可以访问

            .antMatchers("/","/index").permitAll()

            // 访问 /select 需要登录

            .antMatchers("/select").authenticated()

            // 访问 /delete 需要拥有 delete权限

            .antMatchers("/delete").hasAuthority("delete")

            // 访问 /update 需要拥有 role_update 角色权限

            .antMatchers("/update").hasRole("update");

    http.exceptionHandling().accessDeniedPage("/error");

}
启动项目,成功跳转,成功登录
可以在 index.html 页面加一个登录按钮,跳转至 /toLogin 方法。
登出(退出)
有登录按钮,就有退出按钮,刚才我还是删除浏览器记录才退出的,太麻烦了,写一个退出功能吧。
修改 权限控制 方法,如果为get请求的方法,需要关闭 csrf()
@Override

protected void configure(HttpSecurity http) throws Exception {

    //配置登录

    http.formLogin()

        //登录页面跳转接口

        .loginPage("/toLogin")

        //登录页面提交时的方法名,process,过程

        .loginProcessingUrl("/login")

        //账号密码,登录页面 input 的 name 值

        .usernameParameter("username").passwordParameter("pwd")

        .and()

        //退出操作

        .logout()

        //退出按钮的方法,如果前端退出按钮方法也为 logout,则此处可不写

        .logoutUrl("/logout")

        //退出成功跳转的方法

        .logoutSuccessUrl("/");

    //链式编程,可以直接接在上方

    //http.logout().logoutSuccessUrl("/");

    //如果不关闭,get请求会被拦截,需要验证,本例中的logout为get请求,需要关闭

    http.csrf().disable();

    http.authorizeRequests()

        // 首页都可以访问

        .antMatchers("/","/index").permitAll()

        // 访问 /select 需要登录

        .antMatchers("/select").authenticated()

        // 访问 /delete 需要拥有 delete权限

        .antMatchers("/delete").hasAuthority("delete")

        // 访问 /update 需要拥有 role_update 角色权限

        .antMatchers("/update").hasRole("update");

    http.exceptionHandling().accessDeniedPage("/error");

}
修改 index.html 页面,添加退出按钮
启动项目
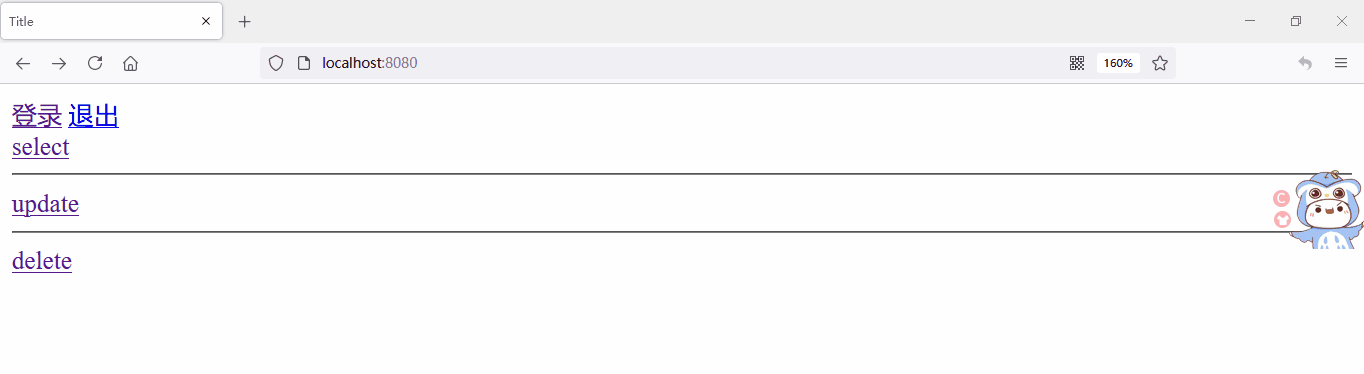
让页面退出和登录不同时存在
导入thymeleaf 和 springsecurity 的整合包(我的springboot版本2.5.2,低版本可能使用的是springsecurity4)
<dependency>

    <groupId>org.thymeleaf.extras</groupId>

    <artifactId>thymeleaf-extras-springsecurity5</artifactId>

</dependency>
<!-- 低版本使用4 -->

<dependency>

    <groupId>org.thymeleaf.extras</groupId>

    <artifactId>thymeleaf-extras-springsecurity4</artifactId>

    <version>3.0.2.RELEASE</version>

</dependency>
html引入命名空间,注意 http://www.thymeleaf.org/thymeleaf-extras-springsecurity5 为 http://www.thymeleaf.org/ + 导入依赖的名称,如果导入的是 springsecurity4 则为http://www.thymeleaf.org/thymeleaf-extras-springsecurity4
xmlns:sec="http://www.thymeleaf.org/thymeleaf-extras-springsecurity5"
启动项目
一般来说,自己没有的权限,不应该显示出来,本例中 root 有所有权限,test 有 select、delete权限,我们让自己的权限显示出来,自己没有的权限不显示出来,修改 index.html 代码
启动项目

由于没有登录,所以什么权限都没有。
使用注解控制方法权限
修改 权限控制 方法,将其他需要登录验证的权限控制删除,添加 permit "/toLogin" 方法,其他方法都需要权限
@Override

protected void configure(HttpSecurity http) throws Exception {

    //配置登录

    http.formLogin()

        //登录页面跳转接口

        .loginPage("/toLogin")

        //登录页面提交时的方法名,process,过程

        .loginProcessingUrl("/login")

        //账号密码,登录页面 input 的 name 值

        .usernameParameter("username").passwordParameter("pwd")

        .and()

        //退出操作

        .logout()

        //退出按钮的方法,如果前端退出按钮方法也为 logout,则此处可不写

        .logoutUrl("/logout")

        //退出成功跳转的方法

        .logoutSuccessUrl("/");

    //        链式编程,可以直接接在上方

    //        http.logout().logoutSuccessUrl("/");

    //如果不关闭,get请求会被拦截,需要验证,本例中的logout为get请求,需要关闭

    http.csrf().disable();

    http.authorizeRequests()

        // 首页都可以访问

        .antMatchers("/","/index","/toLogin").permitAll()

        //                // 访问 /select 需要登录

        //                .antMatchers("/select").authenticated()

        //                // 访问 /delete 需要拥有 delete权限

        //                .antMatchers("/delete").hasAuthority("delete")

        //                // 访问 /update 需要拥有 role_update 角色权限

        //                .antMatchers("/update").hasRole("update");

        //其他方法都需要验证

        .anyRequest().authenticated();

    http.exceptionHandling().accessDeniedPage("/error");

}
修改对应controller增加与上方相同的权限
@Controller

public class MyController {

    @GetMapping({"/","/index"})

    public String toIndex(){

        return "index";

    }

    @GetMapping("/select")

    //需要认证,大部分与前端相同

    @PreAuthorize("isAuthenticated()")

    public String select(){

        return "user/select";

    }

    @GetMapping("/delete")

    //需要delete权限

    @PreAuthorize("hasAuthority('delete')")

    public String delete1(){

        return "user/delete";

    }

    @GetMapping("/update")

    //需要update权限

    @PreAuthorize("hasRole('update')")

    public String update(){

        return "user/update";

    }

    @GetMapping("/error")

    public String errorPage(){

        return "error";

    }

    @GetMapping("/toLogin")

    public String toLogin(){

        return "login";

    }

}
使用数据库账号密码登录
实现 UserDetails 实现类
实现 UserDetailsService 实现类
修改 认证 方法
准备工作
mysql数据库
创建用户表及对应数据
CREATE TABLE user (

id int(20) primary key comment '用户id',

name varchar(30) comment '用户名',

pwd varchar(100) comment '密码'

);

insert into user values (1,'root','$2a$10$r.6c2l3FffSbTfHASQB.vepKYahB/Ct0VhvtgZESK3llquYlpM52q');

insert into user values (2,'test','$2a$10$r.6c2l3FffSbTfHASQB.vepKYahB/Ct0VhvtgZESK3llquYlpM52q');
创建用户权限表
CREATE TABLE user_auth (

id INT(20) comment '用户id',

auth VARCHAR(20) comment '权限'

);

insert into user_auth values (1,'delete');

insert into user_auth values (1,'ROLE_update');

insert into user_auth values (2,'delete');
实现 UserDetails 实现类
实现 UserDetails 接口即可,在重写方法中,他需要什么,我们写什么给他,比如需要password,给他写一个password,其他boolean值返回true即可。
编写无参和有参构造方法,给password和username赋值。
public class MyUserDetail implements UserDetails {

    private String password;

    private String username;

    Collection<GrantedAuthority> authorities;

    public MyUserDetail(){

    }

    public MyUserDetail(String password, String username) {

        this.password = password;

        this.username = username;

    }

    @Override

    public Collection<? extends GrantedAuthority> getAuthorities() {

        return this.authorities;

    }

    @Override

    public String getPassword() {

        return this.password;

    }

    @Override

    public String getUsername() {

        return this.username;

    }

    @Override

    public boolean isAccountNonExpired() {

        return true;

    }

    @Override

    public boolean isAccountNonLocked() {

        return true;

    }

    @Override

    public boolean isCredentialsNonExpired() {

        return true;

    }

    @Override

    public boolean isEnabled() {

        return true;

    }

}
实现 UserDetailsService 实现类
简单实现:查询用户,返回上方的实现类
@Service

public class MyUserServiceImpl implements UserDetailsService {

    @Autowired

    private UserMapper userMapper;

    @Override

    public UserDetails loadUserByUsername(String username) throws UsernameNotFoundException {

        //获取用户,根据用户名获取用户

        User user = userMapper.getUserByName(username);

        if(user == null){

            //用户不存在时抛出异常

            throw new UsernameNotFoundException("用户不存在");

        }

        //由于需要一个 UserDetails(interface),所以我们 new 一个我们写的实现类返回回去,

        MyUserDetail userDetail = new MyUserDetail(user.getPwd(), user.getName());

        return userDetail;

    }

}
修改 认证 方法
之前的认证是通过内存中的账号密码,本次使用数据库
@Override

protected void configure(AuthenticationManagerBuilder auth) throws Exception {

    //BCrypt加密每次盐都不一样,所以加密之后的值一般不一样,下面为 1 加密后的结果

    //$2a$10$r.6c2l3FffSbTfHASQB.vepKYahB/Ct0VhvtgZESK3llquYlpM52q

    auth.userDetailsService(userDetailsService)

        .passwordEncoder(new BCryptPasswordEncoder());

    //        // 使用内存来设置账号密码

    //        auth.inMemoryAuthentication()

    //                // 密码加密工具,使用的是 security 中的

    //                .passwordEncoder(new BCryptPasswordEncoder())

    //                // 账号密码,密码使用的是加密后的密码,如果你知道加密后密码多少,也可以 .password("xx") //xx为加密后的密码

    //                .withUser("root").password(new BCryptPasswordEncoder().encode("1"))

    //                //给予权限

    //                .authorities("delete","ROLE_update")

    //                // and拼接

    //                .and()

    //                .withUser("test").password(new BCryptPasswordEncoder().encode("1"))

    //                .authorities("delete");

}
启动项目
配置权限
我们看到上方用户都只有select权限(select为登录就有权限),没有其他权限,所以我们需要添加用户相关权限。
在 UserDetailsService 实现类中,获取用户权限,set 进 UserDetails 中
@Override

public UserDetails loadUserByUsername(String username) throws UsernameNotFoundException {

    //获取用户,根据用户名获取用户

    User user = userMapper.getUserByName(username);

    if(user == null){

        //用户不存在时抛出异常

        throw new UsernameNotFoundException("用户不存在");

    }

    //由于需要一个 UserDetails(interface),所以我们 new 一个我们写的实现类返回回去,

    MyUserDetail userDetail = new MyUserDetail(user.getPwd(), user.getName());

    //获取用户权限

    List<String> auths = userMapper.getAuthById(user.getId());

    ArrayList<GrantedAuthority> authorityArrayList = new ArrayList<>();

    //配置权限

    for(String auth : auths){

        authorityArrayList.add(new SimpleGrantedAuthority(auth));

    }

    //如果没有set方法,需要到 MyUserDetail 中添加 set 方法

    /**

         *     public void setAuthorities(Collection<GrantedAuthority> authorities) {

         *         this.authorities = authorities;

         *     }

         */

    userDetail.setAuthorities(authorityArrayList);

    return userDetail;

}
重启验证

注意事项
- Role 和 Authority 是一个东西,role只是 Authority 前加一个 ROLE_
- 退出使用 get 方法时需要关闭 csrf
- 使用注解控制权限的时候需要添加 登录 方法可以访问
- 使用的springboot版本
- 如果想自定义加密方式实现 PasswordEncoder 接口即可
- 由于html代码被转义了,附上代码地址
Spring Security 初学的更多相关文章
- Spring boot +Spring Security + Thymeleaf 认证失败返回错误信息
[Please make sure to select the branch corresponding to the version of Thymeleaf you are using] Stat ...
- 适合新手入门Spring Security With JWT的Demo
Demo 地址:https://github.com/Snailclimb/spring-security-jwt-guide .欢迎 star! Spring Security 是Spring 全家 ...
- Spring Security OAuth2 开发指南
官方原文:http://projects.spring.io/spring-security-oauth/docs/oauth2.html 翻译及修改补充:Alex Liao. 转载请注明来源:htt ...
- spring mvc 和spring security配置 web.xml设置
<?xml version="1.0" encoding="UTF-8"?> <web-app xmlns="http://xmln ...
- SPRING SECURITY JAVA配置:Web Security
在前一篇,我已经介绍了Spring Security Java配置,也概括的介绍了一下这个项目方方面面.在这篇文章中,我们来看一看一个简单的基于web security配置的例子.之后我们再来作更多的 ...
- 【OAuth2.0】Spring Security OAuth2.0篇之初识
不吐不快 因为项目需求开始接触OAuth2.0授权协议.断断续续接触了有两周左右的时间.不得不吐槽的,依然是自己的学习习惯问题,总是着急想了解一切,习惯性地钻牛角尖去理解小的细节,而不是从宏观上去掌握 ...
- spring security oauth2.0 实现
oauth应该属于security的一部分.关于oauth的的相关知识可以查看阮一峰的文章:http://www.ruanyifeng.com/blog/2014/05/oauth_2_0.html ...
- Spring Security(08)——intercept-url配置
http://elim.iteye.com/blog/2161056 Spring Security(08)--intercept-url配置 博客分类: spring Security Spring ...
- Spring Security控制权限
Spring Security控制权限 1,配置过滤器 为了在项目中使用Spring Security控制权限,首先要在web.xml中配置过滤器,这样我们就可以控制对这个项目的每个请求了. < ...
- Spring Security笔记:Hello World
本文演示了Spring Security的最最基本用法,二个页面(或理解成二个url),一个需要登录认证后才能访问(比如:../admin/),一个可匿名访问(比如:../welcome) 注:以下内 ...
随机推荐
- SpringBoot+阿里云OCR图片识别
准备条件:阿里云OCR图片识别API购买,初次购买1分钱500次接口调用 一.控制层 @GetMapping("/uploadManual") @ApiOperation(&quo ...
- 前端使用 Konva 实现可视化设计器(4)
给上一章做一个补充,就是实现通过上下左右按键移动所选节点. 继续求 Star ,希望大家多多一键三连,十分感谢大家的支持~ 创作不易,Star 50 个,创作加速! github源码 gitee源码 ...
- Stage模型深入解读
原文链接:https://mp.weixin.qq.com/s/4Mb5BMw1IgKvqE0Ff9Ts-w,点击链接查看更多技术内容: HarmonyOS 3.1版本(API 9)推出了全新应 ...
- 直播预告丨Hello HarmonyOS进阶课程第二课——计算机视觉
为了帮助初识HarmonyOS的开发者快速入门,我们曾推出Hello HarmonyOS系列一共5期课程,从最基础的配置IDE和创建Hello World开始,详细介绍HarmonyOS基础.开发环境 ...
- ArcMap分别求取矢量要素各区域的面积
本文介绍基于ArcMap软件,自动批量计算矢量图层中各个要素的面积的方法. 一次,遇到一个问题,需要分别计算ArcMap软件中一个图层的所有面要素的面积.如图,这个图层中包括多个省级行政区矢量 ...
- 重新点亮linux 命令树————用户和用户组管理[六]
前言 简单整理一下用户和用户组管理. 正文 主要是介绍下面的命令: useradd 新建用户 userdel 删除用户 passwd 修改用户面 usermod 修改用户属性 chage 修改用户属性 ...
- sass的用法重温
Sass使用变量,变量以$开头 $bgcolor:#f40; background-color:$bgcolor; 如果变量需要嵌套在字符串当中,就需要写在#{}之中 $direction:left; ...
- HarmonyOS NEXT应用开发之深色模式适配
介绍 本示例介绍在开发应用以适应深色模式时,对于深色和浅色模式的适配方案,采取了多种策略如下: 固定属性适配:对于部分组件的颜色属性,如背景色或字体颜色,若保持不变,可直接设定固定色值或引用固定的资源 ...
- Java单元测试技巧之PowerMock
简介: 高德的技术大佬向老师在谈论方法论时说到:"复杂的问题要简单化,简单的问题要深入化." 这句话让我感触颇深,这何尝不是一套编写代码的方法--把一个复杂逻辑拆分为许多简单逻辑, ...
- UWP 从文件 StorageFile 转 SoftwareBitmap 图片方法
本文告诉大家如何在 UWP 从 文件 StorageFile 转 SoftwareBitmap 图片的方法 使用以下三步即可从文件 StorageFile 转 SoftwareBitmap 图片 第一 ...