008.Ansible文件管理模块
一 stat模块
检查文件状态使用,模块获取文件的状态等信息,类似与linux中的STAT命令可以用来获取文件的属主、可读/写、文件状态等信息
[root@node1 ansible]# stat lookup_files_ex.yml
  File: ‘lookup_files_ex.yml’

  Size: 125           Blocks: 8          IO Block: 4096   regular file

Device: fd00h/64768d    Inode: 69018922    Links: 1

Access: (0644/-rw-r--r--)  Uid: (    0/    root)   Gid: (    0/    root)

Access: 2020-04-30 18:01:52.947596173 +0800

Modify: 2020-04-30 18:01:51.624591268 +0800

Change: 2020-04-30 18:01:51.626591276 +0800

 Birth: -
[root@node1 ansible]# vim files_stat_ex.yml
- hosts: demo2.example.com

  gather_facts: no

  tasks:

    - name: stat /rtc/fstab

      stat:

        path: /etc/fstab

      register: fstab_stat

    - name: print fstab_stat

      debug:

        msg: "{{ fstab_stat }}"
[root@node1 ansible]# ansible-playbook files_stat_ex.yml
TASK [print fstab_stat] ***********************************************************************************************************************

ok: [demo2.example.com] => {

    "msg": {

        "changed": false,

        "failed": false,

        "stat": {

            "atime": 1588162552.5214317,

            "attr_flags": "",

            "attributes": [],

            "block_size": 4096,

            "blocks": 8,

            "charset": "us-ascii",

            "checksum": "8e1580bbd25809a2232e28adba26735dad99cc06",

            "ctime": 1565620911.8073654,

            "dev": 64768,

            "device_type": 0,

            "executable": false,

            "exists": true,

            "gid": 0,

            "gr_name": "root",

            "inode": 33554498,

            "isblk": false,

            "ischr": false,

            "isdir": false,

            "isfifo": false,

            "isgid": false,

            "islnk": false,

            "isreg": true,

            "issock": false,

            "isuid": false,

            "mimetype": "text/plain",

            "mode": "0644",

            "mtime": 1565620660.3251472,

            "nlink": 1,

            "path": "/etc/fstab",

            "pw_name": "root",

            "readable": true,

            "rgrp": true,

            "roth": true,

            "rusr": true,

            "size": 465,

            "uid": 0,

            "version": "598828928",

            "wgrp": false,

            "woth": false,

            "writeable": true,

            "wusr": true,

            "xgrp": false,

            "xoth": false,

            "xusr": false

        }

    }

}
二 blockinfile模块
blockinfile 是 Ansible 的一个非常实用的模块,和单行替换模块 lineinfile 类似,但是可以帮助我们在文件中插入一段文本。
[root@node1 ansible]# vim files/test.html
<html>

    <head>

    </head>

    <body>

    </body>

</html>
[root@node1 ansible]# vim blockfile_ex.yml
- name: blockinfile module test
hosts: demo3.example.com
tasks:
- name: install httpd
yum:
name: httpd
state: installed
- name: copy test.html to dest
copy:
src: files/test.html
dest: /var/www/html/test.html
- name: add block
blockinfile:
marker: "<!--{mark} ANSIBLE MANAGED BLOCK -->"
insertafter: "<body>"
path: /var/www/html/test.html
block:
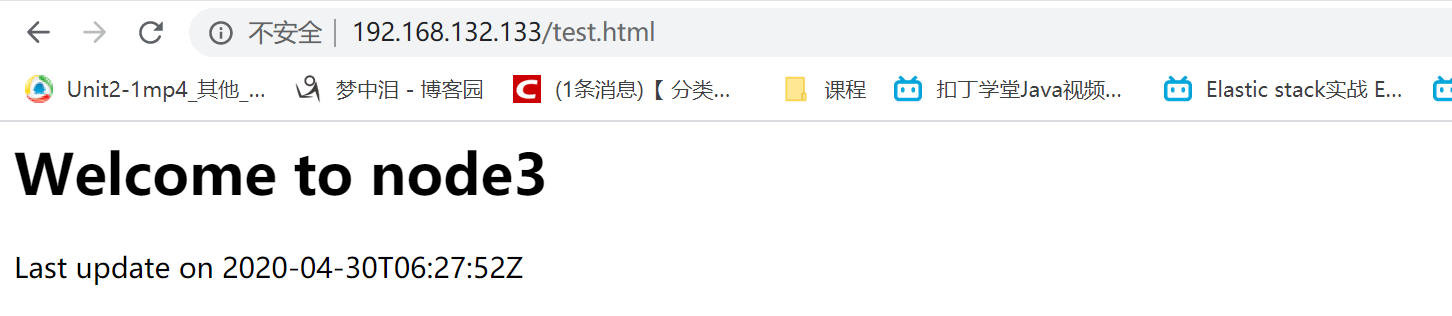
<h1>Welcome to {{ ansible_hostname}}</h1>
<p>Last update on {{ ansible_date_time.iso8601}} </p>
- name: start service
service:
name: httpd
state: started
执行
[root@node1 ansible]# ansible-playbook blockfile_ex.yml
访问
三 lineinfile模块
在大多数时候,我们在linux上的操作,就是针对文件的操作,通过配置管理工具对配置文件作统一的配置修改是一个非常酷的功能。
下面是官方针对该模块的说明:
lineinfile - Ensure a particular line is in a file, or replace an existing line using a back-referenced regular expression
简单讲,这个模块就是针对一个文件中行内容的操作。
下面我们详细说一说其具体可以做的事情。
3.1 修改匹配行
修改selinux示例
[root@node1 ansible]# ansible demo3.example.com -m shell -a "cat /etc/selinux/config |grep ^SELINUX="

[root@node1 ansible]# vim edit_selinux.yml
- hosts: demo3.example.com

  gather_facts: no

  tasks:

    - name: disable selinux

      lineinfile:

        path: /etc/selinux/config

        regex: ^SELINUX=

        line: SELINUX=disabled
[root@node1 ansible]# ansible-playbook edit_selinux.yml
[root@node1 ansible]# ansible demo3.example.com -m shell -a "cat /etc/selinux/config |grep ^SELINUX="
demo3.example.com | CHANGED | rc=0 >>

SELINUX=disabled
在node3节点写入一个文件
[root@node3 ~]# vim /tmp/test.conf
Listen 127.0.0.1:80

Listen 80

Port
3.2 插入匹配行
[root@node1 ansible]# vim lineinfile.yml
- hosts: demo3.example.com

  gather_facts: no

  tasks:

    - name: inser after

      lineinfile:

        path: /tmp/test.conf

        insertafter: "^Listen 80"   #在之后插入

        line: "aaaaa"

    - name: inser befor

      lineinfile:

        path: /tmp/test.conf

        insertbefore: "^Listen 80"    #之前插入

        line: "befor bbbb"
执行
[root@node1 ansible]# ansible-playbook lineinfile.yml
[root@node1 ansible]# ansible demo3.example.com -m shell -a "cat /tmp/test.conf"
demo3.example.com | CHANGED | rc=0 >>

Listen 127.0.0.1:80

befor bbbb

Listen 80

aaaaa

Port
3.3 删除匹配行
[root@node1 ansible]# vim lineinfile.yml
- hosts: demo3.example.com

  gather_facts: no

  vars:

    testfile: "/tmp/test.conf"

  tasks:

    - name: inser after

      lineinfile:

        path: "{{testfile}}"

        insertafter: "^Listen 80"

        line: "aaaaa"

    - name: inser befor

      lineinfile:

        path: "{{ testfile }}"

        insertbefore: "^Listen 80"

        line: "befor bbbb"

    - name: delete line

      lineinfile:

        path: "{{ testfile }}"

        regex: "^Port"

        state: absent
[root@node1 ansible]# ansible-playbook lineinfile.yml
[root@node1 ansible]# ansible demo3.example.com -m shell -a "cat /tmp/test.conf"
demo3.example.com | CHANGED | rc=0 >>

Listen 127.0.0.1:80

befor bbbb

Listen 80

aaaaa
3.4 文件存在则添加一行内容
往/etc/hosts里添加一行10.1.61.131 test.dz11.com(多次执行,不会重复添加),示例如下:
- name: add a line

  lineinfile:

    path: /etc/hosts

    line: '10.1.61.131 test.dz11.com'
如果有匹配的行则修改该行,如果不匹配则添加
[root@node1 ansible]# vim lineinfile.yml
- hosts: demo3.example.com

  gather_facts: no

  vars:

    testfile: "/tmp/test.conf"

  tasks:

    - name: inser after

      lineinfile:

        path: "{{testfile}}"

        insertafter: "^Listen 80"

        line: "aaaaa"

    - name: inser befor

      lineinfile:

        path: "{{ testfile }}"

        insertbefore: "^Listen 80"

        line: "befor bbbb"

    - name: delete line

      lineinfile:

        path: "{{ testfile }}"

        regex: "^Port"

        state: absent

    - name: regex

      lineinfile:

        path: "{{testfile}}"

        regex: "^Listen 8080 "

        line: "Listen 809090 "
[root@node1 ansible]# ansible-playbook lineinfile.yml
[root@node1 ansible]# ansible demo3.example.com -m shell -a "cat /tmp/test.conf"
demo3.example.com | CHANGED | rc=0 >>

Listen 127.0.0.1:80

befor bbbb

Listen 80

aaaaa

Listen 809090
3.5 参数backrefs,backup说明
- backup: 是否备份原文件,默认为no
- backrefs:
- 当backrefs为no时,如果regex没有匹配到行,则添加一行,如果Regx匹配到行,则修改该行
- 当backrefs为yes时,如果regex没有匹配到行,则保持原文件不变,如果regex匹配到行,则修改该行
- backrefs默认为no,所以上面那个示例中,我们没有配置backrefs,而默认没有匹配,则修改。
3.6 使用validate验证文件是否正确修改
在一些场景下,我们修改完文件后,需要对文件做一下测试,用以检查文件修改之后,是否能正常运行。如http.conf、nginx.conf等,一旦改错,而不加以测试,可能会直接导致http服务挂掉。
可以使用validate关键字,在修改完成以后,对文件执行检测:
- name: test validate

  lineinfile:

      dest: /etc/sudoers

      state: present

      regexp: '^%ADMIN ALL='

      line: '%ADMIN ALL=(ALL)'

      validate: 'visudo -cf %s'    #这里就是执行检测,比如nginx就可以写入nginx -t检测配置文件

  tags:

    - testsudo
博主声明:本文的内容来源主要来自誉天教育晏威老师,由本人实验完成操作验证,需要的博友请联系誉天教育(http://www.yutianedu.com/),获得官方同意或者晏老师(https://www.cnblogs.com/breezey/)本人同意即可转载,谢谢!
008.Ansible文件管理模块的更多相关文章
- ansible文件模块使用
1. 文件组装模块-assemble assemble主要是将多份配置文件组装为一份配置文件. 参数 必填 默认 选项 说明 Backup 否 No Yes/no 是否创建备份文件,使用时间戳 Del ...
- Ansible15:文件管理模块及Jinja2过滤器
目录 常用文件管理模块 1. file 2. synchronize 3. copy 4. fetch 5. lineinfile 6. stat 7. blockinfile Jinja2模板管理 ...
- Ansible 常用模块详解
经过前面的介绍,我们已经熟悉了 Ansible 的一些常识性的东西和如何编译安装Ansible,从本章开始我们将全面介绍 Ansible 的各种生产常用模块,这些也是我们使用 Ansible 的过程中 ...
- ansible的模块使用
转载于 https://www.cnblogs.com/franknihao/p/8631302.html [Ansible 模块] 就如python库一样,ansible的模块也分成了基本模块和 ...
- ansible服务模块和组模块使用
本篇文章主要是介绍ansible服务模块和组模块的使用. 主要模块为ansible service module和ansible group moudle,下面的内容均是通过实践得到,可以直接运行相关 ...
- ansible常用模块用法
ansible常用模块用法 2015-07-21 10:25 24458人阅读 评论(1) 收藏 举报 分类: Linux(44) ansible 版权声明:本文为博主原创文章,未经博主允许不得 ...
- Linux之ansible 常用模块
目的 代码发布系统 代码发布:把本地的代码通过某些方式弄到线上,可以供别人访问 部署 前戏 ansible 批量在远程主机上执行命令 puppet ruby ansible saltstack pyt ...
- Ansible常用模块介绍及使用(week5_day1_part2)--技术流ken
Ansible模块 在上一篇博客<Ansible基础认识及安装使用详解(一)--技术流ken>中以及简单的介绍了一下ansible的模块.ansible是基于模块工作的,所以我们必须掌握几 ...
- Ansible常用模块命令
Ansible常用模块命令 一.安装ansible yum install epel-release yum install ansible 二.配置文件配置 vi /etc/ansible/ansi ...
随机推荐
- SpringCloudAlibaba—微服务概念及SpringCloudAlibaba介绍
目录 1.1 系统架构演变 1.1.1 单体应用架构 1.1.2垂直应用架构 1.1.3 分布式架构 1.1.4 SOA架构 1.1.5 微服务架构 1.2 微服务架构介绍 1.2.1 微服务架构的常 ...
- JS基础学习第三天
条件分支语句switch语句语法: 1234567891011121314 switch(条件表达式){ case 表达式: 语句... break; case 表达式: 语句... break; c ...
- Dapper, Ef core, Freesql 插入大量数据性能比较(一)
需求:导入9999行数据时Dapper, Ef core, Freesql 谁的性能更优,是如何执行的,级联增加谁性能更佳. 确认方法:sql server 的 sys.dm_exec_query_s ...
- Dynamics CRM安装教程八:Claims-based认证-外部访问配置(IFD配置)
内部访问配置完成后就剩下最关键的最后一步了,就是外部访问配置,这个配置好以后就可以让非域用户的计算机访问到我们的CRM系统了.言归正传开始进行配置打开CRM服务器的Dynamic CRM部署管理,选择 ...
- C语言头文件到底是什么?
C语言头文件到底是什么? 在C语言学习的时候总是会引入这样的语句#include <stdio.h>,书上解释说把stdio.h这个文件的全部内容直接插入到这个位置,然后再经过C语言的编译 ...
- 扩展 GRTN:云原生趋势下的 RTC 架构演进
在 2021 LiveVideoStackCon 音视频技术大会上海站,聚焦 "轻端重云和边缘架构新模式" 专场,阿里云视频云的 RTC 传输专家杨成立(忘篱)带来 "基 ...
- Libraries
Math.ceil() The Math.ceil() function returns the smallest integer greater than or equal to a given n ...
- Nginx 配置浏览Linux 系统目录并下载文件
准备工作: 安装编译工具及库文件: yum -y install make zlib zlib-devel gcc-c++ libtool openssl openssl-devel 安装PCRE( ...
- 去css 冗余方法
1.float在某种意义上而言与display:inline-block属性的作用是一模一样的, 所以类似于display:block; float:left; 就是说.float:left 可以让行 ...
- php 简易日志函数应用 debug_backtrace()
1 public static function writeILogs($datas) 2 { 3 $bt = debug_backtrace(); 4 $caller = array_shift($ ...