基于注解的简单SSH保存用户小案例
需求:搭建SSH框架环境,使用注解进行相关的注入(实体类的注解,AOP注解、DI注入),保存用户信息
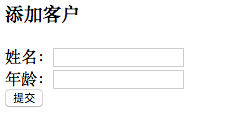
效果:
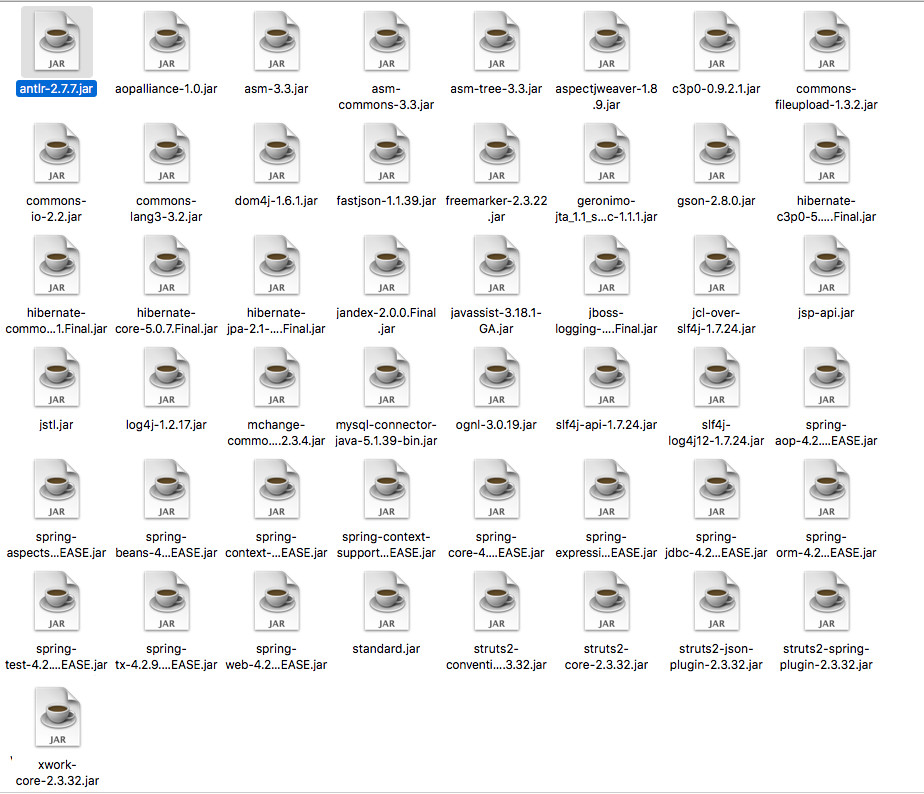
一、导依赖包
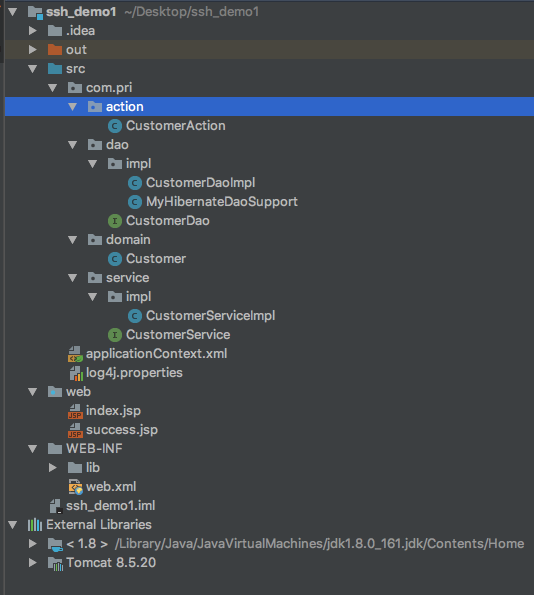
二、项目的目录结构
三、web.xml配置
 <?xml version="1.0" encoding="UTF-8"?>

 <web-app xmlns="http://xmlns.jcp.org/xml/ns/javaee"

          xmlns:xsi="http://www.w3.org/2001/XMLSchema-instance"

          xsi:schemaLocation="http://xmlns.jcp.org/xml/ns/javaee http://xmlns.jcp.org/xml/ns/javaee/web-app_3_1.xsd"

          version="3.1">

     <!--懒加载过滤器,解决懒加载问题-->

     <filter>

         <filter-name>openSession</filter-name>

         <filter-class>org.springframework.orm.hibernate5.support.OpenSessionInViewFilter</filter-class>

     </filter>

     <filter-mapping>

         <filter-name>openSession</filter-name>

         <url-pattern>*.action</url-pattern>

     </filter-mapping>

     <!-- struts2的前端控制器 -->

     <filter>

         <filter-name>struts</filter-name>

         <filter-class>org.apache.struts2.dispatcher.ng.filter.StrutsPrepareAndExecuteFilter</filter-class>

     </filter>

     <filter-mapping>

         <filter-name>struts</filter-name>

         <url-pattern>/*</url-pattern>

     </filter-mapping>

     <!-- spring 创建监听器 -->

     <listener>

         <listener-class>org.springframework.web.context.ContextLoaderListener</listener-class>

     </listener>

     <context-param>

         <param-name>contextConfigLocation</param-name>

         <param-value>classpath:applicationContext.xml</param-value>

     </context-param>

 </web-app>
四、applicationContext.xml配置
 <?xml version="1.0" encoding="UTF-8"?>

 <beans xmlns="http://www.springframework.org/schema/beans"

        xmlns:xsi="http://www.w3.org/2001/XMLSchema-instance"

        xmlns:tx="http://www.springframework.org/schema/tx"

        xmlns:contex="http://www.springframework.org/schema/context"

        xsi:schemaLocation="http://www.springframework.org/schema/beans

         http://www.springframework.org/schema/beans/spring-beans.xsd

         http://www.springframework.org/schema/tx

         http://www.springframework.org/schema/tx/spring-tx.xsd

         http://www.springframework.org/schema/context

         http://www.springframework.org/schema/context/spring-context.xsd">

     <!-- 打开注解扫描开关 -->

     <contex:component-scan base-package="com.pri"/>

     <!-- 以下是属于hibernate的配置 -->

     <bean id="dataSource" class="com.mchange.v2.c3p0.ComboPooledDataSource">

         <property name="driverClass" value="com.mysql.jdbc.Driver"/>

         <property name="jdbcUrl" value="jdbc:mysql:///ssh_demo1?useSSL=false"/>

         <property name="user" value="root"/>

         <property name="password" value=""/>

     </bean>

     <bean id="sessionFactory" class="org.springframework.orm.hibernate5.LocalSessionFactoryBean">

         <!--1、核心配置-->

         <property name="dataSource" ref="dataSource"/>

         <!-- 2、可选配置-->

         <property name="hibernateProperties">

             <props>

                 <prop key="hibernate.dialect">org.hibernate.dialect.MySQL5Dialect</prop>

                 <prop key="hibernate.show_sql">true</prop>

                 <prop key="hibernate.format_sql">true</prop>

                 <prop key="hibernate.hbm2ddl.auto">update</prop>

             </props>

         </property>

         <!-- 3、扫描映射文件 -->

         <property name="packagesToScan" value="com.pri.domain"></property>

     </bean>

     <!--开启事务控制-->

     <bean id="transactionManager" class="org.springframework.orm.hibernate5.HibernateTransactionManager">

         <property name="sessionFactory" ref="sessionFactory"></property>

     </bean>

     <tx:annotation-driven transaction-manager= "transactionManager"/>

 </beans>
五、log4j.properties配置
#设置日志记录到控制台的方式

log4j.appender.std=org.apache.log4j.ConsoleAppender

#out以黑色字体输出,err以红色字体输出

log4j.appender.std.Target=System.err

log4j.appender.std.layout=org.apache.log4j.PatternLayout

log4j.appender.std.layout.ConversionPattern=%d{yyyy-MM-dd HH:mm:ss} %5p %c{1}:%L - %m%n

#设置日志记录到文件的方式

log4j.appender.file=org.apache.log4j.FileAppender

#日志文件路径文件名

log4j.appender.file.File=mylog.log

#日志输出的格式

log4j.appender.file.layout=org.apache.log4j.PatternLayout

log4j.appender.file.layout.ConversionPattern=%d{ABSOLUTE} %5p %c{1}:%L - %m%n

#日志输出的级别,以及配置记录方案,级别:error > warn > info>debug>trace

log4j.rootLogger=info, std, file
六、页面代码
index.jsp
<%@ page contentType="text/html;charset=UTF-8" language="java" %>

<html>

  <head>

    <title>$Title$</title>

  </head>

  <body>

  <h3>添加客户</h3>

  <form action="${ pageContext.request.contextPath }/customerAction_save" method="post">

      姓名:<input type="text" name="name" /><br/>

      年龄:<input type="text" name="age" /><br/>

      <input type="submit" value="提交"/><br/>

  </form>

  </body>

</html>
success.jsp
<%@ page contentType="text/html;charset=UTF-8" language="java" %>

<html>

<head>

    <title>首页</title>

</head>

<body>

    <h1>保存成功!</h1>

</body>

</html>
七、实体层代码
 package com.pri.domain;

 import javax.persistence.*;

 @Entity

 @Table(name = "customer")

 public class Customer {

     @Id

     @Column(name = "userId")

     @GeneratedValue(strategy = GenerationType.IDENTITY)

     private Integer userId;

     @Column(name = "name")

     private String name;

     @Column(name = "age")

     private Integer age;

     public Integer getUserId() {return userId; }

     public void setUserId(Integer userId) {this.userId = userId;}

     public String getName() {return name;}

     public void setName(String name) {this.name = name;}

     public Integer getAge() {return age;}

     public void setAge(Integer age) {this.age = age;}

 }
八、action层代码
 package com.pri.action;

 import com.pri.domain.Customer;

 import com.pri.service.CustomerService;

 import com.opensymphony.xwork2.ActionSupport;

 import com.opensymphony.xwork2.ModelDriven;

 import org.apache.struts2.convention.annotation.Action;

 import org.apache.struts2.convention.annotation.Namespace;

 import org.apache.struts2.convention.annotation.ParentPackage;

 import org.apache.struts2.convention.annotation.Result;

 import org.springframework.context.annotation.Scope;

 import org.springframework.stereotype.Controller;

 import javax.annotation.Resource;

 @Controller("customerAction")

 @ParentPackage(value = "struts-default")

 @Scope("prototype")

 @Namespace(value = "/")

 public class CustomerAction extends ActionSupport implements ModelDriven<Customer>{

     private Customer customer;

     @Resource(name = "customerService")

     private CustomerService customerService;

     @Override

     public Customer getModel() {

         if (customer == null ){

             customer = new Customer();

         }

         return customer;

     }

     @Action(value = "customerAction_save",

             results = {@Result(name = SUCCESS,type = "redirect",location = "/success.jsp")})

     public String save(){

         customerService.save(customer);

         return SUCCESS;

     }

 }
九、service层代码
package com.pri.service;

import com.pri.domain.Customer;

public interface CustomerService {

    void save(Customer user);

}

//=======================================

package com.pri.service.impl;

import com.pri.domain.Customer;

import com.pri.dao.CustomerDao;

import com.pri.service.CustomerService;

import org.springframework.stereotype.Service;

import org.springframework.transaction.annotation.Transactional;

import javax.annotation.Resource;

@Service("customerService")

@Transactional

public class CustomerServiceImpl implements CustomerService {

    @Resource(name = "customerDao")

    private CustomerDao customerDao;

    @Override

    public void save(Customer customer) {

        customerDao.save(customer);

    }

}
十、dao层代码
package com.pri.dao;

import com.pri.domain.Customer;

public interface CustomerDao {

    void save(Customer customer);

}

//==================================================================

package com.pri.dao.impl;

import org.hibernate.SessionFactory;

import org.springframework.orm.hibernate5.support.HibernateDaoSupport;

import org.springframework.stereotype.Component;

import javax.annotation.Resource;

@Component("myHibernateDaoSupport")

public class MyHibernateDaoSupport extends HibernateDaoSupport {

    @Resource(name = "sessionFactory")

    public void setSuperSessionFactory(SessionFactory sessionFactory){

        super.setSessionFactory(sessionFactory);

    }

}

//=================================================

package com.pri.dao.impl;

import com.pri.dao.CustomerDao;

import com.pri.domain.Customer;

import org.springframework.stereotype.Repository;

@Repository("customerDao")

public class CustomerDaoImpl extends MyHibernateDaoSupport implements CustomerDao {

    @Override

    public void save(Customer customer) {

        getHibernateTemplate().save(customer);

    }

}
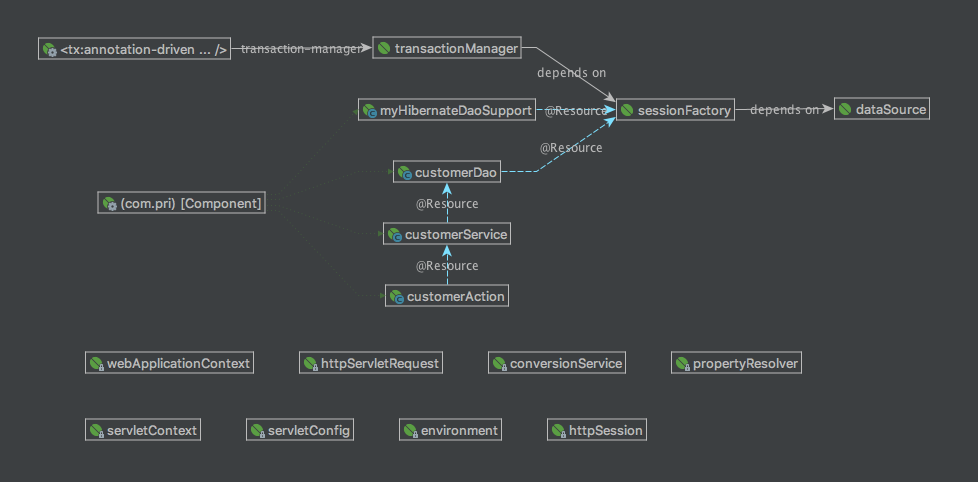
十一、Spring Beans Dependencies
基于注解的简单SSH保存用户小案例的更多相关文章
- Netty学习——基于netty实现简单的客户端聊天小程序
Netty学习——基于netty实现简单的客户端聊天小程序 效果图,聊天程序展示 (TCP编程实现) 后端代码: package com.dawa.netty.chatexample; import ...
- springboot+ehcache 基于注解实现简单缓存demo
1.加入maven依赖 <dependency> <groupId>org.springframework.boot</groupId> <artifactI ...
- jackson基于注解的简单使用
Jackson提供了一系列注解,方便对JSON序列化和反序列化进行控制,下面介绍一些常用的注解. 1.@JsonIgnore 此注解用于属性上,作用是进行JSON操作时忽略该属性. 2.@JsonFo ...
- 10 Spring框架--基于注解和xml的配置的应用案例
1.项目结构 2.基于xml配置的项目 <1>账户的业务层接口及其实现类 IAccountService.java package lucky.service; import lucky. ...
- Spring中基于注解的IOC(二):案例与总结
2.Spring的IOC案例 创建maven项目 导入依赖 pom.xml xmlns:xsi="http://www.w3.org/2001/XMLSchema-instance" ...
- Hibernate基于注解annotation的配置
Annotation在框架中是越来越受欢迎了,因为annotation的配置比起XML的配置来说方便了很多,不需要大量的XML来书写,方便简单了很多,只要几个annotation的配置,就可以完成我们 ...
- 菜鸟学SSH(十七)——基于注解的SSH将配置精简到极致
很早之前就想写一篇关于SSH整合的博客了,但是一直觉得使用SSH的时候那么多的配置文件,严重破坏了我们代码整体性,比如你要看两个实体的关系还得对照*.hbm.xml文件,要屡清一个Action可能需要 ...
- Servlet之保存用户偏好设置简单功能的实现
写在前面: 先来陈述一下为什么会有这样一个需求和这篇博文. 这是公司的一个项目,我们负责前端,后台服务由其他公司负责.该系统有一个系统偏好设置模块,用户可以设置系统的背景图片等系统样式,因为这是一个比 ...
- 8 -- 深入使用Spring -- 4...5 AOP代理:基于注解的“零配置”方式
8.4.5 基于注解的“零配置”方式 AspectJ允许使用注解定义切面.切入点和增强处理,而Spring框架则可识别并根据这些注解来生成AOP代理.Spring只是使用了和AspectJ 5 一样的 ...
随机推荐
- 3分钟解决MySQL 1032 主从错误(转)
转自 https://blog.51cto.com/suifu/1845457 3分钟解决MySQL 1032主从错误 Part1:写在最前 1032错误----现在生产库中好多数据,在从库误删了, ...
- ubuntu下apache2使用的简单总结
一. 修改apache2原80端口为90端口 1. 修改/etc/apache2/ports.conf, 将端口80改为90,443,改为444 2. 修改/etc/apache2/sites ...
- Java 设计模式之单利模式
一.首先介绍一下单例模式: 单例模式(Singleton),也叫单子模式,是一种常用的软件设计模式.在应用这个模式时,单例对象的类必须保证只有一个实例存在.许多时候整个系统只需要拥有一个的全局 ...
- eclipse安装SonarLint插件,sonarLint客户端的使用
一.在线安装sonarLint 打开eclipse里的help->Eclipse Marketplace,搜索“sonar”关键字,目前sonar的插件是sonarlint,如下图: 点击“In ...
- OO第二单元の小结
第二单元(线程与电梯问题)总结博客 三次作业的设计策略 第一次:本次作业只有一部电梯,而且不用捎带.因此,我一共设计了两个线程:一个负责管理输入,一个负责电梯运行.同时,我将调度队列设置为单例模式,里 ...
- AFNetworking 3.1.0 使用中某些知识点讲解
# POST / GET 请求 /*! 首先要知道,POST请求不能被缓存,只有 GET 请求能被缓存.因为从数学的角度来讲,GET 的结果是 幂等 的,就好像字典里的 key 与 value 就是 ...
- JQ 文件上传
var formData = new FormData(); var name = $("input").val(); formData.append("file&quo ...
- 03-树3 Tree Traversals Again (25 分)
An inorder binary tree traversal can be implemented in a non-recursive way with a stack. For example ...
- windows下python3.7.2内置venv虚拟环境下pyinstaller错误问题
起因 开发一直使用python -m venv .pyenv 方式创建虚拟环境,在利用pyinstaller打包发布应用时,出现错误 3178 INFO: Warnings written to C: ...
- Windows开发经验 - WinDbg
1. 远程调试 参考文章:https://docs.microsoft.com/en-us/windows-hardware/drivers/debugger/remode-debugging-usi ...