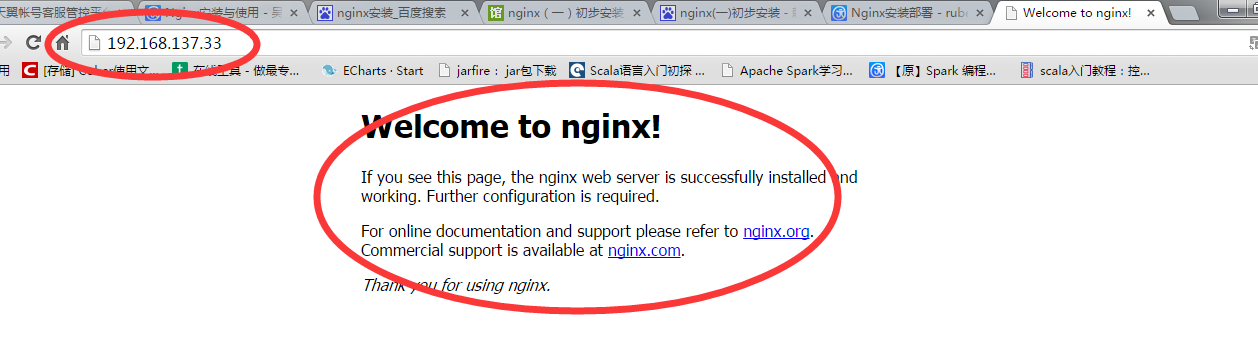
CentOS6.5安装nginx及负载均衡配置
1、下载PCRE, 是一个用C语言编写的正则表达式函数库
[root@localhost download]# wget http://ncu.dl.sourceforge.net/project/libpng/zlib/1.2.8/zlib-1.2.8.tar.gz
[root@localhost download]# wget http://www.openssl.org/source/openssl-1.0.1p.tar.gz
# nginx Startup script for the Nginx HTTP Server
# it is v.0.0.2 version.
# chkconfig: - 85 15
# description: Nginx is a high-performance web and proxy server.
# It has a lot of features, but it's not for everyone.
# processname: nginx
# pidfile: /var/run/nginx.pid
# config: /usr/local/nginx/conf/nginx.conf
nginxd=/usr/local/nginx/sbin/nginx
nginx_config=/usr/local/nginx/conf/nginx.conf
nginx_pid=/var/run/nginx.pid
RETVAL=0
prog="nginx"
# Source function library.
. /etc/rc.d/init.d/functions
# Source networking configuration.
. /etc/sysconfig/network
# Check that networking is up.
[ ${NETWORKING} = "no" ] && exit 0
[ -x $nginxd ] || exit 0
# Start nginx daemons functions.
start() {
if [ -e $nginx_pid ];then
echo "nginx already running...."
exit 1
fi
echo -n $"Starting $prog: "
daemon $nginxd -c ${nginx_config}
RETVAL=$?
echo
[ $RETVAL = 0 ] && touch /var/lock/subsys/nginx
return $RETVAL
}
# Stop nginx daemons functions.
stop() {
echo -n $"Stopping $prog: "
killproc $nginxd
RETVAL=$?
echo
[ $RETVAL = 0 ] && rm -f /var/lock/subsys/nginx /var/run/nginx.pid
}
# reload nginx service functions.
reload() {
echo -n $"Reloading $prog: "
#kill -HUP `cat ${nginx_pid}`
killproc $nginxd -HUP
RETVAL=$?
echo
}
# See how we were called.
case "$1" in
start)
start
;;
stop)
stop
;;
reload)
reload
;;
restart)
stop
start
;;
status)
status $prog
RETVAL=$?
;;
*)
echo $"Usage: $prog {start|stop|restart|reload|status|help}"
exit 1
esac
exit $RETVAL
nginx (pid 2417 2416) is running...
[root@localhost logs]# /etc/init.d/nginx stop
Stopping nginx: [ OK ]
[root@localhost logs]# /etc/init.d/nginx start
Starting nginx: [ OK ]
[root@localhost logs]# /etc/init.d/nginx status
nginx (pid 2454 2452) is running...
pid /usr/local/nginx/nginx.pid;
worker_rlimit_nofile 102400;
events
{
use epoll;
worker_connections 102400;
}
http
{
include mime.types;
default_type application/octet-stream;
fastcgi_intercept_errors on;
charset utf-8;
server_names_hash_bucket_size 128;
client_header_buffer_size 4k;
large_client_header_buffers 4 32k;
client_max_body_size 300m;
sendfile on;
tcp_nopush on;
keepalive_timeout 60;
tcp_nodelay on;
client_body_buffer_size 512k;
proxy_connect_timeout 5;
proxy_read_timeout 60;
proxy_send_timeout 5;
proxy_buffer_size 16k;
proxy_buffers 4 64k;
proxy_busy_buffers_size 128k;
proxy_temp_file_write_size 128k;
gzip_min_length 1k;
gzip_buffers 4 16k;
gzip_http_version 1.1;
gzip_comp_level 2;
gzip_types text/plain application/x-javascript text/css application/xml;
gzip_vary on;
###2012-12-19 change nginx logs
log_format main '$http_x_forwarded_for - $remote_user [$time_local] "$request" '
'$status $body_bytes_sent "$http_referer" '
'"$http_user_agent" $request_time $remote_addr';
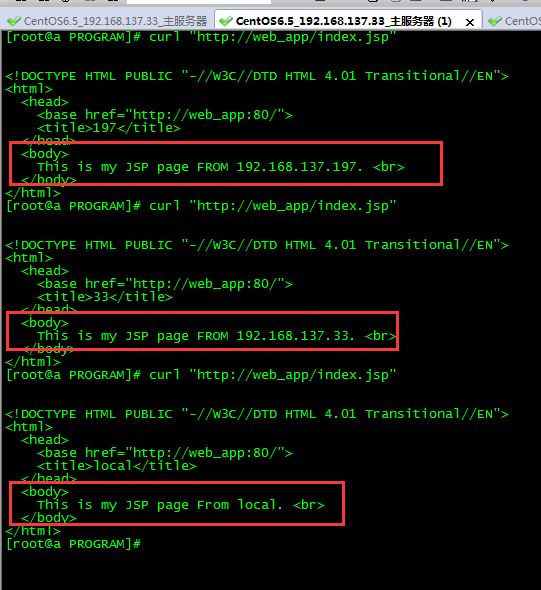
upstream web_app {
server 192.168.137.197:8080 weight=1 max_fails=2 fail_timeout=30s;
server 192.168.137.33:8080 weight=1 max_fails=2 fail_timeout=30s;
server 10.10.33.59:8080 weight=1 max_fails=2 fail_timeout=30s;
}
####chinaapp.sinaapp.com
server {
listen 80;
server_name chinaapp.sinaapp.com;
index index.jsp index.html index.htm;
#发布目录/data/www
root /data/www;
location /
{
proxy_next_upstream http_502 http_504 error timeout invalid_header;
proxy_set_header Host $host;
proxy_set_header X-Real-IP $remote_addr;
proxy_set_header X-Forwarded-For $proxy_add_x_forwarded_for;
proxy_pass http://web_app;
expires 3d;
}
}
}
/usr/local/nginx/sbin/nginx: error while loading shared libraries: libpcre.so.1: cannot open shared object file: No such file or directory
libpcre.so.0
libpcre.so.0.0.1
[root@localhost local]# ls /lib/ |grep pcre
[root@localhost local]# cd nginx
[root@localhost nginx]# /usr/local/nginx/sbin/nginx -c /usr/local/nginx/conf/nginx.conf
CentOS6.5安装nginx及负载均衡配置的更多相关文章
- 傻瓜式安装nginx以及负载均衡配置
概述 需求 做了一个对内的http api应用.由于只有一台服务器,考虑到升级问题(即升级时会造成几秒钟用户访问不了),决定搭一个nginx,公共端口:9999,部署2套应用,端口:9981,9982 ...
- nginx四层负载均衡配置
nginx四层负载均衡配置代理Mysql集群 环境如下: ip 192.168.6.203 Nginx ip 192.168.6.*(多台) Mysql 步骤一 查看Nginx是否安装stream模块 ...
- Nginx + Tomcat 负载均衡配置详解
Nginx常用操作指南一.Nginx 与 Tomcat 安装.配置及优化1. 检查和安装依赖项 yum -y install gcc pcre pcre-devel zlib zlib-devel o ...
- Docker安装nginx以及负载均衡
首先在linux系统中新建一个data文件夹进行nginx容器的创建--即为:mkdir data. 一:第一次 1 第一步: 使用 docker pull nginx将nginx的镜像从仓库下载下来 ...
- [转]CENTOS 6.5 配置YUM安装NGINX+服务器负载均衡
原文连接: CENTOS 6.5 配置YUM安装NGINX http://blog.sina.com.cn/s/blog_69f467b70102uyux.html 参考博文: Centos下安装. ...
- centos6 Nginx+Tomcat负载均衡配置
一.Nginx简介 Nginx是一个web服务器也可以用来做负载均衡及反向代理使用,目前使用最多的就是负载均衡,具体简介我就不介绍了百度一下有很多,下面直接进入安装步骤 二.Nginx安装 1.下载N ...
- Nginx+tomcat负载均衡配置
Nginx+tomcat是目前主流的java web架构,如何让nginx+tomcat同时工作呢,也可以说如何使用nginx来反向代理tomcat后端均衡呢?直接安装配置如下: 1.JAVA JDK ...
- Linux上安装nginx+tomcat负载均衡
1.Ngnix Nginx (发音同 engine x)是一款轻量级的Web 服务器/反向代理服务器及电子邮件(IMAP/POP3)代理服务器,并在一个BSD-like 协议下发行. 其特点是占有内 ...
- Linux记录-Nginx+Tomcat负载均衡配置
Nginx负载均衡配置及策略: 轮询(默认) 优点:实现简单缺点:不考虑每台服务器的处理能力配置示例如下:upstream www.xxx.com {# 需要负载的server列表server www ...
随机推荐
- 126. Word Ladder II
题目: Given two words (beginWord and endWord), and a dictionary's word list, find all shortest transfo ...
- 中断服务程序不用interrupt关键字也可实现中断,该关键字是否必须?
2013-06-20 11:13:35 中断服务程序不用interrupt关键字也可实现中断,该关键字是否必须? 使用tools->pin connect,将INT5与pin.txt关联,模拟外 ...
- DSP\BIOS调试Heaps are enabled,but not set correctly
转自:http://blog.sina.com.cn/s/blog_735f291001015t9i.html Heaps are enabled, but the segment for DSP/B ...
- Git教程(3)命令行使用git简单示例
基础 Git系统下的的文件有3种状态: 已修改(modified):已修改表示修改了文件,但还没保存到数据库中. 已暂存(staged) : 已暂存表示对一个已修改文件的当前版本做了标记,使之包含在下 ...
- Android 权限查寻表
示例 <?xml version="1.0" encoding="utf-8"?> <manifest xmlns:android=" ...
- HTML5学习(六)---------SVG 与Canvas
参考教程:http://www.w3school.com.cn/html5/html_5_canvas_vs_svg.asp Canvas 和 SVG 都允许您在浏览器中创建图形,但是它们在根本上是不 ...
- Highcharts20151130
$(function () { $('#container').highcharts({ chart: { type: 'spline' // 图的类型 }, title: { text: null ...
- 【转】 实现 Cocos2d-x 全局定时器
转自:http://www.tairan.com/archives/3998 cocos2d-x 中有自己的定时器实现,一般用法是在场景,层等内部实现,定时器的生命周期随着它们的消亡而消亡,就运行周期 ...
- Nginx出现“413 Request Entity Too Large”错误解决方法
Nginx出现“413 Request Entity Too Large”错误解决方法 2011-03-25 13:49:55| 分类: 默认分类 | 标签:413 request entit ...
- 百度UEditor编辑器使用教程与使用方法
我们在做网站的时候,网站后台系统一般都会用到web编辑器,今天笔者就给大家推荐一款百度UEditor编辑器.关于这款百度UEditor编辑器官网上也有简单的教程,不过看着比较费劲,今天笔者就跟大家分享 ...