spring-data-redis2.0以上配置redis连接
1.所需的maven依赖
     <dependency>

          <groupId>org.springframework.data</groupId>

          <artifactId>spring-data-redis</artifactId>

          <version>2.0.0.RELEASE</version>

      </dependency>

      <dependency>

          <groupId>redis.clients</groupId>

          <artifactId>jedis</artifactId>

          <version>2.9.0</version>

      </dependency>

   <dependency>

       <groupId>org.springframework</groupId>

       <artifactId>spring-xxx</artifactId>

    </dependency>
此处需要注意的是spring-data-redis2.0以上版本所需的jedis版本为2.9.0 目前最新的版本也为2.9.0 否则会报ClassNotFoundException或者NoSuchMethodError等异常
spring-xxx即为spring其他依赖的包,网上很多 找到粘贴吧
此外如果想查看工程用的包所依赖的包的版本可以去http://mvnrepository.com/ 网上输入对应的包如spring-data-redis
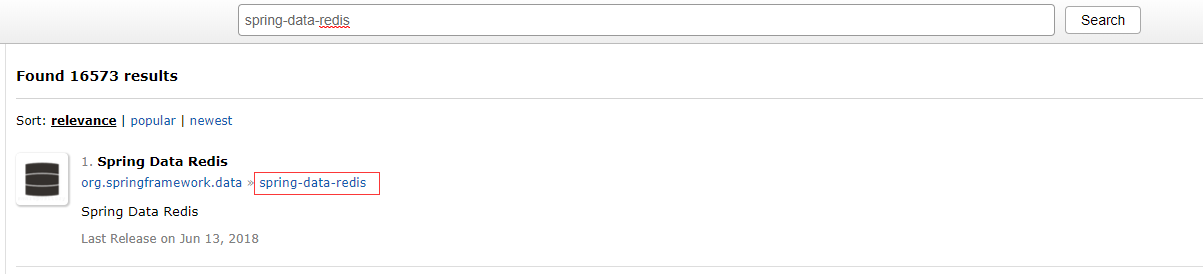
点击后会罗列出maven仓库里所包含的版本 点击当前使用的版本如案例中的2.0.0 往下翻则会展示出所选包依赖的包
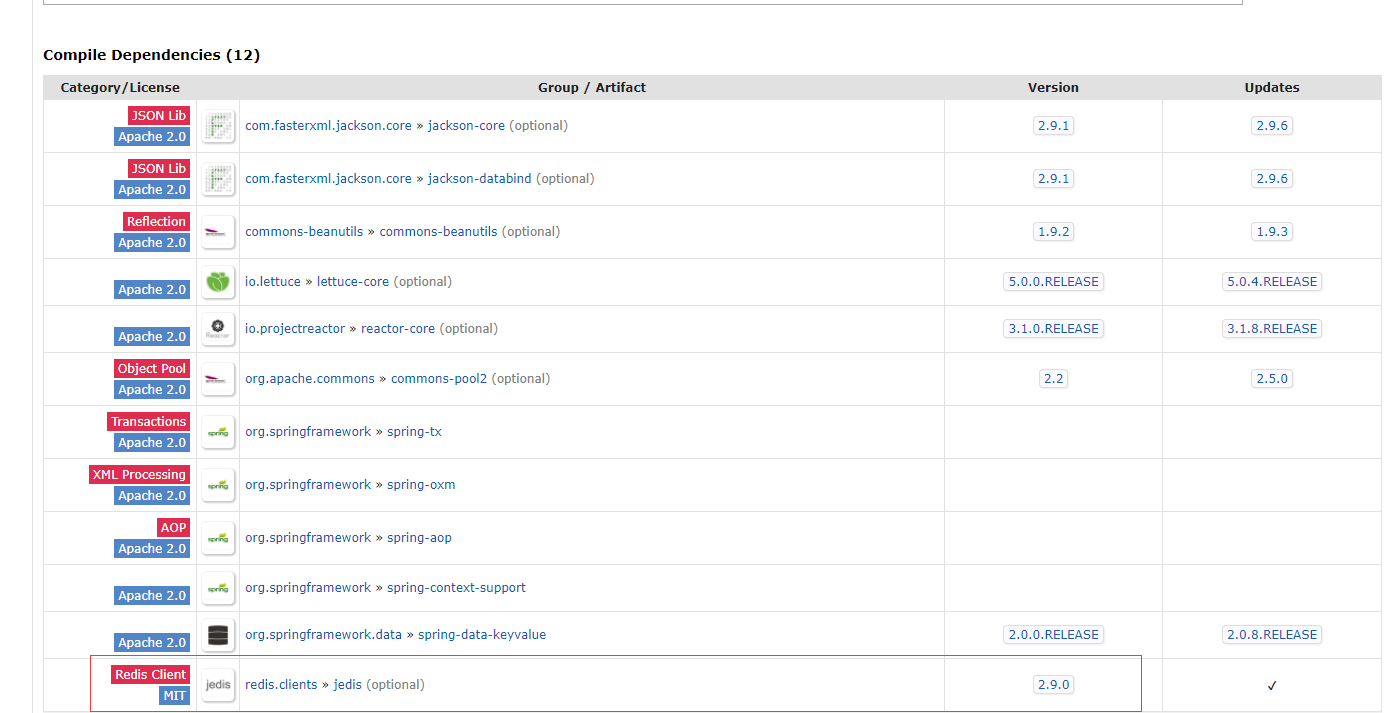
这儿就会指明依赖jedis的包且最低版本为2.9.0
2.配置redis.properties
redis.host = 172.25.12.123

redis.port = 6379

redis.auth = admin

redis.maxTotal = 100

redis.maxIdle = 20

redis.maxWaitMillis = 10000

redis.testOnBorrow = true

redis.testOnReturn = true

redis.dbIndex = 3
3.配置spring-redis.xml
<?xml version="1.0" encoding="UTF-8"?>

<beans xmlns="http://www.springframework.org/schema/beans"

       xmlns:xsi="http://www.w3.org/2001/XMLSchema-instance"

       xmlns:context="http://www.springframework.org/schema/context"

       xsi:schemaLocation="http://www.springframework.org/schema/beans

       http://www.springframework.org/schema/beans/spring-beans.xsd

       http://www.springframework.org/schema/context

       http://www.springframework.org/schema/context/spring-context.xsd

">

    <!--引入配置文件-->

    <context:property-placeholder location="redis.properties" ignore-unresolvable="true"></context:property-placeholder>

    <!--设置jedisPool链接池的配置-->

    <bean id="jedisPoolConfig" class="redis.clients.jedis.JedisPoolConfig">

        <property name="maxTotal" value="${redis.maxTotal}"/>

        <property name="maxIdle" value="${redis.maxIdle}"/>

        <property name="maxWaitMillis" value="${redis.maxWaitMillis}"/>

        <property name="testOnBorrow" value="${redis.testOnBorrow}"/>

        <property name="testOnReturn" value="${redis.testOnReturn}"/>

    </bean>

    <!--redis链接密码-->

    <bean id="redisPassword" class="org.springframework.data.redis.connection.RedisPassword">

        <constructor-arg name="thePassword" value="${redis.auth}"></constructor-arg>

    </bean>

    <!--spring-data-redis2.0以上的配置-->

    <bean id="redisStandaloneConfiguration" class="org.springframework.data.redis.connection.RedisStandaloneConfiguration">

        <property name="hostName" value="${redis.host}"/>

        <property name="port" value="${redis.port}"/>

        <property name="password" ref="redisPassword" />

        <property name="database" value="${redis.dbIndex}"/>

    </bean>

    <!--配置jedis链接工厂 spring-data-redis2.0中

        建议改为构造器传入一个RedisStandaloneConfiguration  单机

                            RedisSentinelConfiguration  主从复制

                            RedisClusterConfiguration  集群-->

    <bean id="jedisConnectionFactory" class="org.springframework.data.redis.connection.jedis.JedisConnectionFactory">

        <!--注销掉的部分为spring-data-redis2.0以下的版本配置的方式-->

      <!--  <property name="hostName" value="${redis.host}"/>

        <property name="port" value="${redis.port}"/>

        <property name="poolConfig" ref="jedisPoolConfig"/>

        <property name="password" value="${redis.auth}" />

        <property name="database" value="${redis.dbIndex}"/>-->

        <!--spring-data-redis2.0以上建议获取的方式-->

        <constructor-arg name="standaloneConfig" ref="redisStandaloneConfiguration"></constructor-arg>

    </bean>

    <!--手动设置 key  与 value的序列化方式-->

    <bean id="keySerializer" class="org.springframework.data.redis.serializer.StringRedisSerializer"/>

    <bean id="valueSerializer" class="org.springframework.data.redis.serializer.GenericJackson2JsonRedisSerializer"/>

    <!--配置jedis模板  -->

    <bean id = "redisTemplate" class="org.springframework.data.redis.core.RedisTemplate">

        <property name="connectionFactory" ref="jedisConnectionFactory" />

        <property name="keySerializer" ref="keySerializer" />

        <property name="valueSerializer" ref="valueSerializer" />

        <property name="hashKeySerializer" ref="keySerializer" />

        <property name="hashValueSerializer" ref="valueSerializer" />

    </bean>

    <!--也可以StringRedisTemplate  专注于String的操作  -->

    <bean id="stringRedisTemplate" class="org.springframework.data.redis.core.StringRedisTemplate">

        <!--<property name="connectionFactory" ref="jedisConnectionFactory"></property>-->

        <!--在StringRedisTemplate与redisTemplate不同,可以直接造构造器中传入ConnectionFactory-->

        <constructor-arg name="connectionFactory" ref="jedisConnectionFactory"></constructor-arg>

        <property name="keySerializer" ref="keySerializer" />

        <property name="valueSerializer" ref="valueSerializer" />

        <property name="hashKeySerializer" ref="keySerializer" />

        <property name="hashValueSerializer" ref="valueSerializer" />

    </bean>

</beans>
上面需要注意一点的是
在spring-data-redis2.0以上的版本中在配置密码的时候不能像老版本直接设置密码值,需要注入一个RedisPassword的bean 在RedisPassword的构造方法中设置密码
3.最后进行测试测试
package com.springactul.splx.nosql.redis;

import org.junit.Test;

import org.junit.runner.RunWith;

import org.springframework.beans.factory.annotation.Autowired;

import org.springframework.data.redis.core.RedisTemplate;

import org.springframework.data.redis.core.StringRedisTemplate;

import org.springframework.data.redis.core.ValueOperations;

import org.springframework.test.context.ContextConfiguration;

import org.springframework.test.context.junit4.SpringJUnit4ClassRunner;

/**

 * Created by zhoum on 2018-06-22.

 */

@RunWith(SpringJUnit4ClassRunner.class)

@ContextConfiguration(locations = {"classpath*:spring-*.xml"})

public class RedisTest {

    @Autowired

    private RedisTemplate redisTemplate;

    @Autowired

    private StringRedisTemplate stringRedisTemplate;

    @Test

    public void test1(){

        ValueOperations valueOperations = redisTemplate.opsForValue();

        valueOperations.set("first","hellow word");

        System.out.println(valueOperations.get("first"));

    }

    @Test

    public void test2(){

        ValueOperations<String, String> stringStringValueOperations = stringRedisTemplate.opsForValue();

        stringStringValueOperations.set("secound","hello everyone");

        System.out.println(stringStringValueOperations.get("secound"));

    }

}
注意:在本篇博客中只讲了RedisStandalongConfiguration的配置方式 ,并且测试本着以能连通redis的目的进行非常简单的测试,如果想要了解更详细的使用或者配置
可以参考 https://gitee.com/wjtree/codes/itcdnko9f5zqwr8u4gejs95 这篇文章
spring-data-redis2.0以上配置redis连接的更多相关文章
- Spring Boot 2.0 教程 | 配置 Undertow 容器
欢迎关注个人微信公众号: 小哈学Java, 文末分享阿里 P8 资深架构师吐血总结的 <Java 核心知识整理&面试.pdf>资源链接!! 文章首发于个人网站 https://ww ...
- [每日短篇] 1C - Spring Data JPA (0)
2019独角兽企业重金招聘Python工程师标准>>> 准备把 Spring Data JPA 完整看一遍,顺便把关键要点记录一下.在写这篇文章的今天,再不用 Spring Boot ...
- Spring Boot 2.0 的配置绑定类Bindable居然如此强大
1. 前言 在开发Spring Boot应用时会用到根据条件来向Spring IoC容器注入Bean.比如配置文件存在了某个配置属性才注入Bean : 图中红色的部分是说,只有ali.pay.v1.a ...
- spring Data Jpa的依赖+配置
spring data jpa 是spring基于的orm框架,jpa规范的基础上封装的一套JPA应用框架 添加的相关依赖: <properties> <spring.version ...
- python 基础 10.0 nosql 简介--redis 连接池及管道
一. NOSQL 数据库简介 NoSQL 泛指非关系型的数据库.非关系型数据库与关系型数据库的差别 非关系型数据库的优势: 1.性能NOSQL 是基于键值对的,可以想象成表中的主键和值的对应关系,而且 ...
- Spring DM 2.0 环境配置 解决Log4j问题
搭建 spring dm 2.0 环境出的问题 log4j 的问题解决办法是 一.引入SpringDM2.0的Bundle,最后完成如下图所示:注意:要引入slf4j.api.slf4j.log4j. ...
- Spring Boot 2.0 教程 - 配置详解
Spring Boot 可以通过properties文件,YAML文件,环境变量和命令行参数进行配置.属性值可以通过,@Value注解,Environment或者ConfigurationProper ...
- yii2.0 手动配置redis
手动安装yii2.0-redis扩展 1.点击下载:yii2.0-redis扩展 2.把下载的扩展文件放到vendor/yiisoft/下,命名为yii2-redis 3.修改vender/yiiso ...
- Django项目settings配置redis连接
CACHES = { "default": { "BACKEND": "django_redis.cache.RedisCache", &q ...
随机推荐
- css杂项补充
css杂项补充 一.块与内联 1.块 独行显示 支持宽高,宽度默认适应父级,高度默认由子级或内容撑开 设置宽高后,采用设置的宽高 2.内联 同行显示 不支持宽高 margin上下无效果,左右会起作用, ...
- 【python3接口自动化基础】json总结
Json知识归纳: Post请求有两种方法传json参数 传json参数(自动转json了)---json=dict 传data参数(需json转换) ---data=json.dumps(dic) ...
- 关于读取excel 和 写excel
def sync_db(data_list): '''Synchron potential student from excel to PrepareToCrm ''' push_list = ...
- Nhibernate 使用 (二)
在第一篇中该做的配置基本上已经全部完成,现在直接开始测试 public static ISession NhibClient() { try { // Nhibernate 配置文件的位置 var p ...
- pandas合并数据集-【老鱼学pandas】
有两个数据集,我们想把他们的结果根据相同的列名或索引号之类的进行合并,有点类似SQL中的从两个表中选择出不同的记录并进行合并返回. 合并 首先准备数据: import pandas as pd imp ...
- spark DataFrame
DataFrame的推出,让Spark具备了处理大规模结构化数据的能力,不仅比原有的RDD转化方式更加简单易用,而且获得了更高的计算性能.Spark能够轻松实现从MySQL到DataFrame的转化, ...
- 将cookie 转换成字典格式
b = 'bid=Qzw9cKnyESM; ll="108288"; __yadk_uid=4YChvgeANLBEh4iV00n1tc0HQ8zpmSl1; __utmc=301 ...
- 使用BITSADMIN下载文件
BITSADMIN /RAWRETURN /TRANSFER D /PRIORITY HIGH http://127.0.0.1:80/file.exe C:\ProgramData\file.exe
- Java笔记(二十) 注解
注解 一.内置注解 Java内置了一些常用注解: 1.@Override 该注解修饰一个方法,表示当前类重写了父类的该方法. 2.@Deprecated 该注解可以修饰类.方法.字段.参数等.表示对 ...
- ZooKeeper Getting Started Guide
http://zookeeper.apache.org/doc/trunk/zookeeperStarted.html What is ZooKeeper? ZooKeeper is a centra ...