React native 中 SectionList用法
一、代码
 import React, { Component } from 'react';

 import {

     AppRegistry,

     View,

     Text,

     SectionList,

 } from 'react-native';

 export default class App extends React.Component {

     constructor(props) {

         super(props);

     }

     _renderItem = (info) => {

         var txt = '  ' + info.item.title;

         return <Text

             style={{ height: 60, textAlignVertical: 'center', backgroundColor: "#ffffff", color: '#5C5C5C', fontSize: 15 }}>{txt}</Text>

     }

     _sectionComp = (info) => {

         var txt = info.section.key;

         return <Text

             style={{ height: 50, textAlign: 'center', textAlignVertical: 'center', backgroundColor: '#9CEBBC', color: 'white', fontSize: 30 }}>{txt}</Text>

     }

     render() {

         var sections = [

             { key: "A", data: [{ title: "爱" }, { title: "啊" }, { title: "奥" }] },

             { key: "B", data: [{ title: "不" }, { title: "吧" }, { title: "包" }] },

             { key: "C", data: [{ title: "吃" }, { title: "车" }] },

             { key: "W", data: [{ title: "王者" }, { title: "王者荣耀" }] },

         ];

         return (

             <View style={{ flex: 1 }}>

                 <SectionList

                     numColumns ={3}

                     horizontal={false}

                     renderSectionHeader={this._sectionComp}

                     renderItem={this._renderItem}

                     sections={sections}

                     ItemSeparatorComponent={() => <View><Text></Text></View>}

                     ListHeaderComponent={() => <View style={{ backgroundColor: '#25B960', alignItems: 'center', height: 30 }}><Text style={{ fontSize: 18, color: '#ffffff' }}>通讯录</Text></View>}

                     ListFooterComponent={() => <View style={{ backgroundColor: '#25B960', alignItems: 'center', height: 30 }}><Text style={{ fontSize: 18, color: '#ffffff' }}>通讯录尾部</Text></View>}

                 />

             </View>

         );

     }

 }
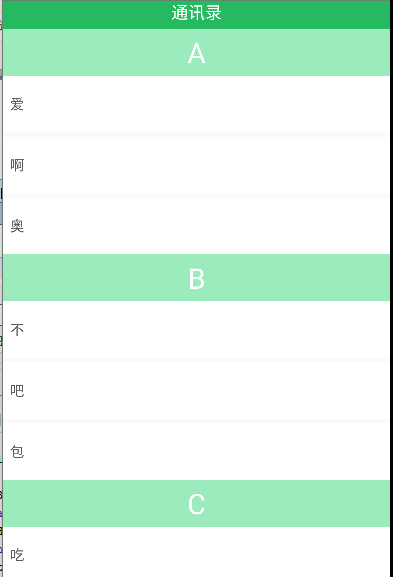
二、效果图
React native 中 SectionList用法的更多相关文章
- [转] 「指尖上的魔法」 - 谈谈 React Native 中的手势
http://gold.xitu.io/entry/55fa202960b28497519db23f React-Native是一款由Facebook开发并开源的框架,主要卖点是使用JavaScrip ...
- [转] 在React Native中使用ART
http://bbs.reactnative.cn/topic/306/%E5%9C%A8react-native%E4%B8%AD%E4%BD%BF%E7%94%A8art 前半个月捣腾了一下Rea ...
- React Native 中 CSS 的使用
首先声明,此文原作者为黎 跃春 React Native中CSS 内联样式 对象样式 使用Stylesheet.Create 样式拼接 导出样式对象 下面的代码是index.ios.js中的代码: / ...
- react native中的欢迎页(解决首加载白屏)
参照网页: http://blog.csdn.net/fengyuzhengfan/article/details/52712829 首先是在原生中写一些方法,然后通过react native中js去 ...
- React Native中的网络请求fetch和简单封装
React Native中的网络请求fetch使用方法最为简单,但却可以实现大多数的网络请求,需要了解更多的可以访问: https://segmentfault.com/a/1190000003810 ...
- react native中使用echarts
开发平台:mac pro node版本:v8.11.2 npm版本:6.4.1 react-native版本:0.57.8 native-echarts版本:^0.5.0 目标平台:android端收 ...
- react native中一次错误排查 Error:Error: Duplicate resources
最近一直在使用react native中,遇到了很多的坑,同时也学习到了一些移动端的开发经验. 今天在做一个打包的测试时,遇到了一个问题,打包过程中报错“Error:Error: Duplicate ...
- 在React Native中,使用fetch网络请求 实现get 和 post
//在React Native中,使用fetch实现网络请求 /* fetch 是一个封装程度更高的网络API, 使用了Promise * Promise 是异步编程的一种解决方案 * Promise ...
- 《React Native 精解与实战》书籍连载「React Native 中的生命周期」
此文是我的出版书籍<React Native 精解与实战>连载分享,此书由机械工业出版社出版,书中详解了 React Native 框架底层原理.React Native 组件布局.组件与 ...
随机推荐
- 浙江省住房和城乡建设厅 http://www.zjjs.com.cn/ 漏洞提示
http://220.189.211.52/zjjsgbxx/FileAttach/96dcdf11-c45e-4455-a443-f6dea8a44e23.html 可以下载,浏览 改修,
- cmd命令往MySQL数据库提交数据
第一步:MySQL -V检查下载成功否第二步:mysql -u root -p 登陆密码第三步:创建一个数据库 create database if not exists 数据库name: 第四步:展 ...
- mac系统vscode环境配置,以及iTerm2配置Zsh + on-my-zsh shell
https://segmentfault.com/a/1190000013612471?utm_source=tag-newest https://ohmyz.sh/ 一:安装iTerm2终端 htt ...
- SQL Server 创建索引方法
转自 <SQL Server 创建索引的 5 种方法> 地址:https://www.cnblogs.com/JiangLe/p/4007091.html 前期准备: create tab ...
- xshell6 同时操作多个终端
当我们使用Xshell的时候,有时候需要同时建立多个会话,连接不同的服务器或者不同的用户,如何同时向所有会话发送同一指令呢?方法如下: 1.依次点击 查看 ---> 撰写 ---> 撰写 ...
- win10安装配置nodejs
下载node 官网下载node 接下来在命令提示符里(win+R)输入node -v和npm -v,如图所示,表示安装完成. 测试, 配置node 在nodejs文件目录下,新建文件夹node ...
- flex布局设置width无效
子元素设置 : flex: 0 0 85px; 参数: flex属性是flex-grow, flex-shrink 和 flex-basis的简写,默认值为0 1 auto.后两个属性可选. 该属性有 ...
- .net core 2.0 webapi部署iis操作
1.安装 .net core 2.0 runtime, (dotnet-runtime-2.0.7-win-x64.exe) https://www.microsoft.com/net/downloa ...
- prerender-spa-plugin Vue预渲染配合meta-info优化seo
记录一下解决方案的过程 先安装prerender和puppeteer插件 这个国外大神写的 github地址就不附上了(百度有) cnpm install prerender-spa-plugin ...
- 聚类--K均值算法
import numpy as np from sklearn.datasets import load_iris iris = load_iris() x = iris.data[:,1] y = ...