SpringMVC(三十) 实例:SpringMVC_RESTRUL_CRUD_显示所有员工信息
Step by step to create a springMVC demo.
1. 创建一个dynamic web 工程。
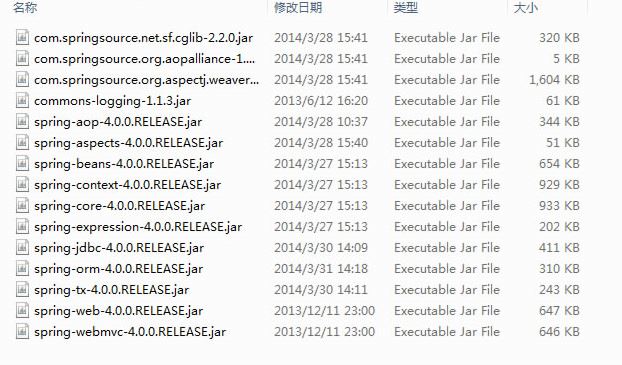
2. 添加需要的jar文件,如下图:
3. 配置web.xml:配置dispatcher servlet; 配置hiddenhttpmethod
|
1
2
3
4
5
6
7
8
9
10
11
12
13
14
15
16
17
18
19
20
21
22
23
24
25
26
27
28
29
30
31
32
33
34
35
36
37
|
<?xml version="1.0" encoding="UTF-8"?><web-app xmlns:xsi="http://www.w3.org/2001/XMLSchema-instance" xmlns="http://java.sun.com/xml/ns/javaee" xsi:schemaLocation="http://java.sun.com/xml/ns/javaee http://java.sun.com/xml/ns/javaee/web-app_3_0.xsd" id="WebApp_ID" version="3.0"> <display-name>Curd</display-name> <!-- The front controller of this Spring Web application, responsible for handling all application requests --> <servlet> <servlet-name>springDispatcherServlet</servlet-name> <servlet-class>org.springframework.web.servlet.DispatcherServlet</servlet-class> <init-param> <param-name>contextConfigLocation</param-name> <param-value>classpath:springmvc.xml</param-value> </init-param> <load-on-startup>1</load-on-startup> </servlet> <!-- Map all requests to the DispatcherServlet for handling --> <servlet-mapping> <servlet-name>springDispatcherServlet</servlet-name> <url-pattern>/</url-pattern> </servlet-mapping> <filter> <filter-name>HiddenHttpMethodFilter</filter-name> <filter-class>org.springframework.web.filter.HiddenHttpMethodFilter</filter-class> </filter> <filter-mapping> <filter-name>HiddenHttpMethodFilter</filter-name> <url-pattern>/*</url-pattern> </filter-mapping></web-app> |
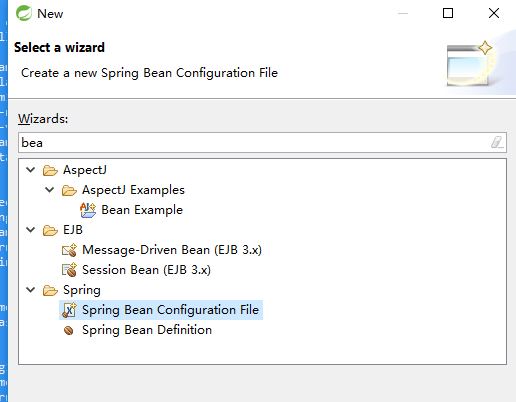
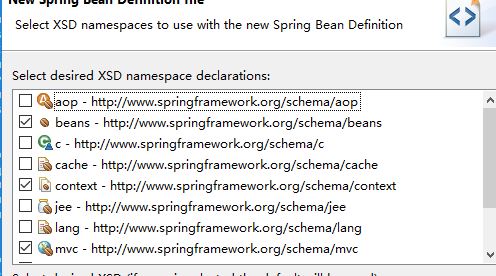
4. 创建SpringMVC.xml,创建Spring Bean Configuration file. 选中bean, context, mvc命名空间。
5. 编辑springmvc.xml文件。配置context:component-scan 和 InternalResourceViewResolver

<?xml version="1.0" encoding="UTF-8"?>

<beans xmlns="http://www.springframework.org/schema/beans"

    xmlns:xsi="http://www.w3.org/2001/XMLSchema-instance"

    xmlns:context="http://www.springframework.org/schema/context"

    xmlns:mvc="http://www.springframework.org/schema/mvc"

    xsi:schemaLocation="http://www.springframework.org/schema/mvc http://www.springframework.org/schema/mvc/spring-mvc-4.3.xsd

        http://www.springframework.org/schema/beans http://www.springframework.org/schema/beans/spring-beans.xsd

        http://www.springframework.org/schema/context http://www.springframework.org/schema/context/spring-context-4.3.xsd">

    <!-- autoScanComponent -->

    <context:component-scan base-package="com.atguigu.springmvc"></context:component-scan>

    <!-- 视图解析器 -->

    <bean class="org.springframework.web.servlet.view.InternalResourceViewResolver">

        <property name="prefix" value="/WEB-INF/views/"></property>

        <property name="suffix" value=".jsp"></property>

    </bean>

</beans>
6.其它文件结构图如下:

7. 创建index.jsp文件。内容如下:
<%@ page language="java" contentType="text/html; charset=ISO-8859-1"

    pageEncoding="ISO-8859-1"%>

<!DOCTYPE html PUBLIC "-//W3C//DTD HTML 4.01 Transitional//EN" "http://www.w3.org/TR/html4/loose.dtd">

<html>

<head>

<meta http-equiv="Content-Type" content="text/html; charset=ISO-8859-1">

<title>Insert title here</title>

</head>

<body>

<a href="listAllEmployees">list all employees</a>

</body>

</html>
8. 创建entity和service Dao。entity定义了对象结构。service dao定义了对象业务操作行为,如创建,查询和删除。
Department类:
package com.atguigu.springmvc.entities;

public class Department {

    private Integer id;

    private String departmentName;

    public Department(Integer id, String departmentName) {

        super();

        this.id = id;

        this.departmentName = departmentName;

    }

    public Integer getId() {

        return id;

    }

    public void setId(Integer id) {

        this.id = id;

    }

    public String getDepartmentName() {

        return departmentName;

    }

    public void setDepartmentName(String departmentName) {

        this.departmentName = departmentName;

    }

}
Employee类:
package com.atguigu.springmvc.entities;

import java.util.Date;

public class Employee {

    private Integer id;

    private String lastname;

    private String email;

    private Integer gender;

    private Department department;

    private Date birth;

    private Float salary;

    public Employee(Integer id, String lastname, String email, Integer gender, Department department, Date birth,

            Float salary) {

        super();

        this.id = id;

        this.lastname = lastname;

        this.email = email;

        this.gender = gender;

        this.department = department;

        this.birth = birth;

        this.salary = salary;

    }

    public Integer getId() {

        return id;

    }

    public void setId(Integer id) {

        this.id = id;

    }

    public String getLastname() {

        return lastname;

    }

    public void setLastname(String lastname) {

        this.lastname = lastname;

    }

    public String getEmail() {

        return email;

    }

    public void setEmail(String email) {

        this.email = email;

    }

    public Integer getGender() {

        return gender;

    }

    public void setGender(Integer gender) {

        this.gender = gender;

    }

    public Department getDepartment() {

        return department;

    }

    public void setDepartment(Department department) {

        this.department = department;

    }

    public Date getBirth() {

        return birth;

    }

    public void setBirth(Date birth) {

        this.birth = birth;

    }

    public Float getSalary() {

        return salary;

    }

    public void setSalary(Float salary) {

        this.salary = salary;

    }

}
9. Dao类 demo代码如下:
DepartmentDao:
package com.atguigu.springmvc.dao;

import java.util.Collection;

import java.util.HashMap;

import java.util.Map;

import org.springframework.stereotype.Repository;

import com.atguigu.springmvc.entities.Department;

@Repository

public class DepartmentDao {

    private static Map<Integer, Department> departments = null;

    static{

        departments = new HashMap<>();

        departments.put(101, new Department(101,"D-AA"));

        departments.put(102, new Department(101,"D-AA"));

        departments.put(103, new Department(101,"D-AA"));

        departments.put(104, new Department(101,"D-AA"));

        departments.put(105, new Department(101,"D-AA"));

    }

    public Collection<Department> getDepartment(Integer id) {

        System.out.println(departments.values().getClass());

        System.out.println(departments.values());

        return departments.values();

    }

}
EmployeeDao:
package com.atguigu.springmvc.dao;

import java.util.Collection;

import java.util.Date;

import java.util.HashMap;

import java.util.Map;

import org.springframework.beans.factory.annotation.Autowired;

import org.springframework.stereotype.Repository;

import com.atguigu.springmvc.entities.Department;

import com.atguigu.springmvc.entities.Employee;

@Repository

public class EmployeeDao {

    private static Map<Integer, Employee> employess = null;

    @Autowired

    private DepartmentDao departmentDao;

    static{

        employess = new HashMap<>();

        employess.put(1001, new Employee(1001,"E-AA", "aa@163.com", 1, new Department(101, "D-AA"), new Date(), (float) 123));

        employess.put(1002, new Employee(1002,"E-AA", "aa@163.com", 1, new Department(102, "D-AA"), new Date(), (float) 124));

        employess.put(1003, new Employee(1003,"E-AA", "aa@163.com", 1, new Department(103, "D-AA"), new Date(), (float) 125));

        employess.put(1004, new Employee(1004,"E-AA", "aa@163.com", 1, new Department(104, "D-AA"), new Date(), (float) 126));

        employess.put(1005, new Employee(1005,"E-AA", "aa@163.com", 1, new Department(105, "D-AA"), new Date(), (float) 127));

    }

    public Collection<Employee> getAll() {

        return employess.values();

    }

}
10. 通过Controller控制listAllEmployees action的视图返回,在该controller方法中,把所有的employess对象通过一个集合的方式传到视图中,视图可以通过获取该session attribute,从而获取相关数据。
package com.atguigu.springmvc.handlers;

import java.util.Map;

import org.springframework.beans.factory.annotation.Autowired;

import org.springframework.stereotype.Controller;

import org.springframework.web.bind.annotation.RequestMapping;

import com.atguigu.springmvc.dao.EmployeeDao;

@Controller

public class ListEmployees {

    @Autowired

    private EmployeeDao employeeDao;

    @RequestMapping("listAllEmployees")

    public String listAllEmployees(Map<String,Object> map) {

        map.put("employees",employeeDao.getAll());

        return "list";

    }

}
11. 上面代码使返回视图为list.jsp。
<%@ page language="java" contentType="text/html; charset=ISO-8859-1"

    pageEncoding="ISO-8859-1"%>

<%@ taglib prefix="c" uri="http://java.sun.com/jsp/jstl/core" %>

<!DOCTYPE html PUBLIC "-//W3C//DTD HTML 4.01 Transitional//EN" "http://www.w3.org/TR/html4/loose.dtd">

<html>

<head>

<meta http-equiv="Content-Type" content="text/html; charset=ISO-8859-1">

<title>Insert title here</title>

</head>

<body>

    <h1>hello world</h1>

    <c:if test="${empty requestScope.employees }">

        <h1>no employee</h1>

    </c:if>

    <c:if test="${!empty requestScope.employees }">

        <table border="1" cellpadding="10" cellspacing="0">

            <tr>

                <th>ID</th>

                <th>LastName</th>

                <th>Email</th>

                <th>Gender</th>

                <th>Department</th>

                <th>Edit</th>

                <th>Delete</th>

            </tr>

            <c:forEach items="${requestScope.employees }" var="emp">

                <tr>

                    <td>${emp.id }</td>

                    <td>${emp.lastname }</td>

                    <td>${emp.email }</td>

                    <td>${emp.gender == 0 ? "Female" : "Male" }</td>

                    <td>${emp.department.departmentName }</td>

                    <td><a href="">Edit</a></td>

                    <td><a href="">Delete</a></td>

                </tr>

            </c:forEach>

        </table>

    </c:if>

</body>

</html>
12. 完成以上代码后,可以执行测试。
SpringMVC(三十) 实例:SpringMVC_RESTRUL_CRUD_显示所有员工信息的更多相关文章
- Android实战简易教程-第三十九枪(第三方短信验证平台Mob和验证码自己主动填入功能结合实例)
用户注冊或者找回password时通常会用到短信验证功能.这里我们使用第三方的短信平台进行验证实例. 我们用到第三方短信验证平台是Mob,地址为:http://mob.com/ 一.注冊用户.获取SD ...
- 品Spring:真没想到,三十步才能完成一个bean实例的创建
在容器启动快完成时,会把所有的单例bean进行实例化,也可以叫做预先实例化. 这样做的好处之一是,可以及早地发现问题,及早的抛出异常,及早地解决掉. 本文就来看下整个的实例化过程.其实还是比较繁琐的. ...
- 面渣逆袭:Spring三十五问,四万字+五十图详解
大家好,我是老三啊,面渣逆袭 继续,这节我们来搞定另一个面试必问知识点--Spring. 有人说,"Java程序员都是Spring程序员",老三不太赞成这个观点,但是这也可以看出S ...
- Bootstrap <基础三十二>模态框(Modal)插件
模态框(Modal)是覆盖在父窗体上的子窗体.通常,目的是显示来自一个单独的源的内容,可以在不离开父窗体的情况下有一些互动.子窗体可提供信息.交互等. 如果您想要单独引用该插件的功能,那么您需要引用 ...
- Bootstrap <基础三十>Well
Well 是一种会引起内容凹陷显示或插图效果的容器 <div>.为了创建 Well,只需要简单地把内容放在带有 class .well 的 <div> 中即可.下面的实例演示了 ...
- 无废话ExtJs 入门教程十五[员工信息表Demo:AddUser]
无废话ExtJs 入门教程十五[员工信息表Demo:AddUser] extjs技术交流,欢迎加群(201926085) 前面我们共介绍过10种表单组件,这些组件是我们在开发过程中最经常用到的,所以一 ...
- 三十项调整助力 Ubuntu 13.04 更上一层楼
在Ubuntu 13.04 Raring Ringtail安装完成之后,我们还有三十项调整需要进行. 1.Ubuntu 13.04 Raring Ringtail安装完毕后,我又进行了一系列工作 大家 ...
- 三十二、Java图形化界面设计——布局管理器之CardLayout(卡片布局)
摘自 http://blog.csdn.net/liujun13579/article/details/7773945 三十二.Java图形化界面设计--布局管理器之CardLayout(卡片布局) ...
- SQL注入之Sqli-labs系列第三十八关、第三十九关,第四十关(堆叠注入)
0x1 堆叠注入讲解 (1)前言 国内有的称为堆查询注入,也有称之为堆叠注入.个人认为称之为堆叠注入更为准确.堆叠注入为攻击者提供了很多的攻击手段,通过添加一个新 的查询或者终止查询,可以达到修改数据 ...
随机推荐
- 用json获取拉钩网的信息
class LaoGo(object): def __init__(self): self.url="http://www.lagou.com/lbs/getAllCitySearchLab ...
- python - 发送带各种类型附件的邮件
如何发送各种类型的附件. 基本思路就是,使用MIMEMultipart来标示这个邮件是多个部分组成的,然后attach各个部分.如果是附件,则add_header加入附件的声明. 在python中,M ...
- LeetCode(122):卖股票的最佳时机 II
Easy! 题目描述: 给定一个数组,它的第 i 个元素是一支给定股票第 i 天的价格. 设计一个算法来计算你所能获取的最大利润.你可以尽可能地完成更多的交易(多次买卖一支股票). 注意:你不能同时参 ...
- 编辑方法分享之如何编辑PDF文件内容
我们现在在工作中会经常使用到PDF文件,还会有遇到需要编辑PDF文件的时候,PDF文件的编辑问题一直是个大难题.很多朋友在面对PDF文件的时候束手无策,不知道该怎么对它进行编辑.下面小编就教给大家一个 ...
- Imperial roads 非严格次小生成树
cf测评姬比uva快了五倍... /* 不管这条边是不是在mst上,直接跑lca求出路径上的最大边w即可 ans=mst-w+dist(u,v) */ #include<bits/stdc++. ...
- 统计nginx日志里访问次数最多的前十个IP
awk '{print $1}' /var/log/nginx/access.log | sort | uniq -c | sort -nr -k1 | head -n 10
- 获取git更新文件
#获取最后一个版本的更新日志workspace2=/testtemplogdir=/testtmprm -rf ${logdir}/change.loggit diff --stat $GIT_PRE ...
- Nginx配置笔记
配置资源的缓存周期 location ~ .*\.(gif|jpg|jpeg|png|bmp|swf)$ { root www; expires 3560d; } loca ...
- 20165206 2017-2018-2 《Java程序设计》第五周学习总结
20165206 2017-2018-2 <Java程序设计>第五周学习总结 教材学习内容总结 内部类:支持在一个类中定义另一个类的类. 外嵌类:包含内部类的类,称为内部类的外嵌类. 匿名 ...
- linux 搭建testlink的问题总结
testlink问题总结 1.要求环境centos7,安装php版本5.5以上(7.1.5),mysql5.6 ,5.7测试还不行(改变挺大的5.7表结构,字段啥的待研究),apache任意版本即可 ...