
Nginx安装,开箱即用?

一、官网
- 首页:http://nginx.org/
- 下载地址:http://nginx.org/download
- 安装文档:http://nginx.org/en/docs/install.html
- 安装配置参数:http://nginx.org/en/docs/configure.html
二、Nginx版本类型
访问http://nginx.org/download/得到如下的网页
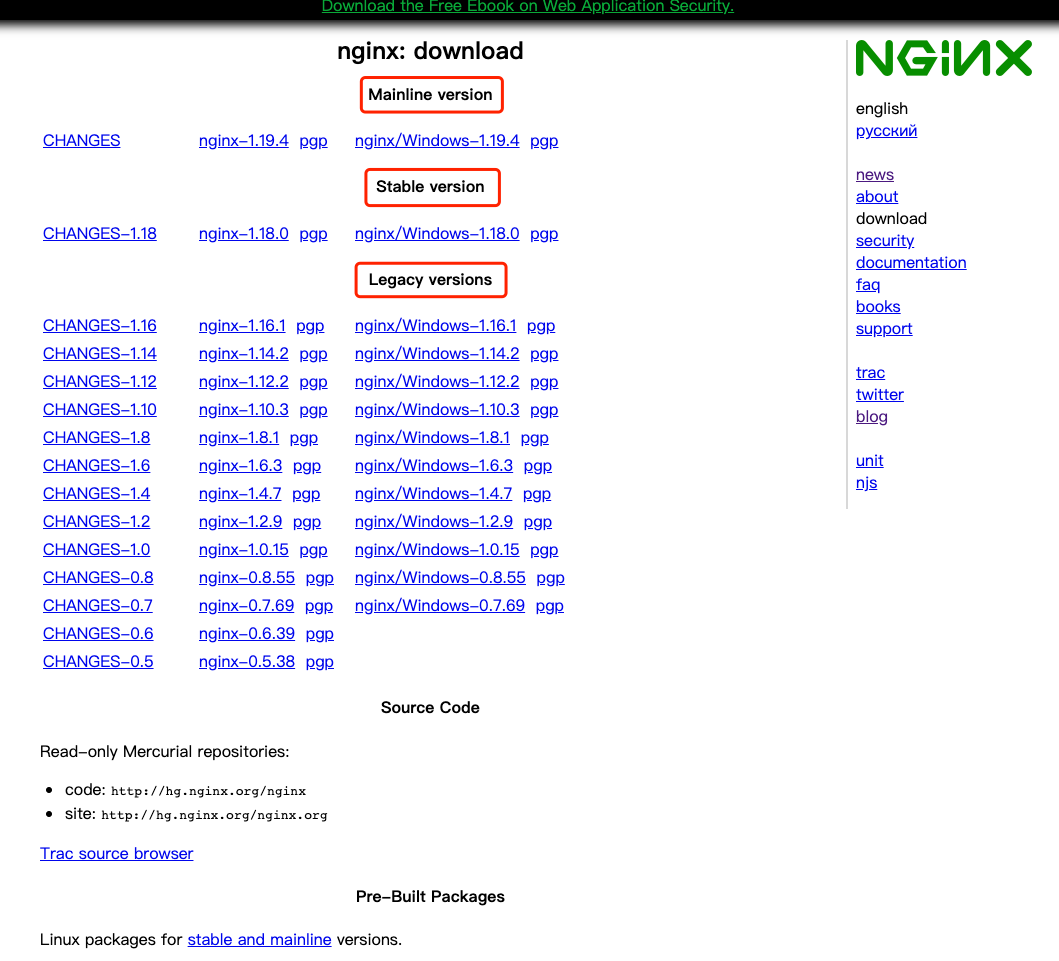
从上面可以看出Nginx官网提供了三个类型的版本
- Mainline version:Mainline是Nginx目前主力在做的版本,开发版。
- Stable version:最新稳定版,生产环境上建议使用的版本。
- Legacy versions:遗留的老的稳定版。
我们安装的时候注意在官网选择安装最近的Stable的版本,这里我们选择的是nginx-1.18.0。
三、安装方式
源码编译安装
四、安装Nginx运行所需要的依赖库
gcc

pcre

zlib

openssl
- 安装gcc
gcc是Linux下的编译器,它可以编译C、C++、Ada、Object C和Java等语言。这里是nginx编译需要。
# yum -y install gcc
- 安装pcre
pcre是一个perl库,Nginx的HTTP模块使用pcre来解析正则表达式。进行重定向支持。
# yum install -y pcre pcre-devel
- 安装zlib
zlib是一个文件压缩和解压缩的库,Nginx使用zlib对HTTP数据包进行gzip压缩和解压。
# yum install -y zlib zlib-devel
- 安装openssl
openssl是一个来进行安全通信的类库,Nginx需要依赖openssl来支撑对https的支持。
# yum -y install openssl openssl-devel
- 查看依赖类库安装情况
# rpm -qa gcc*

gcc-8.3.1-5.el8.0.2.x86_64

# rpm -qa  pcre*

pcre-utf16-8.42-4.el8.x86_64

pcre2-10.32-1.el8.x86_64

pcre-8.42-4.el8.x86_64

pcre-utf32-8.42-4.el8.x86_64

pcre-cpp-8.42-4.el8.x86_64

pcre2-utf32-10.32-1.el8.x86_64

pcre2-devel-10.32-1.el8.x86_64

pcre-devel-8.42-4.el8.x86_64

pcre2-utf16-10.32-1.el8.x86_64

# rpm -qa zlib*

zlib-devel-1.2.11-16.el8_2.x86_64

zlib-1.2.11-16.el8_2.x86_64

# rpm -qa  openssl*

openssl-1.1.1c-15.el8.x86_64

openssl-pkcs11-0.4.10-2.el8.x86_64

openssl-libs-1.1.1c-15.el8.x86_64

openssl-devel-1.1.1c-15.el8.x86_64
五、安装nginx
- 下载Nginx安装包
# wget http://nginx.org/download/nginx-1.18.0.tar.gz
- 解压Nginx安装包
# tar -zxvf nginx-1.18.0.tar.gz
- 配置并检查编译环境(configure)
需要强调的参数
--prefix=path
defines a directory that will keep server files. This same directory will also be used for all relative paths set by configure (except for paths to libraries sources) and in the nginx.conf configuration file. It is set to the /usr/local/nginx directory by default.
这是设置Nginx安装路径的参数,在nginx.conf配置文件中,配置设置的所有相对路径(库源路径除外)也将使用同一个目录。
默认设置为/usr/local/nginx目录。需要修改Nginx安装目录的可以通过设置这个参数来达到目的。
我这里使用默认的目录,不设置该参数。
--with-http_ssl_module
enables building a module that adds the HTTPS protocol support to an HTTP server. This module is not built by default. The OpenSSL library is required to build and run this module.
添加HTTPS协议支持模块,该模块默认不参与编译构建,需要手动开启。
由于目前主流的网站都支持Https协议,所以这里开启该模块。
# pwd

/soft/nginx-1.18.0

# ls

auto  CHANGES  CHANGES.ru  conf  configure  contrib  html  LICENSE  Makefile  man  objs  README  src

# ./configure  --with-http_ssl_module
执行./configure *** 命令后终端上会有些输出。
输出的信息里会包含依赖的组件是否完整,如果不完整则需要另行安装。
输出的信息里会包含配置文件目录信息,日志文件目录信息等一些很重要的我们做运维依赖的信息。
# ./configure  --with-http_ssl_module

# 省略若干行

Configuration summary

  + using system PCRE library

  + using system OpenSSL library

  + using system zlib library

  nginx path prefix: "/usr/local/nginx"

  nginx binary file: "/usr/local/nginx/sbin/nginx"

  nginx modules path: "/usr/local/nginx/modules"

  nginx configuration prefix: "/usr/local/nginx/conf"

  nginx configuration file: "/usr/local/nginx/conf/nginx.conf"

  nginx pid file: "/usr/local/nginx/logs/nginx.pid"

  nginx error log file: "/usr/local/nginx/logs/error.log"

  nginx http access log file: "/usr/local/nginx/logs/access.log"

  nginx http client request body temporary files: "client_body_temp"

  nginx http proxy temporary files: "proxy_temp"

  nginx http fastcgi temporary files: "fastcgi_temp"

  nginx http uwsgi temporary files: "uwsgi_temp"

  nginx http scgi temporary files: "scgi_temp"
- 编译(make)
# make

# 省略若干行

sed -e "s|%%PREFIX%%|/usr/local/nginx|" \

	-e "s|%%PID_PATH%%|/usr/local/nginx/logs/nginx.pid|" \

	-e "s|%%CONF_PATH%%|/usr/local/nginx/conf/nginx.conf|" \

	-e "s|%%ERROR_LOG_PATH%%|/usr/local/nginx/logs/error.log|" \

	< man/nginx.8 > objs/nginx.8

make[1]: Leaving directory `/soft/nginx-1.18.0'
- 安装(make install)
# make install
- Nginx安装目录下启动Nginx
# cd /usr/local/nginx/

# ls

conf  html  logs  sbin

# sbin/nginx
- 测试Nginx启动
- 通过
curl的方式
# curl localhost

<!DOCTYPE html>

<html>

<head>

<title>Welcome to nginx!</title>

<style>

    body {

        width: 35em;

        margin: 0 auto;

        font-family: Tahoma, Verdana, Arial, sans-serif;

    }

</style>

</head>

<body>

<h1>Welcome to nginx!</h1>

<p>If you see this page, the nginx web server is successfully installed and

working. Further configuration is required.</p>

<p>For online documentation and support please refer to

<a href="http://nginx.org/">nginx.org</a>.<br/>

Commercial support is available at

<a href="http://nginx.com/">nginx.com</a>.</p>

<p><em>Thank you for using nginx.</em></p>

</body>

</html>
- 通过浏览器的方式
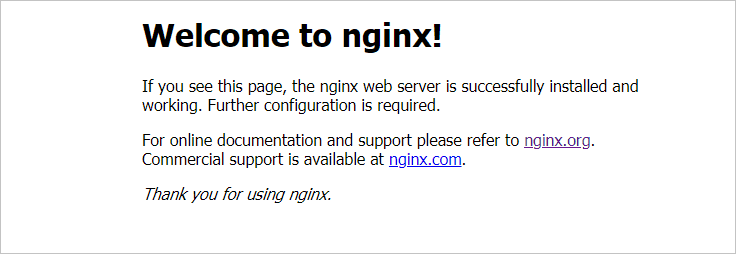
在浏览器地址栏输入Nginx所在主机的IP,出现如下界面表示安装启动成功。
- Nginx的进程
# ps -ef | grep nginx

root      1253     1  0 10:54 ?        00:00:00 nginx: master process ./nginx

nobody    1254  1253  0 10:54 ?        00:00:00 nginx: worker process

root      1267 56707  0 10:54 pts/4    00:00:00 grep nginx
可以看到Nginx的master和worker进程
- 配置Nginx环境变量
# vim /etc/profile
# set nginx environment

export NGINX_HOME=/usr/local/src/nginx

export PATH=${NGINX_HOME}/sbin:$PATH
# source /etc/profile
验证环境变量是否生效
# pwd

/soft

# nginx -v

nginx version: nginx/1.18.0
- nginx 命令行
- 帮助命令
# nginx -h

nginx version: nginx/1.18.0

Usage: nginx [-?hvVtTq] [-s signal] [-c filename] [-p prefix] [-g directives]

Options:

  -?,-h         : this help

  -v            : show version and exit

  -V            : show version and configure options then exit

  -t            : test configuration and exit

  -T            : test configuration, dump it and exit

  -q            : suppress non-error messages during configuration testing

  -s signal     : send signal to a master process: stop, quit, reopen, reload

  -p prefix     : set prefix path (default: /usr/local/nginx/)

  -c filename   : set configuration file (default: conf/nginx.conf)

  -g directives : set global directives out of configuration file
- 启动
# nginx
- 重启
# nginx -s reload
- 关闭
# nginx -s stop
或者查进程号之后 kill -9 pid。

星辰大海,点滴为途。
Nginx安装,开箱即用?的更多相关文章
- zabbix 3.0.3 (nginx)安装过程中的问题排错记录
特殊注明:安装zabbix 2.4.8和2.4.6遇到2个问题,如下:找了很多解决办法,实在无解,只能换版本,尝试换(2.2.2正常 | 3.0.3正常)都正常,最后决定换3.0.3 1.Error ...
- Nginx 安装以及反向代理配置(windows)
安装 windows 下 Nginx 安装非常简单,下载地址 http://nginx.org/en/download.html. 选择红框这个,下载下来是个 zip 文件,解压.这时我们双击根目录的 ...
- nginx安装与配置
一.在线安装 ubuntu 安装 sudo apt-get install nginx 安装后文件结构为: 配置文件:/etc/nginx ,并且每台虚拟主机已经安排在 /etc/nginx/site ...
- Windows下将nginx安装为服务运行
今天看到nginx这个小服务器软件正式版更新到了1.4.2,想玩下它.这个服务器软件虽小,但功能强大,是开源软件,有着良好的性能,被很多个人.企业,甚至大型企业所使用! 由于是在Windows下,所以 ...
- windows下nginx安装、配置与使用(转载)
目前国内各大门户网站已经部署了Nginx,如新浪.网易.腾讯等:国内几个重要的视频分享网站也部署了Nginx,如六房间.酷6等.新近发现Nginx 技术在国内日趋火热,越来越多的网站开始部署Nginx ...
- 阿里云服务器Linux CentOS安装配置(八)nginx安装、配置、域名绑定
阿里云服务器Linux CentOS安装配置(八)nginx安装.配置.域名绑定 1.安装nginx yum -y install nginx 2.启动nginx service nginx star ...
- Linux系统下Nginx安装详解
该随笔为个人原创,后期会根据项目实践实时更新,如若转载,请注明出处,方便大家获得最新博文! 注:安装Nginx需要Linux系统已经安装 openssl-fips-2.0.2.tar.gz zli ...
- Linux下查看Nginx安装目录、版本号信息?
Linux环境下,怎么确定Nginx是以那个config文件启动的? 输入命令行: ps -ef | grep nginx 摁回车,将出现如下图片: master process 后面的就是 ngi ...
- nginx安装及负载均衡配置
Nginx (“engine x”) 是一个高性能的 HTTP 和 反向代理 服务器,也是一个 IMAP/POP3/SMTP 代理服务器. Nginx 是由 Igor Sysoev 为俄罗斯访问量第二 ...
随机推荐
- 科大讯飞语音合成系统 V5.0绿色便携版
中文名: 中科大讯飞Interphonic 5.0语音合成系统英文名: Interphonic 5.0版本: 5.0发行时间: 2006年制作发行: 中科大讯飞语言: 简体中文系统简介InterPho ...
- Jmeter(9)常用定时器
测试计划中元件的执行顺序依次为: 配置元件--逻辑控制器--前置处理器--定时器--取样器--后置处理器--断言--监听器 一.定时器作用域 1.定时器是在每个取样器之前执行的,无论定时器是在取样器之 ...
- 【MySQL】Novicat 连接mysql 报错1251的问题处理,Novicat12 破解方法
1.远程连接时,报错 是因为我们的navicat版本太低 在网上查的是,出现这个原因是mysql8之前的版本中加密规则是mysql_native_password,而在mysql8之后,加密规则是ca ...
- 马赛克密码破解——GitHub 热点速览 Vol.50
作者:HelloGitHub-小鱼干 "xx"(爆粗口) 这个词是最能体现本人看到本周 GitHub 热点的心情的.那一天,看到用图片处理技术还原马赛克密码的 Depix 便惊为天 ...
- pag object设模式
pag object 是自动化测试最佳模式测试之一,它主要体现在对界面交互细节的封装 优点: 减少代码重复,提高测试的可读性,提搞测试用例的可维护性.
- IphoneX适配正确姿势
IphoneX适配正确姿势 写在前面 距离18年9月iphonex发布以来已经快两年了(所以对于iphonex机型的头部刘海(sensor housing)和底部小黑条(Home Indicator) ...
- 泡面不好吃,我用了这篇k8s调度器,征服了他
1.1 调度器简介 来个小刘一起 装逼吧 ,今天我们来学习 K8的调度器 Scheduler是 Kubernetes的调度器,主要的任务是把定义的 pod分配到集群的节点上,需要考虑以下问题: 公平: ...
- 移位运算符<<与>>
程序设计中,我们有时会看到两种运算符:<<和>>,这两种运算符均为移位运算符,属于位操作运算符中的一种,分别为<<(左移)和>>(右移). 其中,左移运 ...
- Windows无法访问共享文件夹
问题描述 今天打开vss连接代码,提示如下信息 解决办法 可行:重置登录用户信息 原博文 https://zhidao.baidu.com/question/1174230805440255699.h ...
- CentOS7下常用安装服务软件yum方式的介绍
简介:介绍yum软件包的管理并配置本地yum源 yum安装:基于 C/S 架构,yum安装称之为傻瓜式安装 yum安装优点:方便快捷,不用考虑包依赖,自动下载软件包. yum安装缺点:人为无法干预,无 ...