数据库命令行工具USQL、mycli、litecli、pgcli
USQL
USQL 是一款使用 Go 语言开发的支持 SQL/NoSQL 数据库的通用命令行工具,它支持多种主流的数据库软件,目前最新版本是usql 0.7.0。比如 PostgreSQL、MySQL、Oracle Database、SQLite3、Microsoft SQL Server 以及许多其它的数据库(包括 NoSQL 和非关系型数据库)。
USQL 的灵感来自 PostgreSQL 的 PSQL,USQL 支持大多数 PSQL 的核心特性,比如:设置变量、反引号参数。并具有 PSQL 不支持的其它功能,如语法高亮、基于上下文的自动补全和多数据库支持等。
安装 USQL
由于 USQL 使用 Go 语言开发,具备了良好的Linux、Windows等跨平台特性。USQL 安装非常简单,官方也提供二进制、Homebrew、Scoop等多种安装方式。这里我们就使用最具通用性的二进制方式安装,以 Linux 平台为例:
$ wget https://github.com/xo/usql/releases/download/v0.7.0/usql-0.7.0-linux-amd64.tar.bz2
$ tar xjvf usql-0.7.0-linux-amd64.tar.bz2
$ sudo mv usql /usr/local/bin
如果你使用其它平台,可根据实际情况在官方下载页面下载对应版本。
USQL 用法
mycli
mycli 是基于MySQL的命令行工具,直接使用 pip install mycli 安装,
具体介绍见 https://github.com/dbcli/mycli
$ mycli --help
Usage: mycli [OPTIONS] [DATABASE] A MySQL terminal client with auto-completion and syntax highlighting. Examples:
- mycli my_database
- mycli -u my_user -h my_host.com my_database
- mycli mysql://my_user@my_host.com:3306/my_database Options:
-h, --host TEXT Host address of the database.
-P, --port INTEGER Port number to use for connection. Honors
$MYSQL_TCP_PORT.
-u, --user TEXT User name to connect to the database.
-S, --socket TEXT The socket file to use for connection.
-p, --password TEXT Password to connect to the database.
--pass TEXT Password to connect to the database.
--ssh-user TEXT User name to connect to ssh server.
--ssh-host TEXT Host name to connect to ssh server.
--ssh-port INTEGER Port to connect to ssh server.
--ssh-password TEXT Password to connect to ssh server.
--ssh-key-filename TEXT Private key filename (identify file) for the
ssh connection.
--ssl-ca PATH CA file in PEM format.
--ssl-capath TEXT CA directory.
--ssl-cert PATH X509 cert in PEM format.
--ssl-key PATH X509 key in PEM format.
--ssl-cipher TEXT SSL cipher to use.
--ssl-verify-server-cert Verify server's "Common Name" in its cert
against hostname used when connecting. This
option is disabled by default.
-V, --version Output mycli's version.
-v, --verbose Verbose output.
-D, --database TEXT Database to use.
-d, --dsn TEXT Use DSN configured into the [alias_dsn]
section of myclirc file.
--list-dsn list of DSN configured into the [alias_dsn]
section of myclirc file.
-R, --prompt TEXT Prompt format (Default: "\t \u@\h:\d> ").
-l, --logfile FILENAME Log every query and its results to a file.
--defaults-group-suffix TEXT Read MySQL config groups with the specified
suffix.
--defaults-file PATH Only read MySQL options from the given file.
--myclirc PATH Location of myclirc file.
--auto-vertical-output Automatically switch to vertical output mode
if the result is wider than the terminal
width.
-t, --table Display batch output in table format.
--csv Display batch output in CSV format.
--warn / --no-warn Warn before running a destructive query.
--local-infile BOOLEAN Enable/disable LOAD DATA LOCAL INFILE.
--login-path TEXT Read this path from the login file.
-e, --execute TEXT Execute command and quit.
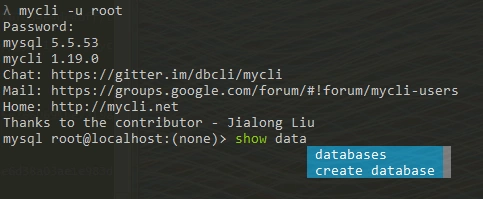
--help Show this message and exit. λ mycli -u root
Password:
mysql 5.5.53
mycli 1.19.0
Chat: https://gitter.im/dbcli/mycli
Mail: https://groups.google.com/forum/#!forum/mycli-users
Home: http://mycli.net
Thanks to the contributor - Jialong Liu
mysql root@localhost:(none)> show data
databases
create database
注:进入MySQL命令行后如果想执行Linux命令怎么办,先退出执行然后再登录MySQL?麻烦,其实可以直接用system。
mysql> system pwd

/root

mysql> system ll

sh: ll: command not found

mysql> system ls -al

total 40160

dr-xr-x---.   39 root     root         4096 Jul 10 14:47 .

dr-xr-xr-x.   29 root     root         4096 May  5 18:55 ..
litecli
litecli 是基于 sqlite 的命令行工具,直接用 pip install -U litecli 安装,具体介绍见
https://github.com/dbcli/litecli
$ litecli --help

Usage: litecli [OPTIONS] [DATABASE]

  A SQLite terminal client with auto-completion and syntax highlighting.

  Examples:

    - litecli lite_database

Options:

  -V, --version           Output litecli's version.

  -D, --database TEXT     Database to use.

  -R, --prompt TEXT       Prompt format (Default: "\d> ").

  -l, --logfile FILENAME  Log every query and its results to a file.

  --liteclirc PATH        Location of liteclirc file.

  --auto-vertical-output  Automatically switch to vertical output mode if the

                          result is wider than the terminal width.

  -t, --table             Display batch output in table format.

  --csv                   Display batch output in CSV format.

  --warn / --no-warn      Warn before running a destructive query.

  -e, --execute TEXT      Execute command and quit.

  --help                  Show this message and exit.

λ litecli

Version: 1.0.0

Mail: https://groups.google.com/forum/#!forum/litecli-users

Github: https://github.com/dbcli/litecli

(none)> .tables

Not connected to database.

(none)> .databases

Not connected to database.

(none)> use test

You are now connected to database "test"

Time: 0.001s

test> .tables

Time: 0.000s

test> CREATE TABLE COMPANY(

         ID INT PRIMARY KEY     NOT NULL,

         NAME           TEXT    NOT NULL,

         AGE            INT     NOT NULL,

         ADDRESS        CHAR(50),

         SALARY         REAL

      );

Query OK, 0 rows affected

Time: 0.077s

test> .tables

+---------+

| name    |

+---------+

| COMPANY |

+---------+

Time: 0.040s
pgcli
pgcli 是一个基于 PostgreSQL 的命令行工具,支持自动补全和语法高亮,直接使用pip install -U pgcli 安装,具体介绍见 https://github.com/dbcli/pgcli
$ pgcli --help

Usage: pgcli [OPTIONS] [DATABASE] [USERNAME]Options:

  -h, --host TEXT     Host address of the postgres database.

  -p, --port INTEGER  Port number at which the postgres instance is listening.

  -U, --user TEXT     User name to connect to the postgres database.

  -W, --password      Force password prompt.

  -w, --no-password   Never prompt for password.

  -v, --version       Version of pgcli.

  -d, --dbname TEXT   database name to connect to.

  --pgclirc TEXT      Location of pgclirc file.

  --help              Show this message and exit.
数据库命令行工具USQL、mycli、litecli、pgcli的更多相关文章
- Mysql数据库命令行输入错误怎么办
Mysql数据库命令行输入错误 缺少另一半 错误输入 ' 或 " 时,必须键入另一半才能退出命令. 缺少分号 写入语句缺少分号需要补全. 输入quit或者exit退出 ctrl+c,完全退出 ...
- orcl数据库命令行怎么导入dmp格式的文件
2018-05-23 1.创建空间 以system的身份登陆orcl 打开SQL Window界面,输入以下命令create tablespace SGXC(表空间的名字)datafile 'D:/S ...
- MySql数据库命令行操作说明
MySql数据库操作说明 1. 使用电脑的运行cmd指令打开dos界面 2. 输入cd C:\Program Files\MySql\bin命令回车,进入mysqld目录 3. 输入mysql ...
- 数据库命令行操作语句 linux 详细
1.连接数据库 命令: use <数据库名> 2.查看表的引擎类型等状态信息 SHOW TABLE STATUS [FROMdb_name] [LIKE 'pattern'] 3.当前数据 ...
- MYSQL 数据库命令行终端操作笔记
1.数据库登录: 1.登录本地的MYSQL数据库:mysql -u root -p 2.连接远程主机上的MYSQL数据库:mysql -h 192.168.191.2 -u root -p 123 ...
- postgres 数据库命令行客户端psql的使用命令总结
1.切换到 postgres 用户: 2.输入: psql , 进入到postgresql的客户端psql: 3.\l 查看当前所有的数据库: 4.psql database1 ...
- oracle数据库命令行查看存储过程
之前有用过这种写法,转换大小写在赋给字段,但是没成功,偶然间发现别人有这么写,今天试了下确实可以
- Oracle数据库命令行下数据的导入导出
//设置导入导出字符集,导入导出都要设置一下 export NLS_LANG=AMERICAN_AMERICA.ZHS16GBK //导出 exp system/oracle@orcl file=/u ...
- 七个用于数据科学(data science)的命令行工具
七个用于数据科学(data science)的命令行工具 数据科学是OSEMN(和 awesome 相同发音),它包括获取(Obtaining).整理(Scrubbing).探索(Exploring) ...
随机推荐
- SQL学习(八)日期处理
不同数据库中,针对日期处理的函数不同 Oracle中常用日期函数 (1.sysdate: 获取当前系统时间 如: select sysdate() ----返回当前时间,包括年月日 时分秒 (2.to ...
- 1-2、kubernetes架构概述和kubernetes基础概念
kubernetes https://draveness.me/understanding-kubernetes http://kubernetes.kansea.com/docs/ master/n ...
- C基础知识(10):预处理器
C预处理器不是编译器的组成部分,但是它是编译过程中一个单独的步骤.简言之,C预处理器只不过是一个文本替换工具而已,它们会指示编译器在实际编译之前完成所需的预处理. 所有的预处理器命令都是以井号(#)开 ...
- Spring:注解(@suppresswarnings,@Valid,初始化静态配置数据,定时任务,@EnableAutoConfiguration)
1.@suppresswarnings(" ") 2.@Valid @Valid注解用于校验,所属包为:javax.validation.Valid. ① 首先需要在实体类的相应字 ...
- Django-MVC框架和MTV框架
MVC框架 全称Model View Controller,分为三个基本部分:模型Model.视图View和控制器Controller,具有耦合性低.重用性高.生命周期低等优点. 结构 View层,操 ...
- ipcs查看消息队列命令
修改消息队列大小: root:用户: /etc/sysctl.conf kernel.msgmnb =4203520 #kernel.msgmnb =3520 kernel.msgmni = 2878 ...
- t-sql最短路径搜索
SET STATISTICS IO ON; SET STATISTICS TIME ON; GO IF OBJECT_ID(N'dbo.t1') IS NOT NULL DROP TABLE dbo. ...
- SQL SERVER 字符串函数 STUFF()
说明: STUFF 函数将字符串插入到另一个字符串中. 它从第一个字符串的开始位置删除指定长度的字符:然后将第二个字符串插入到第一个字符串的开始位置. 语法: STUFF ( character_ex ...
- 索引及explain 详解
索引的分类: 普通索引:仅加速查询 唯一索引:加速查询 + 列值唯一(可以有null) 主键索引:加速查询 + 列值唯一(不可以有null)+ 表中只有一个 组合索引:多列值组成一个索引,专门用于组合 ...
- hashMap怎样解决hash冲突
通过链表的方式处理: java1.7是单向链表 jvav1.8在数量小于8时是单向链表,大于8就是红黑树,查找方式遍历判断 解决冲突的方式很多,例如再hash,再散列(开放地址法,探测再散列)