PXE安装操作系统
TFTP服务
用PXE安装操作系统依赖于DHCP服务和TFTP服务
网卡一般都内置的TFTP客户端的程序
systemctl enable tftp systemctl enable dhcpd
 [root@centos7 dhcp]# yum install tftp-server

 [root@centos7 dhcp]# rpm -ql tftp-server

 /etc/xinetd.d/tftp

 /usr/lib/systemd/system/tftp.service

 /usr/lib/systemd/system/tftp.socket

 /usr/sbin/in.tftpd

 /usr/share/doc/tftp-server-5.2

 /usr/share/doc/tftp-server-5.2/CHANGES

 /usr/share/doc/tftp-server-5.2/README

 /usr/share/doc/tftp-server-5.2/README.security

 /usr/share/man/man8/in.tftpd..gz

 /usr/share/man/man8/tftpd..gz

 /var/lib/tftpboot

 #安装客户端

 [root@yxh6 ~]# yum install tftp

 [root@yxh6 ~]# tftp 192.168.231.7

 tftp> get file

 #file存在服务端的/var/lib/tftpboot目录下
TFTP配置
搭建PXE服务器
[root@centos7 html]#yum install httpd

[root@centos7 html]# systemctl start httpd

[root@centos7 html]# vi /etc/fstab

/dev/sr0             /var/www/html/centos7          iso9660       defautls

[root@centos7 html]# mount -a

mount: /dev/sr0 is write-protected, mounting read-only

[root@centos7 html]# mkdir ksdir{,}

[root@centos7 html]# ls

centos6  centos7  ksdir6  ksdir7

[root@centos7 html]# cp /root/anaconda-ks.cfg ksdir7/ks7_desktop.cfg

[root@centos7 html]# cd ksdir7

[root@centos7 ksdir7]# ls

ks7_desktop.cfg

[root@centos7 ksdir7]# ll

total

-rw-------  root root  May  : ks7_desktop.cfg

[root@centos7 ksdir7]# chmod  ks7_desktop.cfg

[root@centos7 ksdir7]# ll

total

-rw-r--r--  root root  May  : ks7_desktop.cfg
准备yum源和ks文件
[root@centos7 dhcp]# vi dhcpd.conf

#配置和自动安装系统相关的配置

subnet 192.168.231.0 netmask 255.255.255.224 {

  range 192.168.231.10 192.168.231.20;

  option routers 192.168.231.254;

  next-server 192.168.231.7;

  filename "pxelinux.0";

}

[root@centos7 dhcp]# systemctl restart dhcpd.service

[root@centos7 dhcp]# systemctl enable dhcpd httpd
配置DHCP
 [root@centos7 dhcp]# yum install  tftp-server syslinux

 [root@centos7 dhcp]# cd /var/lib/tftpboot

 [root@centos7 tftpboot]# mkdir pxelinux.cfg/

 #pxelinux. 文件来自于 syslinux软件包,必须先安装syslinux

 [root@centos7 tftpboot]# cp /usr/share/syslinux/pxelinux.  .

 [root@centos7 tftpboot]# cp /var/www/html/centos7/isolinux/{vmlinuz,initrd.img,vesamenu.c32} /var/lib/tftpboot/

 [root@centos7 tftpboot]#cp /var/www/html/centos7/isolinux/isolinux.cfg /var/lib/tftpboot/pxelinux.cfg/default

 [root@centos7 pxelinux.cfg]# vi default

 label linux

   menu label ^Install Desktop7

   kernel vmlinuz

   append initrd=initrd.img ks=http://192.168.231.7/ksdir7/ks7_desktop.cfg

 [root@centos7 pxelinux.cfg]#systemctl enable tftp.socket

 [root@centos7 pxelinux.cfg]#systemctl start  tftp
配置TFTP
 #version=DEVEL

 # System authorization information

 auth --enableshadow --passalgo=sha512

 # Use CDROM installation media

 url --url=http://192.168.231.7/centos7

 # Use graphical install

 #graphical

 text

 # Run the Setup Agent on first boot

 firstboot --enable

 ignoredisk --only-use=sda

 # Keyboard layouts

 keyboard --vckeymap=us --xlayouts='us'

 # System language

 lang en_US.UTF-

 reboot

 # Network information

 network  --bootproto=dhcp --device=ens33 --onboot=on --ipv6=auto --no-activate

 network  --hostname=centosmy7.localdomain

 # Root password

 rootpw --iscrypted $$RzUIKaLkncGUm9SL$FtuXzR8IpSz2OEQp.LlDrDH1O62SMrZ/Gj06iTSNqlxWma/aHf21lpikhNln6UgNyuL/HqGUrM45feTBkMC1T0

 # System services

 services --disabled="chronyd"

 # System timezone

 timezone Asia/Shanghai --isUtc --nontp

 # X Window System configuration information

 xconfig  --startxonboot

 # System bootloader configuration

 bootloader --append=" crashkernel=auto" --location=mbr --boot-drive=sda

 zerombr

 # Partition clearing information

 clearpart --none --initlabel

 # Disk partitioning information

 part swap --fstype="swap" --ondisk=sda --size=

 part / --fstype="xfs" --ondisk=sda --size=

 part /data --fstype="xfs" --ondisk=sda --size=

 part /boot --fstype="xfs" --ondisk=sda --size=

 %packages

 @base

 @core

 @dial-up

 @fonts

 @guest-agents

 @print-client

 @x11

 kexec-tools

 %end

 %addon com_redhat_kdump --enable --reserve-mb='auto'

 %end

 %anaconda

 pwpolicy root --minlen= --minquality= --notstrict --nochanges --notempty

 pwpolicy user --minlen= --minquality= --notstrict --nochanges --emptyok

 pwpolicy luks --minlen= --minquality= --notstrict --nochanges --notempty

 %end

 %post

  systemctl disable initial-setup.service

  systemctl  disable  initial-setup-graphical.service

  systemctl set-default multi-user.target

  mkdir -p /root/oscreate

  useradd laozijiadeuser

 %end
ks文件示例
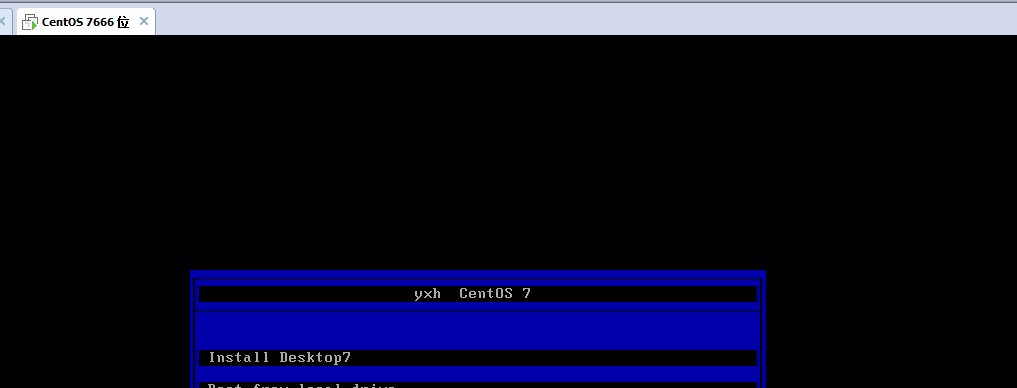
新创建一个虚拟机,把网卡的网段设置成和服务器为同一个网段,启动机器出现下图
PXE安装多个版本的系统
安装不同版本的操作系统,需要分别拷贝对应的内核文件和ks文件,不能混合使用
mkdir /var/lib/tftpboot/pxelinux.cfg/

cp /usr/share/syslinux/pxelinux. /var/lib/tftpboot/

cp /usr/share/syslinux/menu.c32 /var/lib/tftpboot/

mkdir /var/lib/tftpboot/centos{,}

cp  /var/www/html/centos//isolinux/{vmlinuz,initrd.img} /var/lib/tftpboot/centos7/

cp  /var/www/html/centos//isolinux/{vmlinuz,initrd.img} /var/lib/tftpboot/centos6/

cp /var/www/html/centos//isolinux/isolinux.cfg  /var/lib/tftpboot/pxelinux.cfg/default

vim /var/lib/tftpboot/pxelinux.cfg/default

cat /var/lib/tftpboot/pxelinux.cfg/default

cat /var/lib/tftpboot/pxelinux.cfg/default

default menu.c32

timeout

menu title www.yxh.com

label centos7

  menu label ^Install  Desktop CentOS

  kernel centos7/vmlinuz

  append initrd=centos7/initrd.img ks=http://192.168.30.17/ksdir/ks7_desktop.cfg

label centos6

  menu label install ^Mini CentOS

  menu default

  kernel centos6/vmlinuz

  append initrd=centos6/initrd.img ks=http://192.168.30.17/ksdir/ks6_mini.cfg

label local

  menu label Boot from ^local drive

  localboot 0xffff

menu end
代码示例
 tree /var/lib/tftpboot/

 /var/lib/tftpboot/

 ├── centos6

 │├── initrd.img

 │└── vmlinuz

 ├── centos7

 │├── initrd.img

 │ └── vmlinuz

 ├── menu.c32

 ├── pxelinux.

 └── pxelinux.cfg

     └── default
文件结构目录
Linux配置服务的一般步骤
1.检查防火墙和selinux
2.安装包
3.启动服务
4.检查服务是否成功启动
5.在客户端执行命令测试
6.每个服务都有自己的工作主目录
PXE安装操作系统的更多相关文章
- PXE+Kickstart+DHCP+TFTP实现无人值守安装操作系统
PXE+Kickstart+DHCP+TFTP实现无人值守安装操作系统 PXE + Kickstart PXE的工作流程及配置文件 Kickstart的配置文件 Linux安装大致可以分为2个阶段 第 ...
- [转]CentOS 6.4下PXE+Kickstart无人值守安装操作系统
一.简介 1.1 什么是PXE PXE(Pre-boot Execution Environment,预启动执行环境)是由Intel公司开发的最新技术,工作于Client/Server的网络模式,支持 ...
- CentOS 6.4下PXE+Kickstart无人值守安装操作系统 转
一.简介 1.1 什么是PXE PXE(Pre-boot Execution Environment,预启动执行环境)是由Intel公司开发的最新技术,工作于Client/Server的网络模式,支持 ...
- RHEL7下PXE+NFS+Kickstart无人值守安装操作系统
RHEL7下PXE+NFS+Kickstart无人值守安装操作系统 1.配置yum源 vim /etc/yum.repos.d/development.repo [development] name= ...
- RHEL7下PXE+Apache+Kickstart无人值守安装操作系统
RHEL7下PXE+Apache+Kickstart无人值守安装操作系统 1.配置yum源 vim /etc/yum.repos.d/development.repo [development] na ...
- CentOS 6.6下PXE+Kickstart无人值守安装操作系统
一.简介 1.1 什么是PXE PXE(Pre-boot Execution Environment,预启动执行环境)是由Intel公司开发的最新技术,工作于Client/Server的网络模式,支持 ...
- 【转载】CentOS 6.4下PXE+Kickstart无人值守安装操作系统
[转载]CentOS 6.4下PXE+Kickstart无人值守安装操作系统 转自:CentOS 6.4下PXE+Kickstart无人值守安装操作系统 - David_Tang - 博客园 http ...
- Centos下PXE+Kickstart无人值守安装操作系统
一.简介 1.1 什么是PXE PXE(Pre-boot Execution Environment,预启动执行环境)是由Intel公司开发的最新技术,工作于Client/Server的网络模式,支持 ...
- CentOS 7下PXE+Kickstart无人值守安装操作系统
1.简介 1.1. 什么是PXE PXE(Pre-boot Execution Environment,预启动执行环境)是由Intel公司开发的最新技术,工作于Client/Server的网络模式,支 ...
随机推荐
- Golang Gin 框架 Route备注
https://www.jianshu.com/p/d4b52187d233 https://blog.csdn.net/weixin_34210740/article/details/8602756 ...
- 前端分页插件pagination
摘要: 最近在开发项目中又用到了前端分页,以前也做过,为了方便以后使用所以将他封装成第三方插件,不依赖任何库.网上已经有很多插件,问什么还要自己造轮子? 自己写的扩展性高 不依赖任何库 作为一次技术沉 ...
- 8 -- 深入使用Spring -- 5...1 启用Spring缓存
8.5.1 启用Spring缓存 Spring配置文件专门为缓存提供了一个cache:命名空间,为了启用Spring缓存,需要在配置文件中导入cache:命名空间. 导入cache:命名空间之后,启用 ...
- 【中间件安全】IIS7.0 安全加固规范
1. 适用情况 适用于使用IIS7进行部署的Web网站. 2. 技能要求 熟悉IIS配置操作,能够利用IIS进行建站,并能针对站点使用IIS进行安全加固. 3. 前置条件 1. 根据站点开放端口.进程 ...
- LostRoutes项目日志——编辑project.json
第一个Scene编译后运行会报错: Uncaught TypeError: Cannot read property 'style' of null 这是因为没有在project.json中包含已经编 ...
- [原]openstack-kilo--issue(十九) ImportError: Could not import settings 'openstack_dashboard.settings' (Is it on sys.path? Is there an import error in the settings file?): No module named main
查看此问题的时候请先查看 这个问题包含在(十)中,此篇只是从(十)中分离出来 openstack-kilo--issue(十)ERROR: openstack Unable to establish ...
- Oracle数据库入门——基础知识
1.安装完成Oracle数据库后,使用sqlplus客户端登录数据库管理系统,只输入用户名,没有输入密码时,会提示口令为空,登录被拒绝. 请输入用户名:system 输入口令: ERROR:ORA-0 ...
- ORM跨表查询问题
环境准备: 表结构 from django.db import models # Create your models here. class Publisher(models.Model): id ...
- nodejs XML和json互相转换
Docs: https://www.npmjs.com/package/fast-xml-parser const xml = ` <user> <name>ajanuw< ...
- python 中 try ...except
捕捉异常 try: 下的代码段 即为 需要捕捉异常的代码段: except: 捕获某一模块的异常,须带异常模块名称,可带原因参数:except 下代码为该异常发生时,所执行的代码:一个try可对应多 ...