kivy Properties
Introduction to Properties
Properties are an awesome way to define events and bind to them. Essentially, they produce events such that when an attribute of your object changes, all properties that reference that attribute are automatically updated.
There are different kinds of properties to describe the type of data you want to handle.
Declaration of a Property
To declare properties, you must declare them at the class level. The class will then do the work to instantiate the real attributes when your object is created. These properties are not attributes: they are mechanisms for creating events based on your attributes:
class MyWidget(Widget):

    text = StringProperty('')
When overriding __init__, always accept **kwargs and use super() to call the parent’s __init__ method, passing in your class instance:
def __init__(self, **kwargs):

    super(MyWidget, self).__init__(**kwargs)
Dispatching a Property event
Kivy properties, by default, provide an on_<property_name> event. This event is called when the value of the property is changed.
Note
If the new value for the property is equal to the current value, then the on_<property_name> event will not be called.
For example, consider the following code:
1 |
class CustomBtn(Widget):
pressed = ListProperty([0, 0])
def on_touch_down(self, touch):
|
In the code above at line 3:
pressed = ListProperty([0, 0])
We define the pressed Property of type ListProperty, giving it a default value of [0, 0]. From this point forward, the on_pressed event will be called whenever the value of this property is changed.
At Line 5:
def on_touch_down(self, touch):

    if self.collide_point(*touch.pos):

        self.pressed = touch.pos

        return True

    return super(CustomBtn, self).on_touch_down(touch)
We override the on_touch_down() method of the Widget class. Here, we check for collision of the touch with our widget.
If the touch falls inside of our widget, we change the value of pressed to touch.pos and return True, indicating that we have consumed the touch and don’t want it to propagate any further.
Finally, if the touch falls outside our widget, we call the original event using super(…) and return the result. This allows the touch event propagation to continue as it would normally have occurred.
Finally on line 11:
def on_pressed(self, instance, pos):

    print ('pressed at {pos}'.format(pos=pos))
We define an on_pressed function that will be called by the property whenever the property value is changed.
Note
This on_<prop_name> event is called within the class where the property is defined. To monitor/observe any change to a property outside of the class where it’s defined, you should bind to the property as shown below.
Binding to the property
How to monitor changes to a property when all you have access to is a widget instance? You bind to the property:
your_widget_instance.bind(property_name=function_name)
For example, consider the following code:
1 |
class RootWidget(BoxLayout):
def __init__(self, **kwargs):
|
If you run the code as is, you will notice two print statements in the console. One from the on_pressed event that is called inside the CustomBtn class and another from the btn_pressed function that we bind to the property change.
The reason that both functions are called is simple. Binding doesn’t mean overriding. Having both of these functions is redundant and you should generally only use one of the methods of listening/reacting to property changes.
You should also take note of the parameters that are passed to the on_<property_name> event or the function bound to the property.
def btn_pressed(self, instance, pos):
The first parameter is self, which is the instance of the class where this function is defined. You can use an in-line function as follows:
1 |
cb = CustomBtn() def _local_func(instance, pos): |
The first parameter would be the instance of the class the property is defined.
The second parameter would be the value, which is the new value of the property.
Here is the complete example, derived from the snippets above, that you can use to copy and paste into an editor to experiment.
1 |
from kivy.app import App |
Running the code above will give you the following output:
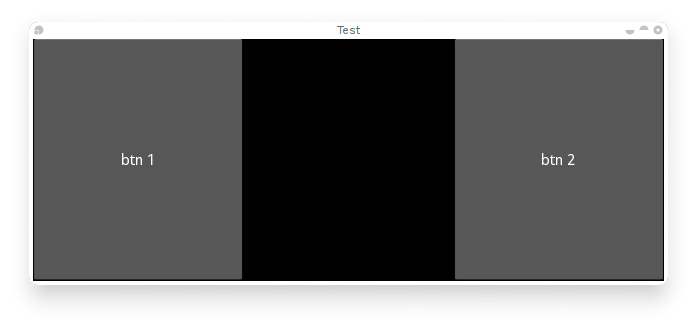
Our CustomBtn has no visual representation and thus appears black. You can touch/click on the black area to see the output on your console.
Compound Properties
When defining an AliasProperty, you normally define a getter and a setter function yourself. Here, it falls on to you to define when the getter and the setter functions are called using the bind argument.
Consider the following code.
1 |
cursor_pos = AliasProperty(_get_cursor_pos, None, bind=( |
Here cursor_pos is a AliasProperty which uses the getter _get_cursor_pos with the setter part set to None, implying this is a read only Property.
The bind argument at the end defines that on_cursor_pos event is dispatched when any of the properties used in the bind= argument change.
kivy Properties的更多相关文章
- kivy sdl2 - ImportError: DLL load failed: 找不到指定的模块
from kivy.app import App from kivy.uix.button import Button class TestApp(App): def build(self): ret ...
- 『Python Kivy』Kivy模板语言KV说明
语言概念 KV语言允许你以声明的方式创建控件树,以及绑定控件属性到其他的控件或使用一种自然的方式进行回调. 它允许非常快速并灵活的改变你的UI. 它还可以让你的应用程序与应用程序的界面进行分隔. 如何 ...
- 『Python Kivy』官方乒乓球游戏示例解析
本篇文章用于对Kivy框架官方所给出的一个「乒乓球」小游戏的源码进行简单地解析.我会尽可能的将方方面面的内容都说清楚.在文章的最下方为官方所给出的这个小游戏的教程以及游戏源码. 由于篇幅所限,本文只简 ...
- kivy学习二:做一个查询所在地区身份证前6位的小软件
经过半个月的尝试,终于成功,记录下来备查! 做完之后发现有很多的问题没有解决,请大佬多批评指教! 强烈建议:学习KIVY的查看官方文档 需要用的知识: 1.字典的相关知识 2.kivy的下拉列表(Dr ...
- kivy file import
from kivy.app import Appfrom kivy.uix.boxlayout import BoxLayoutfrom kivy.properties import ObjectPr ...
- 使用Buildozer部署Kivy到移动设备上
在安装好Buildozer软件之后,我们在包含main.py的文件夹下运行buildozer init这个命令,然后我们就会看到在该文件夹下有一个buildozer.spec这个文件,这个文件主要是用 ...
- kivy中bind的使用
一般在kivy中使用bind()来绑定回调函数,所谓回调函数,个人理解就是一个预先定义好的方法, 因为APP是静态的, 需要等待用户进行操作, 特定的操作背后都绑定了特定的回调函数, 一般有两种类型: ...
- Kivy: Building GUI and Mobile apps with Python
Intro Python library for building gui apps (think qt, gdk,processing) build from ground up for lates ...
- spring无法读取properties文件数据
只讲述异常点,关于怎么配置文件,这里不做说明. 1. controller中无法读取config.properties文件 controller中注入的@Value配置是从servlet-cont ...
随机推荐
- SpringMVC的Model ModeMap ModelAndView @ModelAttribute @SessionAttribute区分
Spring MVC整理系列(05)————Spring MVC配置解析及整合SpriSpring MVC之@ModelAttribute.@SessionAttributes以及Model的使用介绍 ...
- SecureCRT乱码问题的解决
== 安装后默认的设置是utf8,不是汉字乱码,是一块一块的看不清,OMG... 设置这两个页面就好了
- https://sweetalert2.github.io/
https://sweetalert2.github.io/
- Linux df命令详解
1.命令:df 2.命令功能:显示指定磁盘文件的可用空间. 3.命令参数: -a #全部文件系统列表 -h #方便阅读方式显示 -H #等于“-h”,但是计算式,1K=1000,而不是1K=1024 ...
- JMeter TCP性能测试
jmeter是一款纯java的性能测试工具,跨平台运行方便.提供图形化界面设置.简单易用. 在性能测试方法论中,很典型的方法就是二八原则,量化业务需求. 二八原则:指80%的业务量在20%的时 ...
- cocos2d-X JS 获取cocostudio中的UI组件
1.先加载cocostudio导出的json文件,代码如下所示: var dong = ccs.load("res/Login.json"); //_login.setPositi ...
- EasyTouch中虚拟摇杆的使用EasyJoystick
unity3d自带的虚拟摇杆显然没有EasyTouch好用 首先下载这个插件 http://pan.baidu.com/s/1hqJAbTa 下载完成后.导入到unity,可以看看里面的案例
- Android -- GreenDao3.2的简单使用
1,最近看了一篇文章关于GreenDao的文章 ,感觉使用这个操作数据库还是很好用的,帮我们省了不少的查询代码,今天就和大家一起来简单的使用一下吧.首先这是官网地址:https://github.co ...
- sqlserver备份还原数据库时报占用错误
.做项目时遇到这种情形:原来的test_dev数据库,想复制出test_ft供测试用.此时备份test_dev出test_backup文件,想直接还原成test_ft时会报占用错误. 还原数据库:Th ...
- Springboot整合Mybatis 之分页插件使用
1: 引入jar包 <!-- 引入MyBatis分页插件--> <dependency> <groupId>com.github.pagehelper</gr ...