k8s上安装elasticsearch集群
官方文档地址:https://www.elastic.co/guide/en/cloud-on-k8s/current/k8s-quickstart.html
yaml文件地址:https://download.elastic.co/downloads/eck/1.6.0/all-in-one.yaml
前提要求
1.Kubernetes 1.16-1.20
2. es各组件版本
- Elasticsearch, Kibana, APM Server: 6.8+, 7.1+
- Enterprise Search: 7.7+
- Beats: 7.0+
- Elastic Agent: 7.10+
- Elastic Maps Server: 7.11+
安装步骤
1.在k8s中安装部署ECK
2.使用ECK安装部署Elasticsearch集群
3.安装部署Kibana
4.升级部署
5.存储
6.检测
在k8s中安装部署ECK
1.安装自定义资源定义和运算符及其RBAC规则:
kubectl create -f https://download.elastic.co/downloads/eck/1.6.0/all-in-one.yaml
有警告信息:
namespace/elastic-system created

serviceaccount/elastic-operator created

secret/elastic-webhook-server-cert created

configmap/elastic-operator created

Warning: apiextensions.k8s.io/v1beta1 CustomResourceDefinition is deprecated in v1.16+, unavailable in v1.22+; use apiextensions.k8s.io/v1 CustomResourceDefinition

customresourcedefinition.apiextensions.k8s.io/agents.agent.k8s.elastic.co created

customresourcedefinition.apiextensions.k8s.io/apmservers.apm.k8s.elastic.co created

customresourcedefinition.apiextensions.k8s.io/beats.beat.k8s.elastic.co created

customresourcedefinition.apiextensions.k8s.io/elasticmapsservers.maps.k8s.elastic.co created

customresourcedefinition.apiextensions.k8s.io/elasticsearches.elasticsearch.k8s.elastic.co created

customresourcedefinition.apiextensions.k8s.io/enterprisesearches.enterprisesearch.k8s.elastic.co created

customresourcedefinition.apiextensions.k8s.io/kibanas.kibana.k8s.elastic.co created

clusterrole.rbac.authorization.k8s.io/elastic-operator created

clusterrole.rbac.authorization.k8s.io/elastic-operator-view created

clusterrole.rbac.authorization.k8s.io/elastic-operator-edit created

clusterrolebinding.rbac.authorization.k8s.io/elastic-operator created

service/elastic-webhook-server created

statefulset.apps/elastic-operator created

Warning: admissionregistration.k8s.io/v1beta1 ValidatingWebhookConfiguration is deprecated in v1.16+, unavailable in v1.22+; use admissionregistration.k8s.io/v1 ValidatingWebhookConfiguration

validatingwebhookconfiguration.admissionregistration.k8s.io/elastic-webhook.k8s.elastic.co created
2.监控operator 日志
kubectl -n elastic-system logs -f statefulset.apps/elastic-operator
看日志的话也会显示上述警告信息:

使用ECK部署es集群
注意:如果您的Kubernetes集群没有任何Kubernetes节点具有至少2GiB的可用内存,pod将处于挂起状态。
如下是创建一个pod的示范:
默认拉取的镜像是从docker.elastic.co/elasticsearch/elasticsearch:7.13.1拉取的,若是拉入不到,可以先从dockerhub上拉取,然后tag
docker tag elasticsearch:7.12.1 docker.elastic.co/elasticsearch/elasticsearch:7.12.1
# cat es.yaml

apiVersion: elasticsearch.k8s.elastic.co/v1

kind: Elasticsearch

metadata:

  name: quickstart

spec:

  version: 7.13.1

  nodeSets:

  - name: default

    count: 1

    config:

      node.store.allow_mmap: false

# kubectl create -f es.yaml

elasticsearch.elasticsearch.k8s.elastic.co/quickstart created
监视es运行状况和创建进度
kubectl get elasticsearch

NAME         HEALTH   NODES   VERSION   PHASE   AGE

quickstart   green    1       7.12.1    Ready   5m33s
创建集群时,没有运行状况,并且阶段为空。一段时间后,阶段变成就绪,健康变成绿色。
可以看到一个Pod正在启动过程中
kubectl get pods --selector='elasticsearch.k8s.elastic.co/cluster-name=quickstart'

NAME                      READY   STATUS    RESTARTS   AGE

quickstart-es-default-0   1/1     Running   0          5m54s
查看pod日志
kubectl logs -f quickstart-es-default-0
访问es
不建议使用-k标志禁用证书验证,只应用于测试目的
kubectl get service quickstart-es-http
NAME TYPE CLUSTER-IP EXTERNAL-IP PORT(S) AGE
quickstart-es-http ClusterIP 10.3.255.226 <none> 9200/TCP 2m52s
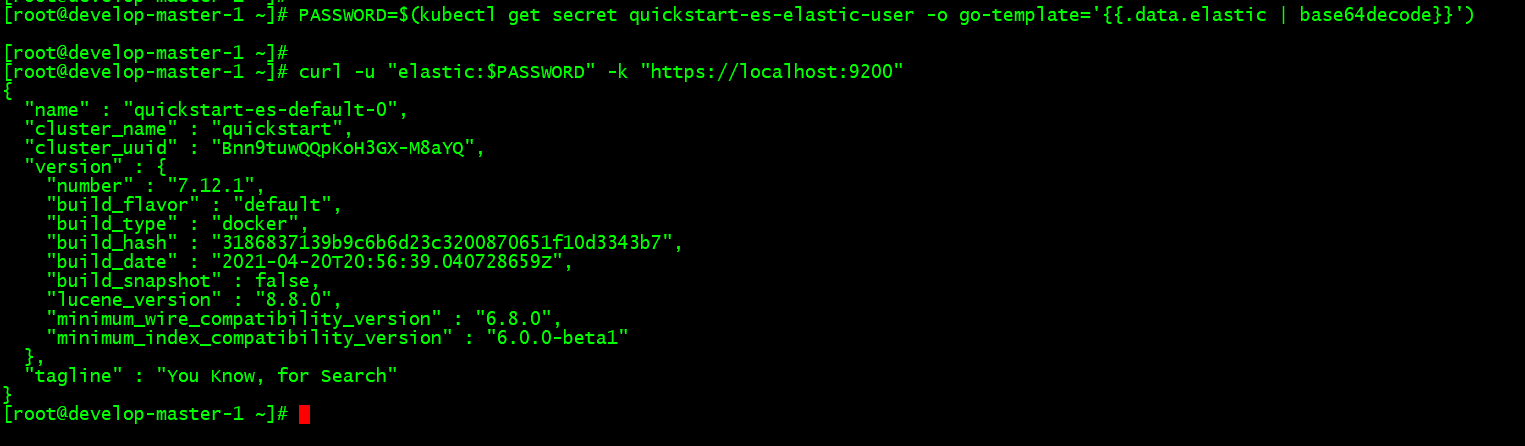
# 获取密码,默认用户名是elastic
PASSWORD=$(kubectl get secret quickstart-es-elastic-user -o go-template='{{.data.elastic | base64decode}}')
# 在Kubernetes 集群内部访问
curl -u "elastic:$PASSWORD" -k "https://quickstart-es-http:9200"
# 在主机上访问
curl -u "elastic:$PASSWORD" -k "https://quickstart-es-http:9200"

三个pod组成的集群,可以随意扩展pod数量
# curl -u "elastic:$PASSWORD" -k "https://localhost:9200/_cat/nodes"

10.0.0.137 15 63 59 6.24 7.62 6.57 cdfhilmrstw - quickstart-es-default-2

10.0.1.219 30 64 46 4.80 3.21 2.53 cdfhilmrstw * quickstart-es-default-0

10.0.2.193 55 63 44 1.97 2.50 2.30 cdfhilmrstw - quickstart-es-default-1
部署kibana
# cat kibana.yaml

apiVersion: kibana.k8s.elastic.co/v1

kind: Kibana

metadata:

  name: quickstart

spec:

  version: 7.13.1

  count: 1

  elasticsearchRef:

    name: quickstart

# kubectl create -f kibana.yaml

kibana.kibana.k8s.elastic.co/quickstart created
监视kibana运行状况和创建进度
# kubectl get pod --selector='kibana.k8s.elastic.co/name=quickstart'

NAME                             READY   STATUS    RESTARTS   AGE

quickstart-kb-5f844868fb-lrn2f   1/1     Running   1          4m26s
访问kibana
# kubectl get service quickstart-kb-http

NAME                 TYPE        CLUSTER-IP    EXTERNAL-IP   PORT(S)    AGE

quickstart-kb-http   ClusterIP   10.3.255.47   <none>        5601/TCP   5m11s

# 本机访问

# kubectl port-forward service/quickstart-kb-http 5601

Forwarding from 127.0.0.1:5601 -> 5601

Forwarding from [::1]:5601 -> 5601

# 获取默认用户名elastic的密码

# kubectl get secret quickstart-es-elastic-user -o=jsonpath='{.data.elastic}' | base64 --decode; echo

# 另一种访问kibana的方法

默认创建的有一个名为quickstart-kb-http的svc,类型是ClusterIP,可以修改这个为NodePort,来实现通过宿主机ip:NodePort来访问
升级部署
首先确保Kubernetes集群有足够的资源来适应这些更改(额外的存储空间、足够的内存和CPU资源来临时启动新的pod等等)。
如下示例是把es集群中节点数量由1增加到3
# cat es.yaml

apiVersion: elasticsearch.k8s.elastic.co/v1

kind: Elasticsearch

metadata:

  name: quickstart

spec:

  version: 7.13.1

  nodeSets:

  - name: default

    count: 3

    config:

      node.store.allow_mmap: false
存储
默认情况下,操作员为Elasticsearch集群中的每个pod创建一个容量为1Gi的PersistentVolumeClaim,以防止意外删除pod时数据丢失。对于生产工作负载,应该使用所需的存储容量和(可选)要与持久卷关联的Kubernetes存储类来定义自己的卷声明模板。卷声明的名称必须始终是elasticsearch数据。
spec:

  nodeSets:

  - name: default

    count: 3

    volumeClaimTemplates:

    - metadata:

        name: elasticsearch-data

      spec:

        accessModes:

        - ReadWriteOnce

        resources:

          requests:

            storage: 5Gi

        storageClassName: standard
如果拥有的Elasticsearch节点按比例缩小,则ECK会自动删除PersistentVolumeClaim资源。根据配置的存储类回收策略,可以保留相应的持久卷。
此外,如果您通过volumeClaimDeletePolicy属性完全删除Elasticsearch集群,您可以控制ECK应该如何处理PersistentVolumeClaims。
apiVersion: elasticsearch.k8s.elastic.co/v1

kind: Elasticsearch

metadata:

  name: es

spec:

  version: 7.13.1

  volumeClaimDeletePolicy: DeleteOnScaledownOnly

  nodeSets:

  - name: default

    count: 3
可能的值为DeleteOnScaleDownandClusterDelete和DeleteOnScaledownOnly。默认情况下,DeleteOnScaledownAndClusterDeletion生效,这意味着所有persistentVolumeClaimes都将与Elasticsearch集群一起删除。但是,删除Elasticsearch群集时,DeleteOnScaleDown仅保留PersistentVolumeClaims。如果使用与以前相同的名称和节点集重新创建已删除的群集,则新群集将采用现有的PersistentVolumeClaims。
k8s上安装elasticsearch集群的更多相关文章
- 在CentOS上安装ZooKeeper集群
一共准备3个CentOS虚拟机 172.16.9.194 172.16.9.195 172.16.9.196 上传zookeeper-3.3.6.tar.gz到服务器并解压,3台服务器的目录结构如下 ...
- Linux上安装Hadoop集群(CentOS7+hadoop-2.8.0)--------hadoop环境的搭建
Linux上安装Hadoop集群(CentOS7+hadoop-2.8.0)------https://blog.csdn.net/pucao_cug/article/details/71698903 ...
- k8s中安装rabbitmq集群
官方文档地址:https://www.rabbitmq.com/kubernetes/operator/quickstart-operator.html 要求 1.k8s版本要1.18及其以上 2.能 ...
- 在Linux上安装Zookeeper集群
xl_echo编辑整理,欢迎转载,转载请声明文章来源.欢迎添加echo微信(微信号:t2421499075)交流学习. 百战不败,依不自称常胜,百败不颓,依能奋力前行.——这才是真正的堪称强大!! - ...
- Centos7上安装Kubernetes集群部署docker
一.安装前准备1.操作系统详情需要三台主机,都最小化安装 centos7.3,并update到最新 [root@master ~]# (Core) 角色 主机名 IPMaster master 192 ...
- K8s 上的分布式存储集群搭建(Rook/ceph)
转载自:https://mp.weixin.qq.com/s/CdLioTzU4oWI688lqYKXUQ 1 环境准备 1.1 基础环境 3台配置一致的虚拟机 虚拟机配置:4c 8g 虚拟机操作系统 ...
- docker-compose安装elasticsearch集群
文件目录: 1.编写docker-compose文件 version: '3' services: es-master: image: elasticsearch:6.4.3 container_na ...
- Windows Server 2008 R2系统上安装SQLServer2012集群(简略)
4台服务器(1台AD.2台SQL服务器.1台iSCSI存储服务器) 9个IP(1个AD的IP.2个SQL服务器的IP.2个心跳IP.1个iSCSI存储服务器的IP.1个集群IP.1个DTC的IP.1个 ...
- win7安装ElasticSearch集群
1.单节点安装请参考上篇博客 http://www.cnblogs.com/lianliang/p/7953754.html 2.集群的安装(这里模拟两个节点) 1)集群的安装,基于之前单节点的安装 ...
随机推荐
- 【RocketMQ】消息的拉取
RocketMQ消息的消费以组为单位,有两种消费模式: 广播模式:同一个消息队列可以分配给组内的每个消费者,每条消息可以被组内的消费者进行消费. 集群模式:同一个消费组下,一个消息队列同一时间只能分配 ...
- 你真的了解JAVA中对象和类、this、super和static关键字吗
作者:小牛呼噜噜 | https://xiaoniuhululu.com 计算机内功.JAVA底层.面试相关资料等更多精彩文章在公众号「小牛呼噜噜 」 目录 Java对象究竟是什么? 创建对象的过程 ...
- 从零开始完整开发基于websocket的在线对弈游戏【五子棋】,只用几十行代码完成全部逻辑。
五子棋是规则简单明了的策略型游戏,先形成五子连线者获胜.本课程习作采用两人在线对弈的方式进行比赛,拿着手机在上下班路上玩特别合适. 整个过程在众触低代码应用平台进行,使用表达式描述游戏逻辑(高度简化版 ...
- Solution -「SDOI2011」拦截导弹
Sol. 题目要求一个数对序列的二维最长下降子序列,我们称其为 Q.并求出每一个元素分别在可能的 Q 中出现了多少次. 直接 Dp,时间复杂度 \(O(n^2)\) 不行.考虑 CDQ 分治 ...
- 2022-07-25 第四组 java之抽象、接口
目录 一.抽象类 1.概念 2.抽象类以及抽象方法格式定义 3.抽象类总结规定 二.接口 1.什么是接口 2.接口的定义 3.接口特性 4.抽象类和接口的区别 5.继承抽象类和实现接口的异同 6.规则 ...
- mysql玩法
如何字段名查找所在的表名 SELECT TABLE_NAME FROM INFORMATION_SCHEMA.COLUMNS WHERE COLUMN_NAME = '字段名字' select sys ...
- Python 函数修饰器
# 一.用函数修饰函数 #!/usr/bin/python3 def decorate_func(func): def call(*args, **kwargs): print('you have c ...
- PostgreSQL定时备份
# PostgreSQL定时备份 # 版本:PostgreSQL14.0 # 一.如果你在pg_hba.conf中设定了密码登录,那么你就需要设置一个默认密码共psql登录的时候跳过验证.如果是roo ...
- 常见SQL及备注
- Java学习 (四)基础篇 Java基础语法
注释&标识符&关键字 注释 注释并不会被执行,其主要目的用于解释当前代码 书写注释是一个非常好的习惯,大厂要求之一 public class hello { public static ...