Android笔记(六十八) Fragment总结
Fragment的产生:
为了适应各种尺寸的屏幕,谷歌推出Fragment,可以把Fragment成Activity的一个组成部分,它拥有自己的生命周期、可以接收并处理用户的各种事件,还可以动态的增删改某个Fragment
Fragment的使用
可以把Fragment当成普通的控件使用,直接写在布局文件中,然后新建一个继承自Fragment的类加载这个布局,然后在Activity的布局文件中直接引用这个Fragment,就是这么简单:
MainActivity.java
package com.example.fragmentdemo;

import android.app.Activity;

import android.os.Bundle;

import android.view.Window;

public class MainActivity extends Activity {

    @Override

    public void onCreate(Bundle savedInstanceState) {

        super.onCreate(savedInstanceState);

        requestWindowFeature(Window.FEATURE_NO_TITLE);

        setContentView(R.layout.activity_main);

    }

}
activity_main.xml
<LinearLayout xmlns:android="http://schemas.android.com/apk/res/android"

    xmlns:tools="http://schemas.android.com/tools"

    android:layout_width="match_parent"

    android:layout_height="match_parent"

    android:orientation="horizontal"

    tools:context="com.example.fragmentdemo.MainActivity" >

    <fragment

        android:id="@+id/fragment1"

        android:name="com.example.fragmentdemo.fragment.Fragment1"

        android:layout_width="wrap_content"

        android:layout_height="match_parent"

        android:layout_weight="1" />

    <fragment

        android:id="@+id/fragment2"

        android:name="com.example.fragmentdemo.fragment.Fragment2"

        android:layout_width="wrap_content"

        android:layout_height="match_parent"

        android:layout_weight="1" />

</LinearLayout>
Fragment1.java
package com.example.fragmentdemo.fragment;

import com.example.fragmentdemo.R;

import android.app.Fragment;

import android.os.Bundle;

import android.view.LayoutInflater;

import android.view.View;

import android.view.ViewGroup;

public class Fragment1 extends Fragment {

    @Override

    public View onCreateView(LayoutInflater inflater, ViewGroup container, Bundle savedInstanceState) {

        View view = inflater.inflate(R.layout.fragment1, container, false);

        return view;

    }

}
fragment1.xml
<?xml version="1.0" encoding="utf-8"?>

<LinearLayout xmlns:android="http://schemas.android.com/apk/res/android"

    android:layout_width="match_parent"

    android:layout_height="match_parent"

    android:orientation="vertical" >

    <TextView

        android:id="@+id/text1"

        android:layout_width="match_parent"

        android:layout_height="match_parent"

        android:background="#DDA0DD"

        android:text="这是Fragment1" />

</LinearLayout>
Fragment2.java
package com.example.fragmentdemo.fragment;

import com.example.fragmentdemo.R;

import android.app.Fragment;

import android.os.Bundle;

import android.view.LayoutInflater;

import android.view.View;

import android.view.ViewGroup;

public class Fragment2 extends Fragment {

    @Override

    public View onCreateView(LayoutInflater inflater, ViewGroup container, Bundle savedInstanceState) {

        // TODO Auto-generated method stub

        return inflater.inflate(R.layout.fragment2, container, false);

    }

}
fragment2.xml
<?xml version="1.0" encoding="utf-8"?>

<LinearLayout xmlns:android="http://schemas.android.com/apk/res/android"

    android:layout_width="match_parent"

    android:layout_height="match_parent"

    android:background="#7B68EE"

    android:orientation="vertical" >

    <Button

        android:layout_width="match_parent"

        android:layout_height="wrap_content"

        android:text="这是Fragment2" />

</LinearLayout>
运行结果:

动态使用Fragment
动态使用Fragment需要以下几个步骤:
1.获取到FragmentManager,在Activity中可以直接通过getFragmentManager得到。
2.开启一个事务,通过调用beginTransaction方法开启。
3.使用add(),replace(),remove(),hide(),show(),detach(),attach()等方法编辑Fragment
add()——往Activity中添加一个Fragment
replace()——使用另外一个Fragment替换当前的Fragment
remove()——移除一个Fragment
hide()——隐藏一个Fragment
show()——将隐藏的Fragment显示
detach()——会将view从UI中移除,和remove()不同,此时fragment的状态依然由FragmentManager维护。
attach()——重建View视图,附加到UI上并显示
4.提交事务,调用commit方法提交。
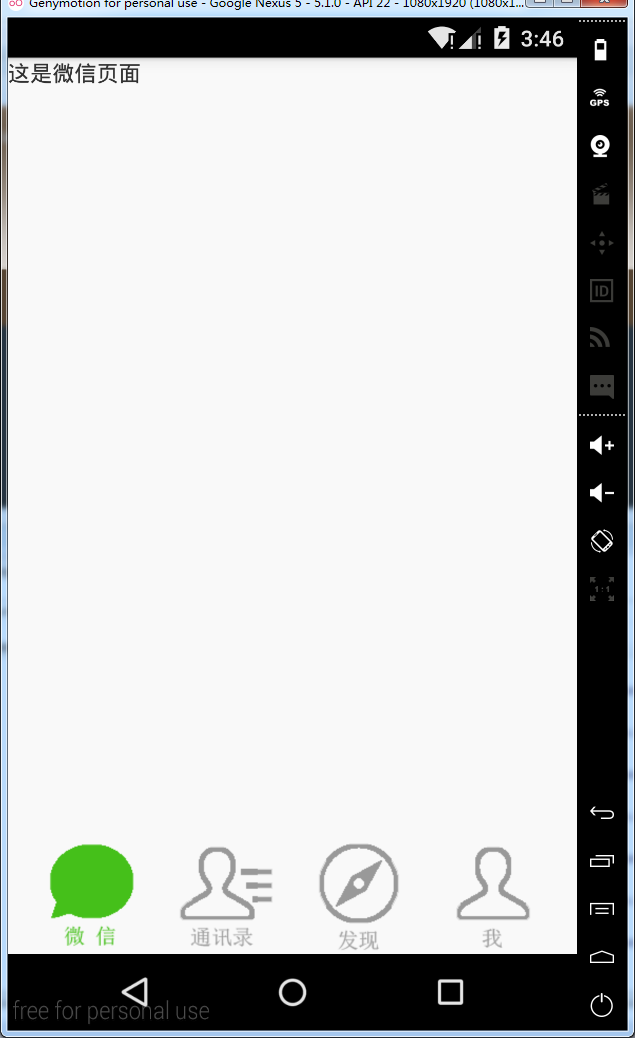
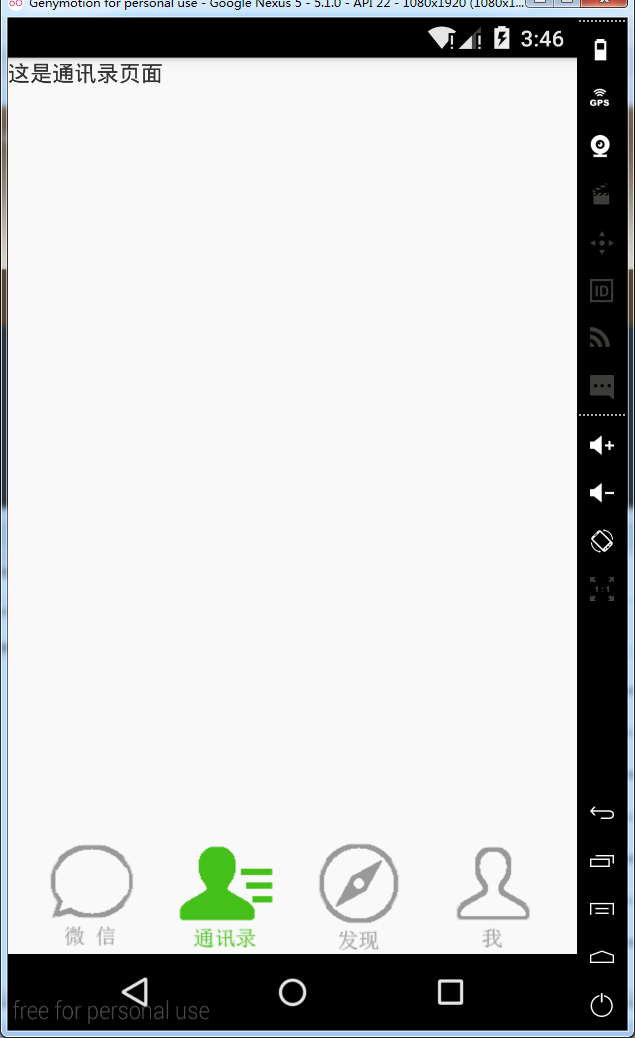
实现微信地步菜单:
MainActivity.java
package cn.lixyz.test;

import android.app.Activity;

import android.os.Bundle;

import android.view.Window;

import android.widget.RadioGroup;

import android.widget.RadioGroup.OnCheckedChangeListener;

import cn.lixyz.test.fragment.DiscoverFragment;

import cn.lixyz.test.fragment.MeFragment;

import cn.lixyz.test.fragment.TXLFragment;

import cn.lixyz.test.fragment.WeChatFragment;

public class MainActivity extends Activity implements OnCheckedChangeListener {

    private RadioGroup rg_tab_buttons;

    @Override

    protected void onCreate(Bundle savedInstanceState) {

        super.onCreate(savedInstanceState);

        requestWindowFeature(Window.FEATURE_NO_TITLE);

        setContentView(R.layout.activity_main);

        getFragmentManager().beginTransaction().add(R.id.layout, new WeChatFragment(), "wechat").commit();

        rg_tab_buttons = (RadioGroup) findViewById(R.id.rg_tab_buttons);

        rg_tab_buttons.setOnCheckedChangeListener(this);

    }

    @Override

    public void onCheckedChanged(RadioGroup group, int checkedId) {

        switch (checkedId) {

        case R.id.rb_wechat:

            getFragmentManager().beginTransaction().replace(R.id.layout, new WeChatFragment(), "wechat").commit();

            break;

        case R.id.rb_txl:

            getFragmentManager().beginTransaction().replace(R.id.layout, new TXLFragment(), "txl").commit();

            break;

        case R.id.rb_discover:

            getFragmentManager().beginTransaction().replace(R.id.layout, new DiscoverFragment(), "discover").commit();

            break;

        case R.id.rb_me:

            getFragmentManager().beginTransaction().replace(R.id.layout, new MeFragment(), "me").commit();

            break;

        }

    }

}
activity_main.xml
<?xml version="1.0" encoding="utf-8"?>

<LinearLayout xmlns:android="http://schemas.android.com/apk/res/android"

    android:layout_width="match_parent"

    android:layout_height="match_parent"

    android:background="#f9f9f9"

    android:orientation="vertical" >

    <LinearLayout

        android:id="@+id/layout"

        android:layout_width="wrap_content"

        android:layout_height="wrap_content"

        android:layout_weight="1"

        android:orientation="vertical" >

    </LinearLayout>

    <RadioGroup

        android:id="@+id/rg_tab_buttons"

        android:layout_width="match_parent"

        android:layout_height="wrap_content"

        android:orientation="horizontal" >

        <TextView

            android:layout_width="wrap_content"

            android:layout_height="wrap_content"

            android:layout_weight="1" />

        <RadioButton

            android:id="@+id/rb_wechat"

            android:layout_width="wrap_content"

            android:layout_height="wrap_content"

            android:background="@drawable/wechat_icon"

            android:button="@null" />

        <TextView

            android:layout_width="wrap_content"

            android:layout_height="wrap_content"

            android:layout_weight="1" />

        <RadioButton

            android:id="@+id/rb_txl"

            android:layout_width="wrap_content"

            android:layout_height="wrap_content"

            android:background="@drawable/txl_icon"

            android:button="@null" />

        <TextView

            android:layout_width="wrap_content"

            android:layout_height="wrap_content"

            android:layout_weight="1" />

        <RadioButton

            android:id="@+id/rb_discover"

            android:layout_width="wrap_content"

            android:layout_height="wrap_content"

            android:background="@drawable/discover_icon"

            android:button="@null" />

        <TextView

            android:layout_width="wrap_content"

            android:layout_height="wrap_content"

            android:layout_weight="1" />

        <RadioButton

            android:id="@+id/rb_me"

            android:layout_width="wrap_content"

            android:layout_height="wrap_content"

            android:background="@drawable/me_icon"

            android:button="@null" />

        <TextView

            android:layout_width="wrap_content"

            android:layout_height="wrap_content"

            android:layout_weight="1" />

    </RadioGroup>

</LinearLayout>
DiscoverFragment.java
package cn.lixyz.test.fragment;

import android.app.Fragment;

import android.os.Bundle;

import android.view.LayoutInflater;

import android.view.View;

import android.view.ViewGroup;

import cn.lixyz.test.R;

public class DiscoverFragment extends Fragment {

    @Override

    public View onCreateView(LayoutInflater inflater, ViewGroup container, Bundle savedInstanceState) {

        return inflater.inflate(R.layout.discover_fragment, container, false);

    }

}
discover_fragment.xml
<?xml version="1.0" encoding="utf-8"?>

<LinearLayout xmlns:android="http://schemas.android.com/apk/res/android"

    android:layout_width="match_parent"

    android:layout_height="match_parent"

    android:orientation="vertical" >

    <TextView

        android:layout_width="wrap_content"

        android:layout_height="wrap_content"

        android:text="这是发现页面" />

</LinearLayout>
MeFragment.java
package cn.lixyz.test.fragment;

import android.app.Fragment;

import android.os.Bundle;

import android.view.LayoutInflater;

import android.view.View;

import android.view.ViewGroup;

import cn.lixyz.test.R;

public class MeFragment extends Fragment {

    @Override

    public View onCreateView(LayoutInflater inflater, ViewGroup container, Bundle savedInstanceState) {

        return inflater.inflate(R.layout.me_fragment, container, false);

    }

}
me_fragment.xml
<?xml version="1.0" encoding="utf-8"?>

<LinearLayout xmlns:android="http://schemas.android.com/apk/res/android"

    android:layout_width="match_parent"

    android:layout_height="match_parent"

    android:orientation="vertical" >

    <TextView

        android:layout_width="wrap_content"

        android:layout_height="wrap_content"

        android:text="这是我页面" />

</LinearLayout>
TXLFragment.java
package cn.lixyz.test.fragment;

import android.app.Fragment;

import android.os.Bundle;

import android.view.LayoutInflater;

import android.view.View;

import android.view.ViewGroup;

import cn.lixyz.test.R;

public class TXLFragment extends Fragment {

    @Override

    public View onCreateView(LayoutInflater inflater, ViewGroup container, Bundle savedInstanceState) {

        return inflater.inflate(R.layout.txl_fragment, container, false);

    }

}
txl_fragment.xml
<?xml version="1.0" encoding="utf-8"?>

<LinearLayout xmlns:android="http://schemas.android.com/apk/res/android"

    android:layout_width="match_parent"

    android:layout_height="match_parent"

    android:orientation="vertical" >

    <TextView

        android:layout_width="wrap_content"

        android:layout_height="wrap_content"

        android:text="这是通讯录页面" />

</LinearLayout>
WeChatFragment.java
package cn.lixyz.test.fragment;

import android.app.Fragment;

import android.os.Bundle;

import android.view.LayoutInflater;

import android.view.View;

import android.view.ViewGroup;

import cn.lixyz.test.R;

public class WeChatFragment extends Fragment {

    @Override

    public View onCreateView(LayoutInflater inflater, ViewGroup container, Bundle savedInstanceState) {

        return inflater.inflate(R.layout.wechat_fragment, container, false);

    }

}
wechat_fragment.xml
<?xml version="1.0" encoding="utf-8"?>

<LinearLayout xmlns:android="http://schemas.android.com/apk/res/android"

    android:layout_width="match_parent"

    android:layout_height="match_parent"

    android:orientation="vertical" >

    <TextView

        android:layout_width="wrap_content"

        android:layout_height="wrap_content"

        android:text="这是微信页面" />

</LinearLayout>
运行结果:


Fragment的生命周期
和Activity一样,Fragment同样也拥有自己的生命周期
package com.example.fragmentdemo.fragment;

import com.example.fragmentdemo.R;

import android.app.Activity;

import android.app.Fragment;

import android.os.Bundle;

import android.util.Log;

import android.view.LayoutInflater;

import android.view.View;

import android.view.ViewGroup;

public class Fragment1 extends Fragment {

    @Override

    public View onCreateView(LayoutInflater inflater, ViewGroup container, Bundle savedInstanceState) {

        Log.d("TTTT", "onCreateView方法运行了...");

        return inflater.inflate(R.layout.fragment1, container, false);

    }

    @Override

    public void onAttach(Activity activity) {

        super.onAttach(activity);

        Log.d("TTTT", "onAttach方法运行了...");

    }

    @Override

    public void onCreate(Bundle savedInstanceState) {

        super.onCreate(savedInstanceState);

        Log.d("TTTT", "onCreate方法运行了...");

    }

    @Override

    public void onActivityCreated(Bundle savedInstanceState) {

        super.onActivityCreated(savedInstanceState);

        Log.d("TTTT", "onActivityCreated方法运行了...");

    }

    @Override

    public void onStart() {

        super.onStart();

        Log.d("TTTT", "onStart方法运行了...");

    }

    @Override

    public void onResume() {

        super.onResume();

        Log.d("TTTT", "onResume方法运行了...");

    }

    @Override

    public void onPause() {

        super.onPause();

        Log.d("TTTT", "onPause方法运行了...");

    }

    @Override

    public void onStop() {

        super.onStop();

        Log.d("TTTT", "onStop方法运行了...");

    }

    @Override

    public void onDestroyView() {

        super.onDestroyView();

        Log.d("TTTT", "onDestroyView方法运行了...");

    }

    @Override

    public void onDestroy() {

        super.onDestroy();

        Log.d("TTTT", "onDestroy方法运行了...");

    }

    @Override

    public void onDetach() {

        super.onDetach();

        Log.d("TTTT", "onDetach方法运行了...");

    }

}
运行程序
12-29 12:12:29.490: D/TTTT(8133): onAttach方法运行了...

12-29 12:12:29.490: D/TTTT(8133): onCreate方法运行了...

12-29 12:12:29.490: D/TTTT(8133): onCreateView方法运行了...

12-29 12:12:29.490: D/TTTT(8133): onActivityCreated方法运行了...

12-29 12:12:29.491: D/TTTT(8133): onStart方法运行了...

12-29 12:12:29.491: D/TTTT(8133): onResume方法运行了...
按HOME键回到桌面
12-29 12:13:17.164: D/TTTT(8133): onPause方法运行了...

12-29 12:13:17.793: D/TTTT(8133): onStop方法运行了...
再次进入程序
12-29 12:13:38.604: D/TTTT(8133): onStart方法运行了...

12-29 12:13:38.604: D/TTTT(8133): onResume方法运行了...
退出程序
12-29 12:13:55.785: D/TTTT(8133): onPause方法运行了...

12-29 12:13:56.464: D/TTTT(8133): onStop方法运行了...

12-29 12:13:56.464: D/TTTT(8133): onDestroyView方法运行了...

12-29 12:13:56.464: D/TTTT(8133): onDestroy方法运行了...

12-29 12:13:56.464: D/TTTT(8133): onDetach方法运行了...
看到这里,我相信大多数朋友已经非常明白了,因为这和Activity的生命周期太相似了。只是有几个Activity中没有的新方法,这里需要重点介绍一下:
onAttach方法:Fragment和Activity建立关联的时候调用。
onCreateView方法:为Fragment加载布局时调用。
onActivityCreated方法:当Activity中的onCreate方法执行完后调用。
onDestroyView方法:Fragment中的布局被移除时调用。
onDetach方法:Fragment和Activity解除关联的时候调用。
Android笔记(六十八) Fragment总结的更多相关文章
- Android笔记(六十九) 仿微信界面(一)
综合之前的Fragment和自定义组件的知识,实现微信界面 MainActivity.java package cn.lixyz.test; import android.app.Acti ...
- Android笔记(六十六) android中的动画——XML文件定义属性动画
除了直接在java代码中定义动画之外,还可以使用xml文件定义动画,以便重用. 如果想要使用XML来编写动画,首先要在res目录下面新建一个animator文件夹,所有属性动画的XML文件都应该存放在 ...
- Android笔记(六十五) android中的动画——属性动画(propertyanimation)
补间动画只能定义起始和结束两个帧在“透明度”.“旋转”.“倾斜”.“位移”4个方面的变化,逐帧动画也只能是播放多个图片,无法满足我们日常复杂的动画需求,所以谷歌在3.0开始,推出了属性动画(prope ...
- Android笔记(六十四) android中的动画——补间动画(tweened animation)
补间动画就是只需要定义动画开始和结束的位置,动画中间的变化由系统去补齐. 补间动画由一下四种方式: 1.AplhaAnimation——透明度动画效果 2.ScaleAnimation ——缩放动画效 ...
- Android笔记(六十二)网络框架volley
什么是Volley 很多时候,我们的APP都需要用到网络技术,使用HTTP协议来发送接收数据,谷歌推出了一个网络框架——volley,该框架适合进行数据量不大,但通信频繁的网络操作. 它的优点: (1 ...
- Android笔记(十八) 下拉列表(Spinner)
App中常用的控件——下拉列表(Spinner),提供特定选择供用户选择 Spinner每次只能选择一个部件,它的选项来自于与之相关联的适配器(apater)中. MainActivity.java ...
- Java框架spring 学习笔记(十八):事务管理(xml配置文件管理)
在Java框架spring 学习笔记(十八):事务操作中,有一个问题: package cn.service; import cn.dao.OrderDao; public class OrderSe ...
- Android为TV端助力 转载:Android绘图Canvas十八般武器之Shader详解及实战篇(上)
前言 Android中绘图离不开的就是Canvas了,Canvas是一个庞大的知识体系,有Java层的,也有jni层深入到Framework.Canvas有许多的知识内容,构建了一个武器库一般,所谓十 ...
- Android为TV端助力 转载:Android绘图Canvas十八般武器之Shader详解及实战篇(下)
LinearGradient 线性渐变渲染器 LinearGradient中文翻译过来就是线性渐变的意思.线性渐变通俗来讲就是给起点设置一个颜色值如#faf84d,终点设置一个颜色值如#CC423C, ...
随机推荐
- typescript - 2.数据类型
typescript中为了使编写的代码更规范,更有利于维护,增加了类型校验,在typescript中主要给我们提供了以下数据类型 布尔类型(boolean) 数字类型(number) 字符串类型(st ...
- Cucumber介绍
Cucumber是一个提供能让我们都理解的普通语言,通过普通语言来描述的测试用例,并支持行为驱动开发的测试工具.Cucumber支持大多数变成语言,如Ruby.Java和Python等. 官方地址:h ...
- linux系统(centos6)的目录结构
/bin:bin是Binary的缩写, 这个目录存放着最经常使用的命令. /boot:这里存放的是启动Linux时使用的一些核心文件,包括一些连接文件以及镜像文件. /dev :dev是Device( ...
- 002-maven开发Java脚手架archrtype【如无定制开发,请直接看3.3使用】
一.概述 项目基础构建需要:项目结构,spring框架,orm,连接池,数据库,单元测试等等. 上述即使复用:001-脚手架发展,基础代码结构+mybatis代码生成,基础代码结构,也需要修改成自己单 ...
- EasyNVR摄像机网页直播中,推流组件EasyRTMP推送RTMP扩展支持HEVC(H.265)的方案
众所周知,RTMP标准协议实际是不支持HEVC(H.265)编码格式的,同样,现行的H5标准里面,也没有对H.265的描述,所以,在很大程度上,H5网页浏览器是无法接入HEVC(H.265)的,但是, ...
- piecewise_construct存在的意义
C++11中大部分的容器对于添加元素除了传统的 insert 或者 pusb_back/push_front 之外都提供一个新的函数叫做 emplace. 比如如果你想要向 std::vector 的 ...
- jenkins中启用tag标签
参照里面的第9步: https://www.cnblogs.com/effortsing/p/10468840.html
- mysql8忘记秘密-重置密码步骤
mysql8修改密码的方式有些许不同 1.配置无密码登录 修改/etc/my.cnf文件,在mysqld模块下添加 skip-grant-tables 2.重启mysql 3.mysql -uroot ...
- Consul服务告警之Watch机制
熔断保护在Consul和Ocelot中都有实现,意思就是当一个服务不正常时(比如我们的一个服务实例挂了,Consul的健康检查机制检测到了),应该给系统维护人员给以告警.在Consul中,服务告警也是 ...
- 使用 pthread_cancel 引入的死锁问题
先来说一下 pthread_cancel 基本概念. pthread_cancel 调用并不是强制终止线程,它只提出请求.线程如何处理 cancel 信号则由目标线程自己决定,可以是忽略.可以是立即终 ...