
项目(1-1)ES32获取mpu9250数据网页交互显示
教程 https://www.hackster.io/donowak/esp32-mpu9250-3d-orientation-visualisation-467dc1
项目地址 https://github.com/DominikN/ESP32-MPU9250-web-view/blob/master/html.h

硬件地址
ESP32 <-> MPU9250

P22   <-> SCL

P21   <-> SDA

P19   <-> INT

GND   <-> GND
版型1(中国深圳常买到)
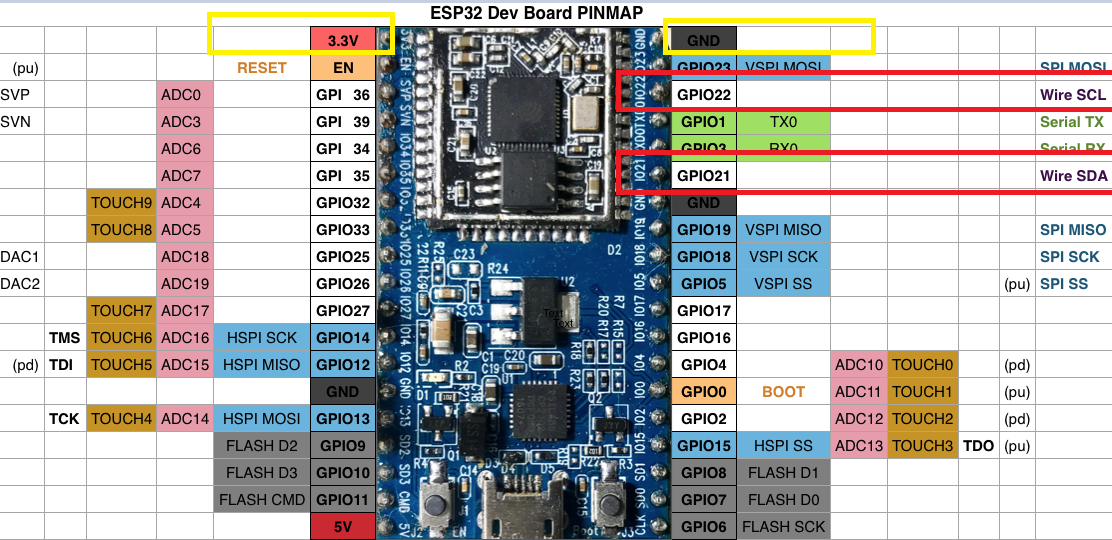
版型2(日本开发板)
https://www.switch-science.com/catalog/3210

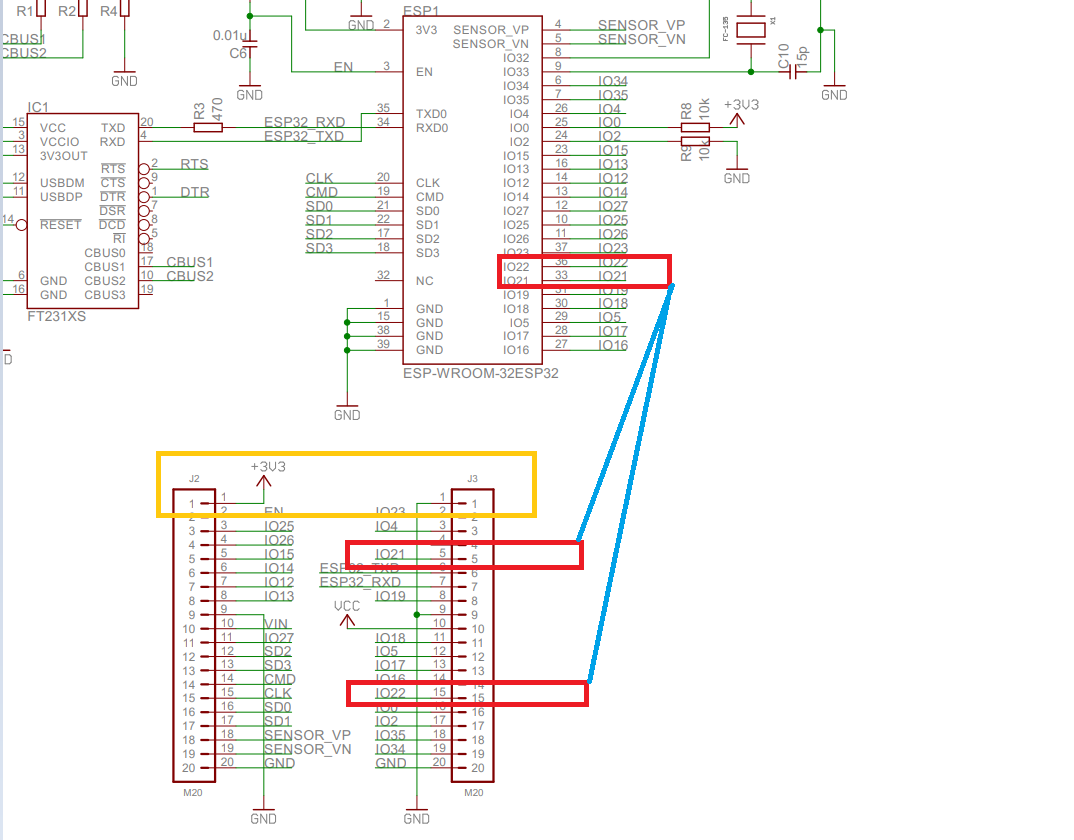
电路图
软件
配置Arduino IDE
要运行该项目,首先需要配置Arduino IDE:
1.为ESP32安装Husarnet软件包:
- 打开
File -> Preferences - 在字段中,其他Board Manager URL 添加以下链接:
https://files.husarion.com/arduino/package_esp32_index.json - 打开
Tools -> Board: ... -> Boards Manager ... - 搜索
esp32-husarnet by Husarion - 单击安装按钮
2.选择ESP32开发板:
- 打开
Tools -> Board - 选择“ESP32 Arduino(Husarnet)”部分下的ESP32开发模块
3.安装ArduinoJson库:(可不安装)
- 打开
Tools -> Manage Libraries... - 搜索
ArduinoJson - 选择版本
5.13.3 - 单击安装按钮
4.安装arduinoWebSockets库(Husarnet fork):(可不安装)
- 下载https://github.com/husarnet/arduinoWebSockets作为ZIP文件(这是由Links2004(Markus)提供的arduinoWebSockets的Husarnet兼容分支)
- 打开
Sketch -> Include Library -> Add .ZIP Library ...选择刚下载的arduinoWebSockets-master.zip 文件,然后单击打开按钮
5.安装SparkFun_MPU-9250-DMP_Arduino_Library:(必须安装)
- 下载https://github.com/sparkfun/SparkFun_MPU-9250-DMP_Arduino_Library作为ZIP文件
- 打开
Sketch -> Include Library -> Add .ZIP Library ...选择您刚刚下载的SparkFun_MPU-9250-DMP_Arduino_Library-master.zip 文件并单击打开按钮
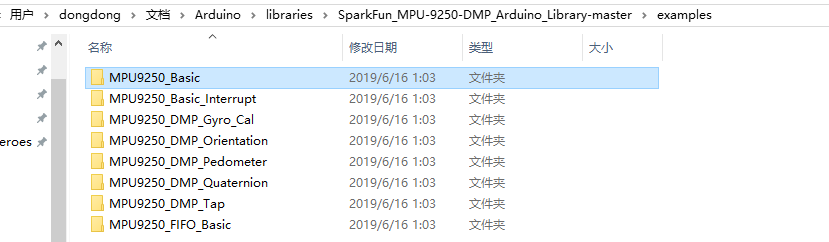
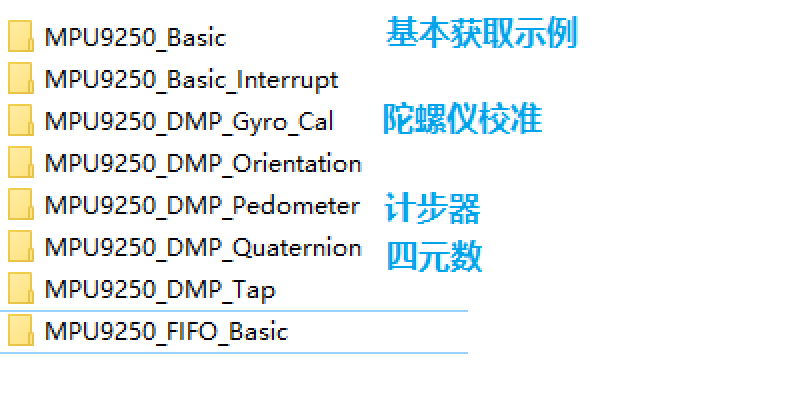
基本读取示例

/************************************************************

MPU9250_Basic

 Basic example sketch for MPU-9250 DMP Arduino Library

Jim Lindblom @ SparkFun Electronics

original creation date: November 23, 2016

https://github.com/sparkfun/SparkFun_MPU9250_DMP_Arduino_Library

This example sketch demonstrates how to initialize the

MPU-9250, and stream its sensor outputs to a serial monitor.

Development environment specifics:

Arduino IDE 1.6.12

SparkFun 9DoF Razor IMU M0

Supported Platforms:

- ATSAMD21 (Arduino Zero, SparkFun SAMD21 Breakouts)

*************************************************************/

#include <SparkFunMPU9250-DMP.h>

#define SerialPort Serial

MPU9250_DMP imu;

void setup()

{

  SerialPort.begin(115200);

  // Call imu.begin() to verify communication with and

  // initialize the MPU-9250 to it's default values.

  // Most functions return an error code - INV_SUCCESS (0)

  // indicates the IMU was present and successfully set up

  if (imu.begin() != INV_SUCCESS)

  {

    while (1)

    {

      SerialPort.println("Unable to communicate with MPU-9250");

      SerialPort.println("Check connections, and try again.");

      SerialPort.println();

      delay(5000);

    }

  }

  // Use setSensors to turn on or off MPU-9250 sensors.

  // Any of the following defines can be combined:

  // INV_XYZ_GYRO, INV_XYZ_ACCEL, INV_XYZ_COMPASS,

  // INV_X_GYRO, INV_Y_GYRO, or INV_Z_GYRO

  // Enable all sensors:

  imu.setSensors(INV_XYZ_GYRO | INV_XYZ_ACCEL | INV_XYZ_COMPASS);

  // Use setGyroFSR() and setAccelFSR() to configure the

  // gyroscope and accelerometer full scale ranges.

  // Gyro options are +/- 250, 500, 1000, or 2000 dps

  imu.setGyroFSR(2000); // Set gyro to 2000 dps

  // Accel options are +/- 2, 4, 8, or 16 g

  imu.setAccelFSR(2); // Set accel to +/-2g

  // Note: the MPU-9250's magnetometer FSR is set at

  // +/- 4912 uT (micro-tesla's)

  // setLPF() can be used to set the digital low-pass filter

  // of the accelerometer and gyroscope.

  // Can be any of the following: 188, 98, 42, 20, 10, 5

  // (values are in Hz).

  imu.setLPF(5); // Set LPF corner frequency to 5Hz

  // The sample rate of the accel/gyro can be set using

  // setSampleRate. Acceptable values range from 4Hz to 1kHz

  imu.setSampleRate(10); // Set sample rate to 10Hz

  // Likewise, the compass (magnetometer) sample rate can be

  // set using the setCompassSampleRate() function.

  // This value can range between: 1-100Hz

  imu.setCompassSampleRate(10); // Set mag rate to 10Hz

}

void loop()

{

  // dataReady() checks to see if new accel/gyro data

  // is available. It will return a boolean true or false

  // (New magnetometer data cannot be checked, as the library

  //  runs that sensor in single-conversion mode.)

  if ( imu.dataReady() )

  {

    // Call update() to update the imu objects sensor data.

    // You can specify which sensors to update by combining

    // UPDATE_ACCEL, UPDATE_GYRO, UPDATE_COMPASS, and/or

    // UPDATE_TEMPERATURE.

    // (The update function defaults to accel, gyro, compass,

    //  so you don't have to specify these values.)

    imu.update(UPDATE_ACCEL | UPDATE_GYRO | UPDATE_COMPASS);

    printIMUData();

  }

}

void printIMUData(void)

{

  // After calling update() the ax, ay, az, gx, gy, gz, mx,

  // my, mz, time, and/or temerature class variables are all

  // updated. Access them by placing the object. in front:

  // Use the calcAccel, calcGyro, and calcMag functions to

  // convert the raw sensor readings (signed 16-bit values)

  // to their respective units.

  float accelX = imu.calcAccel(imu.ax);

  float accelY = imu.calcAccel(imu.ay);

  float accelZ = imu.calcAccel(imu.az);

  float gyroX = imu.calcGyro(imu.gx);

  float gyroY = imu.calcGyro(imu.gy);

  float gyroZ = imu.calcGyro(imu.gz);

  float magX = imu.calcMag(imu.mx);

  float magY = imu.calcMag(imu.my);

  float magZ = imu.calcMag(imu.mz);

  SerialPort.println("Accel: " + String(accelX) + ", " +

              String(accelY) + ", " + String(accelZ) + " g");

  SerialPort.println("Gyro: " + String(gyroX) + ", " +

              String(gyroY) + ", " + String(gyroZ) + " dps");

  SerialPort.println("Mag: " + String(magX) + ", " +

              String(magY) + ", " + String(magZ) + " uT");

  SerialPort.println("Time: " + String(imu.time) + " ms");

  SerialPort.println();

}
更多程序
http上传程序
项目(1-1)ES32获取mpu9250数据网页交互显示的更多相关文章
- easyui panel异步获取后台数据在前台显示
我在使用easyui的时候,想做一个向下图所示的效果,这个panel的样式已经做好了,想从后台异步获取json数据,然后填入到文本框中,不知道哪位大神能给点指导?万分感谢! 放入表单中,使用form对 ...
- 项目(1-2)ES32获取mpu9250传入数据库
. 报一个错,找不到min函数 #define min(X,Y) ((X) < (Y) ? (X) : (Y)) 手动添加 之后不报错了 .最原始的采集 /******************* ...
- 用非GUI模式执行测试,jp@gc - PerfMon Metrics Collector会出现无法获取正确数据的解决办法
用非GUI模式执行测试,jp@gc - PerfMon Metrics Collector会出现无法获取正确数据(实际显示的是Response Times Over Time),解决办法:在GUI模式 ...
- JaveWeb 公司项目(3)----- 通过Thrift端口获取数据库数据
前面两篇博客的内容主要是界面搭建的过程,随着界面搭建工作的完成,网页端需要加入数据,原先的B/S架构中C#通过Thrift接口获取数据,所以在网页端也沿用这个设计 首先,新建一个Maven下的Web项 ...
- java的IO流包装不当导致从网页获取的数据出现乱码
从网页上获取数据时必须要注意字符集的问题.处理不慎确实苦不堪言. 例如通过URL连接时,将字节流InputStream包装成字符流(以便直接存为String)时,一定要注意加上charsetName这 ...
- python获取数据网页数据并创建文件夹保存(基于python3.6)
from urllib.parse import urljoin import urllib.request from bs4 import BeautifulSoup import os impor ...
- Flutter实战视频-移动电商-09.首页_项目结构建立和获取数据
09.首页_项目结构建立和获取数据 在config下创建service_url.dart 用来配置我们后端接口的配置文件 一个变量存 接口地址,一个接口方法地址 所有后天请求数据的方法都放在这个文件夹 ...
- [iOS微博项目 - 2.6] - 获取微博数据
github: https://github.com/hellovoidworld/HVWWeibo A.新浪获取微博API 1.读取微博API 2.“statuses/home_time ...
- [转]WEB页获取串口数据
本文转自:https://www.cnblogs.com/rockyhm/p/3434200.html 最近做一个B/S的项目,需要读取电子秤的值,之前一直没做过,也没有经验,于是在网上找到很多 大 ...
随机推荐
- docker系列之三:docker实际应用
以Docker为基础完成持续集成.自动交付.自动部署: 原理: RD推送代码到git 仓库或者svn等代码服务器上面,git服务器就会通过hook通知jenkins. jenkine 克隆git代码到 ...
- golang 使用 protobuf 的教程
1.下载protobuf的编译器protoc 地址: https://github.com/google/protobuf/releases window: 下载: protoc-3.3.0-w ...
- k8s部署nacos之二 nfs
1.在linux服务器下载nacos 首先安装git命令 yum install git git clone https://github.com/nacos-group/nacos-k8s.git ...
- 『正睿OI 2019SC Day3』
容斥原理 容斥原理指的是一种排重,补漏的计算思想,形式化的来说,我们有如下公式: \[\left | \bigcup_{i=1}^nS_i \right |=\sum_{i}|S_i|-\sum_{i ...
- Direct Buffer介绍
Direct Buffer 前言 上篇文章Buffer末尾中谈到堆内Buffer(Heap Buffer)和直接Buffer(Direct Buffer)的概念,但是却一笔带过,并未涉及其细节,这篇文 ...
- 开发dubbo应用程序(一)入门demo详解
1.简介: 引用自Dubbo官方文档简介: http://dubbo.apache.org/zh-cn/docs/user/dependencies.html 随着互联网的发展,网站应用的规模不断扩大 ...
- CLR学习之初识CLR
一.什么是CLR? CLR即公共语言运行时(Common Language Runtime,简称CRL),就是微软为.net产品构建的运行环境,与java的JVM类似,通俗的讲就是.net虚拟机.CL ...
- .net core将URL请求格式化为XML或JSON(网站动态生成sitemap.xml)
.net core将URL请求格式化为XML或JSON(网站动态生成sitemap.xml) 首先设置 Startup.cs 文件 配置 ConfigureServices services .Add ...
- Spring Web MVC框架简介
Web MVC framework框架 Spring Web MVC框架简介 Spring MVC的核心是`DispatcherServlet`,该类作用非常多,分发请求处理,配置处理器映射,处理视图 ...
- 使用基础知识完成java小作业?强化练习-1.输入数组计算最大值-2.输出数组反向打印-3.求数组平均值与总和-4.键盘输两int,并求总和-5.键盘输三个int,并求最值;
完成几个小代码练习?让自己更加强大?学习新知识回顾一下基础? 1.输入数组计算最大值 2.输出数组反向打印 3.求数组平均值与总和 4.键盘输两int,并求总和 5.键盘输三个int,并求最值 /* ...