
夺命雷公狗-----React---28--小案例之react经典案例todos(全选和反选)完
这个功能实现的步骤如下所示:
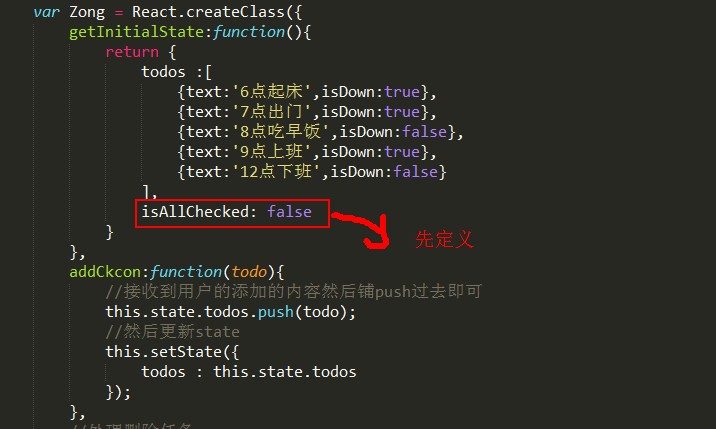
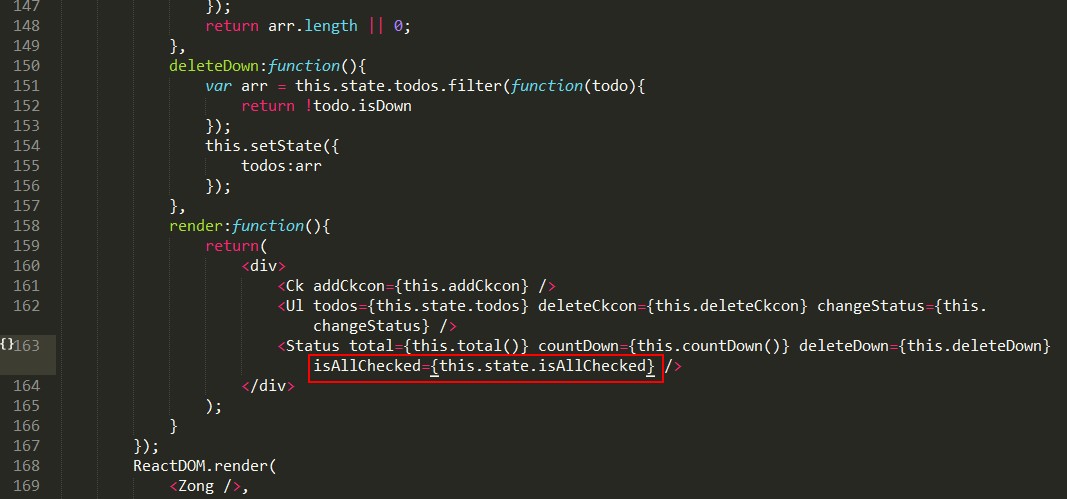
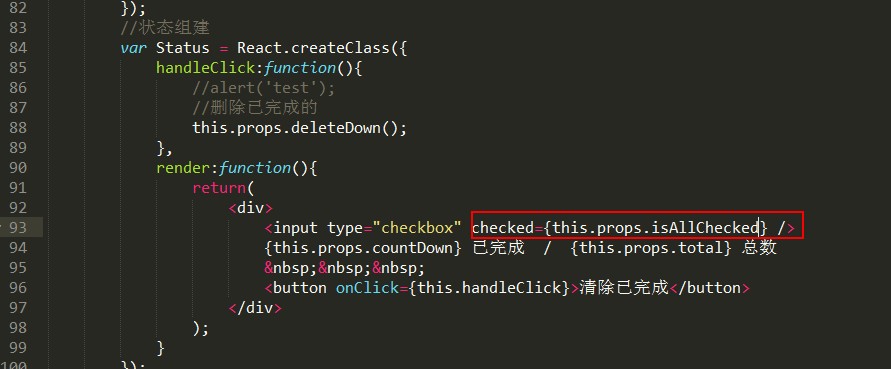
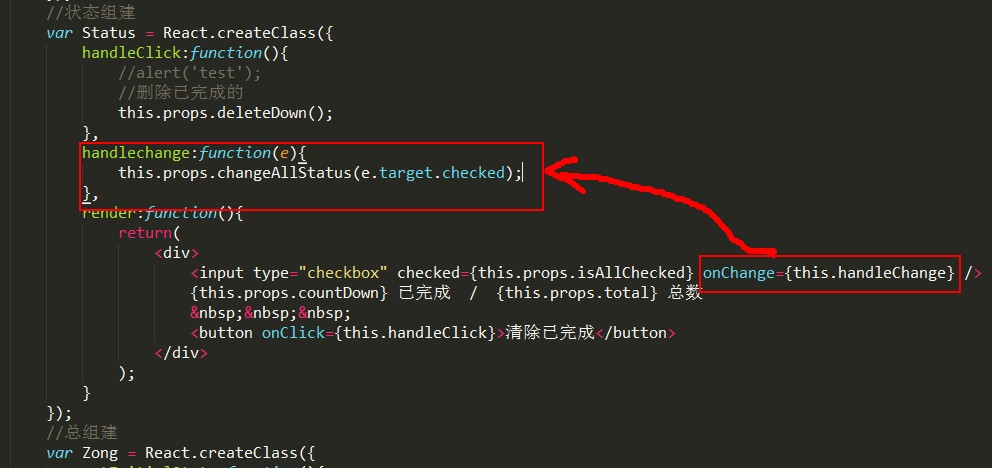
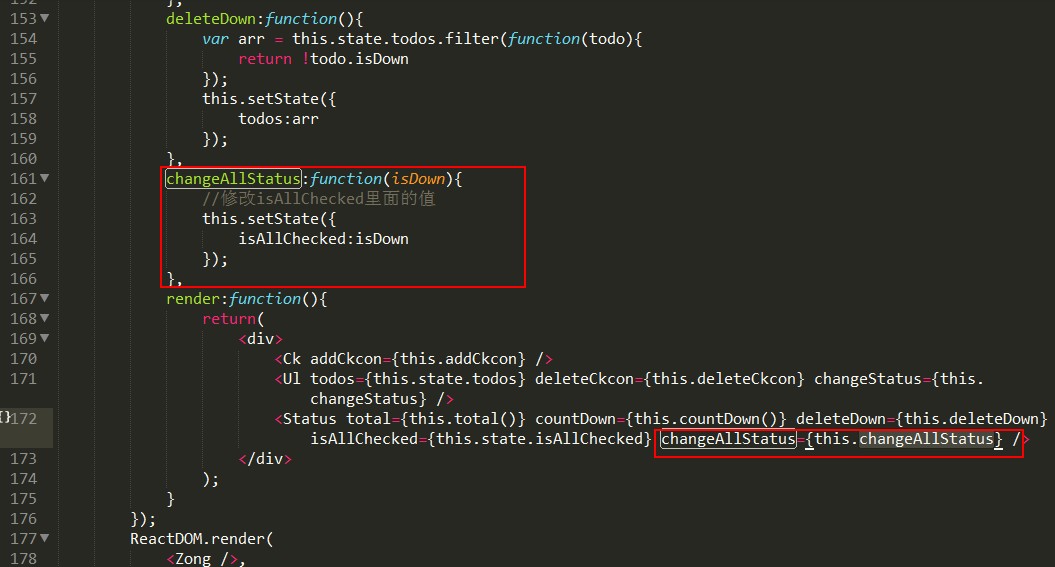
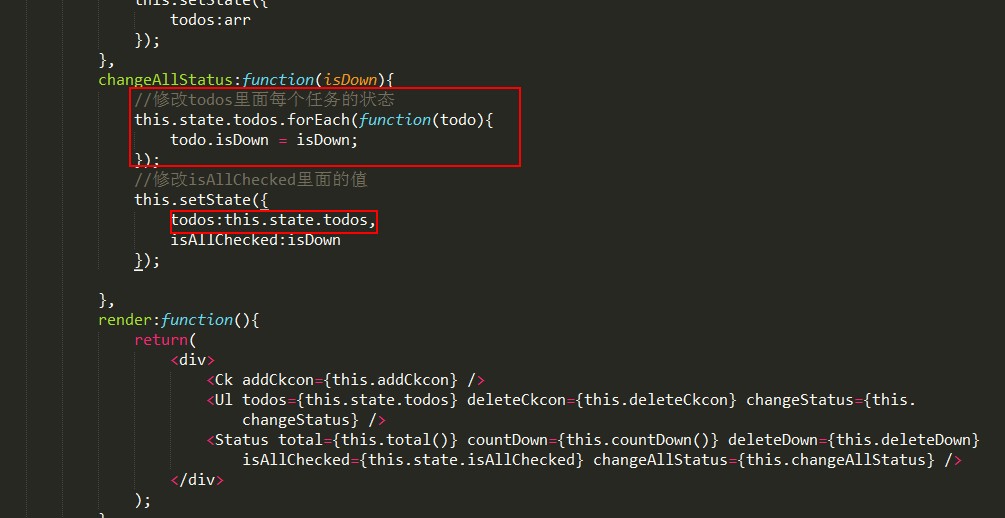
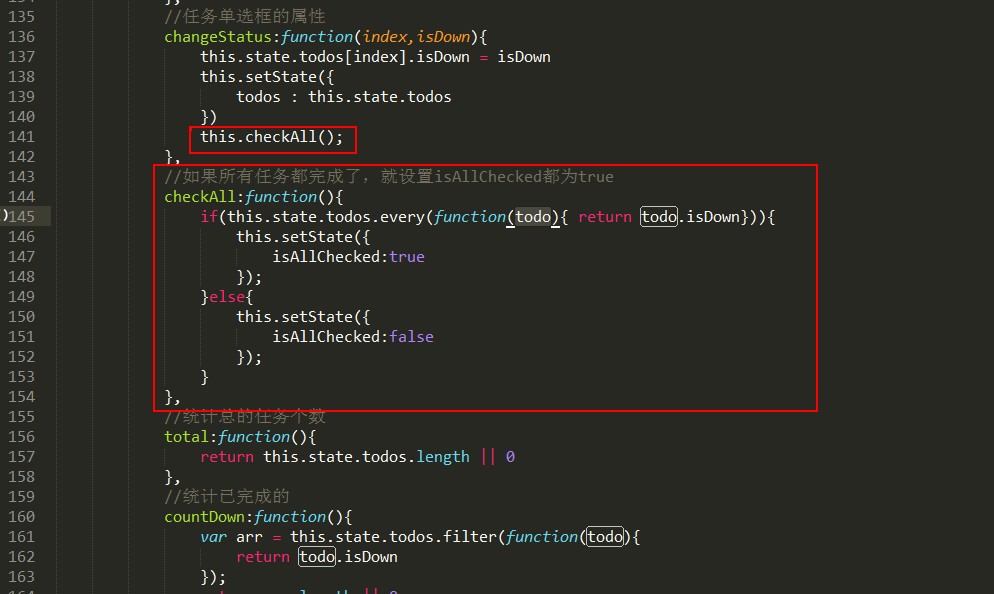
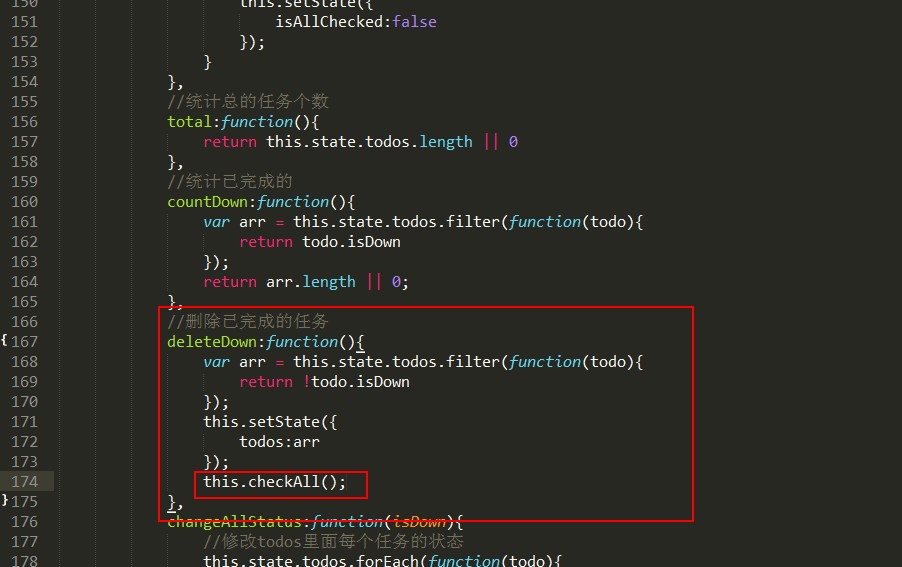
最终实现全选和反选,代码如下所示:
<!DOCTYPE html>
<html lang="en">
<head>
<meta charset="UTF-8">
<title>Document</title>
<script src="./js/react.js"></script>
<script src="./js/react-dom.js"></script>
<script src="./js/browser.min.js"></script>
</head>
<body>
<div id="dome"></div>
<script type="text/babel">
//搜索区域
var Ck = React.createClass({
//处理搜索事件的函数
handleKey:function(e){
//alert('test');
//判断回车enter键才处理,keyCode13==回车键
if(e.keyCode == 13){
//alert('test');
//如果搜索内容是空的让他不走了
if(!e.target.value) return;
//否则添加任务了
var ckcon = {
text : e.target.value,
isDown: false
}
//利用属性完成
this.props.addCkcon(ckcon);
//清空搜索框的内容
e.target.value = '';
} },
render:function(){
return(
<div>
<input type="text" placeholder="你要干嘛?" onKeyUp={this.handleKey} />
</div>
);
}
});
//列表项区域
var Lists = React.createClass({
handleClick:function(){
//alert('test');
this.props.deleteCkcon(this.props.index);
},
//处理单选框的变化事件
handleChange:function(e){
//修改那个任务,修改的值是什么
this.props.changeStatus(this.props.index,e.target.checked);
},
render:function(){
return(
<li>
<label>
<input type="checkbox" checked={this.props.todo.isDown} onChange={this.handleChange} />
{this.props.todo.text}
</label>
<button onClick={this.handleClick}>删除</button>
</li>
);
}
});
//列表框区域
var Ul = React.createClass({
render:function(){
//保存this指针
var _this = this;
return(
<ul>
{
this.props.todos.map(function(item,index){
return <Lists todo={item} key={index} index={index} deleteCkcon={_this.props.deleteCkcon} changeStatus={_this.props.changeStatus} />
})
}
</ul>
);
}
});
//状态组建
var Status = React.createClass({
handleClick:function(){
//alert('test');
//删除已完成的
this.props.deleteDown();
},
handleChange:function(e){
this.props.changeAllStatus(e.target.checked);
},
render:function(){
return(
<div>
<input type="checkbox" checked={this.props.isAllChecked} onChange={this.handleChange} />
{this.props.countDown} 已完成 / {this.props.total} 总数
<button onClick={this.handleClick}>清除已完成</button>
</div>
);
}
});
//总组建
var Zong = React.createClass({
getInitialState:function(){
return {
todos :[
{text:'6点起床',isDown:true},
{text:'7点出门',isDown:true},
{text:'8点吃早饭',isDown:false},
{text:'9点上班',isDown:true},
{text:'12点下班',isDown:false}
],
isAllChecked: false
}
},
addCkcon:function(todo){
//接收到用户的添加的内容然后铺push过去即可
this.state.todos.push(todo);
//然后更新state
this.setState({
todos : this.state.todos
});
},
//处理删除任务
deleteCkcon:function(index){
//用函数splice来删除掉指定的数组元素
this.state.todos.splice(index,1);
//删除完成后来更新下页面的内容
this.setState({
todos : this.state.todos
});
},
//任务单选框的属性
changeStatus:function(index,isDown){
this.state.todos[index].isDown = isDown
this.setState({
todos : this.state.todos
})
this.checkAll();
},
//如果所有任务都完成了,就设置isAllChecked都为true
checkAll:function(){
if(this.state.todos.every(function(todo){ return todo.isDown})){
this.setState({
isAllChecked:true
});
}else{
this.setState({
isAllChecked:false
});
}
},
//统计总的任务个数
total:function(){
return this.state.todos.length || 0
},
//统计已完成的
countDown:function(){
var arr = this.state.todos.filter(function(todo){
return todo.isDown
});
return arr.length || 0;
},
//删除已完成的任务
deleteDown:function(){
var arr = this.state.todos.filter(function(todo){
return !todo.isDown
});
this.setState({
todos:arr
});
this.checkAll();
},
changeAllStatus:function(isDown){
//修改todos里面每个任务的状态
this.state.todos.forEach(function(todo){
todo.isDown = isDown;
});
//修改isAllChecked里面的值
this.setState({
todos:this.state.todos,
isAllChecked:isDown
}); },
render:function(){
return(
<div>
<Ck addCkcon={this.addCkcon} />
<Ul todos={this.state.todos} deleteCkcon={this.deleteCkcon} changeStatus={this.changeStatus} />
<Status total={this.total()} countDown={this.countDown()} deleteDown={this.deleteDown} isAllChecked={this.state.isAllChecked} changeAllStatus={this.changeAllStatus} />
</div>
);
}
});
ReactDOM.render(
<Zong />,
document.getElementById('dome')
);
</script>
</body>
</html>
夺命雷公狗-----React---28--小案例之react经典案例todos(全选和反选)完的更多相关文章
- 夺命雷公狗-----React---12--添加类和样式
<!DOCTYPE> <html> <head> <meta charset="utf-8"> <title></ ...
- 夺命雷公狗-----React---11--添加css样式的方法
<!DOCTYPE> <html> <head> <meta charset="utf-8"> <title></ ...
- 夺命雷公狗-----React---10--组建嵌套进行数据遍历
先写一个组建... 然后进行嵌套.. <!DOCTYPE html> <html lang="en"> <head> <meta char ...
- 夺命雷公狗-----React---9--map数据的遍历
比如我们要实现的是这种效果: 用这种方法来写,她只能写死在哪,没啥意思,所以我们定义一个数据,然后来测试下map方法对她遍历出来的数据 <!DOCTYPE html> <html l ...
- 夺命雷公狗-----React---8--react官方提供的组建实现双向绑定
首先要引入她.. <!DOCTYPE html> <html lang="en"> <head> <meta charset=" ...
- 夺命雷公狗-----React---7--组建的状态props和state
props:组建初始要渲染的数据,他是不可以改变的 state:组建状态发生改变,调用render重新渲染数据 我们来写一个例子: <!DOCTYPE html> <html lan ...
- 夺命雷公狗-----React---6--props多属性的传递
<!DOCTYPE html> <html lang="en"> <head> <meta charset="UTF-8&quo ...
- 夺命雷公狗-----React---5--props对象的传递
提示:props的值是不可以改变的... <!DOCTYPE html> <html lang="en"> <head> <meta ch ...
- 夺命雷公狗-----React---4--props变量的传递
提示:props的值是不可以改变的... <!DOCTYPE html> <html lang="en"> <head> <meta ch ...
随机推荐
- 使用BigDecimal进行精确运算以及格式化输出数字
一.引言 借用<Effactive Java>这本书中的话,float和double类型的主要设计目标是为了科学计算和工程计算.他们执行二进制浮点运算,这是为了在广域数值范围上提供 ...
- 00 LabVIEW中类的动态类型处理
1.父类使用自己的Method,连线默认为父类自己的控件 2.如果子类没有重写父类的Method,则子类使用父类方法时,直接创建出来即自己的数据类型 3.如果子类重写了父类的Method,则子类使 ...
- TweenMax参数说明
TweenMax 建立在 TweenLite 和 TweenFilterLite 基础之上,因此,又揉合了这二者的功能,使得功能更加的齐备,但是如果说易用性,觉得还是 TweenLite 来得方便一些 ...
- matlab函数大全
Matlab 图像处理相关函数命令大全 一.通用函数: colorbar 显示彩色条 语法:colorbar \ colorbar('vert') \ colorbar('horiz') \ col ...
- 使用安卓手机上的shh软件ConnectBot管理您的Linux服务器
ConnectBot是一款在Android手机上通过命令行方式连接管理类Unix系统的软件(类Unix系统包含:FreeBSD.OpenBSD.NetBSD.Solaris.Mac.AIX.GUN/L ...
- http详解
mac地址是网卡出厂的时候给定的固定地址.ip是当前节点被分配的地址,mac和ip相互配对: ip间通信- http本身是无状态无连接的,因为有这样的特性才能让他适用于当今这么复杂的网络环境. 但是有 ...
- 解决FTP的URL访问不能有中文名称的问题,报java.lang.IllegalArgumentException
最近一个项目要用到FTP做上传下载,我访问ftp的url中有中文名称,结果每次都报如下错: 1 Exception in thread "main" java.lang.Illeg ...
- 再谈java两种变量(基本类型和引用类型)(综合各路大神)
基本类型: 基本类型自然不用说了,它的值就是一个数字,一个字符或一个布尔值. int a: a=250: //声明变量a的同时,系统给a分配了数据空间. 引用类型: 是一个对象类型,值是什么呢? ...
- merge 本地 master 分支代码提示 “Already up-to-date”
在使用 git 的过程中由于误操作,导致从本地 master 分支 merge 代码到当前分支失败,虽然当前分支和 master 分支代码不同步,但是仍然提示 Already up-to-date. ...
- Linux从零单排(二):setuptools、pip、anaconda2的环境配置
为了更方便的使用Python的类库,需要进行相应的配置 (一)setuptools的配置 1.setuptools的下载 命令行输入wget https://pypi.python.org/packa ...