IOS开发学习笔记041-UITableView总结1
一、UITableView的常用属性
1、分割线
// 分割线
self.tableView.separatorColor = [UIColorredColor];

// 隐藏分割线
self.tableView.separatorStyle = UITableViewCellSeparatorStyleNone;
2、选中样式
// cell选中样式,貌似几个枚举效果都一样
cell.selectionStyle = UITableViewCellSelectionStyleBlue;
// cell选中背景色
UIView *selectedBackground = [[UIView alloc] init];
selectedBackground.backgroundColor = [UIColor greenColor];
cell.selectedBackgroundView = selectedBackground;
3、背景色
// cell默认背景色
cell.backgroundColor = [UIColor redColor];
// backgroundView 的优先级大于backgroundColor
UIView *background = [[UIView alloc] init];
background.backgroundColor = [UIColor orangeColor];
cell.backgroundView = background;
设置背景色有两种方式,注意一点就是 :
backgroundView 的优先级大于backgroundColor
4、指示器
指示器默认显示的是第一个 UITableViewCellAccessoryNone
typedef NS_ENUM(NSInteger, UITableViewCellAccessoryType) {
UITableViewCellAccessoryNone, // don't show any accessory view
UITableViewCellAccessoryDisclosureIndicator, // regular chevron. doesn't track
UITableViewCellAccessoryDetailDisclosureButton, // info button w/ chevron. tracks
UITableViewCellAccessoryCheckmark, // checkmark. doesn't track
UITableViewCellAccessoryDetailButton NS_ENUM_AVAILABLE_IOS(7_0) // info button. tracks
};
样式依次为:


// cell指示器
cell.accessoryType = UITableViewCellAccessoryCheckmark;
也可以自定义View显示。
// 显示预定义按钮
cell.accessoryView = [UIButtonbuttonWithType:UIButtonTypeContactAdd];

// 自定义view
UILabel *name = [[UILabel alloc] init];
name.frame = CGRectMake(200, 0, 80, 40);
name.text = [NSString stringWithFormat: @"英雄%zd",indexPath.row + 1];
name.textAlignment = NSTextAlignmentRight;
name.textColor = [UIColor lightGrayColor];
cell.accessoryView = name;

二、cell的循环利用方式
1、方式1
- (UITableViewCell *)tableView:(UITableView *)tableView cellForRowAtIndexPath:(NSIndexPath *)indexPath
{
/**
* 什么时候调用:每当有一个cell进入视野范围内就会调用
*/
// 0.重用标识
// 被static修饰的局部变量:只会初始化一次,在整个程序运行过程中,只有一份内存
static NSString *ID = @"cell";
// 1.先根据cell的标识去缓存池中查找可循环利用的cell
UITableViewCell *cell = [tableView dequeueReusableCellWithIdentifier:ID];
// 2.如果cell为nil(缓存池找不到对应的cell)
if (cell == nil) {
cell = [[UITableViewCellalloc] initWithStyle:UITableViewCellStyleDefaultreuseIdentifier:ID];
}
// 3.覆盖数据
cell.textLabel.text = [NSString stringWithFormat:@"testdata - %zd", indexPath.row];
return cell;
}
2、方式2
- 定义一个全局变量
// 定义重用标识
NSString *ID = @"cell";
- 注册某个标识对应的cell类型
- (void)viewDidLoad {
[super viewDidLoad];
// 注册某个标识对应的cell类型
[self.tableView registerClass:[UITableViewCell class] forCellReuseIdentifier:ID];
}
- 在数据源方法中返回cell,
- (UITableViewCell *)tableView:(UITableView *)tableView cellForRowAtIndexPath:(NSIndexPath *)indexPath
{
// 1.去缓存池中查找cell
UITableViewCell *cell = [tableView dequeueReusableCellWithIdentifier:ID];
// 2.覆盖数据
cell.textLabel.text = [NSString stringWithFormat:@"testdata - %zd", indexPath.row];
return cell;
}
3、方式3
在storyboard中设置UITableView的Dynamic Prototypes Cell

设置cell的重用标识
在代码中利用重用标识获取cell
- (UITableViewCell *)tableView:(UITableView *)tableView cellForRowAtIndexPath:(NSIndexPath *)indexPath
{
// 0.重用标识
// 被static修饰的局部变量:只会初始化一次,在整个程序运行过程中,只有一份内存
static NSString *ID = @"cell";
// 1.先根据cell的标识去缓存池中查找可循环利用的cell
UITableViewCell *cell = [tableView dequeueReusableCellWithIdentifier:ID];
// 2.覆盖数据
cell.textLabel.text = [NSString stringWithFormat:@"cell - %zd", indexPath.row];
return cell;
}
三、自定义cell
使用系统自带的cell有时不能满足需求,可以自定义cell,实现自己想要的界面。
cell的自定义分两种,等高的和不等高的,等高的比较容易实现。
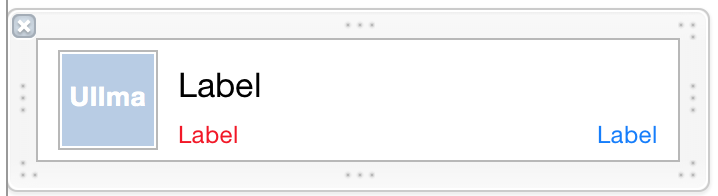
实现界面如下:
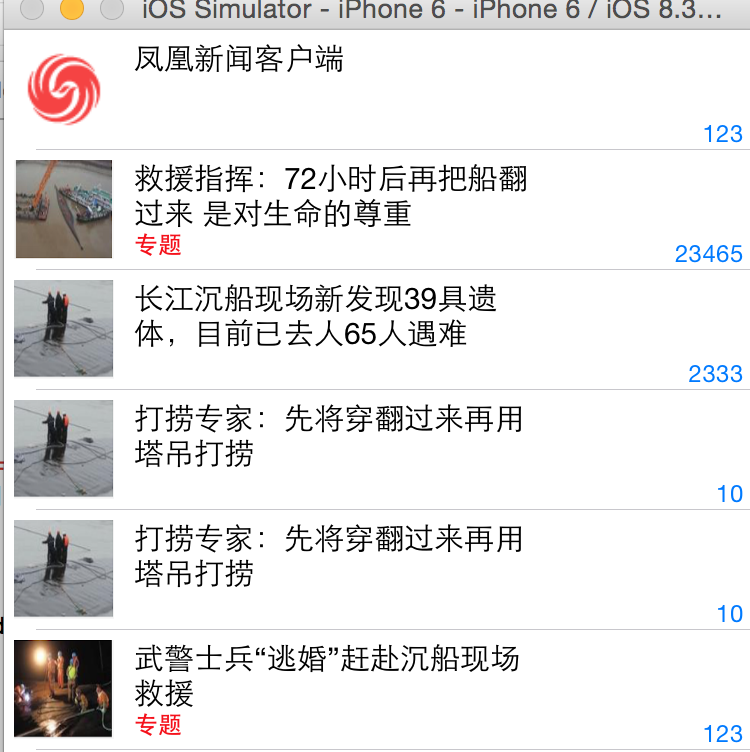
1、等高cell
storyboard实现自定义cell
- 创建一个继承自UITableViewCell的子类,比如SLQFengCell
#import <UIKit/UIKit.h>
@interface SLQFengCell : UITableViewCell
@end
- 在storyboard中
- 往cell里面增加需要用到的子控件
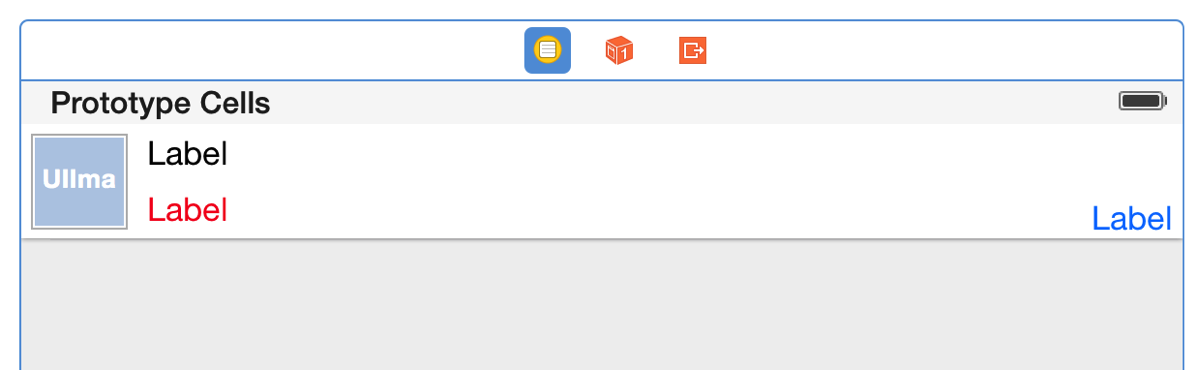
- 设置cell的重用标识
- 设置cell的class为SLQFengCell
- 在控制器中
- 利用重用标识找到cell
- 给cell传递模型数据
- (UITableViewCell *)tableView:(UITableView *)tableView cellForRowAtIndexPath:(NSIndexPath *)indexPath
{
// 从缓存池中获取数据,如果没有就根据ID创建一个
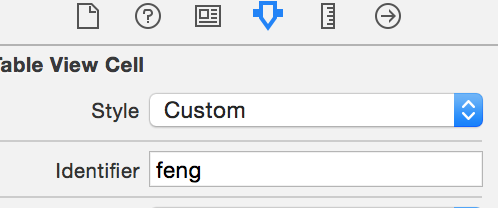
static NSString *ID =@"feng";
SLQFengCell *cell = [tableView dequeueReusableCellWithIdentifier:ID];
// 传递模型数据
cell.fengNews = self.news[indexPath.row];
return cell;
}
- 在SLQFengCell中
- 将storyboard中的子控件连线到类扩展中
@interfaceSLQFengCell ()
@property (weak, nonatomic) IBOutletUIImageView *image;
@property (weak, nonatomic) IBOutletUILabel *titleLable;
@property (weak, nonatomic) IBOutletUILabel *topicLable;
@property (weak, nonatomic) IBOutletUILabel *commentLable;
@end
- 需要提供一个模型属性,重写模型的set方法,在这个方法中设置模型数据到子控件上

#import <UIKit/UIKit.h>
@classSLQFengNews;
@interface SLQFengCell : UITableViewCell
@property (strong, nonatomic) SLQFengNews *fengNews; // 模型属性
@end
- 重写set方法,对模型对象就行赋值。
// 重写set方法
- (void)setFengNews:(SLQFengNews *)fengNews
{
_fengNews = fengNews;
// 设置图片
self.image.image = [UIImage imageNamed:fengNews.image];
// 设置标题
self.titleLable.text = fengNews.title;
self.titleLable.font = [UIFontsystemFontOfSize:15];
// 判断是否是专题
if (fengNews.isTopic)
{
self.topicLable.hidden = NO;
self.topicLable.text = @"专题";
self.topicLable.font = [UIFontboldSystemFontOfSize:12];
}
else
{
self.topicLable.hidden = YES;
}
// 设置评论数
self.commentLable.text = fengNews.comment;
self.commentLable.font = [UIFontsystemFontOfSize:12];
}
- 在模型类中添加对应数量的属性,并写一个对象方法返回模型初始化后的对象
#import <Foundation/Foundation.h>
@interface SLQFengNews : NSObject
/*图片*/
@property (strong, nonatomic) NSString *image;
/*标题*/
@property (strong, nonatomic) NSString *title;
/*专题*/
@property (assign, nonatomic,getter = isTopic) BOOL topic;
/*评论数*/
@property (strong, nonatomic) NSString *comment;
+ (instancetype)fengNewsWithDict:(NSDictionary *)dict;
@end
//实现文件
#import "SLQFengNews.h"
@implementation SLQFengNews
// 根据字典返回对象
+ (instancetype)fengNewsWithDict:(NSDictionary *)dict
{
SLQFengNews *feng = [[SLQFengNewsalloc] init];
[feng setValuesForKeysWithDictionary:dict];
return feng;
}
@end
数据使用plist文件,保存各种信息

xib自定义cell
很多步骤和在storyboard里差不多
- 1.创建一个继承自UITableViewCell的子类,比如 SLQFengCell (同上)
- 2.创建一个xib文件(文件名建议跟cell的类名一样),比如SLQFengCell.xib
- 拖拽一个UITableViewCell出来
- 修改cell的class为 SLQFengCell (同上)
- 设置cell的重用标识 (同上)
- 往cell中添加需要用到的子控件,实现如下界面
- 3.在控制器中
- 利用registerNib...方法注册xib文件
- 利用重用标识找到cell(如果没有注册xib文件,就需要手动去加载xib文件)
- 给cell传递模型数据,代码如下,这里对cell的创建方法进行封装
- - (UITableViewCell *)tableView:(UITableView *)tableView cellForRowAtIndexPath:(NSIndexPath *)indexPath
- {
- SLQFengCell *cell = [SLQFengCell cellWithTableView:tableView]; // 这里对cell的创建进行封装
- // 传递模型数据
- cell.fengNews = self.news[indexPath.row];
- return cell;
- }
- 4.在SLQFengCell中
- 将xib中的子控件连线到类扩展中(同上)
- 需要提供一个模型属性,重写模型的set方法,在这个方法中设置模型数据到子控件上(同上)
- 也可以将创建获得cell的代码封装起来(比如cellWithTableView:方法)
- 在 SLQFengCell类中定义方法cellWithTableView
// 返回cell对象,这里做加载xib的操作
+ (instancetype)cellWithTableView:(UITableView *)tableView
{
static NSString *ID = @"feng";
SLQFengCell *cell = [tableView dequeueReusableCellWithIdentifier:ID];
if(cell == nil)
{
cell = [[[NSBundlemainBundle] loadNibNamed:NSStringFromClass([SLQFengCellclass]) owner:niloptions:nil] lastObject];
}
return cell;
}
代码自定义cell(使用frame)
1.创建一个继承自UITableViewCell的子类,比如XMGDealCell
- 在initWithStyle:reuseIdentifier:方法中
- 添加子控件
- 设置子控件的初始化属性(比如文字颜色、字体)
// 初始化控件,添加控件到contentView,并设置相关的属性
- (instancetype)initWithStyle:(UITableViewCellStyle)style reuseIdentifier:(NSString *)reuseIdentifier
{
if (self = [super initWithStyle:style reuseIdentifier:reuseIdentifier])
{
UIImageView *image = [[UIImageView alloc] init];
[self.contentView addSubview:image];
self.image = image;
UILabel *title = [[UILabel alloc] init];
title.numberOfLines = 0;
[self.contentView addSubview:title];
self.titleLable = title;
UILabel *topic = [[UILabel alloc] init];
topic.textColor = [UIColor redColor];
topic.font = [UIFont systemFontOfSize:12];
[self.contentView addSubview:topic];
self.topicLable = topic;
UILabel *comment = [[UILabel alloc] init];
comment.font = [UIFont systemFontOfSize:12];
comment.textColor = [UIColor blueColor];
comment.textAlignment = NSTextAlignmentRight;
[self.contentView addSubview:comment];
self.commentLable = comment;
}
return self;
}
- 在layoutSubviews方法中设置子控件的frame
// 设置控件的frame
- (void)layoutSubviews
{
[superlayoutSubviews];
CGFloat contentH = self.contentView.frame.size.height;
CGFloat contentW = self.contentView.frame.size.width;
CGFloat margin = 10;
CGFloat imageX = margin;
CGFloat imageY = margin;
CGFloat imageW = 50;
CGFloat imageH = contentH - 2 * imageY;
self.image.frame = CGRectMake(imageX, imageY, imageW, imageH);
// titleLabel
CGFloat titleX = CGRectGetMaxX(self.image.frame) + margin;
CGFloat titleY = imageY;
CGFloat titleW = contentW - titleX - margin;
CGFloat titleH = 20;
self.titleLable.frame = CGRectMake(titleX, titleY, titleW, titleH);
// topicLabel
CGFloat topicX = titleX;
CGFloat topicH = 20;
CGFloat topicY = contentH - margin - topicH;
CGFloat topicW = 70;
self.topicLable.frame = CGRectMake(topicX, topicY, topicW, topicH);
// commentLable
CGFloat commentH = topicH;
CGFloat commentY = topicY;
CGFloat commentX = CGRectGetMaxX(self.topicLable.frame) + margin;
CGFloat commentW = contentW - commentX - margin;
self.commentLable.frame = CGRectMake(commentX, commentY, commentW, commentH);
}
- 需要提供一个模型属性,重写模型的set方法,在这个方法中设置模型数据到子控件
- 2.在控制器中
- 利用registerClass...方法注册SLQFengCell类
- (void)viewDidLoad {
[superviewDidLoad];
[self.tableViewregisterClass:[SLQFengCellclass] forCellReuseIdentifier:@"feng"];
}
- 利用重用标识找到cell(如果没有注册类,就需要手动创建cell)
- 给cell传递模型数据 (同上)
- 也可以将创建获得cell的代码封装起来(比如cellWithTableView:方法) (同上)
代码参考
http://pan.baidu.com/s/1pJ7Oayn
代码自定义cell(使用autolayout)
1.创建一个继承自UITableViewCell的子类,比如XMGDealCell
- 在initWithStyle:reuseIdentifier:方法中
- 添加子控件
- 添加子控件的约束(masonry)(这里添加约束,layoutSubviews不用重写了)
// 初始化控件,添加控件到contentView,并设置相关的属性
- (instancetype)initWithStyle:(UITableViewCellStyle)style reuseIdentifier:(NSString *)reuseIdentifier
{
if (self = [super initWithStyle:style reuseIdentifier:reuseIdentifier])
{
UIImageView *image = [[UIImageView alloc] init];
[self.contentView addSubview:image];
self.image = image;
UILabel *title = [[UILabel alloc] init];
title.numberOfLines = 0;
[self.contentView addSubview:title];
self.titleLable = title;
UILabel *topic = [[UILabel alloc] init];
topic.textColor = [UIColor redColor];
topic.font = [UIFont systemFontOfSize:12];
[self.contentView addSubview:topic];
self.topicLable = topic;
UILabel *comment = [[UILabel alloc] init];
comment.font = [UIFont systemFontOfSize:12];
comment.textColor = [UIColor blueColor];
comment.textAlignment = NSTextAlignmentRight;
[self.contentView addSubview:comment];
self.commentLable = comment;
// 添加约束
CGFloat margin = 10;
[self.image makeConstraints:^(MASConstraintMaker *make) {
make.size.equalTo(50);
make.top.left.equalTo(self.contentView.top).offset(margin);
}];
[self.titleLable makeConstraints:^(MASConstraintMaker *make) {
make.left.equalTo(self.image.right).offset(margin);
make.top.equalTo(self.image.top);
make.right.equalTo(self.contentView.right).offset(-margin);
}];
[self.topicLable makeConstraints:^(MASConstraintMaker *make) {
make.left.equalTo(self.titleLable.left);
make.bottom.equalTo(self.image.bottom);
make.width.equalTo(100);
}];
[self.commentLable makeConstraints:^(MASConstraintMaker *make) {
make.left.equalTo(self.topicLable.right).offset(margin);
make.right.equalTo(self.titleLable.right);
make.bottom.equalTo(self.topicLable.bottom);
}];
}
return self;
}
- 设置子控件的初始化属性(比如文字颜色、字体)
- 需要提供一个模型属性,重写模型的set方法,在这个方法中设置模型数据到子控件
- 2.在控制器中 (同上)
- 利用registerClass...方法注册SLQFengCell类
- (void)viewDidLoad {
[superviewDidLoad];
[self.tableViewregisterClass:[SLQFengCellclass] forCellReuseIdentifier:@"feng"];
}
- 利用重用标识找到cell(如果没有注册类,就需要手动创建cell)
- 给cell传递模型数据 (同上)
- 也可以将创建获得cell的代码封装起来(比如cellWithTableView:方法) (同上)
明天继续非等高的Cell....
2015-06-04
IOS开发学习笔记041-UITableView总结1的更多相关文章
- iOS开发学习笔记:基础篇
iOS开发需要一台Mac电脑.Xcode以及iOS SDK.因为苹果设备都具有自己封闭的环境,所以iOS程序的开发必须在Mac设备上完成(当然,黑苹果应该也是可以的,但就需要花很多的精力去折腾基础环境 ...
- ios开发学习笔记(1)
objective-c基础总结 第一二章 1.application:didiFinishLauchingWithOptions:程序启动后立即执行 2.启动界面代码格式:self.window = ...
- iOS开发学习笔记
1 常用的第三方工具 1.1 iPhone Simulator 测试程序需要模拟器iPhone Simulator 1.2 设计界面需要Interface Builder,Interface Buil ...
- ios开发学习笔记(这里一定有你想要的东西,全部免费)
1,Search Bar 怎样去掉背景的颜色(storyboard里只能设置background颜色,可是发现clear Color无法使用). 其实在代码里还是可以设置的,那就是删除背景view [ ...
- IOS开发学习笔记026-UITableView的使用
UITableView的简单使用过程 简单介绍 两种样式 UITableViewStylePlain UITableViewStyleGrouped 数据显示需要设置数据源,数据源是符合遵守协议 &l ...
- IOS开发学习笔记017-第一个IOS应用
第一个IOS应用程序,就从最简单的开始吧. 1.先了解一下开发环境,Xcode的相关组成 2.还有模拟器 3.运行与停止按钮 4.新建一个工程 5.看看main函数里都有啥 6.现在来添加一个控件 1 ...
- (ios开发学习笔记一)ios项目文件结构
转自:http://www.cnblogs.com/macroxu-1982/archive/2012/07/31/2616389.html 下面是单个窗体项目例子,我们从这个项目开始,说明ios项目 ...
- IOS开发学习笔记043-QQ聊天界面实现
QQ聊天界面实现 效果如下: 实现过程: 1.首先实现基本界面 头像使用 UIImageView : 文字消息使用 UIButton 标签使用 UILable :水平居中 所有元素在一个cell中,在 ...
- IOS开发学习笔记042-UITableView总结2
一.自定义非等高的cell 如常见的微博界面,有的微博只有文字,有的有文字和图片.这些微博的高度不固定需要重新计算. 这里简单说一下几种方法.前面的步骤和设置等高的cell一样.现在来 ...
随机推荐
- 报错:Program "sh" not found in PATH
参考原文:http://vin-mail.blog.163.com/blog/static/37895280201211932919513/ 如果你按照我的方法 先配置了cygwin的环境变量,在打开 ...
- 【转】【C++】【MFC】各种数据类型大小
*原文地址:http://blog.csdn.net/xuexiacm/article/details/8122267 /*运行结果分析: 以上结果已经很明白了,一下补充说明几点: 概念.整型:表示整 ...
- php-7.1.11编译选项配置
./configure \ --prefix=/usr/local/php-7.1.11 \ --with-config-file-path=/usr/local/php7.1.11/etc \ -- ...
- tomcat jvm参数优化
根据gc(垃圾回收器)的选择,进行参数优化 JVM给了三种选择:串行收集器.并行收集器.并发收集器,但是串行收集器只适用于小数据量的情况,所以这里的选择主要针对并行收集器和并发收集器. -XX:+Us ...
- linux打开文件数测试
/proc/sys/kernel/threads-max 系统最大线程数量 /proc/sys/vm/max_map_count 限制一个进程可以拥有的VMA(虚拟内存区域)的数量 /proc/sys ...
- php使用GD库实现图片水印和缩略图——封装成类
学完了如何使用GD库来实现对图片的各种处理,那么我们可以发现,不管哪种方法,都有相似之处,如果我们把这些相似的地方和不相似的地方都封装成类,这样就可以提升代码的速度,而且节省了很多时间,废话不多说,来 ...
- [Asp.Net] MVC 和Web API Action 获取参数的区别
Asp.net MVC 和web api 的action 在获取从前台传入的数据是有很大不同 前台使用ajax的方式向后台发起post的请求 Content-Type:application/json ...
- java基础编程——树的子结构
题目描述 输入两棵二叉树A,B,判断B是不是A的子结构.(ps:我们约定空树不是任意一个树的子结构) 题目代码 /** * 输入两棵二叉树A,B,判断B是不是A的子结构.(ps:我们约定空树不是任意一 ...
- 关于Star UML
为什么是使用Star UML而不是Visio 2013呢? 以前本人在大学期间使用的Visio 2013来绘制UML的,最近一个星期因为在阅读源码,所以有多学了一门UML绘制工具—Star UML,下 ...
- 线段树和zkw线段树
作者作为一个蒟蒻,也是最近才自学了线段树,不对的地方欢迎大佬们评论,但是不要喷谢谢 好啦,我们就开始说说线段树吧 线段树是个支持区间操作和查询的东东,平时的话还是蛮实用的 下面以最基本的区间加以及查询 ...