SpringBoot 2.0.3 源码解析
前言
用SpringBoot也有很长一段时间了,一直是底层使用者,没有研究过其到底是怎么运行的,借此机会今天试着将源码读一下,在此记录。。。我这里使用的SpringBoot 版本是 2.0.3.RELEASE
源码解析
SpringApplication 的初始化
1.首先一个完整的SpringBoot项目一定会有个启动类,这里就是我们整个程序的入口;
@SpringBootApplication

public class TeachercommunitystudioApplication extends SpringBootServletInitializer{

    public static void main(String[] args) {

        SpringApplication.run(TeachercommunitystudioApplication.class, args);

    }
}
2.只有一行代码,调用了 SpringApplication的静态 run()方法,
//调用重载run方法
public static ConfigurableApplicationContext run(Class<?> primarySource, String... args) {

    return run(new Class[]{primarySource}, args);

}


//参数为Class<?>数组 1.+版本这里是Object

public static ConfigurableApplicationContext run(Class<?>[] primarySources, String[] args) {

    return (new SpringApplication(primarySources)).run(args);

}
3.在run()方法中调用构造函数创建SrpingApplicatin的对象,入参其实就是启动类的class对象,并调用该对象的run方法。
   //resourceLoader这里传入的是null, primarySources就是有启动类的class对象
   public SpringApplication(ResourceLoader resourceLoader, Class<?>... primarySources) {
     //为成员变量sources复制,sources是set<String> 类型
     this.sources = new LinkedHashSet();

        this.bannerMode = Mode.CONSOLE;

        this.logStartupInfo = true;

        this.addCommandLineProperties = true;

        this.headless = true;

        this.registerShutdownHook = true;

        this.additionalProfiles = new HashSet();

        this.resourceLoader = resourceLoader;

        Assert.notNull(primarySources, "PrimarySources must not be null");
     //primarySources就是启动类class对象

        this.primarySources = new LinkedHashSet(Arrays.asList(primarySources));
      /*① 程序类型 通过一个枚举类判断web程序类型,WebApplicationType枚举类中的字段
          包括 响应式程序,none, servlet程序*/

        this.webApplicationType = this.deduceWebApplicationType();
      //② 初始化classPath下的所有可用的应用初始化器 ApplicationContextInitalizer

        this.setInitializers(this.getSpringFactoriesInstances(ApplicationContextInitializer.class));
     //④ 初始化监听器

        this.setListeners(this.getSpringFactoriesInstances(ApplicationListener.class));
        //⑤ 获取main方法的类名

        this.mainApplicationClass = this.deduceMainApplicationClass();

    }
① SpringBoot 2.0以后引入WebApplicationType新特性,该类是个枚举类,deduceWebApplicationType()方法推断使用哪中web程序,默认servlet程序
    private WebApplicationType deduceWebApplicationType() {

        if (ClassUtils.isPresent("org.springframework.web.reactive.DispatcherHandler", (ClassLoader)null) && !ClassUtils.isPresent("org.springframework.web.servlet.DispatcherServlet", (ClassLoader)null)) {

            return WebApplicationType.REACTIVE;

        } else {

            String[] var1 = WEB_ENVIRONMENT_CLASSES;

            int var2 = var1.length;

            for(int var3 = 0; var3 < var2; ++var3) {

                String className = var1[var3];

                if (!ClassUtils.isPresent(className, (ClassLoader)null)) {

                    return WebApplicationType.NONE;

                }

            }

        //默认servlet

            return WebApplicationType.SERVLET;

        }

    }
//枚举类,web应用程序种类
public enum WebApplicationType {

    NONE,

    SERVLET,  //servlet程序

    REACTIVE; //响应式程序

    private WebApplicationType() {

    }

}
② 给SpringApplication的成员变量 List<ApplicationContextInitializer<?>> initializers 赋值, initializers--初始化器集合
调用 setInitializers(Collection<? extends ApplicationContextInitializer<?>> initializers){ ...}方法。代码如下
    public void setInitializers(Collection<? extends ApplicationContextInitializer<?>> initializers) {

        this.initializers = new ArrayList();

        this.initializers.addAll(initializers);

    }
在构造方法中调用 setInitializers(Collection<? extends ApplicationContextInitializer<?>>) 入参为方法 getSpringFactoriesInstances(Class<T> type) 获取Srping工厂初始化器 的返回值
  private <T> Collection<T> getSpringFactoriesInstances(Class<T> type) {

        return this.getSpringFactoriesInstances(type, new Class[0]);

    }

    private <T> Collection<T> getSpringFactoriesInstances(Class<T> type, Class<?>[] parameterTypes, Object... args) {

        ClassLoader classLoader = Thread.currentThread().getContextClassLoader();

        //获取所有BeanFactory的名字

     ③ Set<String> names = new LinkedHashSet(SpringFactoriesLoader.loadFactoryNames(type, classLoader));

     //创建工厂实例

        List<T> instances = this.createSpringFactoriesInstances(type, parameterTypes, classLoader, args, names);

        AnnotationAwareOrderComparator.sort(instances);//排序

        return instances;

    }

  private <T> List<T> createSpringFactoriesInstances(Class<T> type, Class<?>[] parameterTypes, ClassLoader classLoader, Object[] args, Set<String> names) {

        List<T> instances = new ArrayList(names.size());

        Iterator var7 = names.iterator();

        while(var7.hasNext()) {

            String name = (String)var7.next();

            try {
          //实例数容器中的BeanFactory(这里指ApplicationContextInitializer)

                Class<?> instanceClass = ClassUtils.forName(name, classLoader);

                Assert.isAssignable(type, instanceClass);
          //反射机制获取到构造方法对象,执行实例化

                Constructor<?> constructor = instanceClass.getDeclaredConstructor(parameterTypes);

                T instance = BeanUtils.instantiateClass(constructor, args);

                instances.add(instance);

            } catch (Throwable var12) {

                throw new IllegalArgumentException("Cannot instantiate " + type + " : " + name, var12);

            }

        }

        return instances;

    }
③ SpringFactoriesLoader.loadFactoryNames(type, classLoader) 方法,从META/Spring.factories的资源文件中,读取key为ApplicationContextInitialiner对应的值
从下面的代码我们可以看到,根据从构造方法中 ApplicationContextInitializer.class对象获取到ApplicationContextInitializer的类名路径,然后根据该类名路径
从 META/Spring.factoryes 文件中 获取对应的值,如下图
    public static List<String> loadFactoryNames(Class<?> factoryClass, @Nullable ClassLoader classLoader) {
     //获取到类的全路径名称

        String factoryClassName = factoryClass.getName();
     return (List)loadSpringFactories(classLoader).getOrDefault(factoryClassName, Collections.emptyList());

    }

    private static Map<String, List<String>> loadSpringFactories(@Nullable ClassLoader classLoader) {

        MultiValueMap<String, String> result = (MultiValueMap)cache.get(classLoader);

        if (result != null) {

            return result;

        } else {

            try {

                Enumeration<URL> urls = classLoader != null ? classLoader.getResources("META-INF/spring.factories") : ClassLoader.getSystemResources("META-INF/spring.factories");

                LinkedMultiValueMap result = new LinkedMultiValueMap();

                while(urls.hasMoreElements()) {
            ...
          }
          ...
        }
        ...
      }
  }
META-INF/spring.factories文件的内容,及ApplicationContextInitializer所对应的值
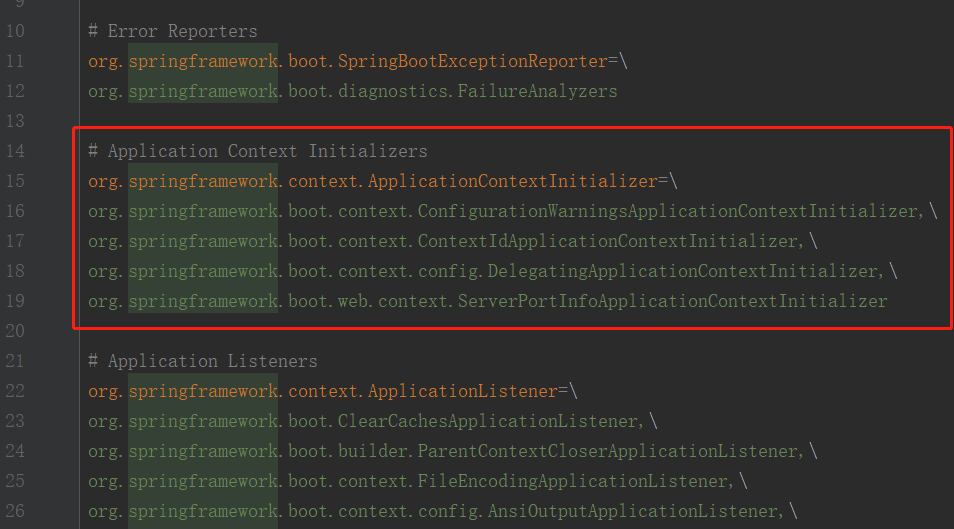
可以看到,这里得到的值有四个类 ConfigurationWarningsApplicationContextInitializer、ContextIdApplicationContextInitializer、DelegatingApplicationContextInitializer、ServerPortInfoApplicationContextInitializer
所以 List<T> instances = this.createSpringFactoriesInstances(type, parameterTypes, classLoader, args, names);这一步得到的List<T>的值就是他们四个的实例
    public void setInitializers(Collection<? extends ApplicationContextInitializer<?>> initializers) {

        this.initializers = new ArrayList();

        this.initializers.addAll(initializers);

    }
所以成员变量 initializers 的初始化变量值其实就是以上四个类的对象组成的List
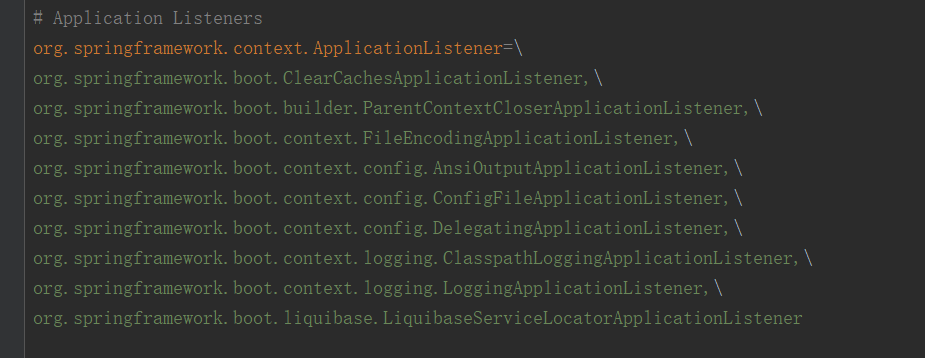
④ 初始化监听器方法 this.setListeners()
this.setListeners(this.getSpringFactoriesInstances(ApplicationListener.class));
整体流程和初始化应用初始化器类似,只不过从 META-INF/spring.factories 中获取的key为 ApplicationListener 的值,然后实例化几个对象后,封装为集合赋值给 this.setListeners()
⑤ this.mainApplicationClass = this.deduceMainApplicationClass(); 获取main方法的类名
  private Class<?> deduceMainApplicationClass() {

        try {

            StackTraceElement[] stackTrace = (new RuntimeException()).getStackTrace();

            StackTraceElement[] var2 = stackTrace;

            int var3 = stackTrace.length;


       //遍历堆栈跟踪元素,获取到调用当前类的方法判断是否为("main"),是的话返回main所在的类名

            for(int var4 = 0; var4 < var3; ++var4) {
StackTraceElement stackTraceElement = var2[var4];
if ("main".equals(stackTraceElement.getMethodName())) {

                    return Class.forName(stackTraceElement.getClassName());

                }

            }

        } catch (ClassNotFoundException var6) {

        }

        return null;

    }
2.run方法的执行流程
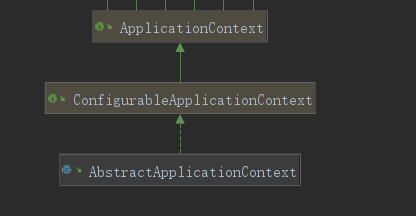
上面的流程执行完毕后,SpringApplication类就初始化完毕了,我们得到一个SpringApplication对象,然后掉用该对象的run()方法。run方法返回值为ConfigurableApplicationContext ---继承自---> ApplicationContext
run()方法内都做了什么事情呢,简单来说就是:
1)准备Spring的环境,
2)打印banner
3)通过spring环境准备上下文 ApplicationContext
4)刷新上下文,即真正去准备项目的Spring环境
下面我们根据代码来分析一下。
    public ConfigurableApplicationContext run(String... args) {

        // 声明一个秒表。计算并打印出程序耗时
        StopWatch stopWatch = new StopWatch();

        stopWatch.start();

        ConfigurableApplicationContext context = null;
        // 程序异常报告

        Collection<SpringBootExceptionReporter> exceptionReporters = new ArrayList();
        // ①设置系统为Headless模式

        this.configureHeadlessProperty();
        // ② 初始化SrpingApplicationRunListeners监听器

        SpringApplicationRunListeners listeners = this.getRunListeners(args);

        listeners.starting();

        Collection exceptionReporters;

        try {
        // 初始化应用参数,参数为main方法中传入的args

            ApplicationArguments applicationArguments = new DefaultApplicationArguments(args);

        // ③ 根据listeners和 applicationArguments 应用参数 来配置SpringBoot的应用环境

            ConfigurableEnvironment environment = this.prepareEnvironment(listeners, applicationArguments);

        // 根据环境配置去除要忽略的 bean信息
         this.configureIgnoreBeanInfo(environment);
       // Banner打印,这里就不再多说了

            Banner printedBanner = this.printBanner(environment);

            /* ④ 根据 webApplicationType 应用类型来确定该 SpringBoot 项目应该创建什么类型的应用上下文 ApplicationContext
         如果没有明确的设置应用程序上下文会返回合适的默认值, */

            context = this.createApplicationContext();
            /* 和上面说的getSpringFactoriesInstances是一个套路,从META-INF/springfactories中获取键为SpringBootExceptionReporter的value
           然后将这些值使用反射,进行实例化返回一个集合 */
            exceptionReporters = this.getSpringFactoriesInstances(SpringBootExceptionReporter.class, new Class[]{ConfigurableApplicationContext.class}, context);


         // ⑤ 完成整个容器的创建于启动以及 bean的注入功能
         this.prepareContext(context, environment, listeners, applicationArguments, printedBanner);
         // ⑥ 刷新上下文

            this.refreshContext(context);

            this.afterRefresh(context, applicationArguments);

            stopWatch.stop();

            if (this.logStartupInfo) {

                (new StartupInfoLogger(this.mainApplicationClass)).logStarted(this.getApplicationLog(), stopWatch);

            }

            listeners.started(context);

            this.callRunners(context, applicationArguments);

        } catch (Throwable var10) {

            this.handleRunFailure(context, var10, exceptionReporters, listeners);

            throw new IllegalStateException(var10);

        }

        try {

            listeners.running(context);

            return context;

        } catch (Throwable var9) {

            this.handleRunFailure(context, var9, exceptionReporters, (SpringApplicationRunListeners)null);

            throw new IllegalStateException(var9);

        }

    }
① 设置系统为Headless模式
Headess模式是系统的一种配置模式,在系统缺少显示设备,鼠标键盘等外设时可以使用该模式。一般是在程序开始激活headless模式,告诉程序,现在你要工作在Headless mode下,就不要指望硬件帮忙了,你得自力更生,依靠系统的计算能力模拟出这些特性来。
   private boolean headless;

  //构造函数中
   this.headless = true;

  private void configureHeadlessProperty() {

        System.setProperty("java.awt.headless", System.getProperty("java.awt.headless", Boolean.toString(this.headless)));

    }
② 初始化SrpingApplicationRunListeners监听器
这里依然调用 getSpringFactoriesInstances()方法,和上面基本是一样的套路,从 META-INF/spring.factories 中获取键 SpringApplicationRunListener 的 value.
        SpringApplicationRunListeners listeners = this.getRunListeners(args);

        listeners.starting();

        try {

            ApplicationArguments applicationArguments = new DefaultApplicationArguments(args);

            ConfigurableEnvironment environment = this.prepareEnvironment(listeners, applicationArguments);

            this.configureIgnoreBeanInfo(environment);

            Banner printedBanner = this.printBanner(environment);

            context = this.createApplicationContext();

            exceptionReporters = this.getSpringFactoriesInstances(SpringBootExceptionReporter.class, new Class[]{ConfigurableApplicationContext.class}, context);

            this.prepareContext(context, environment, listeners, applicationArguments, printedBanner);

            this.refreshContext(context);

            this.afterRefresh(context, applicationArguments);

            stopWatch.stop();

            if (this.logStartupInfo) {

                (new StartupInfoLogger(this.mainApplicationClass)).logStarted(this.getApplicationLog(), stopWatch);

            }

            listeners.started(context);

            this.callRunners(context, applicationArguments);

        }

     try {
        listeners.running(context);
        return context;
    }
  // getSpringFactoriesInstances()方法和构造函数中的应用程序初始化类的初始化过程是同一个方法,基本流程就是从META-INF/spring.factories 配置文件里根据键取值
  private SpringApplicationRunListeners getRunListeners(String[] args) {

        Class<?>[] types = new Class[]{SpringApplication.class, String[].class};

        return new SpringApplicationRunListeners(logger, this.getSpringFactoriesInstances(SpringApplicationRunListener.class, types, this, args));

    }
③ 根据listeners和 applicationArguments 应用参数 来配置SpringBoot的应用环境
  // environment成员变量, 在构造函数中未赋值

  private ConfigurableEnvironment environment;

  private ConfigurableEnvironment prepareEnvironment(SpringApplicationRunListeners listeners, ApplicationArguments applicationArguments) {

        ConfigurableEnvironment environment = this.getOrCreateEnvironment();
       // 配置环境

        this.configureEnvironment((ConfigurableEnvironment)environment, applicationArguments.getSourceArgs());

        listeners.environmentPrepared((ConfigurableEnvironment)environment);

        this.bindToSpringApplication((ConfigurableEnvironment)environment);

        if (this.webApplicationType == WebApplicationType.NONE) {

            environment = (new EnvironmentConverter(this.getClassLoader())).convertToStandardEnvironmentIfNecessary((ConfigurableEnvironment)environment);

        }

        ConfigurationPropertySources.attach((Environment)environment);

        return (ConfigurableEnvironment)environment;

    }

    // environment不为null直接返回,为null则新建

    private ConfigurableEnvironment getOrCreateEnvironment() {

        if (this.environment != null) {

            return this.environment;

        } else {

            return (ConfigurableEnvironment)(this.webApplicationType == WebApplicationType.SERVLET ? new StandardServletEnvironment() : new StandardEnvironment());

        }

    }
   // 配置环境
    protected void configureEnvironment(ConfigurableEnvironment environment, String[] args) {
        this.configurePropertySources(environment, args);  //配置要使用的属性源 PropertySources
        this.configureProfiles(environment, args);  //配置要使用的Profiles
    }
    // 将环境绑定到 SpringApplication
    protected void bindToSpringApplication(ConfigurableEnvironment environment) {
        try {
            Binder.get(environment).bind("spring.main", Bindable.ofInstance(this));
        } catch (Exception var3) {
            throw new IllegalStateException("Cannot bind to SpringApplication", var3);
        }
    }
④ 根据 webApplicationType 应用类型创建不同类型的ApplicationContext,未指定的话返回默认的ApplicationContext
    protected ConfigurableApplicationContext createApplicationContext() {

        Class<?> contextClass = this.applicationContextClass;

        if (contextClass == null) {

            try {

                switch(this.webApplicationType) {

                case SERVLET:

                    contextClass = Class.forName("org.springframework.boot.web.servlet.context.AnnotationConfigServletWebServerApplicationContext");

                    break;

                case REACTIVE:

                    contextClass = Class.forName("org.springframework.boot.web.reactive.context.AnnotationConfigReactiveWebServerApplicationContext");

                    break;

                default:

                    contextClass = Class.forName("org.springframework.context.annotation.AnnotationConfigApplicationContext");

                }

            } catch (ClassNotFoundException var3) {

                throw new IllegalStateException("Unable create a default ApplicationContext, please specify an ApplicationContextClass", var3);

            }

        }

        return (ConfigurableApplicationContext)BeanUtils.instantiateClass(contextClass);

    }
⑤ 完成整个容器的创建、启动以及 bean 的注入功能
    private void prepareContext(ConfigurableApplicationContext context, ConfigurableEnvironment environment, SpringApplicationRunListeners listeners, ApplicationArguments applicationArguments, Banner printedBanner) {

        // 将上面获取到的 environment(配置环境类) 设置给创建好的Application
        context.setEnvironment(environment);

       // a. 该方法对 context 进行了预设置,设置了 ResourceLoader 和 ClassLoader,并向 bean 工厂中添加了一个beanNameGenerator

        this.postProcessApplicationContext(context);

       // b. 在刷新前将 ApplicationContextInitializer 应用于上下文

        this.applyInitializers(context);

        listeners.contextPrepared(context);

        if (this.logStartupInfo) {// 启动日志

            this.logStartupInfo(context.getParent() == null);

            this.logStartupProfileInfo(context);

        }

        context.getBeanFactory().registerSingleton("springApplicationArguments", applicationArguments);

        if (printedBanner != null) {

            context.getBeanFactory().registerSingleton("springBootBanner", printedBanner);

        }

        Set<Object> sources = this.getAllSources();

        Assert.notEmpty(sources, "Sources must not be empty");

        this.load(context, sources.toArray(new Object[0]));

        listeners.contextLoaded(context);

    }
a. postProcessApplicationContext(context); 对context 进行了预设值,设置了 ResourceLoader 和 ClassLoader, 并向bean工厂中添加了一个BeanNameGenerator。
    protected void postProcessApplicationContext(ConfigurableApplicationContext context) {

       // 给ApplicationContext设置BeanNameGenerator;
        if (this.beanNameGenerator != null) {

            context.getBeanFactory().registerSingleton("org.springframework.context.annotation.internalConfigurationBeanNameGenerator", this.beanNameGenerator);

        }

        if (this.resourceLoader != null) {

          // 设置ResourceLoader 设置资源加载器
            if (context instanceof GenericApplicationContext) {

                ((GenericApplicationContext)context).setResourceLoader(this.resourceLoader);

            }

         // 给ApplicationContext 设置 ClassLoader类加载器

            if (context instanceof DefaultResourceLoader) {

                ((DefaultResourceLoader)context).setClassLoader(this.resourceLoader.getClassLoader());

            }

        }

    }
b. 刷新前将所有ApplicationContextInitializer 应用于上下文
    protected void applyInitializers(ConfigurableApplicationContext context) {

        Iterator var2 = this.getInitializers().iterator();

        while(var2.hasNext()) {

            ApplicationContextInitializer initializer = (ApplicationContextInitializer)var2.next();

            Class<?> requiredType = GenericTypeResolver.resolveTypeArgument(initializer.getClass(), ApplicationContextInitializer.class);

            Assert.isInstanceOf(requiredType, context, "Unable to call initializer.");

            initializer.initialize(context);

        }

    }
c. 主要是加载各种beans 到Application对象中,sources和primarySources,primarySources就是构造函数的入参,启动类的class对象
   // 获取所有资源列表
  public Set<Object> getAllSources() {

        Set<Object> allSources = new LinkedHashSet();

        if (!CollectionUtils.isEmpty(this.primarySources)) {

            allSources.addAll(this.primarySources);

        }

        if (!CollectionUtils.isEmpty(this.sources)) {

            allSources.addAll(this.sources);

        }

        return Collections.unmodifiableSet(allSources);

    }

   // 加载各种bean到ApplicationContext对象中

    protected void load(ApplicationContext context, Object[] sources) {

        if (logger.isDebugEnabled()) {

            logger.debug("Loading source " + StringUtils.arrayToCommaDelimitedString(sources));

        }

        BeanDefinitionLoader loader = this.createBeanDefinitionLoader(   // (2)
             this.getBeanDefinitionRegistry(context), sources); // (1)

        if (this.beanNameGenerator != null) {

            loader.setBeanNameGenerator(this.beanNameGenerator);

        }

        if (this.resourceLoader != null) {

            loader.setResourceLoader(this.resourceLoader);

        }

        if (this.environment != null) {

            loader.setEnvironment(this.environment);

        }

        loader.load(); // (3)

    }
(1) getBeanDefinitionRegistry(ApplicationContext context) 获取bean定义注册表
    private BeanDefinitionRegistry getBeanDefinitionRegistry(ApplicationContext context) {

        if (context instanceof BeanDefinitionRegistry) {

            return (BeanDefinitionRegistry)context;

        } else if (context instanceof AbstractApplicationContext) {

            return (BeanDefinitionRegistry)((AbstractApplicationContext)context).getBeanFactory();

        } else {

            throw new IllegalStateException("Could not locate BeanDefinitionRegistry");

        }

    }
(2) createBeanDefinitionLoader(BeanDefinitionRegistry registry, Object[] sources)
通过BeanDefinitionLoader的构造方法把参数(注册表、资源)传进去,然后创建BeanDefinitionLoader。
    protected BeanDefinitionLoader createBeanDefinitionLoader(BeanDefinitionRegistry registry, Object[] sources) {

        return new BeanDefinitionLoader(registry, sources);

    }
(3) load() 调用BeanDefinitionLoader 对象的方法 load();把资源全部加载
    // 遍历所有资源
    public int load() {

        int count = 0;

        Object[] var2 = this.sources;

        int var3 = var2.length;

        for(int var4 = 0; var4 < var3; ++var4) {

            Object source = var2[var4];

            count += this.load(source);

        }

        return count;

    }

    // 根据资源的类型,调用不同的重载方法进行加载

    private int load(Object source) {

        Assert.notNull(source, "Source must not be null");

        if (source instanceof Class) {

            return this.load((Class)source);

        } else if (source instanceof Resource) {

            return this.load((Resource)source);

        } else if (source instanceof Package) {

            return this.load((Package)source);

        } else if (source instanceof CharSequence) {

            return this.load((CharSequence)source);

        } else {

            throw new IllegalArgumentException("Invalid source type " + source.getClass());

        }

    }
⑥ 刷新上下文
    private void refreshContext(ConfigurableApplicationContext context) {

        this.refresh(context); // a. 刷新底层的 ApplicationContext

        if (this.registerShutdownHook) {

            try {
           /* registerShutdownHook 是一个公共方法,它可以创建线程并将其注册到 Java 虚拟机,
                  以便在关机时运行,以关闭 ApplicationContext  */
                context.registerShutdownHook();

            } catch (AccessControlException var3) {

            }

        }

    }
a. refresh ( ApplicationContext context ) 刷新底层的ApplicationContext
refresh()调用了 ApplicationContext 的一个子接口的实现类AvstractApplicationContext (抽象类) 中的 refresh() 方法
    protected void refresh(ApplicationContext applicationContext) {

        Assert.isInstanceOf(AbstractApplicationContext.class, applicationContext);

        ((AbstractApplicationContext)applicationContext).refresh();

    }
    public void refresh() throws BeansException, IllegalStateException {

        synchronized(this.startupShutdownMonitor) {
        // 准备刷新上下文

            this.prepareRefresh();
        // 通知子类刷新内部Bean工厂

            ConfigurableListableBeanFactory beanFactory = this.obtainFreshBeanFactory();
        // 准备Bean工厂, 在上下文中使用

            this.prepareBeanFactory(beanFactory);

            try {
            // 允许在上下文子类中对Bean工厂进行后处理

                this.postProcessBeanFactory(beanFactory);
             // 调用上下文中注册为Bean 的工厂处理器

                this.invokeBeanFactoryPostProcessors(beanFactory);
            // 注册拦截Bean创建的bean处理器

                this.registerBeanPostProcessors(beanFactory);
            // 注册上下文中的消息源

                this.initMessageSource();
            // 初始化事件广播机制

                this.initApplicationEventMulticaster();
            // 在特定上下文子类中初始化其他特殊Bean

                this.onRefresh();
            // 检查注册监听器Bean

                this.registerListeners();
            // 实例化所有剩余单例(非惰性)完成BeanFactory的初始化

                this.finishBeanFactoryInitialization(beanFactory);
            // 发布相应的事件

                this.finishRefresh();

            } catch (BeansException var9) {

                if (this.logger.isWarnEnabled()) {

                    this.logger.warn("Exception encountered during context initialization - cancelling refresh attempt: " + var9);

                }

            // 销毁已创建的单例,避免资源的浪费

                this.destroyBeans();
            // 重置活动的标志

                this.cancelRefresh(var9);

                throw var9;

            } finally {
            // 重置Spring中的常见内省缓存

                this.resetCommonCaches();

            }

        }

    }
通过以上代码可以看到,这里在做各种初始化工作, 后面有个 finishBeanFactoryInitialization() 方法完成BeanFactory的初始化,我们重点看下这个;该方法进行了非懒加载beans的初始化工作。进去看一下。
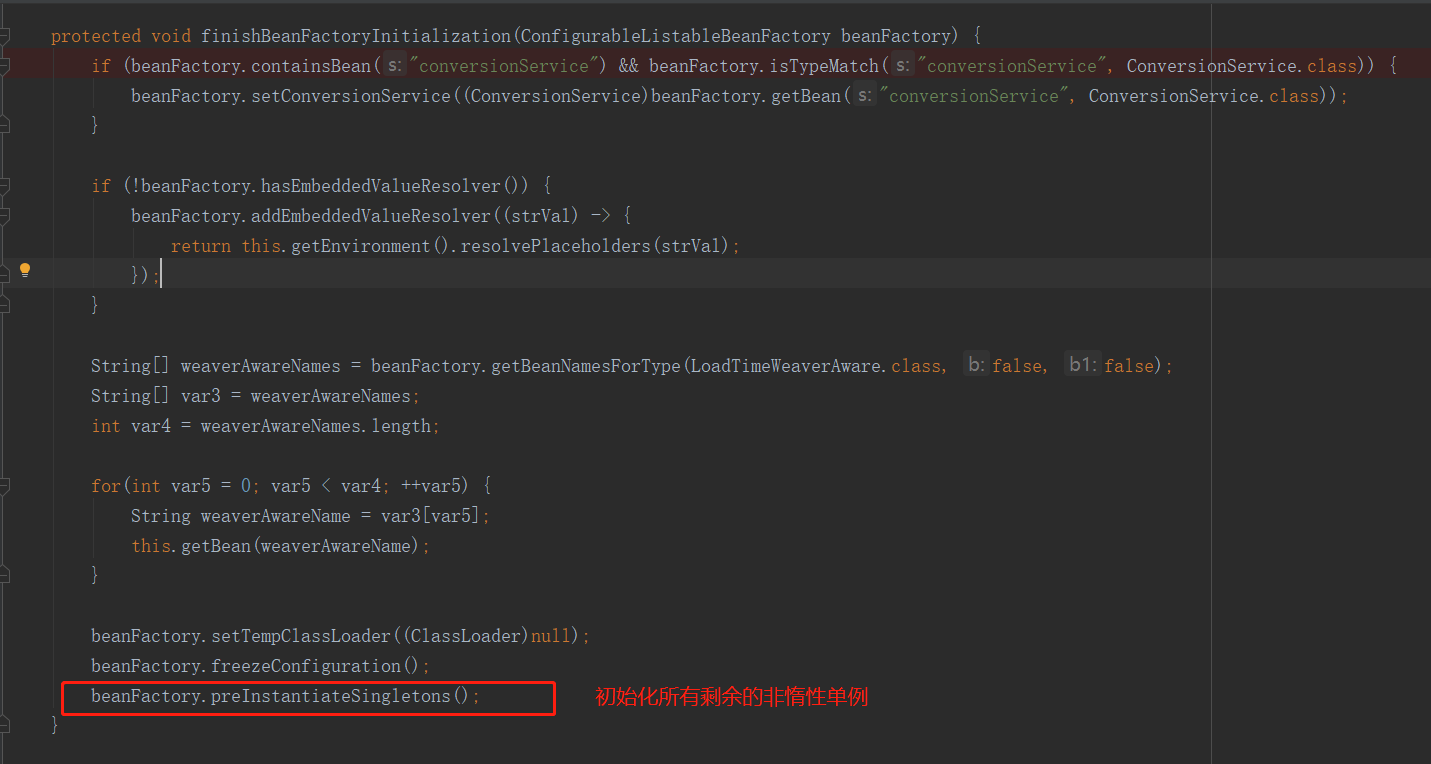
我们看到,最后调用了 beanFactory的 preInstantiateSingletons();再进去看一下,beanFactory - -ConfigurableListableBeanFactory 只有一个实现类 DefaultListableBeanFactory 实现了 该方法,进去看看具体如何实现的。
    public void preInstantiateSingletons() throws BeansException {

        if (this.logger.isDebugEnabled()) {

            this.logger.debug("Pre-instantiating singletons in " + this);

        }

        List<String> beanNames = new ArrayList(this.beanDefinitionNames);

        Iterator var2 = beanNames.iterator();

        while(true) {

            String beanName;

            Object bean;

            do {

                while(true) {

                    RootBeanDefinition bd;

                    do {

                        do {

                            do {

                                if (!var2.hasNext()) {

                                    var2 = beanNames.iterator();

                                    while(var2.hasNext()) {

                                        beanName = (String)var2.next();

                                        Object singletonInstance = this.getSingleton(beanName);

                                        if (singletonInstance instanceof SmartInitializingSingleton) {

                                            SmartInitializingSingleton smartSingleton = (SmartInitializingSingleton)singletonInstance;

                                            if (System.getSecurityManager() != null) {

                                                AccessController.doPrivileged(() -> {

                                                    smartSingleton.afterSingletonsInstantiated();

                                                    return null;

                                                }, this.getAccessControlContext());

                                            } else {

                                                smartSingleton.afterSingletonsInstantiated();

                                            }

                                        }

                                    }

                                    return;

                                }

                                beanName = (String)var2.next();

                                bd = this.getMergedLocalBeanDefinition(beanName);

                            } while(bd.isAbstract());

                        } while(!bd.isSingleton());

                    } while(bd.isLazyInit());

                    if (this.isFactoryBean(beanName)) {

                        bean = this.getBean("&" + beanName);

                        break;

                    }

                    this.getBean(beanName);

                }

            } while(!(bean instanceof FactoryBean));

            FactoryBean<?> factory = (FactoryBean)bean;

            boolean isEagerInit;

            if (System.getSecurityManager() != null && factory instanceof SmartFactoryBean) {

                SmartFactoryBean var10000 = (SmartFactoryBean)factory;

                ((SmartFactoryBean)factory).getClass();

                isEagerInit = (Boolean)AccessController.doPrivileged(var10000::isEagerInit, this.getAccessControlContext());

            } else {

                isEagerInit = factory instanceof SmartFactoryBean && ((SmartFactoryBean)factory).isEagerInit();

            }

            if (isEagerInit) {

                this.getBean(beanName);

            }

        }

    }
猛地一看有点多顿时不知从何下手,但仔细看看,好像整段代码都围绕着 getBean()来写的,由此推测getBean才是重头戏,找到重点那就跟踪看一下,发现进入了AbstractBeanFactory类,(好像有点熟悉,先不管继续向下看),在getBean中最终调用了AbstractBeanFactory中的doGetBean()方法()。
    protected <T> T doGetBean(String name, @Nullable Class<T> requiredType, @Nullable Object[] args, boolean typeCheckOnly) throws BeansException {

        String beanName = this.transformedBeanName(name);

        Object sharedInstance = this.getSingleton(beanName);

        Object bean;

        if (sharedInstance != null && args == null) {

            if (this.logger.isDebugEnabled()) {

                if (this.isSingletonCurrentlyInCreation(beanName)) {

                    this.logger.debug("Returning eagerly cached instance of singleton bean '" + beanName + "' that is not fully initialized yet - a consequence of a circular reference");

                } else {

                    this.logger.debug("Returning cached instance of singleton bean '" + beanName + "'");

                }

            }

            bean = this.getObjectForBeanInstance(sharedInstance, name, beanName, (RootBeanDefinition)null);

        } else {

            if (this.isPrototypeCurrentlyInCreation(beanName)) {

                throw new BeanCurrentlyInCreationException(beanName);

            }

            BeanFactory parentBeanFactory = this.getParentBeanFactory();

            if (parentBeanFactory != null && !this.containsBeanDefinition(beanName)) {

                String nameToLookup = this.originalBeanName(name);

                if (parentBeanFactory instanceof AbstractBeanFactory) {

                    return ((AbstractBeanFactory)parentBeanFactory).doGetBean(nameToLookup, requiredType, args, typeCheckOnly);

                }

                if (args != null) {

                    return parentBeanFactory.getBean(nameToLookup, args);

                }

                return parentBeanFactory.getBean(nameToLookup, requiredType);

            }

            if (!typeCheckOnly) {

                this.markBeanAsCreated(beanName);

            }

            try {

                RootBeanDefinition mbd = this.getMergedLocalBeanDefinition(beanName);

                this.checkMergedBeanDefinition(mbd, beanName, args);

                String[] dependsOn = mbd.getDependsOn();

                String[] var11;

                if (dependsOn != null) {

                    var11 = dependsOn;

                    int var12 = dependsOn.length;

                    for(int var13 = 0; var13 < var12; ++var13) {

                        String dep = var11[var13];

                        if (this.isDependent(beanName, dep)) {

                            throw new BeanCreationException(mbd.getResourceDescription(), beanName, "Circular depends-on relationship between '" + beanName + "' and '" + dep + "'");

                        }

                        this.registerDependentBean(dep, beanName);

                        try {

                            this.getBean(dep);

                        } catch (NoSuchBeanDefinitionException var24) {

                            throw new BeanCreationException(mbd.getResourceDescription(), beanName, "'" + beanName + "' depends on missing bean '" + dep + "'", var24);

                        }

                    }

                }

                if (mbd.isSingleton()) {

                    sharedInstance = this.getSingleton(beanName, () -> {

                        try {

                            return this.createBean(beanName, mbd, args);

                        } catch (BeansException var5) {

                            this.destroySingleton(beanName);

                            throw var5;

                        }

                    });

                    bean = this.getObjectForBeanInstance(sharedInstance, name, beanName, mbd);

                } else if (mbd.isPrototype()) {

                    var11 = null;

                    Object prototypeInstance;

                    try {

                        this.beforePrototypeCreation(beanName);

                        prototypeInstance = this.createBean(beanName, mbd, args);

                    } finally {

                        this.afterPrototypeCreation(beanName);

                    }

                    bean = this.getObjectForBeanInstance(prototypeInstance, name, beanName, mbd);

                } else {

                    String scopeName = mbd.getScope();

                    Scope scope = (Scope)this.scopes.get(scopeName);

                    if (scope == null) {

                        throw new IllegalStateException("No Scope registered for scope name '" + scopeName + "'");

                    }

                    try {

                        Object scopedInstance = scope.get(beanName, () -> {

                            this.beforePrototypeCreation(beanName);

                            Object var4;

                            try {

                                var4 = this.createBean(beanName, mbd, args);

                            } finally {

                                this.afterPrototypeCreation(beanName);

                            }

                            return var4;

                        });

                        bean = this.getObjectForBeanInstance(scopedInstance, name, beanName, mbd);

                    } catch (IllegalStateException var23) {

                        throw new BeanCreationException(beanName, "Scope '" + scopeName + "' is not active for the current thread; consider defining a scoped proxy for this bean if you intend to refer to it from a singleton", var23);

                    }

                }

            } catch (BeansException var26) {

                this.cleanupAfterBeanCreationFailure(beanName);

                throw var26;

            }

        }

        if (requiredType != null && !requiredType.isInstance(bean)) {

            try {

                T convertedBean = this.getTypeConverter().convertIfNecessary(bean, requiredType);

                if (convertedBean == null) {

                    throw new BeanNotOfRequiredTypeException(name, requiredType, bean.getClass());

                } else {

                    return convertedBean;

                }

            } catch (TypeMismatchException var25) {

                if (this.logger.isDebugEnabled()) {

                    this.logger.debug("Failed to convert bean '" + name + "' to required type '" + ClassUtils.getQualifiedName(requiredType) + "'", var25);

                }

                throw new BeanNotOfRequiredTypeException(name, requiredType, bean.getClass());

            }

        } else {

            return bean;

        }

    }
在doGetBean()方法中看到createBean(); 该方法在这里并没有实现;由AbstractBeanFactory的实现类 AbstractAutowireCapableBeanFactory 实现了该方法;该类时一个抽象类。
    public Object createBean(Class<?> beanClass, int autowireMode, boolean dependencyCheck) throws BeansException {

        RootBeanDefinition bd = new RootBeanDefinition(beanClass, autowireMode, dependencyCheck);

        bd.setScope("prototype");

        return this.createBean(beanClass.getName(), bd, (Object[])null);

    }

    protected Object createBean(String beanName, RootBeanDefinition mbd, @Nullable Object[] args) throws BeanCreationException {

        if (this.logger.isDebugEnabled()) {

            this.logger.debug("Creating instance of bean '" + beanName + "'");

        }

        RootBeanDefinition mbdToUse = mbd;

        Class<?> resolvedClass = this.resolveBeanClass(mbd, beanName, new Class[0]);

        if (resolvedClass != null && !mbd.hasBeanClass() && mbd.getBeanClassName() != null) {

            mbdToUse = new RootBeanDefinition(mbd);

            mbdToUse.setBeanClass(resolvedClass);

        }

        try {

            mbdToUse.prepareMethodOverrides();

        } catch (BeanDefinitionValidationException var9) {

            throw new BeanDefinitionStoreException(mbdToUse.getResourceDescription(), beanName, "Validation of method overrides failed", var9);

        }

        Object beanInstance;

        try {

            beanInstance = this.resolveBeforeInstantiation(beanName, mbdToUse);

            if (beanInstance != null) {

                return beanInstance;

            }

        } catch (Throwable var10) {

            throw new BeanCreationException(mbdToUse.getResourceDescription(), beanName, "BeanPostProcessor before instantiation of bean failed", var10);

        }

        try {

            beanInstance = this.doCreateBean(beanName, mbdToUse, args);

            if (this.logger.isDebugEnabled()) {

                this.logger.debug("Finished creating instance of bean '" + beanName + "'");

            }

            return beanInstance;

        } catch (ImplicitlyAppearedSingletonException | BeanCreationException var7) {

            throw var7;

        } catch (Throwable var8) {

            throw new BeanCreationException(mbdToUse.getResourceDescription(), beanName, "Unexpected exception during bean creation", var8);

        }

    }
这里就可以看出来,这里是创建bean的核心方法了,头铁着又向下跟了一段,最终了了的发现其底层是cglib和jdk的aop切面来实现的。差点迷失在Spring庞大的代码里出不来。到这里run方法的流程就差不多执行完毕了。还有最后一步。
结语
最后再来总结一下,springboot大体的执行流程
1. prepareRefresh:预处理,包括属性验证等。
2. prepareBeanFactory:主要对beanFactory设置了相关属性,并注册了3个Bean:environment,systemProperties和systemEnvironment供程序中注入使用。
3. invokeBeanFactoryPostProcessors:执行所以BeanFactoryPostProcessor的postProcessBeanFactory方法。
4. registerBeanPostProcessors:注册BeanFactoryPostProcessors到BeanFactory。
5. initMessageSource:初始化MessageSource。
6. initApplicationEventMulticaster:初始化事件广播器ApplicationEventMulticaster。
7. registerListeners:事件广播器添加监听器,并广播早期事件。
8. finishBeanFactoryInitialization:结束BeanFactory的实例化,也就是在这真正去创建单例Bean。
9. finishRefresh:刷新的收尾工作。清理缓存,初始化生命周期处理器等等。
10. destroyBeans:销毁创建的bean。
11. cancelRefresh:取消刷新。
12. resetCommonCaches:清理缓存。
SpringBoot 2.0.3 源码解析的更多相关文章
- SpringBoot的条件注解源码解析
SpringBoot的条件注解源码解析 @ConditionalOnBean.@ConditionalOnMissingBean 启动项目 会在ConfigurationClassBeanDefini ...
- Masonry1.0.2 源码解析
在了解Masonry框架之前,有必要先了解一下自动布局的概念.在iOS6之前,UI布局的方式是通过frame属性和Autoresizing来完成的,而在iOS6之后,苹果公司推出了AutoLayout ...
- YYModel V1.0.4源码解析
YYKit出现了很长时间了,一直想要详细解析一下它的源码,都是各种缘由推迟了. 最近稍微闲了一点,决定先从最简单的YYModel开始吧. 首先,我也先去搜索了一下YYModel相关的文章,解析主要AP ...
- SpringBoot exception异常处理机制源码解析
一.Spring Boot默认的异常处理机制 1:浏览器默认返回效果 2:原理解析 为了便于源码跟踪解析,在·Controller中手动设置异常. @RequestMapping(value=&quo ...
- SpringBoot自动配置的源码解析
首先,写源码分析真的很花时间,所以希望大家转的时候也请注明一下,Thanks♪(・ω・)ノ SpringBoot最大的好处就是对于很多框架都默认的配置,让我们开发的时候不必为了大一堆的配置文件头疼,关 ...
- springboot2.0.3源码篇 - 自动配置的实现,发现也不是那么复杂
前言 开心一刻 女儿: “妈妈,你这么漂亮,当年怎么嫁给了爸爸呢?” 妈妈: “当年你爸不是穷嘛!‘ 女儿: “穷你还嫁给他!” 妈妈: “那时候刚刚毕业参加工作,领导对我说,他是我的扶贫对象,我年轻 ...
- 【JUC源码解析】CyclicBarrier
简介 CyclicBarrier,一个同步器,允许多个线程相互等待,直到达到一个公共屏障点. 概述 CyclicBarrier支持一个可选的 Runnable 命令,在一组线程中的最后一个线程到达之后 ...
- Redis系列(十):数据结构Set源码解析和SADD、SINTER、SDIFF、SUNION、SPOP命令
1.介绍 Hash是以K->V形式存储,而Set则是K存储,空间节省了很多 Redis中Set是String类型的无序集合:集合成员是唯一的. 这就意味着集合中不能出现重复的数据.可根据应用场景 ...
- ArrayList、CopyOnWriteArrayList源码解析(JDK1.8)
本篇文章主要是学习后的知识记录,存在不足,或许不够深入,还请谅解. 目录 ArrayList源码解析 ArrayList中的变量 ArrayList构造函数 ArrayList中的add方法 Arra ...
随机推荐
- Wpf发送接收 win32消息
#region WPF发送和接收win32消息 public const int WM_GETTEXT = 0x0D; public const int WM_SETTEXT = 0x0C; publ ...
- 我写的一个Qt 显示二维码( QR Code)的控件(可以去掉对 libpthread 的依赖,而且编译出的库文件可以在 vc2010 的release 模式下使用)
最近一个项目需要显示二维码,所以花了点时间(只用了一个晚上,写的很不完善),写了个显示二维码的控件.当然这个控件用到了些开源的代码,比如qrencode,所以我也打算把我的代码开源. 我的代码参考了 ...
- easyui tree后台传json处理问题
一.tree json格式 [ { "id": 1, "text": "权限管理", "iconCls": " ...
- BI-学习之 新概念介绍
什么是统一维度模型 层次结构.级别.成员和度量值 什么是MDX MDX与SQL的区别 什么是数据仓库 什么是OLAP数据分析引擎 BI企业级解决方案 什么是统一维度模型 维度(dimension)是描 ...
- The Portable Executable File Format from Top to Bottom(每个结构体都非常清楚)
The Portable Executable File Format from Top to Bottom Randy KathMicrosoft Developer Network Technol ...
- Qt学习虚拟机--基于MSYS2-MinGW环境并带有各种开源的软件库!
Qt学习虚拟机--基于MSYS2-MinGW环境并带有各种开源的软件库!虚拟机地址,VM10和以上:http://pan.baidu.com/s/1slcTA49包含两个分卷压缩包,加起来5GB多. ...
- 伪元素黑魔法:一个替代onerror解决图片加载失败的方案
问题的引出是这样的,在一个项目中有大量的页面主体是table做数据展示,所以就封装了一个table的组件,提供动态渲染的方案.有个问题是数据类型中有图片,对于图片的加载失败我们需要做容错.一般我们的思 ...
- 还在被大妈灵魂拷问?使用Python轻松完成垃圾分类!
目录 0 环境 1 引言 2 思路 3 图像分类 4 总结 0 环境 Python版本:3.6.8 系统版本:macOS Mojave Python Jupyter Notebook 1 引言 七月了 ...
- navicat12.0.29破解操作步骤
navicat12.0.29破解操作步骤 2018年07月11日 22:21:17 xijian0521 阅读数:1620 我的百度网盘地址: 下载点这里 以管理员身份运行 此注册机: 打开注册 ...
- .netcore Control调用View方法
控制器代码如下: 视图代码如下: 完整项目代码参考网址:https://github.com/gamecc666/BackTipFrontProject 版权声明:本文为博主原创文章,如需转载,请标明 ...