vue学习笔记(十)路由
前言
在上一篇博客vue学习笔记(九)vue-cli中的组件通信内容中,我们学习组件通信的相关内容和进行了一些组件通信的小练习,相信大家已经掌握了vue-cli中的组件通信,而本篇博客将会带你更上一层楼,说实话有关路由的知识我有提到过一点,使用webstorm搭建vue-cli项目这篇博客结尾的示例就是有关路由的一点小知识,但是当时只是做了一个小小的案例,而本篇博客将会详细讲解vue中的路由相关知识,那么一起来看看吧!
本章目标
- 了解Vue Router的简单介绍
- 学会vue路由的传参方式
Vue Router的介绍
Vue Router是一个Vue核心插件,是Vue.js官方的路由管理器。它和 Vue.js 的核心深度集成,让构建单页面应用变得易如反掌。vue的单页面应用是基于路由和组件的,路由用于设定访问路径,并将路径和组件映射起来。传统的页面应用,是用一些超链接来实现页面切换和跳转的。在vue router单页面应用中,则是路径之间的切换,也就是组件的切换。包含的功能有:
- 嵌套的路由/视图表
- 模块化的、基于组件的路由配置
- 路由参数、查询、通配符
- 基于 Vue.js 过渡系统的视图过渡效果
- 细粒度的导航控制
- 带有自动激活的 CSS class 的链接
- HTML5 历史模式或 hash 模式,在 IE9 中自动降级
- 自定义的滚动条行为
参考资源
中文帮助:https://router.vuejs.org/zh/
英文帮助:https://router.vuejs.org/
Git源码:https://github.com/vuejs/vue-router
vue router中有三个比较重要的概念,route,routes,router,接下来我们一一介绍它们。
- route,它是一个路由,代表一个访问的地址。
- routes 是一组路由,把route组合起来,形成一个数组。
- router 是一个机制,相当于一个管理者,它来管理路由,举个例子来说:假设我们点击按钮需要查询数据怎么办?这时router 就起作用了,它到routes 中去查找,去找到对应查询数据的路由,然后将数组返回到页面上。
- 客户端中的路由,实际上就是dom 元素的显示和隐藏。当页面中显示home 内容的时候,about 中的内容全部隐藏,反之也是一样。客户端路由有两种实现方式:基于hash 和基于html5 history api。
接下来我们通过两种方式来实现vue-router的使用,这两种方式分别是网页版的vue-router的使用和vue-cli版vue-router的使用
网页版
直接下载 / CDN
https://unpkg.com/vue-router/dist/vue-router.js
Unpkg.com 提供了基于 NPM 的 CDN 链接。上面的链接会一直指向在 NPM 发布的最新版本。你也可以像 https://unpkg.com/vue-router@2.0.0/dist/vue-router.js 这样指定 版本号 或者 Tag。
NPM
使用nodejs包管理器安装
npm install vue-router
如果在一个模块化工程中使用它,必须要通过 Vue.use() 明确地安装路由功能
import Vue from 'vue'

import VueRouter from 'vue-router'

Vue.use(VueRouter)
用 Vue.js + Vue Router 创建单页应用,是非常简单的。使用 Vue.js ,我们已经可以通过组合组件来组成应用程序,当你要把 Vue Router 添加进来,我们需要做的是,将组件 (components) 映射到路由 (routes),然后告诉 Vue Router 在哪里渲染它们
<!DOCTYPE html>

<html lang="en">

<head>

    <meta charset="UTF-8">

    <title>网页版vue-router</title>

</head>

<body>

<div id="app">

    <h1>{{msg}}</h1>

    <!--使用router-link组件来导航-->

    <!--通过传入to属性指定链接-->

    <!--router-link组件默认渲染成a标签-->

    <router-link to="/foo">Foo</router-link>

    <router-link to="/bar">Bar</router-link>

    <!--路由出口-->

    <!--路由匹配到的组件将渲染到这里-->

    <router-view></router-view>

</div>

<script src="https://unpkg.com/vue/dist/vue.js"></script>

<script src="https://unpkg.com/vue-router/dist/vue-router.js"></script>

<script>

  //1.定义组件

  const foo={template:'<h1>这是foo组件</h1>'}

  const bar={template: '<h1>这是bar组件</h1>'}

  //2.定义routes

  const routes=[

    {

      path:'/foo',

      component:foo,

      name:foo,

    },

    {

      path:'/bar',

      component:bar,

      name:bar

    }

  ]

  //3.定义router

  const router=new VueRouter({

    routes  //相当于routes:routes

  })

  //4.创建和挂载根实例

  const  vm=new Vue({

    el:'#app',  //挂载元素

    data:{

      msg:'网页版vue-router'

    },

    router:router

  })

</script>

</body>

</html>
结果:


可以看到我们已经实现的简单的路由切换,但是这种方式我们以后的开发中极少用到,作为初学者还是有必要讲解一下
步骤分析:
- 引入js和挂载元素
- 定义组件和定义routes管理每一个路由,一个路由可以对应一个组件,例如示例中/foo对应foo组件,/bar对应bar组件
- 定义router,用来处理请求每一个route对应的信息
注意:<router-view></router-view>这个标签特别重要,如果没有这个标签vue-router将会失效。
vue-cli版
接下来我带大家讲解vue-cli版vue-router的使用,这也是后面开发中常用的手法
安装:
npm install vue-router

yarn add vue-router
这两种方式任意选一种都可以
若在构建vue-cli的时候,在询问“nstall vue-router”(是否安装vue-router)时,选择“Y”,这里就不用重复安装vue-router。使用WebStorm创建一个vue-cli项目,选择使用router:

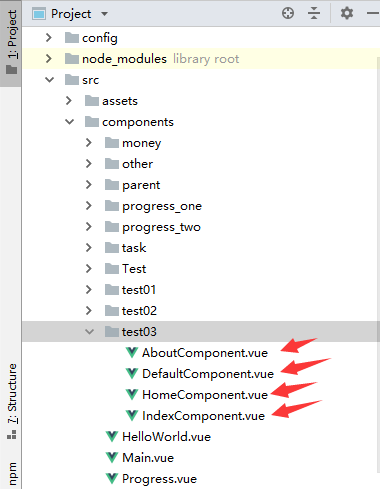
(1)/src/components/test03新建4个组件,分别是IndexComponent.vue,HomeComponent.vue,DefaultComponent.vue,AboutComponent.vue,新建目录结构如下:
(2)在对应的组件写上相应的代码
IndexComponent.vue
<template>

    <div>

      <h1>{{msg}}</h1>

    </div>

</template>

<script>

    export default {

        name: "IndexComponent",

      data(){

          return{

            msg:'这是index组件'

          }

      }

    }

</script>

<style scoped>

</style>
HomeComponent.vue
<template>

    <div>

      <h1>{{msg}}</h1>

    </div>

</template>

<script>

    export default {

        name: "HomeComponent",

      data(){

          return{

            msg:'这是home组件'

          }

      }

    }

</script>

<style scoped>

  h1{

    color: red;

  }

</style>
AboutComponent.vue
<template>

    <div>

      <h1>{{msg}}</h1>

    </div>

</template>

<script>

    export default {

        name: "AboutComponent",

      data(){

          return{

            msg:'这是about组件'

          }

      }

    }

</script>

<style scoped>

  h1{

    color: green;

  }

</style>
DefaultComponent.vue
<template>

    <div>

      <h1>{{msg}}</h1>

    </div>

</template>

<script>

    export default {

        name: "DefaultComponent",

      data(){

          return{

            msg:'这是default组件'

          }

      }

    }

</script>

<style scoped>

  h1{

    color: pink;

  }

</style>
(3)自定义router并在main.js注册
其实我们可以自定义router,自定义的router和原来的router都差不多,我们/src/router新建一个test.js并编写对应的代码
test.js
import Vue from 'vue'

import Router from  'vue-router'

import Index from '@/components/test03/IndexComponent'

import Home from '@/components/test03/HomeComponent'

import Default from '@/components/test03/DefaultComponent'

import About from '@/components/test03/AboutComponent'

Vue.use(Router)

export  default  new Router({

  routes:[

    {

      path:'/',

      component:Index,

      name:Index

    },

    {

      path:'/home',

      component:Home,

      name: Home

    },

    {

      path:'/about',

      component:About,

      name:About

    },

    {

      path:'/default',

      component:Default,

      name:Default

    }

  ]

})
main.js
// The Vue build version to load with the `import` command

// (runtime-only or standalone) has been set in webpack.base.conf with an alias.

import Vue from 'vue'
// import router from './router' //这个是最开始的路由
import  router from './router/test'  //修改原来的路由,换成自己定义的路由

Vue.config.productionTip = false

/* eslint-disable no-new */

new Vue({

  el: '#app',

  router,

  components: {},

  template: ''

})
修改之后IndexComponent.vue
<template>

    <div>

      <h1>{{msg}}</h1>

      <router-link to="/home">Home</router-link>

      <router-link to="/about">About</router-link>

      <router-link to="/default">Default</router-link>

      <router-view></router-view>

    </div>

</template>

<script>

    export default {

        name: "IndexComponent",

      data(){

          return{

            msg:'这是index组件'

          }

      }

    }

</script>

<style scoped>

</style>
index.html
<!DOCTYPE html>

<html>

  <head>

    <meta charset="utf-8">

    <meta name="viewport" content="width=device-width,initial-scale=1.0">

    <title>vue_01</title>

  </head>

  <body>

    <div id="app">

      <!--对应的组件内容渲染到router-view中-->

      <router-view></router-view>

    </div>

    <!-- built files will be auto injected -->

  </body>

</html>
(4)测试结果

vue-router两种方式的使用我已经讲解完成了,写得如此详细,想必大家都可以看得懂。
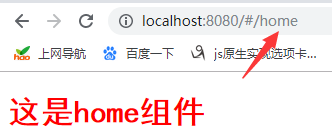
路由模式
vue-router 默认 hash 模式 —— 使用 URL 的 hash 来模拟一个完整的 URL,于是当 URL 改变时,页面不会重新加载
http://localhost:8080/#/home
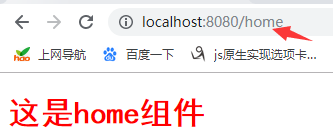
如果不想要很hash,可以用路由的 history 模式,这种模式充分利用 history.pushState API 来完成 URL 跳转而无须重新加载页面
const router = new VueRouter({

  mode: 'history',

  routes: [...]

}
当使用 history 模式时,URL 就像正常的 url
http://localhost:8080/home
test.js
import Vue from 'vue'

import Router from  'vue-router'

import Index from '@/components/test03/IndexComponent'

import Home from '@/components/test03/HomeComponent'

import Default from '@/components/test03/DefaultComponent'

import About from '@/components/test03/AboutComponent'

Vue.use(Router)

export  default  new Router({

  mode:'history',

  routes:[

    {

      path:'/',

      component:Index,

      name:Index

    },

    {

      path:'/home',

      component:Home,

      name: Home

    },

    {

      path:'/about',

      component:About,

      name:About

    },

    {

      path:'/default',

      component:Default,

      name:Default

    }

  ]

})
结果:
不过这种模式需要后台配置支持。如果后台没有正确的配置,当用户在浏览器直接访问 http://site.com/user/id 就会返回 404,详细请参考:https://router.vuejs.org/zh/guide/essentials/history-mode.html
vue路由的传参方式
在讲解vue路由传参方式之前我们需要回顾下组件通信的相关知识,我们知道要实现参数传递如果依靠之前所学的知识,无非三种,父组件向子组件传递参数,子组件向父组件传递参数,非父子组件传递参数,而vue的路由传参的功能就特别强大,可以向任意路由传递参数,接触之前我们先来回顾一下vue中的非父子组件的通信方式吧!
(1)新建目录用于非父子组件通信
在src/components新建test04目录和两个组件分别:BrotherComponent.vue,SisterComponent.vue,以及在src/assets下创建一个bus.js文件,创建之后的目录如下

(2)bus.js充当总线
event.js这个文件中我们只创建了一个新的Vue实例,以后它就承担起了组件之间通信的用来充当总线桥梁了,也就是中央事件总线,为的就是将BrotherComponent.vue和SisterComponent.vue联系起来
bus.js
//方式一

import Vue from 'Vue'

export  default  new Vue

/*方式二

let bus=new Vue

export  default  bus

*/
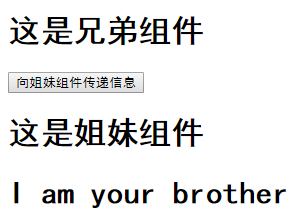
BrotherComponent.vue
<template>

    <div>

      <h1>{{msg}}</h1>

      <button @click="sendMsg()">向姐妹组件传递信息</button>

      <sister></sister>

    </div>

</template>

<script>

    //导入总线

    import  bus from '../../assets/bus'

    //导入姐妹组件

    import  sister from './SisterComponent'

    export default {

        name: "BrotherComponent",

      data(){

        return{

          msg:'这是兄弟组件',

          tips:'I am your brother'

        }

      },

        components:{

          sister  //注册姐妹组件

        },

        methods:{

          sendMsg(){

            bus.$emit('send',this.tips);

          }

        }

    }

</script>

<style scoped>

</style>
在这个组件中首先是导入的总线和姐妹组件,然后注册了姐妹组件,我们在响应点击事件的sendMsg函数中用$emit触发了一个自定义的send事件,并传递了一个字符串参数。
这个参数就是需要传递个姐妹组件的值。$emit实例方法触发当前实例(这里的当前实例就是bus)上的事件,附加参数都会传给监听器回调
SisterComponent.vue
<template>

    <div>

      <h1>这是姐妹组件</h1>

      <h1>{{msg}}</h1>

    </div>

</template>

<script>

    //导入总线

    import  bus from '../../assets/bus'

    export default {

        name: "SisterComponent",

      data(){

          return{

            msg:'',

          }

      },

      mounted(){

      },

      methods:{

          getMsg(){

            bus.$on('send',data=>{

              this.msg=data;

            })

          }

      },

      mounted(){

          this.getMsg();

      }

    }

</script>

<style scoped>

</style>
在这个组件中,我们在mounted中,监听了send,并把传递过来的字符串参数传递给了$on监听器的回调函数,mounted:是一个Vue生命周期中的钩子函数,简单点说就类似于jquery的ready,Vue会在文档加载完毕后调用mounted函数,$on:监听当前实例上的自定义事件(此处当前实例为bus)。事件可以由$emit触发,回调函数会接收所有传入事件触发函数($emit)的额外参数
(3)新建router
在src/router目录下新建common.js路由并写上对应的代码
common.js
import  Vue from 'vue'

import Router from 'vue-router'

import Brother from '@/components/test04/BrotherComponent'

import sister from '@/components/test04/SisterComponent'

Vue.use(Router)

export  default new Router({

    routes:[

      {

        path:'/',

        name:Brother,

        component:Brother

      },

      {

        path:'/sister',

        name:sister,

        component:sister,

      }

    ],

})
(4)main.js注册新增的common路由
// The Vue build version to load with the `import` command

// (runtime-only or standalone) has been set in webpack.base.conf with an alias.

import Vue from 'vue'

// import router from './router'

// import router from './router/hello'

// import  router from './router/test'

import  router from './router/common'

Vue.config.productionTip = false

/* eslint-disable no-new */

new Vue({

  el: '#app',

  router,

  components: {},

  template: ''

})
结果:
总结:
- 创建一个事件总线,例如示例中event.js,用它作为通信桥梁
- 在需要传值的组件中用bus.$emit触发一个自定义事件,并传递参数
- 在需要接收数据的组件中用bus.$on监听自定义事件,并在回调函数中处理传递过来的参数
非父子组件通信我们回顾了一遍之后就进入正式换节了,我会讲解一些常用的方法
vue-router的params参数传递
语法:
- 发送参数的组件,this.$router.push({name:'路由的名称',params:{key1:value1,key2:value2,....}})
- 接收参数的组件,this.$route.params.参数名称
注意:接收参数的时候使用的是this.$route而不是this.$router
示例
(1)新建目录和组件
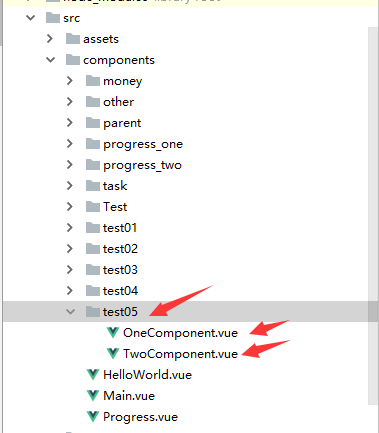
在src/components新建test05目录和OneComponent.vue和TwoComponent.vue两个组件,新建目录和组件之后的结构如下
(2)组件编写对应的代码
OneComponent.vue
<template>

    <div>

      <button @click="sendMsg()">发送消息</button>

    </div>

</template>

<script>

    export default {

        name: "OneComponent",

      data(){

          return{

            code:'我是通过params传过来的'

          }

      },

      methods:{

          sendMsg(){

            this.$router.push({

              name:'two', // 路由的名称,在定义route的时候可以自己定义

              params:{

                code:this.code

              }

            });

          }

      }

    }

</script>

<style scoped>

</style>
TwoComponent,vue
<template>

    <div>

      <h1>{{msg}}</h1>

      <h2>{{this.$route.params.code}}</h2>

    </div>

</template>

<script>

    export default {

        name: "TwoComponent",

        data(){

            return{

              msg:''

            }

        },

        mounted(){

          this.msg=this.$route.params.code;

        }

    }

</script>

<style scoped>

</style>
(3)新建router并在main注册
在src/router目录新建one.js路由并在main.js注册
one.js
import Vue from 'vue'
import Router from 'vue-router'
import one from '@/components/test05/OneComponent'
import two from '@/components/test05/TwoComponent'
Vue.use(Router)
export default new Router({
routes:[
{
path:'/',
name:one,
component:one
},
{
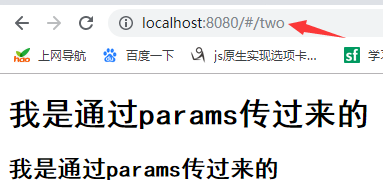
path:"/two",
name:'two', //路由的名称,一定需要加单引号或者双引号,否则找不到
component:two
}
]
})
main.js
// The Vue build version to load with the `import` command

// (runtime-only or standalone) has been set in webpack.base.conf with an alias.

import Vue from 'vue'

// import router from './router'

// import router from './router/hello'

// import  router from './router/test'

// import  router from './router/common'

import router from './router/one'

Vue.config.productionTip = false

/* eslint-disable no-new */

new Vue({

  el: '#app',

  router,

  components: {},

  template: ''

})
(4)测试
vue-router的query参数传递
语法:
- 发送参数的组件:this.$router.push({path:'路由的路径',query:{key1:value1,key2:value2}})
- 接收参数的组件:this.$route.query.参数名称
示例
(1)新建目录和组件
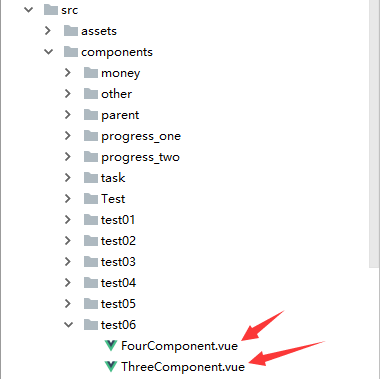
在src/components新建test06目录和ThreeComponent.vue和FourComponent.vue两个组件,新建目录和组件之后的结构如下
(2)组件编写对应的代码
ThreeComponent.vue
<template>
<div>
<button @click="sendMsg()">query传递参数</button>
</div>
</template> <script>
export default {
name: "ThreeComponent",
data(){
return{
msg:'我是通过quey传递参数过来的'
}
},
methods:{
sendMsg(){
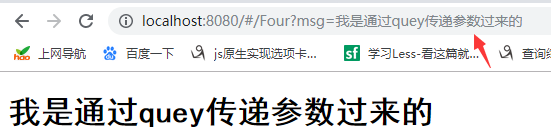
this.$router.push({
path:'Four',
query:{
msg:this.msg
}
})
}
}
}
</script> <style scoped> </style>
FourComponent.vue
<template>

      <div>

        <h1>{{msg}}</h1>

      </div>

</template>

<script>

    export default {

        name: "FourComponent",

      data(){

          return{

            msg:'',

          }

      },

      mounted(){

          this.msg=this.$route.query.msg;

      }

    }

</script>

<style scoped>

</style>
(3)新建router并在main注册
在src/router目录下新建two.js并在main.js注册
two.js
import Vue from 'vue'

import Router from 'vue-router'

import Three from '@/components/test06/ThreeComponent'

import Four from '@/components/test06/FourComponent'

Vue.use(Router)

export  default  new Router({

  routes:[

    {

      path:'/',

      name:'Three', //name需要添加单引号或者双引号,否则找不到

      component:Three

    },

    {

      path:'/four',

      name:'Four',//name需要添加单引号或者双引号,否则找不到

      component:Four

    }

  ]

})
main.js
// The Vue build version to load with the `import` command

// (runtime-only or standalone) has been set in webpack.base.conf with an alias.

import Vue from 'vue'

// import router from './router'

// import router from './router/hello'

// import  router from './router/test'

// import  router from './router/common'

// import router from './router/one'

import router from './router/two'

Vue.config.productionTip = false

/* eslint-disable no-new */

new Vue({

  el: '#app',

  router,

  components: {},

  template: ''

})
(4)测试
params和query的区别
- params传递参数之后刷新界面,参数取值undefined
- query传递参数之后刷新界面,参数仍然保留
- params传递参数只能使用name,不能使用path
- query传递参数既可以使用path,也可以使用name
- params传递参数不会再地址栏显示,类似于post请求
- query传递参数会在地址栏显示,类似于get请求
- params取值使用this.$route.params.参数名称
- query取值使用this.$route.query.参数名称
总结
vue学习笔记(十)路由的更多相关文章
- Vue学习笔记十二:vue-resource的基本使用
目录 HTML 浏览器效果 Vue不提倡使用操作DOM,所以Jquery不使用了,ajax也不使用了.所以,Vue给我们提供了一种和ajax差不多功能的指令,vue-resource HTML < ...
- Vue学习笔记十:过滤器
目录 公共过滤器的写法 简易过滤器+带参数过滤器+多过滤器 私有过滤器 公共过滤器的写法 过滤器的写法还是很简单的 ,如下 <p>{{ msg | filtermsg }}</p&g ...
- Vue学习笔记十三:Vue+Bootstrap+vue-resource从接口获取数据库数据
目录 前言 SpringBoot提供后端接口 Entity类 JPA操作接口 配置文件 数据库表自动映射,添加数据 写提供数据的接口 跨域问题 前端修改 效果图 待续 前言 Vue学习笔记九的列表案例 ...
- vue2.0学习笔记之路由(二)路由嵌套+动画
<!DOCTYPE html> <html lang="en"> <head> <meta charset="UTF-8&quo ...
- vue2.0学习笔记之路由(二)路由嵌套
<!DOCTYPE html> <html lang="en"> <head> <meta charset="UTF-8&quo ...
- Vue学习笔记-Vue.js-2.X 学习(六)===>脚手架Vue-CLI(项目说明-Babel)
五 Vue学习-vue-cli脚手架学习(创建只选一个选项:Babel) 1. 项目目录说明 node_modules : 包管理文件夹 public : 静态资源 src : 源代码 gitign ...
- Vue学习笔记-Vue.js-2.X 学习(四)===>脚手架Vue-CLI(基本工作和创建)
(五) 脚手架Vue-CLI 一 Vue-CLI前提(nodejs和webpack) 二 Vue学习-nodejs按装配置,Node.js 就是运行在服务端的 JavaScript. 1. 去nod ...
- Vue学习笔记-rest_framework_jwt 学习
一 使用环境 开发系统: windows 后端IDE: PyCharm 前端IDE: VSCode 数据库: msyql,navicat 编程语言: python3.7 (Windows x86- ...
- Vue学习笔记-Django REST framework3后端接口API学习
一 使用环境 开发系统: windows 后端IDE: PyCharm 前端IDE: VSCode 数据库: msyql,navicat 编程语言: python3.7 (Windows x86- ...
随机推荐
- OC循环方法推荐-块循环遍历(比for循环好用)
最近在看一本书<Effective OC 2.0>,今天看到有个tip是OC适中循环各自优劣性,作者最终推荐此块循环. 阅读时思考了下块循环是否方便实现内部循环终止外部循环的问题. 于是做 ...
- 学习索引结构的一些案例——Jeff Dean在SystemML会议上发布的论文(下)
[摘要] 除了范围索引之外,点查找的Hash Map在DBMS中起着类似或更重要的作用. 从概念上讲,Hash Map使用Hash函数来确定性地将键映射到数组内的随机位置(参见图[9 ],只有4位开销 ...
- 不给糖果就捣乱,用Python绘制有趣的万圣节南瓜怪【华为云分享】
关于万圣节 万圣节又叫诸圣节,在每年的11月1日,是西方的传统节日:而万圣节前夜的10月31日是这个节日最热闹的时刻.在中文里,常常把万圣节前夜(Halloween)讹译为万圣节(All Saints ...
- git 提交代码步骤
拉取服务器代码,避免覆盖他人代码 git pull 查看当前项目中有哪些文件被修改过 git status 提交代码至缓存 git add . 将代码提交到本地仓库中 git commit -m “提 ...
- iOS 基本控件的使用以及系统层次架构(1)
User Interface iOS系统架构层次图 -CocoaTouch UI相关 -媒体层(Media) 音频.视频.图形.动画 -核心服务层(Core services) 内存.网络.文件.线 ...
- Codeforces Round #605 (Div. 3) E - Nearest Opposite Parity
题目链接:http://codeforces.com/contest/1272/problem/E 题意:给定n,给定n个数a[i],对每个数输出d[i]. 对于每个i,可以移动到i+a[i]和i-a ...
- CoderForces-617B
Bob has a favorite number k and ai of length n. Now he asks you to answer m queries. Each query is g ...
- Python基础第一课
Python基础 安装软件并配置环境变量 1.第一句python --初学后缀名可以是任何数 --后期学习需要导入模块时不是py后缀名会报错 2.两种执行方式 Python解释器 py文件路径 Pyt ...
- LNMP架构的搭建
第9章 LNMP架构的搭建 9.1 什么是LNMP 9.1.1 LNMP的组成 L linux N nginx:实现静态的服务处理 M ...
- python学习笔记-生成随机数
更多大数据分析.建模等内容请关注公众号<bigdatamodeling> 在实现算法时经常会用到随机数,有时会忘记各种随机数的生成方法,这里对Python中的随机数生成方法进行汇总,以供以 ...