基于Groovy搭建Ngrinder脚本调试环境
介绍
最近公司搭建了一套压力测试平台,引用的是开源的项目 Ngrinder,做了二次开发,在脚本管理方面,去掉官方的SVN,引用的是Git,其他就是做了熔断处理等。
对技术一向充满热情的我,必须先来拥抱下传说中的压测平台。
一、开发脚本环境配置项:
安装JDK1.7+,Git,Maven
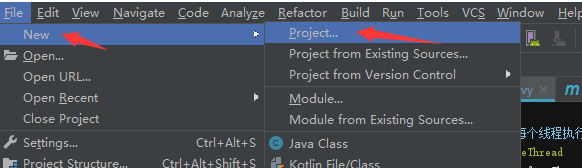
二、新建一个maven项目


三、创建一个groovy脚本TestRunner.groovy,添加以下内容
这个脚本写的就是,向服务端发送Json 格式请求,比较简单,未涉及到上下文参数化,混合场景配置比例,方法介绍等,到时需要再写2篇专题
import HTTPClient.HTTPResponse

import HTTPClient.NVPair

import net.grinder.plugin.http.HTTPPluginControl

import net.grinder.plugin.http.HTTPRequest

import net.grinder.script.GTest

import net.grinder.scriptengine.groovy.junit.GrinderRunner

import net.grinder.scriptengine.groovy.junit.annotation.BeforeProcess

import net.grinder.scriptengine.groovy.junit.annotation.BeforeThread

import org.junit.Test

import org.junit.runner.RunWith

import static net.grinder.script.Grinder.grinder

import static org.hamcrest.Matchers.is

import static org.junit.Assert.assertThat

// 每个测试类加这注解

@RunWith(GrinderRunner)

class TestRunner{

    public static GTest test

    public static HTTPRequest request

    // 在每个进程启动前执行

    @BeforeProcess

    static void beforeProcess() {

        HTTPPluginControl.getConnectionDefaults().timeout = 8000

        test = new GTest(1, "查询贷款数量")

        request = new HTTPRequest()

        grinder.logger.info("before process.");

    }

    // 在每个线程执行前执行

    @BeforeThread

    void beforeThread() {

        //监听目标方法,如果打标不会生成该方法的报告

        test.record(this,"loanCountTest");

        // 延时生成报告

        grinder.statistics.delayReports=true;

        grinder.logger.info("before thread.");

    }

    private NVPair[] headers() {

        return [

                new NVPair("Content-type", "application/json;charset=UTF-8")

        ];

    }

    @Test

    void loanCountTest(){

        def json = "{\"uid\": \"1_1154249\"}";

        HTTPResponse result = request.POST("http://hdai.com/query-loaning-count",json.getBytes(), headers());

        grinder.logger.info(result.getText());

        if (result.statusCode == 301 || result.statusCode == 302) {

            grinder.logger.warn("Warning. The response may not be correct. The response code was {}.", result.statusCode);

        } else {

            assertThat("判断响应结果:",result.statusCode, is(200));

        }

    }

}
四、拷贝以下内容到新建的 pom.xml
<project xmlns="http://maven.apache.org/POM/4.0.0" xmlns:xsi="http://www.w3.org/2001/XMLSchema-instance"

         xsi:schemaLocation="http://maven.apache.org/POM/4.0.0 http://maven.apache.org/xsd/maven-4.0.0.xsd">

    <modelVersion>4.0.0</modelVersion>

    <groupId>ngrinder</groupId>

    <artifactId>loan-xx-perf</artifactId>

    <version>0.0.1</version>

    <properties>

        <ngrinder.version>3.4</ngrinder.version>

        <maven.compiler.source>1.7</maven.compiler.source>

        <maven.compiler.target>1.7</maven.compiler.target>

        <project.build.sourceEncoding>UTF-8</project.build.sourceEncoding>

    </properties>

    <repositories>

        <repository>

            <id>ngrinder.maven.repo</id>

            <url>https://github.com/naver/ngrinder/raw/ngrinder.maven.repo/releases</url>

        </repository>

        <repository>

            <id>ymm-central-cache</id>

            <url>http://maven.aliyun.com/nexus/service/local/repositories/central/content/</url>

        </repository>

        <repository>

            <id>aliyun</id>

            <url>http://maven.aliyun.com/nexus/content/groups/public/</url>

        </repository>

    </repositories>

    <dependencies>

        <dependency>

            <groupId>org.ngrinder</groupId>

            <artifactId>ngrinder-groovy</artifactId>

            <version>${ngrinder.version}</version>

            <scope>provided</scope>

        </dependency>

    </dependencies>

    <build>

        <plugins>

            <plugin>

                <groupId>org.apache.maven.plugins</groupId>

                <artifactId>maven-eclipse-plugin</artifactId>

                <version>2.9</version>

                <configuration>

                    <additionalProjectnatures>

                        <projectnature>

                            org.eclipse.jdt.groovy.core.groovyNature

                        </projectnature>

                        <projectnature>

                            org.eclipse.m2e.core.maven2Nature

                        </projectnature>

                    </additionalProjectnatures>

                </configuration>

            </plugin>

        </plugins>

    </build>

</project>
五、完成后,目录机构如下
resources资源目录下,不能为空,否则上传到 试压机跑压测会报错

六、运行报错处理


添加之后就可以运行成功

七、注意:
- 依赖jar 拉取很慢,有可能会出现超时,多尝试下
- 测试脚本必须是Ngrinder标准的Groovy Maven项目,所以 resources资源目录下,不能为空,我这里随便搞了个文件,服务端会校验目录结构
- 目录结构,maven引用等,可以参考Ngrinder官方的例子:https://github.com/naver/ngrinder/wiki/Groovy-Maven-Structure
八、使用感受:
从零开始搭建了一套本地的 脚本开发环境,我觉得还是特别的快,创建maven 自动引入依赖; 语言开发方面只要熟悉java,上手Groovy 很快就能编写脚本; 编写脚本不像Jmeter 或 loadrunner 那样有可视化界面,而是完全用代码来实现,还好的是它提供了很多的工具类,不用重复造轮子。
基于Groovy搭建Ngrinder脚本调试环境的更多相关文章
- 基于Groovy编写Ngrinder脚本常用方法
1.生成随机字符串(import org.apache.commons.lang.RandomStringUtils) 数字:RandomStringUtils.randomNumeric(lengt ...
- ok6410[002] ubuntu1604系统下搭配ckermit和dnw基于RAM的裸机程序调试环境
ubuntu1604系统下搭配ckermit和dnw基于RAM的裸机程序调试环境 系统: ubuntu16.04 裸板: 飞凌公司OK6410开发板 目标:搭建基于ubuntu1604系统和基于RA ...
- 基于Eclipse搭建Hadoop源码环境
Hadoop使用ant+ivy组织工程,无法直接导入Eclipse中.本文将介绍如何基于Eclipse搭建Hadoop源码环境. 准备工作 本文使用的操作系统为CentOS.需要的软件版本:hadoo ...
- Xcode搭建真机调试环境 图文实例
本文介绍的Xcode搭建真机调试环境 图文实例,图文并茂,使我们学习起来更方便些,我们先来看内容. AD: 2013云计算架构师峰会超低价抢票中 Xcode搭建真机调试环境 是本文要介绍的内容,不多说 ...
- vscode加MinGw三步搭建c/c++调试环境
vscode加MinGw三步搭建c/c++调试环境 step1:安装vscode.MinGw 1.1 vscod常规安装:https://code.visualstudio.com/ 1.2 MinG ...
- 通过模拟器和ida搭建Android动态调试环境的问题
这几天在学Android的native层逆向.在按照教程用ida搭建动态调试环境时,第一步是把android_server 放到手机里执行,但是在手机里可以,在genymotion模拟器上就提示 no ...
- 基于Visual Studio Code搭建Golang开发调试环境【非转载】
由于对Docker+kubernetes的使用及持续关注,要理解这个平台的原理,势必需要对golang有一定的理解,基于此开始利用业余时间学习go,基础语法看完之后,搭建开发环境肯定是第一步,虽然能g ...
- 搭建基于qemu + eclipse的kernel调试环境(by quqi99)
作者:张华 发表于:2016-02-06版权声明:能够随意转载.转载时请务必以超链接形式标明文章原始出处和作者信息及本版权声明 ( http://blog.csdn.net/quqi99 ) 使用q ...
- 微信开发 -- 搭建基于ngrok的微信本地调试环境
第一步,安装ngrok客户端 (1)首先先到官网下载个客户端 http://natapp.cn/,选择适合的客户端类型,本人选择的是windows版 (2)下载后,解压,可以看到如下目录: 第二步,开 ...
随机推荐
- DefaultSerializer requires a Serializable payload but received an object of type [model.Admin]
一.问题描述: 在用redis做二级缓存时,出现如下异常 DefaultSerializer requires a Serializable payload but received an o ...
- 视频监控安防平台-GB28181-2016版-移动位置订阅
视频监控安防平台-GB28181-2016版-移动位置订阅 郑重声明: 本位来自 CSDN博主「沉睡的思绪」,查看原文,请点击下面链接,原文链接:https://blog.csdn.net/songx ...
- 用Python构造ARP请求、扫描、欺骗
目录 0. ARP介绍 1. Scapy简述 2. Scapy简单演示 2.1 安装 2.2 构造包演示 2.2.1 进入kamene交互界面 2.2.2 查看以太网头部 2.2.3 查看 ICMP ...
- ETL-Kettle学习笔记(入门,简介,简单操作)
KETTLE Kettle:简介 ETL:简介 ETL(Extract-Transform-Load的缩写,即数据抽取.转换.装载的过程),对于企业或行业应用来说,我们经常会遇到各种数据的处理,转换, ...
- 前端基于VUE的v-charts的曲线显示
目录 前端基于VUE的v-charts的曲线显示 1. 应用背景 2. 分析数据生产者生成 3. 取出数据消费者 4. 前端显示 4.1 安装V-charts插件 4.2 引入veline曲线插件 4 ...
- 先森林后树木:Elasticsearch各版本升级核心内容必看
在学习Elasticsearch 时候,因为各个版本的问题,搞不清,非常的头疼,官方也给出了各个版本更新的情况,不过是英文版本,版本更新信息又特别多,最近学习,看了很多资料,没有一个整理很清楚的,然后 ...
- Mycat 配置文件rule.xml
rule.xml配置文件定义了我们对表进行拆分所涉及到的规则定义.我们可以灵活的对表使用不同的分片算法,或者对表使用相同的算法但具体的参数不同. 该文件里面主要有tableRule和function这 ...
- 深入集合类系列——ArrayList和Vector的区别
区别: 1)Vector的方法都是同步的(Synchronized),是线程安全的(thread-safe),而ArrayList的方法不是,由于线程的同步必然要影响性能,因此,ArrayList的性 ...
- MYSQL-用户密码修改
解决方法如下:1.终端中结束当前正在运行的mysql进程.# sudo /etc/init.d/mysql stop2.用mysql安全模式运行并跳过权限验证.# sudo /usr/bin/mysq ...
- passwd、shadow、group文件格式
[root@bogon ~]# cat /etc/passwd root:x:0:0:root:/root:/bin/bash 登录名:密码占位符:UID:GID:注释:家目录:用户的默认shell ...