c#操作Zip压缩文件
一、ZipFile
ZipFile类用于选择文件或文件夹进行压缩生成压缩包。
常用属性:
| 属性 | 说明 |
| Count | 文件数目(注意是在ComitUpdat之后才有) |
| Password | 压缩包密码 |
| Size | 压缩包占用空间大小 |
| Name | 压缩包名称,默认输出是文件路径 |
| ZipEntry | 压缩包里的文件,通过索引[]访问 |
其常用方法如下:
| 方法 | 说明 |
| Add | 添加要进行压缩的文件 |
| AddDirectory | 添加文件夹(不会压缩文件夹里的文件) |
| Delete | 删除文件或文件夹 |
| BeginUpdate | 开始修改压缩包 |
| CommitUpdate | 提交修改 |
| SetComment | 添加注释 |
示例1(创建压缩文件):

using (ZipFile zip = ZipFile.Create(@"D:\test.zip"))
{
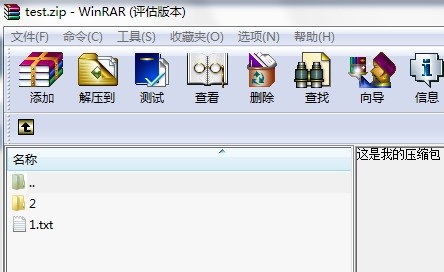
zip.BeginUpdate(); zip.SetComment("这是我的压缩包");
zip.Add(@"D:\1.txt"); //添加一个文件
zip.AddDirectory(@"D:\2"); //添加一个文件夹(这个方法不会压缩文件夹里的文件)
zip.Add(@"D:\2\2.txt"); //添加文件夹里的文件
zip.CommitUpdate();
}
这样生成的压缩包是包含子文件夹,子文件夹也是包含子文件的。
其中,注释如下:
示例2:修改压缩包
  using (ZipFile zip = new ZipFile(@"D:\test.zip"))

      {

          zip.BeginUpdate();

          zip.Add(@"D:\2.txt");

          zip.CommitUpdate();

      }
留意这个示例和上面的有什么不同,上面的是Create方法创建的ZipFile对象,而这里是直接读。因此,如果压缩包里面有文件,则不会改动原来的压缩文件,而是往会里面添加一个。这样就相当于压缩包的修改,而上面是压缩包的创建。
示例3:读取压缩包里的文件:
  using (ZipFile zip = new ZipFile(@"D:\test.zip"))

      {

          foreach (ZipEntry z in zip)

          {

              Console.WriteLine(z);

          }

          ZipEntry z1 = zip[0];

          Console.WriteLine(z1.Name);

     }
二、FastZip
这个类就两个方法:
| 方法 | 说明 |
| CreateZip | 压缩目录 |
| ExtractZip | 解压缩目录 |
1、FastZip用于快速压缩目录,示例如下:
//快速压缩目录,包括目录下的所有文件

(new FastZip()).CreateZip(@"D:\test.zip", @"D:\test\", true, "");
这个是递归压缩的。但是局限性就是只能压缩文件夹。
否则报如下错误:

2、快速解压缩目录
//快速解压

(new FastZip()).ExtractZip(@"D:\test.zip", @"D:\解压目录\", "");
三、ZipOutputStream与ZipEntry
- ZipOutputStream:相当于一个压缩包;
- ZipEntry:相当于压缩包里的一个文件;
以上两个类是SharpZipLib的主类,最耐玩的就是这两个类。
ZipOutputStream常用属性:
| 属性 | 说明 |
| IsFinished | ZipOutputStream是否已结束 |
ZipOutputStream常用方法:
| 方法 | 说明 |
| CloseEntry | 关闭入口,关闭之后不允许再对ZipOutputStream进行操作 |
| Finish | 结束写入 |
| GetLevel | 读取压缩等级 |
| PutNextEntry | 往ZipOutputStream里写入一个ZipEntry |
| SetComment | 压缩包的注释 |
| SetLevel | 设置压缩等级,等级越高文件越小 |
| Write | 写入文件内容 |
使用ZipOutputStream创建一个压缩包并往里面写入一个文件的示例:
        static void Main(string[] args)

        {

            using (ZipOutputStream s = new ZipOutputStream(File.Create(@"D:\123.zip")))

            {

                s.SetLevel(6);  //设置压缩等级,等级越高压缩效果越明显,但占用CPU也会更多using (FileStream fs = File.OpenRead(@"D:\1.txt"))

                {

                    byte[] buffer = new byte[4 * 1024];  //缓冲区,每次操作大小

                    ZipEntry entry = new ZipEntry(Path.GetFileName(@"改名.txt"));     //创建压缩包内的文件

                    entry.DateTime = DateTime.Now;  //文件创建时间

                    s.PutNextEntry(entry);          //将文件写入压缩包

                    int sourceBytes;

                    do

                    {

                        sourceBytes = fs.Read(buffer, 0, buffer.Length);    //读取文件内容(1次读4M,写4M)

                        s.Write(buffer, 0, sourceBytes);                    //将文件内容写入压缩相应的文件

                    } while (sourceBytes > 0);

                }

                s.CloseEntry();

            }

            Console.ReadKey();

        }
以上示例仅仅能够压缩文件,要压缩文件夹就要使用递归的方式,循环子目录并压缩子目录里的文件。
示例2:文件夹压缩,保持原文件夹架构:
    class Program

    {

        static void Main(string[] args)

        {

            string Source = @"D:\test";

            string TartgetFile = @"D:\test.zip";

            Directory.CreateDirectory(Path.GetDirectoryName(TartgetFile));

            using (ZipOutputStream s = new ZipOutputStream(File.Create(TartgetFile)))

            {

                s.SetLevel(6);

                Compress(Source, s);

                s.Finish();

                s.Close();

            }

            Console.ReadKey();

        }

        /// <summary>

        /// 压缩

        /// </summary>

        /// <param name="source">源目录</param>

        /// <param name="s">ZipOutputStream对象</param>

        public static void Compress(string source, ZipOutputStream s)

        {

            string[] filenames = Directory.GetFileSystemEntries(source);

            foreach (string file in filenames)

            {

                if (Directory.Exists(file))

                {

                    Compress(file, s);  //递归压缩子文件夹

                }

                else

                {

                    using (FileStream fs = File.OpenRead(file))

                    {

                        byte[] buffer = new byte[4 * 1024];

                        ZipEntry entry = new ZipEntry(file.Replace(Path.GetPathRoot(file),""));     //此处去掉盘符,如D:\123\1.txt 去掉D:

                        entry.DateTime = DateTime.Now;

                        s.PutNextEntry(entry);

                        int sourceBytes;

                        do

                        {

                            sourceBytes = fs.Read(buffer, 0, buffer.Length);

                            s.Write(buffer, 0, sourceBytes);

                        } while (sourceBytes > 0);

                    }

                }

            }

        }

    }
附上解压缩方法:
        /// <summary>

        /// 解压缩

        /// </summary>

        /// <param name="sourceFile">源文件</param>

        /// <param name="targetPath">目标路经</param>

        public bool Decompress(string sourceFile, string targetPath)

        {

            if (!File.Exists(sourceFile))

            {

                throw new FileNotFoundException(string.Format("未能找到文件 '{0}' ", sourceFile));

            }

            if (!Directory.Exists(targetPath))

            {

                Directory.CreateDirectory(targetPath);

            }

            using (ZipInputStream s = new ZipInputStream(File.OpenRead(sourceFile)))

            {

                ZipEntry theEntry;

                while ((theEntry = s.GetNextEntry()) != null)

                {

                    string directorName = Path.Combine(targetPath, Path.GetDirectoryName(theEntry.Name));

                    string fileName = Path.Combine(directorName, Path.GetFileName(theEntry.Name));

                    // 创建目录

                    if (directorName.Length > 0)

                    {

                        Directory.CreateDirectory(directorName);

                    }

                    if (fileName != string.Empty)

                    {

                        using (FileStream streamWriter = File.Create(fileName))

                        {

                            int size = 4096;

                            byte[] data = new byte[ 4 * 1024];

                            while (true)

                            {

                                size = s.Read(data, 0, data.Length);

                                if (size > 0)

                                {

                                    streamWriter.Write(data, 0, size);

                                }

                                else break;

                            }

                        }

                    }

                }

            }

            return true;

        }
ZipEntry就没什么好说的了,都是一些属性,指示一下,实际用到的很少。
c#操作Zip压缩文件的更多相关文章
- php操作zip压缩文件
php操作zip压缩文件 一.总结 1.php操作zip:php可以操作zip压缩文件,通过 ZZIPLIB扩展库,这些扩展库可以通过composer安装,或者某些版本的php会自带 2.完美操作zi ...
- 【VC++技术杂谈008】使用zlib解压zip压缩文件
最近因为项目的需要,要对zip压缩文件进行批量解压.在网上查阅了相关的资料后,最终使用zlib开源库实现了该功能.本文将对zlib开源库进行简单介绍,并给出一个使用zlib开源库对zip压缩文件进行解 ...
- java ZIP压缩文件
问题描述: 使用java ZIP压缩文件和目录 问题解决: (1)单个文件压缩 注: 以上是实现单个文件写入压缩包的代码,注意其中主要是在ZipOutStream流对象中创建Z ...
- PHP zip压缩文件及解压
PHP zip压缩文件及解压 利用ZipArchive 类实现 只有有函数.界面大家自己写 ZipArchive(PHP 5.3 + 已自带不需要安装dll) /** * 文件解压 * @param ...
- php实现ZIP压缩文件解压缩
测试使用了两个办法都可以实现: 第一个:需要开启配置php_aip.dll <?php //需开启配置 php_zip.dll //phpinfo(); header("Content ...
- java将文件打包成ZIP压缩文件的工具类实例
package com.lanp; import java.io.BufferedInputStream; import java.io.BufferedOutputStream; import ja ...
- php实现ZIP压缩文件解压缩(转)
测试使用了两个办法都可以实现: 第一个:需要开启配置php_aip.dll <?php //需开启配置 php_zip.dll //phpinfo(); header("Content ...
- Python 黑客 --- 002 入门级 ZIP压缩文件口令暴力破解机
Python 黑客 入门级实战:ZIP压缩文件口令暴力破解机 使用的系统:Ubuntu 14.04 LTS Python语言版本:Python 2.7.10 V 编写zip 压缩文件口令破解器需要使用 ...
- PHP生成ZIP压缩文件
PHP生成ZIP压缩文件 /* * 生成zip压缩文件 * $sourceDir:被压缩的文件夹或文件 * $outFileName:输出的压缩文件名称 * */ function createZip ...
随机推荐
- [ActionScript 3.0] AS3 ConvolutionFilter卷积滤镜的应用
ConvolutionFilter 类应用矩阵盘绕滤镜效果.卷积将输入图像的像素与相邻的像素合并以生成图像.通过卷积,可以实现大量的图像效果,包括模糊.边缘检测.锐化.浮雕和斜角.您可以将滤镜应用于任 ...
- asp.net 安全性相关参考
<system.web> <depolyment retail="true" /> </system.web> AntiXSS http:/ ...
- excel数据通过构建sql语句导入到数据库中
拿到一张excel数据表格,数据格式如下图所示: 2.根据excel数据结果,构建保存excel数据的表结构 CREATE TABLE #tmpExcel(IP VARCHAR(100),IPAddr ...
- JDK的版本历史
JDK1.5: 2004年发布----2006年结束 JDK1.6 2006年发布-----2010年结束 一看吓我一条,开始接触JDK都已经是2010年下半年了,可是那是学的就是1.5版本,知道工作 ...
- The Ninth Hunan Collegiate Programming Contest (2013) Problem F
Problem F Funny Car Racing There is a funny car racing in a city with n junctions and m directed roa ...
- 文件的输出与载入之java操作
一.前言 学习java没多久,关键是没怎么系统学过.都是看别人的代码来学习的.今天就把一直以来让我头痛的java IO 的一些基本操作来记录下来,加深记忆. 二.java导入文件到内存中 首先放一个 ...
- Mistral 工作流组件之一 概述
Mistral的前世今生: Mistral是Mirantis公司为Openstack开发的工作流组件,提供Workflow As a Service.典型的应用场景包括任务计划服务Cloud Cro ...
- 将Excel中数据导入数据库(三)
上篇文章将Excel中数据导入数据库时,将从Excel读入的数据均转换成了数据库相应字段的类型,其实这是没有必要的,因为对于数据库各种类型的插入,均可以字符串格式插入.比如表WQ_SWMSAR_A字段 ...
- 不能读取文件“itunes.library.itl”因为它是由更高级别的itunes所创建的
转自:https://zhidao.baidu.com/question/80796363.html 是因为你安装过高版本的后又装你版本的itunes. 你在电脑上搜索所有硬盘上的itunes lib ...
- ASP.NET MVC4 学习系统五(Razor)
Razor ,你好! Razor 是一种把代码和内容进行平滑集成的语法.尽管它引入了一些新的符号和关键字,但是Razor并不是一种新的语法.相反,Razor允许用户使用已知的语言来编写代码 ...