一百二十六:CMS系统之轮播图管理页面布局和添加轮播图的模态对话框制作
视图
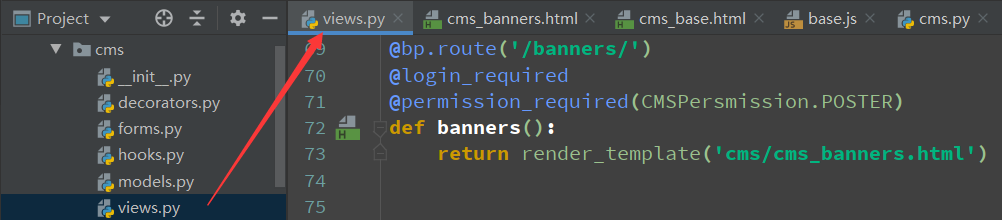
@bp.route('/banners/')
@login_required
@permission_required(CMSPersmission.POSTER)
def banners():
    return render_template('cms/cms_banners.html')
给这个url添加选中事件

else if(url.indexOf('banners') >= 0) {
    var bannerManageLi = $('.banner-manage');
    bannerManageLi.addClass('unfold').siblings().removeClass('unfold');
}
base模板

页面


{% extends 'cms/cms_base.html' %}

{% block title %}
    轮播图管理
{% endblock %}

{% block head %}
    <style>
        .top-box{
            overflow: hidden;
            background: #ecedf0;
            padding: 5px;
        }
        .top-box button{
            float: right;
        }
    </style>
{% endblock %}

{% block page_title %}
    {{ self.title() }}
{% endblock %}

{% block main_content %}
    <div class="top-box">
        <button class="btn btn-warning">添加轮播图</button>
    </div>
    <table class="table table-bordered">
        <thead>
            <tr>
                <th>名称</th>
                <th>图片链接</th>
                <th>跳转链接 </th>
                <th>优先级</th>
                <th>创建时间</th>
                <th>操作</th>
            </tr>
        </thead>

    </table>
{% endblock %}
访问

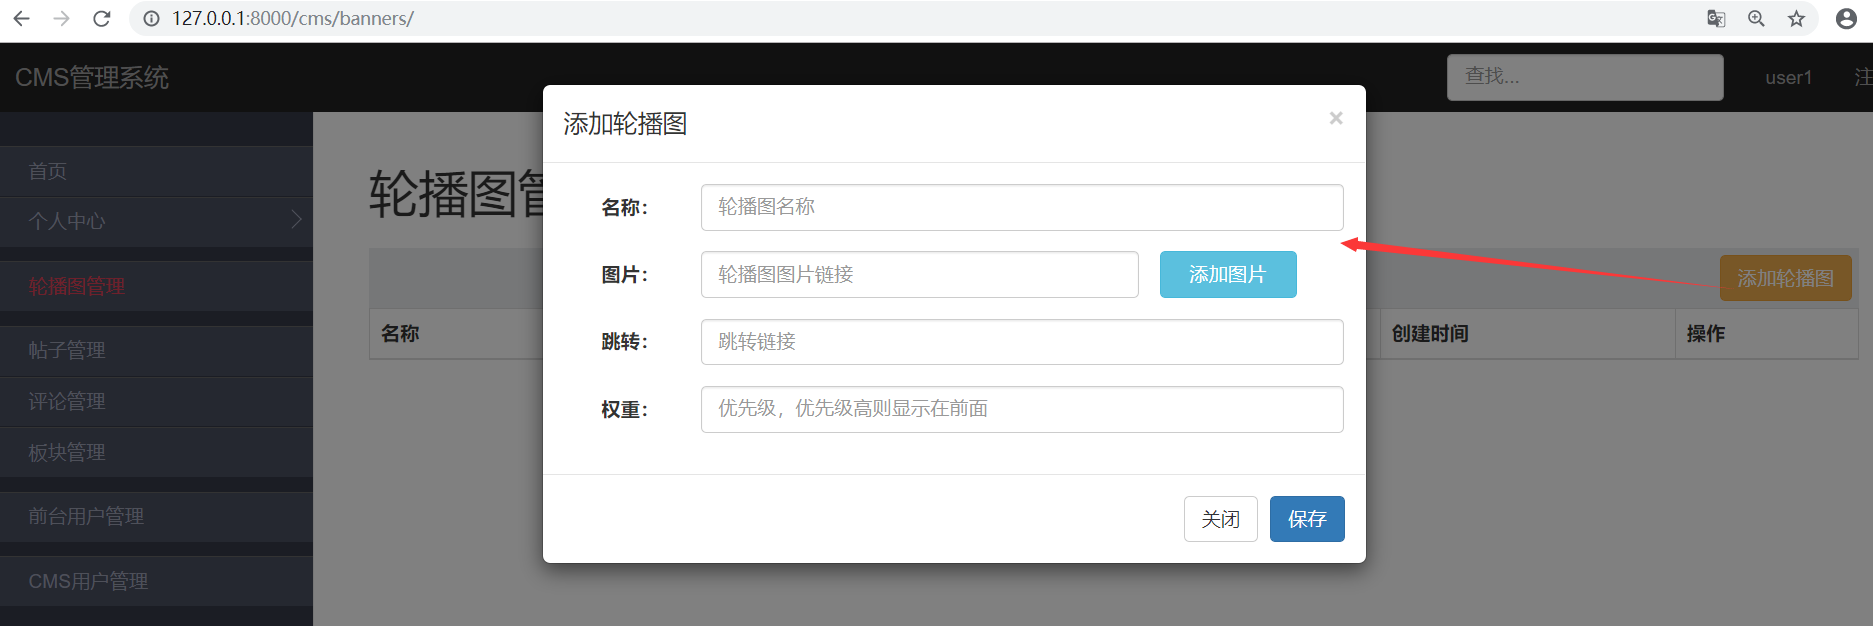
添加轮播图的模态对话框


{% extends 'cms/cms_base.html' %}
{% block title %}
轮播图管理
{% endblock %}
{% block head %}
<style>
.top-box {
overflow: hidden;
background: #ecedf0;
padding: 5px;
}
.top-box button {
float: right;
}
</style>
{% endblock %}
{% block page_title %}
{{ self.title() }}
{% endblock %}
{% block main_content %}
<div class="top-box">
<button class="btn btn-warning" data-toggle="modal" data-target="#banner-dialog">添加轮播图</button>
</div>
<table class="table table-bordered">
<thead>
<tr>
<th>名称</th>
<th>图片链接</th>
<th>跳转链接</th>
<th>优先级</th>
<th>创建时间</th>
<th>操作</th>
</tr>
</thead>
</table>
<!-- 模态对话框,需包含上面button包含的属性(#属性),如这里用的#banner-dialog -->
<div class="modal fade" id="banner-dialog" tabindex="-1" role="dialog" aria-labelledby="myModalLabel">
<div class="modal-dialog" role="document">
<div class="modal-content">
<div class="modal-header">
<button type="button" class="close" data-dismiss="modal" aria-label="Close"><span aria-hidden="true">×</span></button>
<h4 class="modal-title" id="myModalLabel">添加轮播图</h4>
</div>
<div class="modal-body">
<form action="" class="form-horizontal">
<div class="form-group">
<label class="col-sm-2 control-label">名称:</label>
<div class="col-sm-10">
<input type="text" class="form-control" name="name" placeholder="轮播图名称">
</div>
</div>
<div class="form-group">
<label class="col-sm-2 control-label">图片:</label>
<div class="col-sm-7">
<input type="text" class="form-control" name="image_url" placeholder="轮播图图片链接">
</div>
<button class="btn btn-info col-sm-2">添加图片</button>
</div>
<div class="form-group">
<label class="col-sm-2 control-label">跳转:</label>
<div class="col-sm-10">
<input type="text" class="form-control" name="link_url" placeholder="跳转链接">
</div>
</div>
<div class="form-group">
<label class="col-sm-2 control-label">权重:</label>
<div class="col-sm-10">
<input type="text" class="form-control" name="priority" placeholder="优先级,优先级高则显示在前面">
</div>
</div>
</form>
</div>
<div class="modal-footer">
<button type="button" class="btn btn-default" data-dismiss="modal">关闭</button>
<button type="button" class="btn btn-primary">保存</button>
</div>
</div>
</div>
</div>
{% endblock %}
访问
一百二十六:CMS系统之轮播图管理页面布局和添加轮播图的模态对话框制作的更多相关文章
- 一百二十:CMS系统之注册功能前后端逻辑
给提交按钮加一个id,方便写js js //发送ajax请求注册请求$(function () { $('#submit-btn').click(function (event) { event.pr ...
- Flask实战第49天:cms轮播图管理页面布局
新建cms_banners.html继承cms_base.html {% extends 'cms/cms_base.html' %} {% block title %} 轮播图管理-CMS管理系统 ...
- 一百二十七:CMS系统之添加轮播图前后台逻辑
后台逻辑 模型 from exts import dbfrom datetime import datetime class BannerModel(db.Model): __tablename__ ...
- Java开发笔记(一百二十六)Swing的窗口
前面介绍了AWT界面编程的若干技术,在编码实践的时候,会发现AWT用起来甚是别扭,它的毛病包括但不限于下列几点:1.对中文的支持不好,要想在界面上正常显示汉字,还得在运行时指定额外的运行参数“-Dfi ...
- 一百三十:CMS系统之七牛js和python的SDK使用示例
1.安装: pip install qiniu 2.编写获取uptoken的接口 @app.route('/uptoken/')def uptoken(): access_key = '' secre ...
- 一百二十三:CMS系统之登录功能
配置文件中加入前台用户的身份标识 form class SigninForm(BaseForm): telephone = StringField(validators=[Regexp(r'1[345 ...
- 一百二十一:CMS系统之注册后跳转到上一个页面
实现功能,访问测试页面的时候,跳转到注册页面,注册成功后跳转到测试页面 使用参数:若是从其他地址跳转过来时,头部信息中会携带参数referrer,此参数为从从哪个地址跳转到当前地址的,若是直接从浏览器 ...
- 测开之路一百二十六:flask之获取request请求数据
可以根据flask的request对象获取所有的请求信息 path = request.path # 获取请求地址method = request.method # 获取请求方法ip = reques ...
- VMware vSphere 服务器虚拟化之二十六 桌面虚拟化之View Persona Management
VMware vSphere 服务器虚拟化之二十六 桌面虚拟化之View Persona Management 实验失败告终,启动VMware View Persona Management服务报10 ...
随机推荐
- OpenLDAP 搭建入门
系统环境:CentOS 7 slapd版本:2.4.44 简介 OpenLDAP是一款轻量级目录访问协议,基于X.500标准的,支持TCP/IP协议,用于实现账号集中管理的开源软件,提供一整套安全的账 ...
- Ubuntu系统---以virtualenv方式安装Tensorflow-CPU
Ubuntu系统---以virtualenv方式安装Tensorflow-CPU 一.安装环境 环境:Ubuntu18.04+CPU+python2.7 本文介绍:如何在ubuntu上以virtual ...
- Map的使用及遍历方式
Java中Map遍历的四种方式 如果同时需要key和value推荐使用entrySet(第一种): 如果只是获取key,或者value,推荐使用keySet或者values方式(第二种): 如果需要在 ...
- Some ML Tutorials
VAE: What-is-variational-autoencoder-vae-tutorial Variational-autoencoders-explained Building variat ...
- CSS基础学习 17.CSS动画
- 读取根目录src下的指定配置properties文件内容
代码如下: package com.chen.system.util; import java.io.File; import java.io.FileInputStream; import java ...
- react-native-page-listview使用方法(自定义FlatList/ListView下拉刷新,上拉加载更多,方便的实现分页)
react-native-page-listview 对ListView/FlatList的封装,可以很方便的分页加载网络数据,还支持自定义下拉刷新View和上拉加载更多的View.兼容高版本Flat ...
- BZOJ 1097: [POI2007]旅游景点atr 状态压缩+Dijkstra
题解: $k<=20,$ 考虑状压dp. 从 $1$ 号点走到 $n$ 号点经过的点的个数可能会非常多,但是强制要求经过的点一共才 $20$ 个. 而我们发现这个题好就好在可以经过某个城市,而不 ...
- 图像傅里叶变换(快速傅里叶变换FFT)
学习DIP第7天,图像傅里叶变换 转载请标明出处:http://blog.csdn.net/tonyshengtan,欢迎大家转载,发现博客被某些论坛转载后,图像无法正常显示,无法正常表达本人观点,对 ...
- Linux之动态库
命令规则 lib + 名字 + .so 制作步骤 1)生成与位置无关的代码(生成与位置无关的代码) 2)将.o打包成共享库(动态库) 发布和使用共享库 动态库运行原理: 生成动态库: gcc -fPI ...