robot framework笔记(三):扩展SeleniumLibrary库 (自定义关键字)
(一)自定义和浏览器相关的关键字
PYTHON 版本:3.6,不同的版本可能有区别,自己注意下。
以下代码GitHub 版本库地址: https://github.com/blairwind/blog_rf
SeleniumLibrary的扩展文档中提供了3种增加SeleniumLibrary功能的方式。
(1)Plugin API
(2)EventFiringWebDriver
(3)Extending SeleniumLibrary(实际就是继承SeleniumLibrary库)
这里采用继承SeleniumLibrary库的方式。
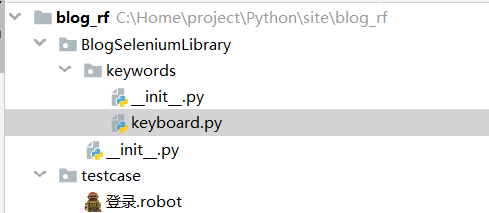
目录结构如下:这里我们将上一篇中说到的关键字加进来
BlogSeleniumLibrary.__init__.py 的代码
# #-*-coding:utf-8-*-

#

from robot.libraries import BuiltIn

from SeleniumLibrary.base import DynamicCore

from SeleniumLibrary.keywords import (AlertKeywords,

                                      BrowserManagementKeywords,

                                      CookieKeywords,

                                      ElementKeywords,

                                      FormElementKeywords,

                                      FrameKeywords,

                                      JavaScriptKeywords,

                                      RunOnFailureKeywords,

                                      ScreenshotKeywords,

                                      SelectElementKeywords,

                                      TableElementKeywords,

                                      WaitingKeywords,

                                      WebDriverCache,

                                      WindowKeywords)

from SeleniumLibrary.locators import ElementFinder

from SeleniumLibrary.utils import Deprecated, LibraryListener, timestr_to_secs

from  SeleniumLibrary import SeleniumLibrary

from BlogSeleniumLibrary.keywords import (

                                            KeyboardKeywords)

class  BlogSeleniumLibrary(SeleniumLibrary):

    def  __init__(self, timeout=5.0, implicit_wait=0.0,

                 run_on_failure='Capture Page Screenshot',

                 screenshot_root_directory=None):

        self.timeout = timestr_to_secs(timeout)

        self.implicit_wait = timestr_to_secs(implicit_wait)

        self.speed = 0.0

        self.run_on_failure_keyword \

            = RunOnFailureKeywords.resolve_keyword(run_on_failure)

        self._running_on_failure_keyword = False

        self.screenshot_root_directory = screenshot_root_directory

        libraries = [

            AlertKeywords(self),

            BrowserManagementKeywords(self),

            CookieKeywords(self),

            ElementKeywords(self),

            FormElementKeywords(self),

            FrameKeywords(self),

            JavaScriptKeywords(self),

            RunOnFailureKeywords(self),

            ScreenshotKeywords(self),

            SelectElementKeywords(self),

            TableElementKeywords(self),

            WaitingKeywords(self),

            WindowKeywords(self),

            KeyboardKeywords(self)

        ]

        self._drivers = WebDriverCache()

        DynamicCore.__init__(self, libraries)

        self.ROBOT_LIBRARY_LISTENER = LibraryListener()

        self._element_finder = ElementFinder(self)

    _speed_in_secs = Deprecated('_speed_in_secs', 'speed')

    _timeout_in_secs = Deprecated('_timeout_in_secs', 'timeout')

    _implicit_wait_in_secs = Deprecated('_implicit_wait_in_secs',

                                        'implicit_wait')

    _run_on_failure_keyword = Deprecated('_run_on_failure_keyword',

                                         'run_on_failure_keyword')
BlogSeleniumLibrary.keywords.__init__.py 的代码
from .keyboard import KeyboardKeywords
BlogSeleniumLibrary.keywords.keyboard.py 的代码
 from SeleniumLibrary.base import keyword, LibraryComponent

 from selenium.webdriver.chrome.options import Options

 from  selenium import webdriver

 from SeleniumLibrary.locators import WindowManager

 class KeyboardKeywords(LibraryComponent):

     def __init__(self, ctx):

         LibraryComponent.__init__(self, ctx)

         self._window_manager = WindowManager(ctx)

     @keyword()

     def get_chrome_options(self, downloads_path):

         '''

         自定义chrome启动参数

         :param downloads_path: 设置默认的文件下载路径

         :return:

         '''

         chrome_options = Options()

         prefs = {

             "download.default_directory": str(downloads_path),

         }

         chrome_options.add_experimental_option('prefs', prefs)  # 设置默认的文件下载路径

         chrome_options.add_argument('disable-infobars')  # chrome76以下禁用chrome受自动软件控制

         # 下面2行chrome76及以上禁用chrome受自动软件控制

         chrome_options.add_experimental_option("useAutomationExtension", False)

         chrome_options.add_experimental_option("excludeSwitches", ["enable-automation"])

         return chrome_options

     @keyword()

     def open_browser_new(self, alias=None,**kwargs):

         '''

         :return:

         '''

         desired_caps = {

             "platform": kwargs["platform"],  #操作系统

             # "platform":"LINUX",

             "browserName": kwargs["browserName"],  #浏览器

             "version":kwargs["version"]  #浏览器版本

         }

         driver = webdriver.Remote(command_executor=kwargs["remote_url"],

                                   desired_capabilities=desired_caps,

                                   options=kwargs["chrome_options"])

         return self.ctx.register_driver(driver,alias)
最后,在RF中导入继承SeleniumLibrary后新建的库就行了,如下:
注意在RF中python 包名和类名一样的的话,导入库的时候就只需要填包名就行了,RF可以直接识别到。不一样的话就还需要加上.class名称,下面这个是不使用selenium grid的版本
*** Settings ***
Library BlogSeleniumLibrary #注意这一行不一样
Suite Teardown CLOSE BROWSER *** Variables ***
${browser} Chrome
${login_url} https://account.cnblogs.com/signin *** Test Cases ***
登录-XXXXXX
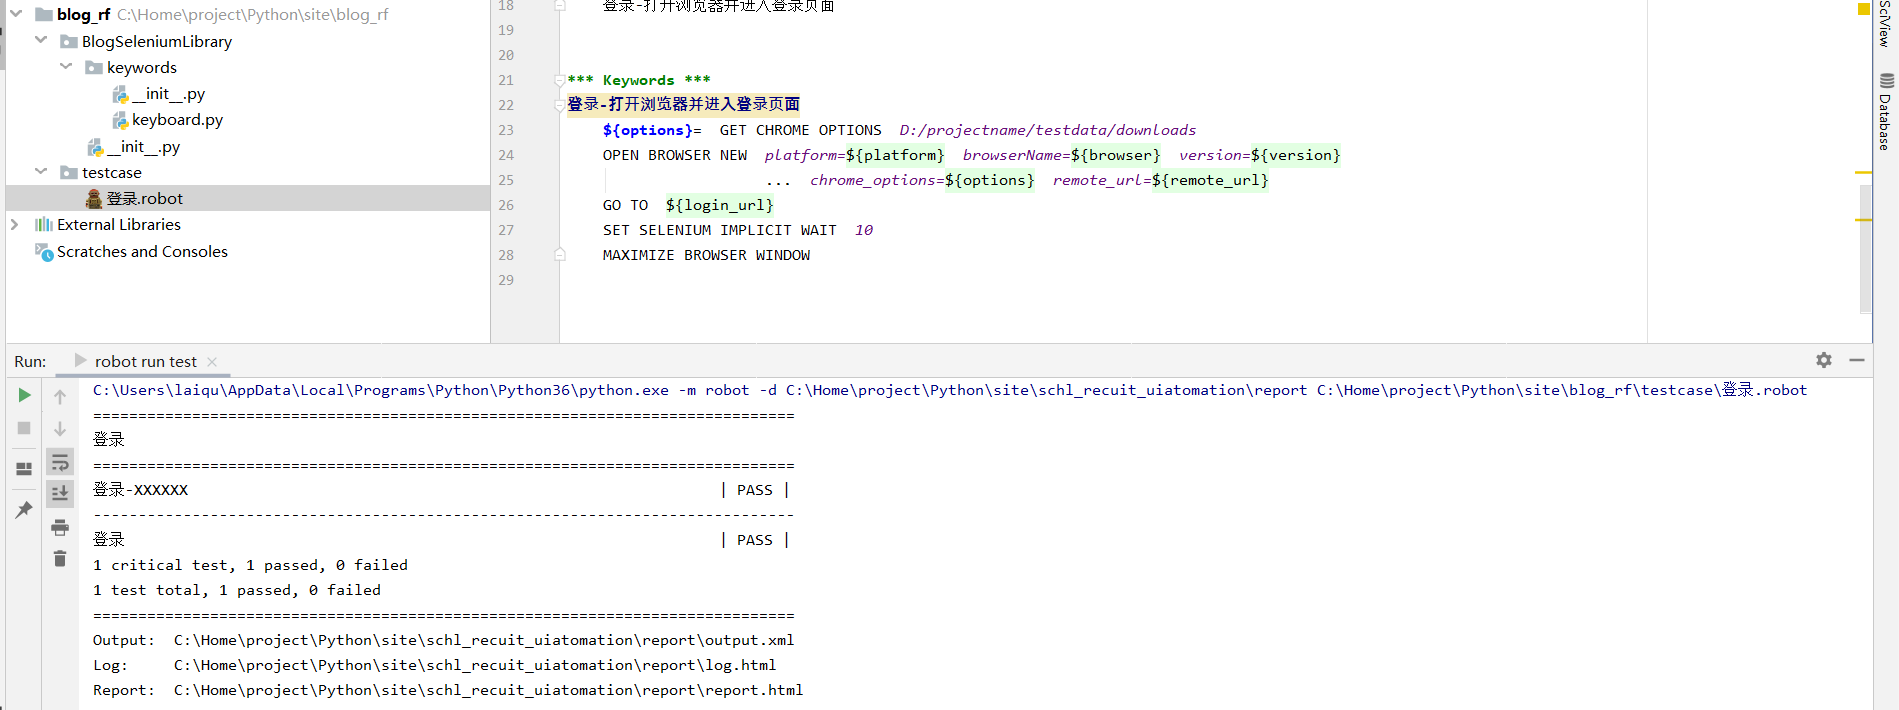
登录-打开浏览器并进入登录页面 *** Keywords ***
登录-打开浏览器并进入登录页面
${options}= GET CHROME OPTIONS D:/projectname/testdata/downloads
CREATE WEBDRIVER ${browser} chrome_options=${options}
GO TO ${login_url}
SET SELENIUM IMPLICIT WAIT 10
MAXIMIZE BROWSER WINDOW
(二)如果要使用selenium grid呢
上篇中说到在RF中使用selenium grid ,在这里说明下。(为什么不使用RF自带的open browser,原因是个人觉得这种方式更方便添加不同的参数。)可以看到这里新加了一个关键字
当然,既然用了selenium grid,肯定会考虑并发执行用例,以及合并测试报告的问题,这里暂不考虑这个。
     @keyword()

     def open_browser_new(self, alias=None,**kwargs):

         '''

         :return:

         '''

         desired_caps = {

             "platform": kwargs["platform"], #操作系统

             # "platform":"LINUX",

             "browserName": kwargs["browserName"], #浏览器

             "version":kwargs["version"]  #浏览器版本

         }

         driver = webdriver.Remote(command_executor=kwargs["remote_url"],

                                   desired_capabilities=desired_caps,

                                   options=kwargs["chrome_options"])

         return self.ctx.register_driver(driver,alias)
在RF中调用这个关键字去启动浏览器就行了。当然前提是你要有一个配好的selenium grid环境,remote_url填自己selenium grid的地址。
 *** Settings ***

 Library                     BlogSeleniumLibrary

 Suite Teardown              CLOSE BROWSER

 *** Variables ***

 ${platform}          WINDOWS

 ${browser}            chrome

 ${version}            79

 ${remote_url}         http://192.168.63.1:4444/wd/hub

 ${login_url}          https://account.cnblogs.com/signin

 *** Test Cases ***

 登录-XXXXXX

     登录-打开浏览器并进入登录页面

 *** Keywords ***

 登录-打开浏览器并进入登录页面

     ${options}=  GET CHROME OPTIONS  D:/projectname/testdata/downloads   #这里是写死的路径,实际项目中应该动态去获取工程路径/testdata/downloads

     OPEN BROWSER NEW  platform=${platform}  browserName=${browser}  version=${version}

                       ...  chrome_options=${options}  remote_url=${remote_url}

     GO TO  ${login_url}

     SET SELENIUM IMPLICIT WAIT  10

     MAXIMIZE BROWSER WINDOW
(三)自定义和浏览器无关的关键字(例如:和数据库相关的关键字)
如果有一些关键字用不到selenium 的webdriver,可以考虑独立出来。例如数据库相关的关键字,实现方式以及在RF中的导入方式,可以参考上一篇的mykeyword 关键字的写法。
robot framework笔记(三):扩展SeleniumLibrary库 (自定义关键字)的更多相关文章
- robot framework笔记(一):环境配置(基于python3)+在pycharm中编写及运行robot脚本
(一)使用pip安装robotframework框架和seleniumlibrary库 pip install --upgrade robotframework pip install --upgra ...
- Robot Framework(三)创建测试用例
2.2.1测试用例语法 基本语法 测试用例由关键字在测试用例表中构建.关键字可以从测试库或资源文件导入,也可以在测试用例文件本身的关键字表中创建. 测试用例表中的第一列包含测试用例名称.测试用例从包含 ...
- robot framework笔记(二):在RF中自定义chrome启动参数
(一)在RF中自定义chrome启动参数 这里主要是实现下面2个功能 1.禁用chrome正受自动测试软件控制的提示 2.设置默认的下载路径(一些导出.下载类的功能,将文件下载到指定路径下) 自定义一 ...
- robot framework用python扩展编写自定义library
我的utils.py文件 #!/usr/bin/env python #-*- coding:utf8 -*- __version__ = '0.1' import sys reload(sys) s ...
- robot framework 笔记(三),RF安装
背景: 本来robot framework的安装应该放在一开始写的,因写博客的时候已经装过了,恰巧重装系统又重装了一遍RF RF推荐使用python2, 使用3的话会遇到一些页面非友好的问题 需要的安 ...
- Robot Framework - 1 - 测试用例与测试库
01- 关于测试库(Test libraries) Test libraries provide the actual testing capabilities to Robot Framework ...
- Robot Framework自动化测试三(selenium API)
Robot Framework Selenium API 说明: 此文档只是将最常用的UI 操作列出.更多方法请查找selenium2Library 关键字库. 一.浏览器驱动 通过不同的浏览器 ...
- robot framework 笔记(一)
背景: 平时使用rf时会用到一些方法,长时间不用就会忘记,本文用来记录当做自己的小笔记 内容持续更新中········ 一.robot framework 大小写转换 1.转换小写: ${low} E ...
- robot framework 使用三:他们主动浏览器的兼容性
robot framework 浏览器兼容性测试 上图中黄色圈的地方默认什么都不写,是firefox浏览器.写上ie就是ie浏览器了 firefox最新版本号即可,ie须要设置: 1. IE选项设置的 ...
随机推荐
- 使用ItextSharop合并pdf文件,体积变大的解决
通用的合并方式导致输出的pdf 文件中嵌入了大量的重复字体.导致文件体积膨胀. 使用基于内存流的方式,读取文件字节,可以解决重复字体的嵌入问题: public static string MergeF ...
- 001 okhttp3的POST使用
继续使用上面的项目 1.被调用的项目 package com.jun.web2forokhttp.okhttp; import com.jun.web2forokhttp.bean.HttpDomai ...
- 027_MacOs上如何将多页word打印到一个页面上
工作中需要把word的多页面内容打印到同一张A4纸,所以就想了办法,首先word导出到pdf. 然后使用MacOs默认的PDF阅读器进行多页打印. 操作如下: 文件-打印布局选择每张纸需要打印的页数左 ...
- k8s记录-kubectl常用
kubectl create/delete -f xxx.yml kubectl get all -A kubectl get pods -o wide kubectl describe pods p ...
- QT笔记--checkbox
1 复选框 一般用来表示“是/否”.: 2 属性有哪些 如果需要默认选中,那么设置QAbstractButton->checked 3 哪些操作函数 需要判断是否选中.也就是isChecked( ...
- was8.5和aop的问题:JVMVRFY013 违反类装入约束
一.错误日志:Error 500: javax.servlet.ServletException: java.lang.VerifyError: JVMVRFY013 违反类装入约束 类=org/sp ...
- vm采用NAT方式连接时,设置静态ip
一,共享无线连接或本地连接,给VMnet8. 在网络配置中,选着无线连接,右键属性,共享. 这里默认给虚拟网卡VMnet8,分配了IP:192.168.137.1. 二,在VMware中配置VMnet ...
- Fiddler如何切换hosts以及切换hosts的另一个神器SwithcHosts
- poj 3744 题解
题目 题意: $ yyf $ 一开始在 $ 1 $ 号节点他要通过一条有 $ n $ 个地雷的道路,每次前进他有 $ p $ 的概率前进一步,有 $ 1-p $ 的概率前进两步,问他不领盒饭的概率. ...
- python 之 Django框架(ORM常用字段和字段参数、关系字段和和字段参数)
12.324 Django ORM常用字段 .id = models.AutoField(primary_key=True):int自增列,必须填入参数 primary_key=True.当model ...