drawRect中抗锯齿
在开始之前,我们需要创建一个DrawRectView
其初始代码为
//

//  DrawRectView.h

//  CGContextSetShouldAntialias

//

//  Created by YouXianMing on 2017/8/30.

//  Copyright © 2017年 TechCode. All rights reserved.

//

#import <UIKit/UIKit.h>

@interface DrawRectView : UIView

@end
//

//  DrawRectView.m

//  CGContextSetShouldAntialias

//

//  Created by YouXianMing on 2017/8/30.

//  Copyright © 2017年 TechCode. All rights reserved.

//

#import "DrawRectView.h"

@implementation DrawRectView

- (instancetype)initWithFrame:(CGRect)frame {

    if (self = [super initWithFrame:frame]) {

        self.backgroundColor   = [UIColor clearColor];

        self.layer.borderWidth = 0.5f;

        self.layer.borderColor = [UIColor redColor].CGColor;

    }

    return self;

}

@end
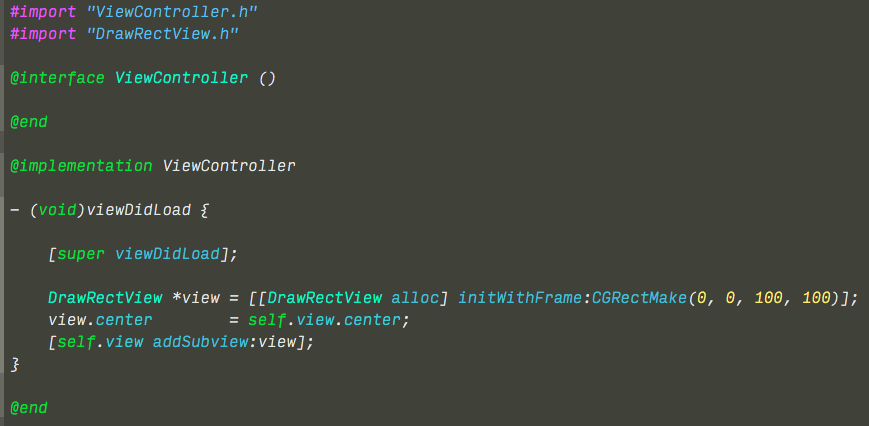
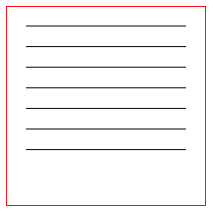
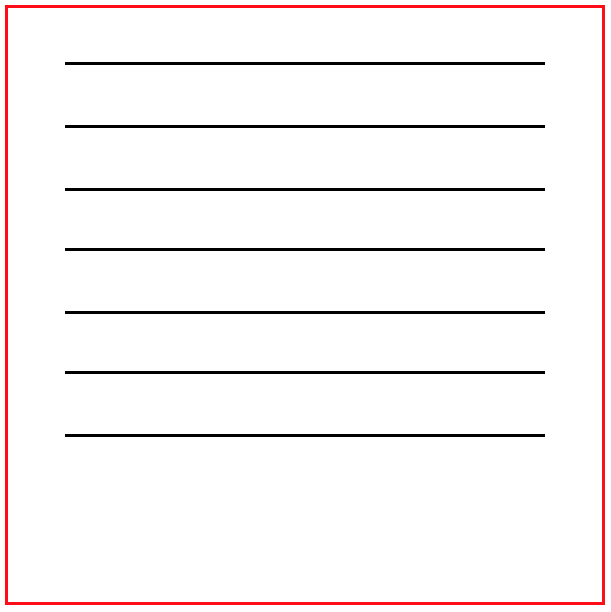
在ViewController中使用(尺寸为100x100并居中)
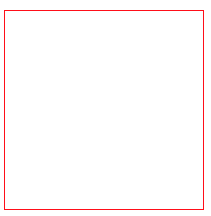
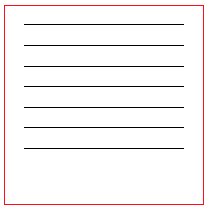
显示效果如下(用红色边框显示边界)
修改DrawRectView.m代码如下
//

//  DrawRectView.m

//  CGContextSetShouldAntialias

//

//  Created by YouXianMing on 2017/8/30.

//  Copyright © 2017年 TechCode. All rights reserved.

//

#import "DrawRectView.h"

@implementation DrawRectView

- (instancetype)initWithFrame:(CGRect)frame {

    if (self = [super initWithFrame:frame]) {

        self.backgroundColor   = [UIColor clearColor];

        self.layer.borderWidth = 0.5f;

        self.layer.borderColor = [UIColor redColor].CGColor;

    }

    return self;

}

- (void)drawRect:(CGRect)rect {

    // Set stroke color

    [[UIColor blackColor] setStroke];

    // Draw 7 lines.

    for (int i = ; i < ; i++) {

        UIBezierPath *path = [UIBezierPath bezierPath];

        path.lineWidth     = 0.5f;

        [path moveToPoint:CGPointMake(,  + i * 10.3)];

        [path addLineToPoint:CGPointMake( + ,  + i * 10.3)];

        [path stroke];

    }

}

@end
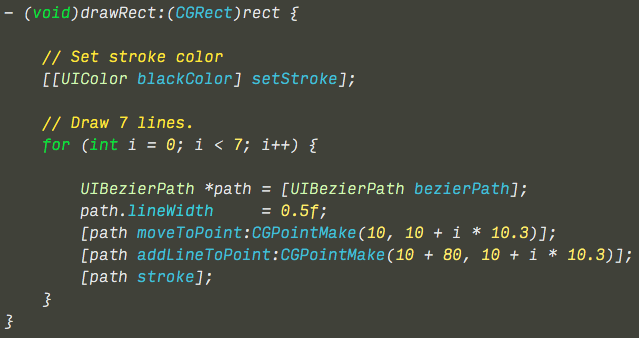
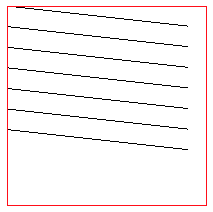
其实就添加了下面的绘图代码而已,绘制7条线条,每条线条的宽度为0.5
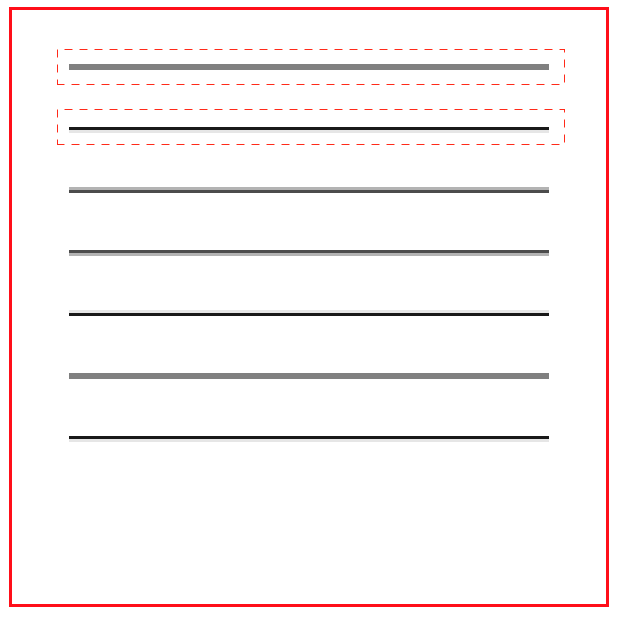
效果如下
将图片放大后会发现,线条的宽度并不一致,有的颜色深,有的颜色浅,这就是开了抗锯齿之后的效果
修改代码关闭抗锯齿
//
// DrawRectView.m
// CGContextSetShouldAntialias
//
// Created by YouXianMing on 2017/8/30.
// Copyright © 2017年 TechCode. All rights reserved.
// #import "DrawRectView.h" @implementation DrawRectView - (instancetype)initWithFrame:(CGRect)frame { if (self = [super initWithFrame:frame]) { self.backgroundColor = [UIColor clearColor];
self.layer.borderWidth = 0.5f;
self.layer.borderColor = [UIColor redColor].CGColor;
} return self;
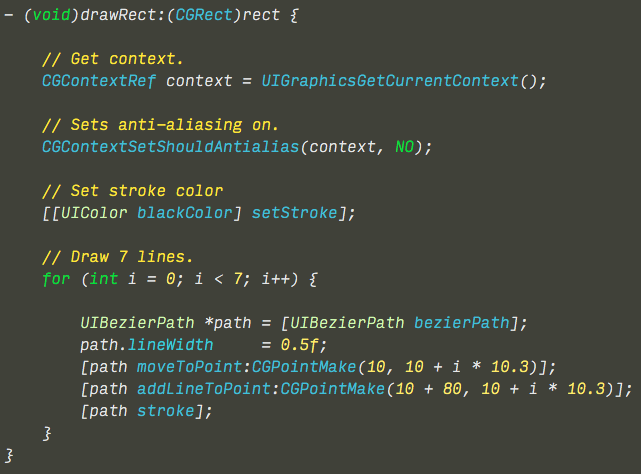
} - (void)drawRect:(CGRect)rect { // Get context.
CGContextRef context = UIGraphicsGetCurrentContext(); // Sets anti-aliasing on.
CGContextSetShouldAntialias(context, NO); // Set stroke color
[[UIColor blackColor] setStroke]; // Draw 7 lines.
for (int i = ; i < ; i++) { UIBezierPath *path = [UIBezierPath bezierPath];
path.lineWidth = 0.5f;
[path moveToPoint:CGPointMake(, + i * 10.3)];
[path addLineToPoint:CGPointMake( + , + i * 10.3)];
[path stroke];
}
} @end
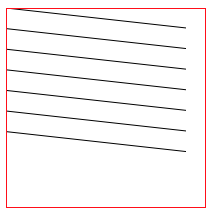
显示效果
图片放大后,线条宽度一致
结论
开了抗锯齿后,系统会对绘制的线条进行一定的模糊处理,来达到不容易看到狗牙的目的,什么是狗牙?你可以运行以下代码来看看两者之间的区别
//

//  DrawRectView.m

//  CGContextSetShouldAntialias

//

//  Created by YouXianMing on 2017/8/30.

//  Copyright © 2017年 TechCode. All rights reserved.

//

#import "DrawRectView.h"

@implementation DrawRectView

- (instancetype)initWithFrame:(CGRect)frame {

    if (self = [super initWithFrame:frame]) {

        self.backgroundColor   = [UIColor clearColor];

        self.layer.borderWidth = 0.5f;

        self.layer.borderColor = [UIColor redColor].CGColor;

    }

    return self;

}

- (void)drawRect:(CGRect)rect {

    // Get context.

    CGContextRef context = UIGraphicsGetCurrentContext();

    // Sets anti-aliasing off.

    CGContextSetShouldAntialias(context, NO);

    // Set stroke color

    [[UIColor blackColor] setStroke];

    // Draw 7 lines.

    for (int i = ; i < ; i++) {

        UIBezierPath *path = [UIBezierPath bezierPath];

        path.lineWidth     = 0.5f;

        [path moveToPoint:CGPointMake(,  + i * 10.3)];

        [path addLineToPoint:CGPointMake( + ,  + i * 10.3)];

        [path stroke];

    }

}

@end
关闭抗锯齿后不会出现模糊现象,都会出现锯齿,俗称狗牙

打开抗锯齿功能之后线条会模糊,锯齿得到了一些缓解,称作抗锯齿

drawRect中抗锯齿的更多相关文章
- CxImage图像库的使用 .
http://blog.csdn.net/wangjie0377/article/details/7830405 CxImage图像库 CxImage下载地址:http://www.codeproje ...
- 【转】CxImage图像库的使用
CxImage下载地址:http://www.codeproject.com/KB/graphics/cximage/cximage600_full.zip 作者:Davide Pizzolato C ...
- 【ShaderToy】基础篇之谈谈点、线的绘制
写在前面 写前面一篇的时候,发现还是不够基础.因此打算增加几篇基础篇,从点线面开始,希望可以更好理解. 其实用Pixel Shader的过程很像在纸上绘画的过程.屏幕上的每一个像素对应了纸上的一个方格 ...
- 【视频开发】 十全大补:CxImage图像处理类库
十全大补:CxImage图像处理类库 转载IT168 CxImage是一个可以用于MFC 的C++图像处理类库类,它可以打开,保存,显示,转换各种常见格式的图像文件,比如BMP, JP ...
- android.graphics(1) - Paint, Canvas, drawLine, drawPoint, drawRect, drawRoundRect, drawCircle, drawOval, drawArc
一.Paint与Canvas 像我们平时画图一样,需要两个工具,纸和笔.Paint就是相当于笔,而Canvas就是纸,这里叫画布. 所以,凡有跟要要画的东西的设置相关的,比如大小,粗细,画笔颜色,透明 ...
- Qt 2D绘图之二:抗锯齿渲染和坐标系统
一.抗锯齿渲染 1.1 逻辑绘图 图形基元的大小(宽度和高度)始终与其数学模型相对应,下图示意了忽略其渲染时使用的画笔的宽度的样子. 1.2 物理绘图(默认情况) 在默认的情况下,绘制会产生锯齿,并且 ...
- drawRect
1) 画笔设置 Paint.Style.STROKE 中空模式 paint = new Paint(); //新建一个画笔对象 paint.setAntiAlias(true);//抗锯齿功能 pai ...
- 用drawRect的方式实现一个尺子
用drawRect的方式实现了一个尺子选择器,demo在这里:https://github.com/Phelthas/LXMRulerView 效果如图: 如果不考虑复用的问题,我感觉最简单的实现 ...
- UIView的layoutSubviews和drawRect方法何时调用
首先两个方法都是异步执行.layoutSubviews方便数据计算,drawRect方便视图重绘. layoutSubviews在以下情况下会被调用: 1.init初始化不会触发layoutSubvi ...
随机推荐
- ionic2中使用moment.js
安装 npm i moment --save 使用 import { Pipe, PipeTransform } from '@angular/core'; import Moment from 'm ...
- JMeter选择协议踩过的坑
- Codeforces 837F Prefix Sums
Prefix Sums 在 n >= 4时候直接暴力. n <= 4的时候二分加矩阵快速幂去check #include<bits/stdc++.h> #define LL l ...
- redis在Windows10下的安装
以前在linux学习了redis,考虑到电脑负荷,这次学习一下如何在本地Windows下安装redis,进行学习. 下面的一些安装的步骤: 1.下载 网址:https://github.com/Mic ...
- Webmin的安装
Webmin的安装很简单,下面就详细说一下安装步骤. 1.用ssh客户端软件登陆服务器2.切换目录到root下,命令是:cd /root/3.下载Webmin的安装文件,命令是:wget http:/ ...
- P1168 中位数
P1168 中位数树状数组+二分答案.树状数组就是起一个高效查询比二分出来的数小的有几个. #include<iostream> #include<cstdio> #inclu ...
- NiftyNet开源平台使用
NiftyNet是一款开源的卷积神经网络平台,专门针对医学图像处理分析,上一篇博客已经详细介绍了这个平台,接下来让我简单介绍一下目前我了解到的使用方法.更详细的使用方法.以及配置过程请查看NiftyN ...
- 一种表达式语言的解析引擎JEXL简单使用
Jexl 是一个 Expression Language 的解析引擎, 是为了方便嵌入你的系统或者程序框架的开发中, 他算是实现了 JSTL 中 EL 的延伸版本. 不过也采用了一些 Velocity ...
- JS实现缓动动画效果
原理如下: 假设要从数值A变化到数值B,如果是线性运动,则每次移动距离是一样:如果是缓动,每次移动距离不一样.那如何才能不一样呢?很简单,按比例移动就可以. 例如:每次移动剩余距离的一半. 对吧,超容 ...
- Android 简历 怎么写? 月薪10K,20K+, 怎么拿到面试?
估计不少找Android工作的,技术还可以,就是投简历,没有面试通知.很有可能是简历的问题. 那么我这里有一些简历,可以参考. 其中也有我的, 月薪20K+的哦, 参考一下,会有你的面试的. 额, ...