class13and14and15_登录窗口
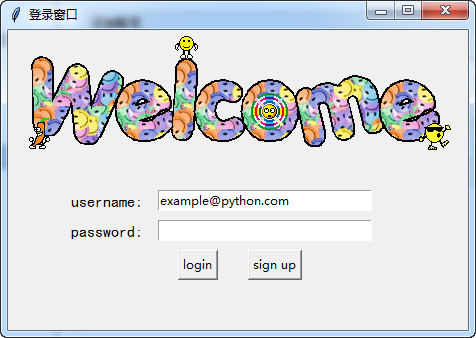
最终的运行效果图(程序见序号6.2):
#!/usr/bin/env python
# -*- coding:utf-8 -*-
# ------------------------------------------------------------
#
# 参考资料:
# 用 python 和 tkinter 做简单的窗口视窗 - 网易云课堂
# https://study.163.com/course/courseLearn.htm?courseId=1003216011#/learn/video?lessonId=1003649337&courseId=1003216011
#
#
# ------------------------------------------------------------
# ******************** class13and14and15_登录窗口 *******************
# ******************** class13and14and15_登录窗口 *******************
# =====>>>>>>内容概览
# =====>>>>>>内容概览# class13and14and15_登录窗口
'''
# ------------------------------------------------------------
# # 1、生成对应窗口,并加载图片
# ------------------------------------------------------------# ------------------------------------------------------------
# # 2、放置登录的标签
# # # 已经实现功能:1、生成对应窗口,并加载图片
# ------------------------------------------------------------# ------------------------------------------------------------
# # 3、放置登录输入信息栏
# # # 已经实现功能:
# # # 1、生成对应窗口,并加载图片
# # # 2、放置登录的标签
# ------------------------------------------------------------# ------------------------------------------------------------
# # 4、放置登录按钮
# # # 已经实现功能:
# # # 1、生成对应窗口,并加载图片
# # # 2、放置登录的标签
# # # 3、放置登录输入信息栏
# ------------------------------------------------------------# ------------------------------------------------------------
# # 5、绑定login 按钮的相关功能
# # # 已经实现功能:
# # # 1、生成对应窗口,并加载图片
# # # 2、放置登录的标签
# # # 3、放置登录输入信息栏
# # # 4、放置登录按钮
# ------------------------------------------------------------# ------------------------------------------------------------
# # 6、绑定sign up 按钮的功能
# # # 已经实现功能:
# # # 1、生成对应窗口,并加载图片
# # # 2、放置登录的标签
# # # 3、放置登录输入信息栏
# # # 4、放置登录按钮
# # # 5、绑定login 按钮的相关功能
# ------------------------------------------------------------# ------------------------------------------------------------
# # 6.1、绑定sign up 按钮的功能, 建立新的sign up窗口
# # # 已经实现功能:
# # # 1、生成对应窗口,并加载图片
# # # 2、放置登录的标签
# # # 3、放置登录输入信息栏
# # # 4、放置登录按钮
# # # 5、绑定login 按钮的相关功能
# # # 6、绑定sign up 按钮的功能
# ------------------------------------------------------------# ------------------------------------------------------------
# # 6.2、完成登录窗口设计
# # # 已经实现功能:
# # # 1、生成对应窗口,并加载图片
# # # 2、放置登录的标签
# # # 3、放置登录输入信息栏
# # # 4、放置登录按钮
# # # 5、绑定login 按钮的相关功能
# # # 6、绑定sign up 按钮的功能
# # # 6.1、绑定sign up 按钮的功能, 建立新的sign up窗口
# ------------------------------------------------------------'''
# ------------------------------------------------分割线-------------------------------------------------
# ------------------------------------------------分割线-------------------------------------------------
# ------------------------------------------------分割线-------------------------------------------------
# ------------------------------------------------分割线-------------------------------------------------

'''

# ------------------------------------------------------------

# # 1、生成对应窗口,并加载图片

# ------------------------------------------------------------

'''

#

# import tkinter as tk

#

# window = tk.Tk()

# window.title("登录窗口")

# window.maxsize(460, 300)

# window.minsize(460, 300)

# # welcom image

# canvas = tk.Canvas(window, width=500, height=200)

# image_file = tk.PhotoImage(file='welcome.gif')

# # 10, 0 表示锚点的横,纵位置;     anchor='nw'表示锚点的位置是左上角

# image = canvas.create_image(10, 0, anchor='nw', image=image_file)

# canvas.pack(side='top')

#

# window.mainloop()

# ------------------------------------------------分割线-------------------------------------------------

'''

# ------------------------------------------------------------

# # 2、放置登录的标签

# # # 已经实现功能:1、生成对应窗口,并加载图片

# ------------------------------------------------------------

'''

# import tkinter as tk

#

# window = tk.Tk()

# window.title("登录窗口")

# window.maxsize(460, 300)

# window.minsize(460, 300)

# # welcom image

# canvas = tk.Canvas(window, width=500, height=200)

# image_file = tk.PhotoImage(file='welcome.gif')

# # 10, 0 表示锚点的横,纵位置;     anchor='nw'表示锚点的位置是左上角

# image = canvas.create_image(10, 0, anchor='nw', image=image_file)

# canvas.pack(side='top')

#

# tk.Label(window, text='username', font=('黑体', 12)).place(x=60, y=160, anchor='nw')

# tk.Label(window, text='password', font=('黑体', 12)).place(x=60, y=190, anchor='nw')

#

# window.mainloop()

#

# ------------------------------------------------分割线-------------------------------------------------

'''

# ------------------------------------------------------------

# # 3、放置登录输入信息栏

# # # 已经实现功能:

# # # 1、生成对应窗口,并加载图片

# # # 2、放置登录的标签

# ------------------------------------------------------------

'''

# import tkinter as tk

#

# window = tk.Tk()

# window.title("登录窗口")

# window.maxsize(460, 300)

# window.minsize(460, 300)

# # welcom image

# canvas = tk.Canvas(window, width=500, height=200)

# image_file = tk.PhotoImage(file='welcome.gif')

# # 10, 0 表示锚点的横,纵位置;     anchor='nw'表示锚点的位置是左上角

# image = canvas.create_image(10, 0, anchor='nw', image=image_file)

# canvas.pack(side='top')

#

# tk.Label(window, text='username', font=('黑体', 12)).place(x=60, y=160, anchor='nw')

# tk.Label(window, text='password', font=('黑体', 12)).place(x=60, y=190, anchor='nw')

#

# # 设置存储的变量

# username = tk.StringVar()

# password = tk.StringVar()

# # 设置登录的输入框,并获取信息

# entry_username = tk.Entry(window, textvariable=username, width=30).place(x=150, y=160, anchor='nw')

# entry_password = tk.Entry(window, textvariable=password, width=30, show='*').place(x=150, y=190, anchor='nw')

# # 初始化 username 的信息

# username.set('example@python.com')

#

# window.mainloop()

#

#

# ------------------------------------------------分割线-------------------------------------------------

'''

# ------------------------------------------------------------

# # 4、放置登录按钮

# # # 已经实现功能:

# # # 1、生成对应窗口,并加载图片

# # # 2、放置登录的标签

# # # 3、放置登录输入信息栏

# ------------------------------------------------------------

'''

# import tkinter as tk

#

# window = tk.Tk()

# window.title("登录窗口")

# window.maxsize(460, 300)

# window.minsize(460, 300)

# # welcom image

# canvas = tk.Canvas(window, width=500, height=200)

# image_file = tk.PhotoImage(file='welcome.gif')

# # 10, 0 表示锚点的横,纵位置;     anchor='nw'表示锚点的位置是左上角

# image = canvas.create_image(10, 0, anchor='nw', image=image_file)

# canvas.pack(side='top')

#

# tk.Label(window, text='username', font=('黑体', 12)).place(x=60, y=160, anchor='nw')

# tk.Label(window, text='password', font=('黑体', 12)).place(x=60, y=190, anchor='nw')

#

# # 设置存储的变量

# username = tk.StringVar()

# password = tk.StringVar()

# # 设置登录的输入框,并获取信息

# entry_username = tk.Entry(window, textvariable=username, width=30).place(x=150, y=160, anchor='nw')

# entry_password = tk.Entry(window, textvariable=password, width=30, show='*').place(x=150, y=190, anchor='nw')

# # 初始化 username 的信息

# username.set('example@python.com')

#

# tk.Button(text='login').place(x=170, y=220, anchor='nw')

# tk.Button(text='sign up').place(x=240, y=220, anchor='nw')

#

# window.mainloop()

# ------------------------------------------------分割线-------------------------------------------------

'''

# ------------------------------------------------------------

# # 5、绑定login 按钮的相关功能

# # # 已经实现功能:

# # # 1、生成对应窗口,并加载图片

# # # 2、放置登录的标签

# # # 3、放置登录输入信息栏

# # # 4、放置登录按钮

# ------------------------------------------------------------

'''

# import tkinter as tk

# from tkinter import messagebox

# import pickle

#

# window = tk.Tk()

# window.title("登录窗口")

# window.maxsize(460, 300)

# window.minsize(460, 300)

# # welcom image

# canvas = tk.Canvas(window, width=500, height=200)

# image_file = tk.PhotoImage(file='welcome.gif')

# # 10, 0 表示锚点的横,纵位置;     anchor='nw'表示锚点的位置是左上角

# image = canvas.create_image(10, 0, anchor='nw', image=image_file)

# canvas.pack(side='top')

#

# tk.Label(window, text='username', font=('黑体', 12)).place(x=60, y=160, anchor='nw')

# tk.Label(window, text='password', font=('黑体', 12)).place(x=60, y=190, anchor='nw')

#

# # 设置存储的变量

# username = tk.StringVar()

# password = tk.StringVar()

# # 设置登录的输入框,并获取信息

# entry_username = tk.Entry(window, textvariable=username, width=30).place(x=150, y=160, anchor='nw')

# entry_password = tk.Entry(window, textvariable=password, width=30, show='*').place(x=150, y=190, anchor='nw')

# # 初始化 username 的信息

# username.set('example@python.com')

#

# def usr_login():

#     usr_name = username.get()

#     usr_password = password.get()

#     try:

#         with open('usrs_info.pickle', 'rb') as usr_file:

#             usrs_info = pickle.load(usr_file)

#     except FileNotFoundError:

#         usrs_info = {'admin': 'admin'}

#         pickle.dump(usrs_info, usr_file)

#

#     if usr_name in usrs_info:

#         if usr_password == usrs_info[usr_name]:

#             messagebox.showinfo(title='Welcom', message='Welcome to log in! \n'+ usr_name)

#         else:

#             messagebox.showerror(title='Error', message='Password Error!\nTry again!!')

#     else:

#         is_sign_up = messagebox.askyesno(title='Ask', message='You have not sign up yet.\nSign up now?')

#         if is_sign_up is True:

#             usr_sign_up()

#

#

# def usr_sign_up():

#     pass

#

# tk.Button(text='login', command=usr_login).place(x=170, y=220, anchor='nw')

# tk.Button(text='sign up', command=usr_sign_up).place(x=240, y=220, anchor='nw')

#

# window.mainloop()

# ------------------------------------------------分割线-------------------------------------------------

'''

# ------------------------------------------------------------

# # 6、绑定sign up 按钮的功能

# # # 已经实现功能:

# # # 1、生成对应窗口,并加载图片

# # # 2、放置登录的标签

# # # 3、放置登录输入信息栏

# # # 4、放置登录按钮

# # # 5、绑定login 按钮的相关功能

# ------------------------------------------------------------

'''

# import tkinter as tk

# from tkinter import messagebox

# import pickle

#

# window = tk.Tk()

# window.title("登录窗口")

# window.maxsize(460, 300)

# window.minsize(460, 300)

# # welcom image

# canvas = tk.Canvas(window, width=500, height=200)

# image_file = tk.PhotoImage(file='welcome.gif')

# # 10, 0 表示锚点的横,纵位置;     anchor='nw'表示锚点的位置是左上角

# image = canvas.create_image(10, 0, anchor='nw', image=image_file)

# canvas.pack(side='top')

#

# tk.Label(window, text='username', font=('黑体', 12)).place(x=60, y=160, anchor='nw')

# tk.Label(window, text='password', font=('黑体', 12)).place(x=60, y=190, anchor='nw')

#

# # 设置存储的变量

# username = tk.StringVar()

# password = tk.StringVar()

# # 设置登录的输入框,并获取信息

# entry_username = tk.Entry(window, textvariable=username, width=30).place(x=150, y=160, anchor='nw')

# entry_password = tk.Entry(window, textvariable=password, width=30, show='*').place(x=150, y=190, anchor='nw')

# # 初始化 username 的信息

# username.set('example@python.com')

#

# def usr_login():

#     usr_name = username.get()

#     usr_password = password.get()

#     try:

#         with open('usrs_info.pickle', 'rb') as usr_file:

#             usrs_info = pickle.load(usr_file)

#     except FileNotFoundError:

#         usrs_info = {'admin': 'admin'}

#         pickle.dump(usrs_info, usr_file)

#

#     if usr_name in usrs_info:

#         if usr_password == usrs_info[usr_name]:

#             messagebox.showinfo(title='Welcom', message='Welcome to log in! \n'+ usr_name)

#         else:

#             messagebox.showerror(title='Error', message='Password Error!\nTry again!!')

#     else:

#         is_sign_up = messagebox.askyesno(title='Ask', message='You have not sign up yet.\nSign up now?')

#         if is_sign_up is True:

#             usr_sign_up()

#

#

# def usr_sign_up():

#     window_sign_up = tk.Toplevel(window)

#     window_sign_up.title('Sign up window')

#     window_sign_up.maxsize(460, 300)

#     window_sign_up.minsize(460, 300)

#

#

#

#

# tk.Button(text='login', command=usr_login).place(x=170, y=220, anchor='nw')

# tk.Button(text='sign up', command=usr_sign_up).place(x=240, y=220, anchor='nw')

#

# window.mainloop()

# ------------------------------------------------分割线-------------------------------------------------

'''

# ------------------------------------------------------------

# # 6.1、绑定sign up 按钮的功能, 建立新的sign up窗口

# # # 已经实现功能:

# # # 1、生成对应窗口,并加载图片

# # # 2、放置登录的标签

# # # 3、放置登录输入信息栏

# # # 4、放置登录按钮

# # # 5、绑定login 按钮的相关功能

# # # 6、绑定sign up 按钮的功能

# ------------------------------------------------------------

'''

# import tkinter as tk

# from tkinter import messagebox

# import pickle

#

# window = tk.Tk()

# window.title("登录窗口")

# window.maxsize(460, 300)

# window.minsize(460, 300)

# # welcom image

# canvas = tk.Canvas(window, width=500, height=200)

# image_file = tk.PhotoImage(file='welcome.gif')

# # 10, 0 表示锚点的横,纵位置;     anchor='nw'表示锚点的位置是左上角

# image = canvas.create_image(10, 0, anchor='nw', image=image_file)

# canvas.pack(side='top')

#

# tk.Label(window, text='username:', font=('黑体', 12)).place(x=60, y=160, anchor='nw')

# tk.Label(window, text='password:', font=('黑体', 12)).place(x=60, y=190, anchor='nw')

#

# # 设置存储的变量

# username = tk.StringVar()

# password = tk.StringVar()

# # 设置登录的输入框,并获取信息

# entry_username = tk.Entry(window, textvariable=username, width=30).place(x=150, y=160, anchor='nw')

# entry_password = tk.Entry(window, textvariable=password, width=30, show='*').place(x=150, y=190, anchor='nw')

# # 初始化 username 的信息

# username.set('example@python.com')

#

# def usr_login():

#     usr_name = username.get()

#     usr_password = password.get()

#     try:

#         with open('usrs_info.pickle', 'rb') as usr_file:

#             usrs_info = pickle.load(usr_file)

#     except FileNotFoundError:

#         usrs_info = {'admin': 'admin'}

#         pickle.dump(usrs_info, usr_file)

#

#     if usr_name in usrs_info:

#         if usr_password == usrs_info[usr_name]:

#             messagebox.showinfo(title='Welcom', message='Welcome to log in! \n'+ usr_name)

#         else:

#             messagebox.showerror(title='Error', message='Password Error!\nTry again!!')

#     else:

#         is_sign_up = messagebox.askyesno(title='Ask', message='You have not sign up yet.\nSign up now?')

#         if is_sign_up is True:

#             usr_sign_up()

#

#

# def usr_sign_up():

#     # 设置窗口

#     window_sign_up = tk.Toplevel(window)

#     window_sign_up.title('Sign up window')

#     window_sign_up.maxsize(460, 150)

#     window_sign_up.minsize(460, 150)

#

#     # 设置标签

#     tk.Label(window_sign_up, text='username:', font=('黑体', 12)).place(x=30, y=30, anchor='nw')

#     tk.Label(window_sign_up, text='password:', font=('黑体', 12)).place(x=30, y=60, anchor='nw')

#     tk.Label(window_sign_up, text='confirm password:', font=('黑体', 12)).place(x=30, y=90, anchor='nw')

#

#     # 设置输入框

#     # 设置存储的变量

#     usr_username = tk.StringVar()

#     usr_password1 = tk.StringVar()

#     usr_password2 = tk.StringVar()

#     # 设置登录的输入框,并获取信息

#     entry_username = tk.Entry(window_sign_up, textvariable=usr_username, width=30).place(x=170, y=30, anchor='nw')

#     entry_password1 = tk.Entry(window_sign_up, textvariable=usr_password1, width=30, show='*').place(x=170, y=60, anchor='nw')

#     entry_password2 = tk.Entry(window_sign_up, textvariable=usr_password2, width=30, show='*').place(x=170, y=90, anchor='nw')

#     # 初始化 username 的信息

#     usr_username.set('example@python.com')

#

#

#

#

# tk.Button(text='login', command=usr_login).place(x=170, y=220, anchor='nw')

# tk.Button(text='sign up', command=usr_sign_up).place(x=240, y=220, anchor='nw')

#

# window.mainloop()

#

# ------------------------------------------------分割线-------------------------------------------------

'''

# ------------------------------------------------------------

# # 6.2、完成登录窗口设计

# # # 已经实现功能:

# # # 1、生成对应窗口,并加载图片

# # # 2、放置登录的标签

# # # 3、放置登录输入信息栏

# # # 4、放置登录按钮

# # # 5、绑定login 按钮的相关功能

# # # 6、绑定sign up 按钮的功能

# # # 6.1、绑定sign up 按钮的功能, 建立新的sign up窗口

# ------------------------------------------------------------

'''

import tkinter as tk

from tkinter import messagebox

import pickle

window = tk.Tk()

window.title("登录窗口")

window.maxsize(460, 300)

window.minsize(460, 300)

# welcom image

canvas = tk.Canvas(window, width=500, height=200)

image_file = tk.PhotoImage(file='welcome.gif')

# 10, 0 表示锚点的横,纵位置;     anchor='nw'表示锚点的位置是左上角

image = canvas.create_image(10, 0, anchor='nw', image=image_file)

canvas.pack(side='top')

tk.Label(window, text='username:', font=('黑体', 12)).place(x=60, y=160, anchor='nw')

tk.Label(window, text='password:', font=('黑体', 12)).place(x=60, y=190, anchor='nw')

# 设置存储的变量

username = tk.StringVar()

password = tk.StringVar()

# 设置登录的输入框,并获取信息

entry_username = tk.Entry(window, textvariable=username, width=30).place(x=150, y=160, anchor='nw')

entry_password = tk.Entry(window, textvariable=password, width=30, show='*').place(x=150, y=190, anchor='nw')

# 初始化 username 的信息

username.set('example@python.com')

def usr_login():

    usr_name = username.get()

    usr_password = password.get()

    try:

        with open('usrs_info.pickle', 'rb') as usr_file:

            usrs_info = pickle.load(usr_file)

    except FileNotFoundError:

        usrs_info = {'admin': 'admin'}

        pickle.dump(usrs_info, usr_file)

    if usr_name in usrs_info:

        if usr_password == usrs_info[usr_name]:

            messagebox.showinfo(title='Welcom', message='Welcome to log in! \n'+ usr_name)

        else:

            messagebox.showerror(title='Error', message='Password Error!\nTry again!!')

    else:

        is_sign_up = messagebox.askyesno(title='Ask', message='You have not sign up yet.\nSign up now?')

        if is_sign_up is True:

            usr_sign_up()

def usr_sign_up():

    # 设置窗口

    window_sign_up = tk.Toplevel(window)

    window_sign_up.title('Sign up window')

    window_sign_up.maxsize(460, 180)

    window_sign_up.minsize(460, 180)

    # 设置标签

    tk.Label(window_sign_up, text='username:', font=('黑体', 12)).place(x=30, y=30, anchor='nw')

    tk.Label(window_sign_up, text='password:', font=('黑体', 12)).place(x=30, y=60, anchor='nw')

    tk.Label(window_sign_up, text='confirm password:', font=('黑体', 12)).place(x=30, y=90, anchor='nw')

    # 设置输入框

    # 设置存储的变量

    usr_username = tk.StringVar()

    usr_password1 = tk.StringVar()

    usr_password2 = tk.StringVar()

    # 设置登录的输入框,并获取信息

    usr_entry_username = tk.Entry(window_sign_up, textvariable=usr_username, width=40).place(x=170, y=30, anchor='nw')

    usr_entry_password1 = tk.Entry(window_sign_up, textvariable=usr_password1, width=40, show='*').place(x=170, y=60, anchor='nw')

    usr_entry_password2 = tk.Entry(window_sign_up, textvariable=usr_password2, width=40, show='*').place(x=170, y=90, anchor='nw')

    # 初始化 username 的信息

    usr_username.set('example@python.com')

    def new_sign_up():

        new_name = usr_username.get()

        new_password = usr_password1.get()

        new_password_confirm = usr_password2.get()

        # 打开配置文件,查看注册的信息是否在文件中

        with open('usrs_info.pickle', 'rb') as usr_file:

            exist_usr_info = pickle.load(usr_file)

        # 对比用户名是否已经储存在文件中

        if new_name in exist_usr_info :

            messagebox.showerror(title='Error',message='The user has already signed up!')

        else:

            if new_password != new_password_confirm:

                messagebox.showerror(title='Error', message='Password and confirm password must be the same!')

            else:

                exist_usr_info[new_name] = new_password

                with open('usrs_info.pickle', 'wb') as usr_file:

                    # 写入到文件中

                    pickle.dump(exist_usr_info, usr_file)

                    messagebox.showinfo(title='Welcome', message='You have successfully signed up!')

                    window_sign_up.destroy()

    # 设置注册的按钮

    tk.Button(window_sign_up, text='sign up', command=new_sign_up).place(x=220, y=120, anchor='nw')

tk.Button(text='login', command=usr_login).place(x=170, y=220, anchor='nw')

tk.Button(text='sign up', command=usr_sign_up).place(x=240, y=220, anchor='nw')

window.mainloop()
最终的运行效果图(程序见序号6.2):
class13and14and15_登录窗口的更多相关文章
- project2_login(登录窗口)
该project是在网易云课堂上的公开课<用 python 和 tkinter 做简单的窗口视窗>课程当中学习的,是该课程中的一个结课小项目,项目中的知识点内容涉及该课程中所学习到的大多数 ...
- 【转】【WPF】WPF 登录窗口关闭时打开主窗口
在WPF中设计登录窗口关闭时打开主窗口,自动生成的App.xaml不能满足要求, 1.把App.xaml的属性窗口中的生成操作设定为 无 2.添加Program类 static class Progr ...
- SourceTree不出现用户登录窗口,提示错误fatal: unable to access'...'; error setting certificate verify locations
SourceTree不出现用户登录窗口,提示错误fatal: unable to access'...'; error setting certificate verify locations; .. ...
- QUI操作超时弹出登录窗口登录的处理方式
在使用QUI开发的业务系统中,如果长时间没操作,session过期后,再次操作系统超时会自动跳转到登陆页面,如果当前有一些操作没有保存,需要重新登录后再次填写信息,用户体验很不好! 为了避免超时后页面 ...
- C#实现登录窗口(不用隐藏)
C#登录窗口的实现,特点就是不用隐藏,感兴趣的朋友不要错过 (1).在程序入口处,打开登录窗口 复制代码代码如下: static void Main() { Application.EnableV ...
- 基于WebForm+EasyUI的业务管理系统形成之旅 -- 登录窗口(Ⅱ)
上篇<基于WebForm+EasyUI的业务管理系统形成之旅 -- 系统设置>,主要是介绍系统浏览器在线下载安装,这些前期准备是非常重要的. 最近忙于将工程管理系统中各个模块,用业务流程方 ...
- 高仿QQ即时聊天软件开发系列之三登录窗口用户选择下拉框
上一篇高仿QQ即时聊天软件开发系列之二登录窗口界面写了一个大概的布局和原理 这一篇详细说下拉框的实现原理 先上最终效果图 一开始其实只是想给下拉框加一个placeholder效果,让下拉框在未选择未输 ...
- 高仿QQ即时聊天软件开发系列之二登录窗口界面
继上一篇高仿QQ即时聊天软件开发系列之一开端之后,开始做登录窗口 废话不多说,先看效果,只有界面 可能还有一些细节地方没有做,例如那个LOGO嘛,不要在意这些细节 GIF虽短,可是这做起来真难,好吧因 ...
- C# WPF 建立无边框(标题栏)的登录窗口
前言:笔者最近用c#写WPF做了一个项目,此前未曾做过完整的WPF项目,算是一边学一边用,网上搜了不少资料,效率当然是不敢恭维的,有时会在一些很简单的问题上纠结很长时间,血与泪的教训可不少. 不过,正 ...
随机推荐
- Linux中网卡配置/etc/sysconfig/network-script/ifcfg-eth0
网络接口配置文件 [root@localhost ~]# cat /etc/sysconfig/network-scripts/ifcfg-eth0 TYPE=Ethernet #网卡类型 DEVIC ...
- 笨办法学Python记录--习题37 异常,lambda,yield,转义序列
习题中提到了raise,查了下,顺便所有异常类关键字罗列如下文章中: 为什么使用异常 错误处理.事件通知.特殊情况处理.退出时的行为.不正常的程序流程. 简单的示例 在没有任何定义x变量的时候: pr ...
- C#网页数据采集(三)HttpWebRequest
<span style="font-family: Arial, Helvetica, sans-serif; background-color: rgb(255, 255, 255) ...
- php开发面试题---Linux常用命令大全
php开发面试题---Linux常用命令大全 一.总结 一句话总结: ls 查看目录中的文件 cd .. 返回上一级目录 cat 查看文件内容 touch 新建文件或修改时间 1.linux 系统信息 ...
- Zend Studio出现 Some characters cannot be mapped using "GBK" character encoding 错误
解决办法: Window->Profermance->General->Content Types->Text看目录下面的每个文件,包括子目录里面 Default encodi ...
- jmeter 环境java监视和管理控制
打开这个小工具的步骤很简单,如果你已经配置好了Jmeter运行的环境,那么你也就不用去做其他的配置,直接 点击:开始——>运行——>输入cmd——>然后在出现的命令行界面输入“jco ...
- Linux shell模拟多线程拷贝
#!/bin/sh #日志文件 log_file=/data/threadcp.log a=$(date +%H%M%S) echo -e "startTime:\t$a" #最大 ...
- Servlet源码分析
Servlet API的核心就是javax.servlet.Servlet接口,所有的Servlet 类(抽象的或者自己写的)都必须实现这个接口.在Servlet接口中定义了5个方法,其中有3个方法是 ...
- hbase之setCaching 和 setBatch 和setMaxResultSize
scan的setBatch()用法 val conf = HBaseConfiguration.create() val table: Table = ConnectionFactory.create ...
- Java标准输入/输出/错误流
只要使用OutputStream对象就可使用System.out和System.err对象引用.只要可以使用InputStream对象就可以使用System.in对象. System类提供了三个静态设 ...