class13and14and15_登录窗口
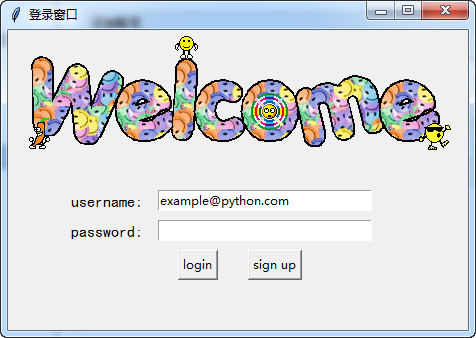
最终的运行效果图(程序见序号6.2):
#!/usr/bin/env python
# -*- coding:utf-8 -*-
# ------------------------------------------------------------
#
# 参考资料:
# 用 python 和 tkinter 做简单的窗口视窗 - 网易云课堂
# https://study.163.com/course/courseLearn.htm?courseId=1003216011#/learn/video?lessonId=1003649337&courseId=1003216011
#
#
# ------------------------------------------------------------
# ******************** class13and14and15_登录窗口 *******************
# ******************** class13and14and15_登录窗口 *******************
# =====>>>>>>内容概览
# =====>>>>>>内容概览# class13and14and15_登录窗口
'''
# ------------------------------------------------------------
# # 1、生成对应窗口,并加载图片
# ------------------------------------------------------------# ------------------------------------------------------------
# # 2、放置登录的标签
# # # 已经实现功能:1、生成对应窗口,并加载图片
# ------------------------------------------------------------# ------------------------------------------------------------
# # 3、放置登录输入信息栏
# # # 已经实现功能:
# # # 1、生成对应窗口,并加载图片
# # # 2、放置登录的标签
# ------------------------------------------------------------# ------------------------------------------------------------
# # 4、放置登录按钮
# # # 已经实现功能:
# # # 1、生成对应窗口,并加载图片
# # # 2、放置登录的标签
# # # 3、放置登录输入信息栏
# ------------------------------------------------------------# ------------------------------------------------------------
# # 5、绑定login 按钮的相关功能
# # # 已经实现功能:
# # # 1、生成对应窗口,并加载图片
# # # 2、放置登录的标签
# # # 3、放置登录输入信息栏
# # # 4、放置登录按钮
# ------------------------------------------------------------# ------------------------------------------------------------
# # 6、绑定sign up 按钮的功能
# # # 已经实现功能:
# # # 1、生成对应窗口,并加载图片
# # # 2、放置登录的标签
# # # 3、放置登录输入信息栏
# # # 4、放置登录按钮
# # # 5、绑定login 按钮的相关功能
# ------------------------------------------------------------# ------------------------------------------------------------
# # 6.1、绑定sign up 按钮的功能, 建立新的sign up窗口
# # # 已经实现功能:
# # # 1、生成对应窗口,并加载图片
# # # 2、放置登录的标签
# # # 3、放置登录输入信息栏
# # # 4、放置登录按钮
# # # 5、绑定login 按钮的相关功能
# # # 6、绑定sign up 按钮的功能
# ------------------------------------------------------------# ------------------------------------------------------------
# # 6.2、完成登录窗口设计
# # # 已经实现功能:
# # # 1、生成对应窗口,并加载图片
# # # 2、放置登录的标签
# # # 3、放置登录输入信息栏
# # # 4、放置登录按钮
# # # 5、绑定login 按钮的相关功能
# # # 6、绑定sign up 按钮的功能
# # # 6.1、绑定sign up 按钮的功能, 建立新的sign up窗口
# ------------------------------------------------------------'''
# ------------------------------------------------分割线-------------------------------------------------
# ------------------------------------------------分割线-------------------------------------------------
# ------------------------------------------------分割线-------------------------------------------------
# ------------------------------------------------分割线-------------------------------------------------

'''

# ------------------------------------------------------------

# # 1、生成对应窗口,并加载图片

# ------------------------------------------------------------

'''

#

# import tkinter as tk

#

# window = tk.Tk()

# window.title("登录窗口")

# window.maxsize(460, 300)

# window.minsize(460, 300)

# # welcom image

# canvas = tk.Canvas(window, width=500, height=200)

# image_file = tk.PhotoImage(file='welcome.gif')

# # 10, 0 表示锚点的横,纵位置;     anchor='nw'表示锚点的位置是左上角

# image = canvas.create_image(10, 0, anchor='nw', image=image_file)

# canvas.pack(side='top')

#

# window.mainloop()

# ------------------------------------------------分割线-------------------------------------------------

'''

# ------------------------------------------------------------

# # 2、放置登录的标签

# # # 已经实现功能:1、生成对应窗口,并加载图片

# ------------------------------------------------------------

'''

# import tkinter as tk

#

# window = tk.Tk()

# window.title("登录窗口")

# window.maxsize(460, 300)

# window.minsize(460, 300)

# # welcom image

# canvas = tk.Canvas(window, width=500, height=200)

# image_file = tk.PhotoImage(file='welcome.gif')

# # 10, 0 表示锚点的横,纵位置;     anchor='nw'表示锚点的位置是左上角

# image = canvas.create_image(10, 0, anchor='nw', image=image_file)

# canvas.pack(side='top')

#

# tk.Label(window, text='username', font=('黑体', 12)).place(x=60, y=160, anchor='nw')

# tk.Label(window, text='password', font=('黑体', 12)).place(x=60, y=190, anchor='nw')

#

# window.mainloop()

#

# ------------------------------------------------分割线-------------------------------------------------

'''

# ------------------------------------------------------------

# # 3、放置登录输入信息栏

# # # 已经实现功能:

# # # 1、生成对应窗口,并加载图片

# # # 2、放置登录的标签

# ------------------------------------------------------------

'''

# import tkinter as tk

#

# window = tk.Tk()

# window.title("登录窗口")

# window.maxsize(460, 300)

# window.minsize(460, 300)

# # welcom image

# canvas = tk.Canvas(window, width=500, height=200)

# image_file = tk.PhotoImage(file='welcome.gif')

# # 10, 0 表示锚点的横,纵位置;     anchor='nw'表示锚点的位置是左上角

# image = canvas.create_image(10, 0, anchor='nw', image=image_file)

# canvas.pack(side='top')

#

# tk.Label(window, text='username', font=('黑体', 12)).place(x=60, y=160, anchor='nw')

# tk.Label(window, text='password', font=('黑体', 12)).place(x=60, y=190, anchor='nw')

#

# # 设置存储的变量

# username = tk.StringVar()

# password = tk.StringVar()

# # 设置登录的输入框,并获取信息

# entry_username = tk.Entry(window, textvariable=username, width=30).place(x=150, y=160, anchor='nw')

# entry_password = tk.Entry(window, textvariable=password, width=30, show='*').place(x=150, y=190, anchor='nw')

# # 初始化 username 的信息

# username.set('example@python.com')

#

# window.mainloop()

#

#

# ------------------------------------------------分割线-------------------------------------------------

'''

# ------------------------------------------------------------

# # 4、放置登录按钮

# # # 已经实现功能:

# # # 1、生成对应窗口,并加载图片

# # # 2、放置登录的标签

# # # 3、放置登录输入信息栏

# ------------------------------------------------------------

'''

# import tkinter as tk

#

# window = tk.Tk()

# window.title("登录窗口")

# window.maxsize(460, 300)

# window.minsize(460, 300)

# # welcom image

# canvas = tk.Canvas(window, width=500, height=200)

# image_file = tk.PhotoImage(file='welcome.gif')

# # 10, 0 表示锚点的横,纵位置;     anchor='nw'表示锚点的位置是左上角

# image = canvas.create_image(10, 0, anchor='nw', image=image_file)

# canvas.pack(side='top')

#

# tk.Label(window, text='username', font=('黑体', 12)).place(x=60, y=160, anchor='nw')

# tk.Label(window, text='password', font=('黑体', 12)).place(x=60, y=190, anchor='nw')

#

# # 设置存储的变量

# username = tk.StringVar()

# password = tk.StringVar()

# # 设置登录的输入框,并获取信息

# entry_username = tk.Entry(window, textvariable=username, width=30).place(x=150, y=160, anchor='nw')

# entry_password = tk.Entry(window, textvariable=password, width=30, show='*').place(x=150, y=190, anchor='nw')

# # 初始化 username 的信息

# username.set('example@python.com')

#

# tk.Button(text='login').place(x=170, y=220, anchor='nw')

# tk.Button(text='sign up').place(x=240, y=220, anchor='nw')

#

# window.mainloop()

# ------------------------------------------------分割线-------------------------------------------------

'''

# ------------------------------------------------------------

# # 5、绑定login 按钮的相关功能

# # # 已经实现功能:

# # # 1、生成对应窗口,并加载图片

# # # 2、放置登录的标签

# # # 3、放置登录输入信息栏

# # # 4、放置登录按钮

# ------------------------------------------------------------

'''

# import tkinter as tk

# from tkinter import messagebox

# import pickle

#

# window = tk.Tk()

# window.title("登录窗口")

# window.maxsize(460, 300)

# window.minsize(460, 300)

# # welcom image

# canvas = tk.Canvas(window, width=500, height=200)

# image_file = tk.PhotoImage(file='welcome.gif')

# # 10, 0 表示锚点的横,纵位置;     anchor='nw'表示锚点的位置是左上角

# image = canvas.create_image(10, 0, anchor='nw', image=image_file)

# canvas.pack(side='top')

#

# tk.Label(window, text='username', font=('黑体', 12)).place(x=60, y=160, anchor='nw')

# tk.Label(window, text='password', font=('黑体', 12)).place(x=60, y=190, anchor='nw')

#

# # 设置存储的变量

# username = tk.StringVar()

# password = tk.StringVar()

# # 设置登录的输入框,并获取信息

# entry_username = tk.Entry(window, textvariable=username, width=30).place(x=150, y=160, anchor='nw')

# entry_password = tk.Entry(window, textvariable=password, width=30, show='*').place(x=150, y=190, anchor='nw')

# # 初始化 username 的信息

# username.set('example@python.com')

#

# def usr_login():

#     usr_name = username.get()

#     usr_password = password.get()

#     try:

#         with open('usrs_info.pickle', 'rb') as usr_file:

#             usrs_info = pickle.load(usr_file)

#     except FileNotFoundError:

#         usrs_info = {'admin': 'admin'}

#         pickle.dump(usrs_info, usr_file)

#

#     if usr_name in usrs_info:

#         if usr_password == usrs_info[usr_name]:

#             messagebox.showinfo(title='Welcom', message='Welcome to log in! \n'+ usr_name)

#         else:

#             messagebox.showerror(title='Error', message='Password Error!\nTry again!!')

#     else:

#         is_sign_up = messagebox.askyesno(title='Ask', message='You have not sign up yet.\nSign up now?')

#         if is_sign_up is True:

#             usr_sign_up()

#

#

# def usr_sign_up():

#     pass

#

# tk.Button(text='login', command=usr_login).place(x=170, y=220, anchor='nw')

# tk.Button(text='sign up', command=usr_sign_up).place(x=240, y=220, anchor='nw')

#

# window.mainloop()

# ------------------------------------------------分割线-------------------------------------------------

'''

# ------------------------------------------------------------

# # 6、绑定sign up 按钮的功能

# # # 已经实现功能:

# # # 1、生成对应窗口,并加载图片

# # # 2、放置登录的标签

# # # 3、放置登录输入信息栏

# # # 4、放置登录按钮

# # # 5、绑定login 按钮的相关功能

# ------------------------------------------------------------

'''

# import tkinter as tk

# from tkinter import messagebox

# import pickle

#

# window = tk.Tk()

# window.title("登录窗口")

# window.maxsize(460, 300)

# window.minsize(460, 300)

# # welcom image

# canvas = tk.Canvas(window, width=500, height=200)

# image_file = tk.PhotoImage(file='welcome.gif')

# # 10, 0 表示锚点的横,纵位置;     anchor='nw'表示锚点的位置是左上角

# image = canvas.create_image(10, 0, anchor='nw', image=image_file)

# canvas.pack(side='top')

#

# tk.Label(window, text='username', font=('黑体', 12)).place(x=60, y=160, anchor='nw')

# tk.Label(window, text='password', font=('黑体', 12)).place(x=60, y=190, anchor='nw')

#

# # 设置存储的变量

# username = tk.StringVar()

# password = tk.StringVar()

# # 设置登录的输入框,并获取信息

# entry_username = tk.Entry(window, textvariable=username, width=30).place(x=150, y=160, anchor='nw')

# entry_password = tk.Entry(window, textvariable=password, width=30, show='*').place(x=150, y=190, anchor='nw')

# # 初始化 username 的信息

# username.set('example@python.com')

#

# def usr_login():

#     usr_name = username.get()

#     usr_password = password.get()

#     try:

#         with open('usrs_info.pickle', 'rb') as usr_file:

#             usrs_info = pickle.load(usr_file)

#     except FileNotFoundError:

#         usrs_info = {'admin': 'admin'}

#         pickle.dump(usrs_info, usr_file)

#

#     if usr_name in usrs_info:

#         if usr_password == usrs_info[usr_name]:

#             messagebox.showinfo(title='Welcom', message='Welcome to log in! \n'+ usr_name)

#         else:

#             messagebox.showerror(title='Error', message='Password Error!\nTry again!!')

#     else:

#         is_sign_up = messagebox.askyesno(title='Ask', message='You have not sign up yet.\nSign up now?')

#         if is_sign_up is True:

#             usr_sign_up()

#

#

# def usr_sign_up():

#     window_sign_up = tk.Toplevel(window)

#     window_sign_up.title('Sign up window')

#     window_sign_up.maxsize(460, 300)

#     window_sign_up.minsize(460, 300)

#

#

#

#

# tk.Button(text='login', command=usr_login).place(x=170, y=220, anchor='nw')

# tk.Button(text='sign up', command=usr_sign_up).place(x=240, y=220, anchor='nw')

#

# window.mainloop()

# ------------------------------------------------分割线-------------------------------------------------

'''

# ------------------------------------------------------------

# # 6.1、绑定sign up 按钮的功能, 建立新的sign up窗口

# # # 已经实现功能:

# # # 1、生成对应窗口,并加载图片

# # # 2、放置登录的标签

# # # 3、放置登录输入信息栏

# # # 4、放置登录按钮

# # # 5、绑定login 按钮的相关功能

# # # 6、绑定sign up 按钮的功能

# ------------------------------------------------------------

'''

# import tkinter as tk

# from tkinter import messagebox

# import pickle

#

# window = tk.Tk()

# window.title("登录窗口")

# window.maxsize(460, 300)

# window.minsize(460, 300)

# # welcom image

# canvas = tk.Canvas(window, width=500, height=200)

# image_file = tk.PhotoImage(file='welcome.gif')

# # 10, 0 表示锚点的横,纵位置;     anchor='nw'表示锚点的位置是左上角

# image = canvas.create_image(10, 0, anchor='nw', image=image_file)

# canvas.pack(side='top')

#

# tk.Label(window, text='username:', font=('黑体', 12)).place(x=60, y=160, anchor='nw')

# tk.Label(window, text='password:', font=('黑体', 12)).place(x=60, y=190, anchor='nw')

#

# # 设置存储的变量

# username = tk.StringVar()

# password = tk.StringVar()

# # 设置登录的输入框,并获取信息

# entry_username = tk.Entry(window, textvariable=username, width=30).place(x=150, y=160, anchor='nw')

# entry_password = tk.Entry(window, textvariable=password, width=30, show='*').place(x=150, y=190, anchor='nw')

# # 初始化 username 的信息

# username.set('example@python.com')

#

# def usr_login():

#     usr_name = username.get()

#     usr_password = password.get()

#     try:

#         with open('usrs_info.pickle', 'rb') as usr_file:

#             usrs_info = pickle.load(usr_file)

#     except FileNotFoundError:

#         usrs_info = {'admin': 'admin'}

#         pickle.dump(usrs_info, usr_file)

#

#     if usr_name in usrs_info:

#         if usr_password == usrs_info[usr_name]:

#             messagebox.showinfo(title='Welcom', message='Welcome to log in! \n'+ usr_name)

#         else:

#             messagebox.showerror(title='Error', message='Password Error!\nTry again!!')

#     else:

#         is_sign_up = messagebox.askyesno(title='Ask', message='You have not sign up yet.\nSign up now?')

#         if is_sign_up is True:

#             usr_sign_up()

#

#

# def usr_sign_up():

#     # 设置窗口

#     window_sign_up = tk.Toplevel(window)

#     window_sign_up.title('Sign up window')

#     window_sign_up.maxsize(460, 150)

#     window_sign_up.minsize(460, 150)

#

#     # 设置标签

#     tk.Label(window_sign_up, text='username:', font=('黑体', 12)).place(x=30, y=30, anchor='nw')

#     tk.Label(window_sign_up, text='password:', font=('黑体', 12)).place(x=30, y=60, anchor='nw')

#     tk.Label(window_sign_up, text='confirm password:', font=('黑体', 12)).place(x=30, y=90, anchor='nw')

#

#     # 设置输入框

#     # 设置存储的变量

#     usr_username = tk.StringVar()

#     usr_password1 = tk.StringVar()

#     usr_password2 = tk.StringVar()

#     # 设置登录的输入框,并获取信息

#     entry_username = tk.Entry(window_sign_up, textvariable=usr_username, width=30).place(x=170, y=30, anchor='nw')

#     entry_password1 = tk.Entry(window_sign_up, textvariable=usr_password1, width=30, show='*').place(x=170, y=60, anchor='nw')

#     entry_password2 = tk.Entry(window_sign_up, textvariable=usr_password2, width=30, show='*').place(x=170, y=90, anchor='nw')

#     # 初始化 username 的信息

#     usr_username.set('example@python.com')

#

#

#

#

# tk.Button(text='login', command=usr_login).place(x=170, y=220, anchor='nw')

# tk.Button(text='sign up', command=usr_sign_up).place(x=240, y=220, anchor='nw')

#

# window.mainloop()

#

# ------------------------------------------------分割线-------------------------------------------------

'''

# ------------------------------------------------------------

# # 6.2、完成登录窗口设计

# # # 已经实现功能:

# # # 1、生成对应窗口,并加载图片

# # # 2、放置登录的标签

# # # 3、放置登录输入信息栏

# # # 4、放置登录按钮

# # # 5、绑定login 按钮的相关功能

# # # 6、绑定sign up 按钮的功能

# # # 6.1、绑定sign up 按钮的功能, 建立新的sign up窗口

# ------------------------------------------------------------

'''

import tkinter as tk

from tkinter import messagebox

import pickle

window = tk.Tk()

window.title("登录窗口")

window.maxsize(460, 300)

window.minsize(460, 300)

# welcom image

canvas = tk.Canvas(window, width=500, height=200)

image_file = tk.PhotoImage(file='welcome.gif')

# 10, 0 表示锚点的横,纵位置;     anchor='nw'表示锚点的位置是左上角

image = canvas.create_image(10, 0, anchor='nw', image=image_file)

canvas.pack(side='top')

tk.Label(window, text='username:', font=('黑体', 12)).place(x=60, y=160, anchor='nw')

tk.Label(window, text='password:', font=('黑体', 12)).place(x=60, y=190, anchor='nw')

# 设置存储的变量

username = tk.StringVar()

password = tk.StringVar()

# 设置登录的输入框,并获取信息

entry_username = tk.Entry(window, textvariable=username, width=30).place(x=150, y=160, anchor='nw')

entry_password = tk.Entry(window, textvariable=password, width=30, show='*').place(x=150, y=190, anchor='nw')

# 初始化 username 的信息

username.set('example@python.com')

def usr_login():

    usr_name = username.get()

    usr_password = password.get()

    try:

        with open('usrs_info.pickle', 'rb') as usr_file:

            usrs_info = pickle.load(usr_file)

    except FileNotFoundError:

        usrs_info = {'admin': 'admin'}

        pickle.dump(usrs_info, usr_file)

    if usr_name in usrs_info:

        if usr_password == usrs_info[usr_name]:

            messagebox.showinfo(title='Welcom', message='Welcome to log in! \n'+ usr_name)

        else:

            messagebox.showerror(title='Error', message='Password Error!\nTry again!!')

    else:

        is_sign_up = messagebox.askyesno(title='Ask', message='You have not sign up yet.\nSign up now?')

        if is_sign_up is True:

            usr_sign_up()

def usr_sign_up():

    # 设置窗口

    window_sign_up = tk.Toplevel(window)

    window_sign_up.title('Sign up window')

    window_sign_up.maxsize(460, 180)

    window_sign_up.minsize(460, 180)

    # 设置标签

    tk.Label(window_sign_up, text='username:', font=('黑体', 12)).place(x=30, y=30, anchor='nw')

    tk.Label(window_sign_up, text='password:', font=('黑体', 12)).place(x=30, y=60, anchor='nw')

    tk.Label(window_sign_up, text='confirm password:', font=('黑体', 12)).place(x=30, y=90, anchor='nw')

    # 设置输入框

    # 设置存储的变量

    usr_username = tk.StringVar()

    usr_password1 = tk.StringVar()

    usr_password2 = tk.StringVar()

    # 设置登录的输入框,并获取信息

    usr_entry_username = tk.Entry(window_sign_up, textvariable=usr_username, width=40).place(x=170, y=30, anchor='nw')

    usr_entry_password1 = tk.Entry(window_sign_up, textvariable=usr_password1, width=40, show='*').place(x=170, y=60, anchor='nw')

    usr_entry_password2 = tk.Entry(window_sign_up, textvariable=usr_password2, width=40, show='*').place(x=170, y=90, anchor='nw')

    # 初始化 username 的信息

    usr_username.set('example@python.com')

    def new_sign_up():

        new_name = usr_username.get()

        new_password = usr_password1.get()

        new_password_confirm = usr_password2.get()

        # 打开配置文件,查看注册的信息是否在文件中

        with open('usrs_info.pickle', 'rb') as usr_file:

            exist_usr_info = pickle.load(usr_file)

        # 对比用户名是否已经储存在文件中

        if new_name in exist_usr_info :

            messagebox.showerror(title='Error',message='The user has already signed up!')

        else:

            if new_password != new_password_confirm:

                messagebox.showerror(title='Error', message='Password and confirm password must be the same!')

            else:

                exist_usr_info[new_name] = new_password

                with open('usrs_info.pickle', 'wb') as usr_file:

                    # 写入到文件中

                    pickle.dump(exist_usr_info, usr_file)

                    messagebox.showinfo(title='Welcome', message='You have successfully signed up!')

                    window_sign_up.destroy()

    # 设置注册的按钮

    tk.Button(window_sign_up, text='sign up', command=new_sign_up).place(x=220, y=120, anchor='nw')

tk.Button(text='login', command=usr_login).place(x=170, y=220, anchor='nw')

tk.Button(text='sign up', command=usr_sign_up).place(x=240, y=220, anchor='nw')

window.mainloop()
最终的运行效果图(程序见序号6.2):
class13and14and15_登录窗口的更多相关文章
- project2_login(登录窗口)
该project是在网易云课堂上的公开课<用 python 和 tkinter 做简单的窗口视窗>课程当中学习的,是该课程中的一个结课小项目,项目中的知识点内容涉及该课程中所学习到的大多数 ...
- 【转】【WPF】WPF 登录窗口关闭时打开主窗口
在WPF中设计登录窗口关闭时打开主窗口,自动生成的App.xaml不能满足要求, 1.把App.xaml的属性窗口中的生成操作设定为 无 2.添加Program类 static class Progr ...
- SourceTree不出现用户登录窗口,提示错误fatal: unable to access'...'; error setting certificate verify locations
SourceTree不出现用户登录窗口,提示错误fatal: unable to access'...'; error setting certificate verify locations; .. ...
- QUI操作超时弹出登录窗口登录的处理方式
在使用QUI开发的业务系统中,如果长时间没操作,session过期后,再次操作系统超时会自动跳转到登陆页面,如果当前有一些操作没有保存,需要重新登录后再次填写信息,用户体验很不好! 为了避免超时后页面 ...
- C#实现登录窗口(不用隐藏)
C#登录窗口的实现,特点就是不用隐藏,感兴趣的朋友不要错过 (1).在程序入口处,打开登录窗口 复制代码代码如下: static void Main() { Application.EnableV ...
- 基于WebForm+EasyUI的业务管理系统形成之旅 -- 登录窗口(Ⅱ)
上篇<基于WebForm+EasyUI的业务管理系统形成之旅 -- 系统设置>,主要是介绍系统浏览器在线下载安装,这些前期准备是非常重要的. 最近忙于将工程管理系统中各个模块,用业务流程方 ...
- 高仿QQ即时聊天软件开发系列之三登录窗口用户选择下拉框
上一篇高仿QQ即时聊天软件开发系列之二登录窗口界面写了一个大概的布局和原理 这一篇详细说下拉框的实现原理 先上最终效果图 一开始其实只是想给下拉框加一个placeholder效果,让下拉框在未选择未输 ...
- 高仿QQ即时聊天软件开发系列之二登录窗口界面
继上一篇高仿QQ即时聊天软件开发系列之一开端之后,开始做登录窗口 废话不多说,先看效果,只有界面 可能还有一些细节地方没有做,例如那个LOGO嘛,不要在意这些细节 GIF虽短,可是这做起来真难,好吧因 ...
- C# WPF 建立无边框(标题栏)的登录窗口
前言:笔者最近用c#写WPF做了一个项目,此前未曾做过完整的WPF项目,算是一边学一边用,网上搜了不少资料,效率当然是不敢恭维的,有时会在一些很简单的问题上纠结很长时间,血与泪的教训可不少. 不过,正 ...
随机推荐
- NOIP模拟测试19
T1: 题目大意:将一颗有N个节点的树分割,使得每个联通块大小相等,问一共有多少方案.(N<=1000000) 首先,一条很显然的性质,每个联通块的大小一定是N的因子. 然后,我们可以对于每个因 ...
- Oracle删除修改字段
Oracle 增加修改删除字段 添加字段的语法:alter table tablename add (column datatype [default value][null/not null],…. ...
- C++ STL(一)介绍及string
STL: C++标准模板库的简称,它是C++的一部份.标准C++库的所有的标识符都是在一个名为std的命名空间中定义的 在使用STL中相关模板时,需要包含相关头文件,然后using namespace ...
- 基于aop的日志记录方式实现
说明 最近有个项目需要增加日志记录功能,因为这个项目原来是基于spring开发的,在查阅了相关资料以后,我采用了spring aop的方式实现该需求,然后就有了本篇文章. 思路 我这边需求是这样的:要 ...
- Useful code snippets with C++ boost
Useful code snippets with C++ boost Is Punctuation It’s very straight forward to use boost.regex as ...
- 配置Maven私服
Nexus 是“开箱即用”的系统,不需要数据库,它使用文件系统加 Lucene 来组织数据,支持 WebDAV 与 LDAP 安全身份认证.Nexus 还提供了强大的仓库管理功能,构件搜索功能,它基于 ...
- ()获取Cookies session
[HttpGet] public string mo() { var httpRequest = HttpContext.Current.Request; var a = httpRequest.Co ...
- 【构造共轭函数+矩阵快速幂】HDU 4565 So Easy! (2013 长沙赛区邀请赛)
[解题思路] 给一张神图,推理写的灰常明白了,关键是构造共轭函数,这一点实在是要有数学知识的理论基础,推出了递推式,接下来就是矩阵的快速幂了. 神图: 给个大神的链接:构造类斐波那契数列的矩阵快速幂 ...
- position:relative/static/fixed/absolute定位的区别以及使用场景
absolute是相对于自己最近的父元素来定位的,relative是相对于自己来定位的 relative 不脱离文档流,absolute 脱离文档流.也就是说:relative 的元素尽管表面上看到它 ...
- Tomcat爆破
把输入的账户和密码包起来 选择第三个模式 第一个添加用户名 第二个添加: 第三个添加密码 选择编码格式 取消打钩