SVNKit学习——基于Repository的操作之print repository tree、file content、repository history(四)
此篇文章同样是参考SVNKit在wiki的官方文档做的demo,每个类都可以单独运行。具体的细节都写到注释里了~
开发背景:
SVNKit版本:1.7.14 附上官网下载链接:https://www.svnkit.com/org.tmatesoft.svn_1.7.14.standalone.zip
jdk版本要求:我试了1.6版本是不行的,1.7版本的jdk没有问题。
操作:①.在官网下载SVNKit1.7.14后将lib/*.jar全部复制到工程中 ②.导入google的Gson的包,这里我用的是gson-2.2.4.jar
仓库目录结构:

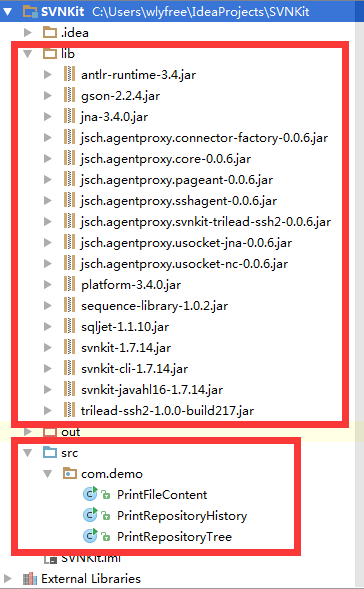
工程结构图:
具体代码:
一、显示svn仓库的树结构

package com.demo;

import org.tmatesoft.svn.core.SVNDirEntry;

import org.tmatesoft.svn.core.SVNNodeKind;

import org.tmatesoft.svn.core.SVNURL;

import org.tmatesoft.svn.core.auth.ISVNAuthenticationManager;

import org.tmatesoft.svn.core.internal.io.dav.DAVRepositoryFactory;

import org.tmatesoft.svn.core.io.SVNRepository;

import org.tmatesoft.svn.core.io.SVNRepositoryFactory;

import org.tmatesoft.svn.core.wc.SVNWCUtil;

import java.io.File;

import java.util.Collection;

import java.util.Iterator;

/**

 * 显示svn仓库的树结构

 */

public class PrintRepositoryTree {

    public static void main(String[] args) throws Exception{

        //1.根据访问协议初始化工厂

        DAVRepositoryFactory.setup();;

        //2.初始化仓库

        String url = "https://wlyfree-PC:8443/svn/svnkitRepository1/trunk";

        SVNRepository svnRepository = SVNRepositoryFactory.create(SVNURL.parseURIEncoded(url));

        //3.创建一个访问的权限

        String username = "wly";

        String password = "wly";

        char[] pwd = password.toCharArray();

        ISVNAuthenticationManager authenticationManager = SVNWCUtil.createDefaultAuthenticationManager(username,pwd);

        svnRepository.setAuthenticationManager(authenticationManager);

        /*输出仓库的根目录和UUID*/

        System.out.println("Repository Root:" + svnRepository.getRepositoryRoot(true));

        System.out.println("Repository UUID:" + svnRepository.getRepositoryUUID(true));

        /**

         * 检验某个URL(可以是文件、目录)是否在仓库历史的修订版本中存在,参数:被检验的URL,修订版本,这里我们想要打印出目录树,所以要求必须是目录

         * SVNNodeKind的枚举值有以下四种:

         *  SVNNodeKind.NONE    这个node已经丢失(可能是已被删除)

         *  SVNNodeKind.FILE    文件

         *  SVNNodeKind.DIR     目录

         *  SVNNodeKind.UNKNOW  未知,无法解析

         * */

        /*

         *  被检验的URL,本例有两种等价的写法。

         *  1.不是以"/"开头的是相对于仓库驱动目录的相对目录,即svnRepository的url,在本例中是:空字符串(url目录是:https://wlyfree-PC:8443/svn/svnkitRepository1/trunk)

         *  2.以"/"开头的是相对于svnRepository root目录的相对目录,即svnRepository的rootUrl,在本例中是:/trunk(root目录是https://wlyfree-pc:8443/svn/svnkitRepository1)

         */

        String checkUrl = "";

        //修订版本号,-1代表一个无效的修订版本号,代表必须是最新的修订版

        long revisionNum = -1;

        SVNNodeKind svnNodeKind = svnRepository.checkPath(checkUrl,revisionNum);

        if(svnNodeKind == SVNNodeKind.NONE){

            System.err.println("This is no entry at " + checkUrl);

            System.exit(1);

        }else if(svnNodeKind == SVNNodeKind.FILE){

            System.err.println("The entry at '" + checkUrl + "' is a file while a directory was expected.");

            System.exit(1);

        }else{

            System.err.println("SVNNodeKind的值:" + svnNodeKind);

        }

        //打印出目录树结构

        listEntries(svnRepository,checkUrl);

        //打印最新修订版的版本号

        System.err.println("最新修订版版本号:" + svnRepository.getLatestRevision());

    }

    private static void listEntries(SVNRepository svnRepository,String path) throws Exception{

        System.err.println("path:" + path);

        Collection entry =  svnRepository.getDir(path, -1 ,null,(Collection)null);

        Iterator iterator = entry.iterator();

        while(iterator.hasNext()){

            SVNDirEntry svnDirEntry = (SVNDirEntry)iterator.next();

            System.out.println("path:" + "/" + (path.equals("") ? "" : path + "/") + svnDirEntry.getName() + ",(author:" + svnDirEntry.getAuthor() + ",revision:" + svnDirEntry.getRevision() + ",date:" + svnDirEntry.getDate() + ")");

            if(svnDirEntry.getKind() == SVNNodeKind.DIR){

                String tempPath = (path.equals("") ? svnDirEntry.getName() : path + "/" + svnDirEntry.getName()) ;

                listEntries(svnRepository,tempPath);

            }

        }

    }

}
运行效果:
Repository Root:https://wlyfree-pc:8443/svn/svnkitRepository1

Repository UUID:62e76a57-4b9a-d34b-92c0-4551f8669da5

SVNNodeKind的值:dir

path:

path:test

path:/init1.txt,(author:wly,revision:8,date:Tue Nov 29 15:36:47 CST 2016)

path:/init2.txt,(author:wly,revision:8,date:Tue Nov 29 15:36:47 CST 2016)

path:/test,(author:wly,revision:10,date:Tue Dec 06 13:50:53 CST 2016)

path:/test/init11.txt,(author:wly,revision:10,date:Tue Dec 06 13:50:53 CST 2016)

path:/test/init22.txt,(author:wly,revision:9,date:Tue Dec 06 12:13:42 CST 2016)

path:/test/test2,(author:wly,revision:9,date:Tue Dec 06 12:13:42 CST 2016)

path:test/test2

path:/test/test2/init111.txt,(author:wly,revision:9,date:Tue Dec 06 12:13:42 CST 2016)

path:/test/test2/init222.txt,(author:wly,revision:9,date:Tue Dec 06 12:13:42 CST 2016)

最新修订版版本号:10

Process finished with exit code 0
二、打印文件内容
获取文件的类型,如果文件是二进制文件,则只输出文件属性;如果文件是一个文本文件,输出文件属性和文件内容
package com.demo;

import com.google.gson.Gson;

import org.tmatesoft.svn.core.*;

import org.tmatesoft.svn.core.auth.ISVNAuthenticationManager;

import org.tmatesoft.svn.core.internal.io.dav.DAVRepositoryFactory;

import org.tmatesoft.svn.core.io.SVNRepository;

import org.tmatesoft.svn.core.io.SVNRepositoryFactory;

import org.tmatesoft.svn.core.wc.SVNWCUtil;

import java.io.ByteArrayOutputStream;

import java.util.Iterator;

import java.util.Map;

/**

 *  获取文件的类型,如果文件是二进制文件,则只输出文件属性;如果文件是一个文本文件,输出文件属性和文件内容

 */

public class PrintFileContent {

    public static void main(String[] args) throws Exception {

        //===========================前面几步和打印树是一样的START===================================

        //1.根据访问协议初始化工厂

        DAVRepositoryFactory.setup();;

        //2.初始化仓库

        String url = "https://wlyfree-PC:8443/svn/svnkitRepository1/trunk";

        SVNRepository svnRepository = SVNRepositoryFactory.create(SVNURL.parseURIEncoded(url));

        //3.创建一个访问的权限

        String username = "wly";

        String password = "wly";

        char[] pwd = password.toCharArray();

        ISVNAuthenticationManager authenticationManager = SVNWCUtil.createDefaultAuthenticationManager(username,pwd);

        svnRepository.setAuthenticationManager(authenticationManager);

        //===========================前面几步和打印树是一样的END===================================

        //这里我们要读取的是其中的一个文件

        String filePath = "test/init11.txt";

        //修订版本号,-1代表一个无效的修订版本号,代表必须是最新的修订版

        long revisionNum = -1;

        SVNNodeKind svnNodeKind = svnRepository.checkPath(filePath,revisionNum);

        if(svnNodeKind == SVNNodeKind.NONE){

            System.err.println("This is no entry at " + filePath);

            System.exit(1);

        }else if(svnNodeKind == SVNNodeKind.DIR){

            System.err.println("The entry at '" + filePath + "' is a directory while a file was expected.");

            System.exit(1);

        }else{

            System.err.println("SVNNodeKind的值:" + svnNodeKind);

        }

        ByteArrayOutputStream byteArrayOutputStream = new ByteArrayOutputStream();

        SVNProperties svnProperties = new SVNProperties();

        //若svnProperties对象非空,使用vnProperties属性接收文件的属性

        svnRepository.getFile(filePath,-1,svnProperties ,byteArrayOutputStream);

        /*

         * 输出文件属性

         */

        System.err.println("文件属性:");

        Map<String,SVNPropertyValue> svnPropertiesMap = svnProperties.asMap();

        Iterator<String> it = svnPropertiesMap.keySet().iterator();

        while(it.hasNext()){

            String key = it.next();

            System.err.println(key + " : " + svnPropertiesMap.get(key));

        }

        //序列化看下svnProperrties中的数据

        Gson gson = new Gson();

        System.err.println(gson.toJson(svnProperties));

        /*

         *  文件是否是文本类型的文件,文本类型文件输出文件内容

         */

        System.err.println("文件内容:");

        String mimeType = svnProperties.getStringValue(SVNProperty.MIME_TYPE);

        System.err.println("mimeType is :" + mimeType);

        boolean isTextType = SVNProperty.isTextMimeType(mimeType);

        if(isTextType){

            System.err.println("The file is a text file,this is contents:");

            byteArrayOutputStream.writeTo(System.err);

        }else{

            System.err.println("The file is not a text file,we can't read content of it.");

        }

    }

}
运行效果:
SVNNodeKind的值:file

文件属性:

svn:entry:uuid : 62e76a57-4b9a-d34b-92c0-4551f8669da5

svn:entry:revision : 10

svn:entry:committed-date : 2016-12-06T05:50:53.160008Z

svn:wc:ra_dav:version-url : /svn/svnkitRepository1/!svn/ver/10/trunk/test/init11.txt

svn:entry:checksum : 8217e71c38f5c42e3fd4e8ac8dc75c4f

svn:entry:committed-rev : 10

svn:entry:last-author : wly

{"myProperties":{"svn:entry:uuid":{"myValue":"62e76a57-4b9a-d34b-92c0-4551f8669da5"},"svn:entry:revision":{"myValue":"10"},"svn:entry:committed-date":{"myValue":"2016-12-06T05:50:53.160008Z"},"svn:wc:ra_dav:version-url":{"myValue":"/svn/svnkitRepository1/!svn/ver/10/trunk/test/init11.txt"},"svn:entry:checksum":{"myValue":"8217e71c38f5c42e3fd4e8ac8dc75c4f"},"svn:entry:committed-rev":{"myValue":"10"},"svn:entry:last-author":{"myValue":"wly"}}}

文件内容:

mimeType is :null

The file is a text file,this is contents:

init

aa

bb

cc

dd

11

22

33

44

Process finished with exit code 0
三、打印历史记录
package com.demo;

import com.google.gson.Gson;

import org.tmatesoft.svn.core.SVNLogEntry;

import org.tmatesoft.svn.core.SVNLogEntryPath;

import org.tmatesoft.svn.core.SVNURL;

import org.tmatesoft.svn.core.auth.ISVNAuthenticationManager;

import org.tmatesoft.svn.core.internal.io.dav.DAVRepositoryFactory;

import org.tmatesoft.svn.core.io.SVNRepository;

import org.tmatesoft.svn.core.io.SVNRepositoryFactory;

import org.tmatesoft.svn.core.wc.SVNWCUtil;

import java.util.Collection;

import java.util.Iterator;

import java.util.Set;

/**

 * 打印历史记录

 */

public class PrintRepositoryHistory {

    public static void main(String[] args) throws Exception{

        //===========================前面几步和打印树是一样的START===================================

        //1.根据访问协议初始化工厂

        DAVRepositoryFactory.setup();;

        //2.初始化仓库

        String url = "https://wlyfree-PC:8443/svn/svnkitRepository1/trunk";

        SVNRepository svnRepository = SVNRepositoryFactory.create(SVNURL.parseURIEncoded(url));

        //3.创建一个访问的权限

        String username = "wly";

        String password = "wly";

        char[] pwd = password.toCharArray();

        ISVNAuthenticationManager authenticationManager = SVNWCUtil.createDefaultAuthenticationManager(username,pwd);

        svnRepository.setAuthenticationManager(authenticationManager);

        //===========================前面几步和打印树是一样的END===================================

        long startVersion = 10;

        long endVersion = 8;

        /*

         *  参数:

         *  1.接收日志

         *  2.接收history对象,每个修订版的信息都代表一个SVNLogEntry对象。如果我们不需要传入一个已经存在的history对象,就传入null值

         *  3.开始修订版本号,0、-1代表最新版本

         *  4.结束修订版本号,0、-1代表最新版本

         *  5.如果需要打印改变路径的信息,则设置为true。会使用每个SVNLogEntry对象记录改变路径的信息getchangedpaths()会返回一个Map<String改变路径,SVNLogEntryPath> 对象

         *  6.strictNode设置为true,复制history的时候不会跳过每个path的修订版日志

         */

        Collection logEntries = svnRepository.log(new String[]{""}, null,8,8,true,true);

        Gson gson = new Gson();

        if(logEntries != null){

            Iterator it = logEntries.iterator();

            while (it.hasNext()){

                SVNLogEntry svnLogEntry = (SVNLogEntry)it.next();

                System.err.println("序列化数据:" + gson.toJson(svnLogEntry));

                if(svnLogEntry.getChangedPaths().size() > 0){

                    System.err.println("Change path:");

                    Set changePathSet = svnLogEntry.getChangedPaths().keySet();

                    if(changePathSet != null && changePathSet.size() > 0){

                        for(Iterator changePaths = changePathSet.iterator();changePaths.hasNext();){

                            SVNLogEntryPath svnLogEntryPath = svnLogEntry.getChangedPaths().get(changePaths.next());

                            System.err.println(gson.toJson(svnLogEntryPath));

                        }

                    }

                }

            }

        }

    }

}
运行效果:
序列化数据:{"myRevision":8,"myChangedPaths":{"/trunk/init1.txt":{"myPath":"/trunk/init1.txt","myType":"A","myCopyRevision":-1,"myNodeKind":{"myID":1}},"/trunk/init2.txt":{"myPath":"/trunk/init2.txt","myType":"A","myCopyRevision":-1,"myNodeKind":{"myID":1}}},"myRevisionProperties":{"myProperties":{"svn:log":{"myValue":"初始化导入目录-myRepository1"},"svn:author":{"myValue":"wly"},"svn:date":{"myValue":"2016-11-29T07:36:47.737654Z"}}},"myHasChildren":false,"myIsSubtractiveMerge":false,"myIsNonInheritable":false}

Change path:

{"myPath":"/trunk/init1.txt","myType":"A","myCopyRevision":-1,"myNodeKind":{"myID":1}}

{"myPath":"/trunk/init2.txt","myType":"A","myCopyRevision":-1,"myNodeKind":{"myID":1}}

Process finished with exit code 0
SVNKit学习——基于Repository的操作之print repository tree、file content、repository history(四)的更多相关文章
- SVNKit学习——Setting Up A Subversion Repository 创建仓库(三)
所谓Setting Up A Subversion Repository,就是在Subversion所在的服务器上创建一个仓库,说白了就是在磁盘上建一个特殊的目录,这里我以windows举例. 1.使 ...
- SVNKit学习——wiki+简介(二)
这篇文章是参考SVNKit官网在wiki的文档,做了个人的理解~ 首先抛出一个疑问,Subversion是做什么的,SVNKit又是用来干什么的? 相信一般工作过的同学都用过或了解过svn,不了解的同 ...
- tensorflow学习笔记——使用TensorFlow操作MNIST数据(2)
tensorflow学习笔记——使用TensorFlow操作MNIST数据(1) 一:神经网络知识点整理 1.1,多层:使用多层权重,例如多层全连接方式 以下定义了三个隐藏层的全连接方式的神经网络样例 ...
- IOS学习笔记25—HTTP操作之ASIHTTPRequest
IOS学习笔记25—HTTP操作之ASIHTTPRequest 分类: iOS2012-08-12 10:04 7734人阅读 评论(3) 收藏 举报 iosios5网络wrapper框架新浪微博 A ...
- 从零学习基于Python的RobotFramework自动化
从零学习基于Python的RobotFramework自动化 一. Python基础 1) 版本差异 版本 编码 语法 其他 2.X ASCII try: raise Type ...
- 《如何学习基于ARM嵌入式系统》笔记整理
author:Peong time:20190603 如何学习基于ARM嵌入式系统 一.嵌入式系统的概念 从硬件上讲,将外围器件,与CPU集成在一起. 从操作系统上讲,定制符合要求的系统内核 从应用上 ...
- tensorflow学习笔记——使用TensorFlow操作MNIST数据(1)
续集请点击我:tensorflow学习笔记——使用TensorFlow操作MNIST数据(2) 本节开始学习使用tensorflow教程,当然从最简单的MNIST开始.这怎么说呢,就好比编程入门有He ...
- python类,魔术方法等学习&&部分ssti常见操作知识点复习加深
python类学习&&部分ssti常见操作知识点复习加深 在做ssti的模块注入的时候经常觉得自己python基础的薄弱,来学习一下,其实还是要多练习多背. 在python中所有类默认 ...
- 深度学习|基于LSTM网络的黄金期货价格预测--转载
深度学习|基于LSTM网络的黄金期货价格预测 前些天看到一位大佬的深度学习的推文,内容很适用于实战,争得原作者转载同意后,转发给大家.之后会介绍LSTM的理论知识. 我把code先放在我github上 ...
随机推荐
- Longest palindrome subsequence
A palindrome is a nonempty string over some alphabet that reads the same forwardand backward. Exampl ...
- db2 tsm backup fails with rc–50(1)
2015-01-05-19.21.54.477532+000 E8484227A347 LEVEL: Error PID : 10027058 TID : ...
- Python开发利器之UliPad
一.安装Ulipad 因为ulipad编辑器使用的是wxpython编写的gui,所以我们需要第三方库wxpython的支持,先讲一下Ulipad在Windows系统环境下的安装: 1. 确实自己的w ...
- PHP正则表达式(转载)
这个星期要攻破PHP正则表达式 正则表达式定义 正则表达式(regular expression)描述了一种字符串匹配的模式,可以用来检查一个串是否含有某种子串.将匹配的子串做替换或者从某个串中取 ...
- java.net.SocketException四大异常解决方案---转
java.net.SocketException如何才能更好的使用呢?这个就需要我们先要了解有关这个语言的相关问题.希望大家有所帮助.那么我们就来看看有关java.net.SocketExceptio ...
- OAuth2.0 微信授权机制
我在了解设计Restful接口的时候,发现涉及到接口验证,可以利用OAuth2.0机制来验证. 我开发的微信端Web网页通过微信授权的时候,微信端也是用OAuth2.0机制来获取用户基本信息. OAu ...
- Python爬虫-播报天气信息(生成exe文件)待续
#!/usr/bin/env python3 # -*- coding : utf-8 -*- '''1.从https://my.oschina.net/joanfen/blog/140364获取要播 ...
- [转]Oracle中没有 if exists(...)
本文转自:http://blog.csdn.net/hollboy/article/details/7550171 对于Oracle中没有 if exists(...) 的语法,目前有许多种解决方法, ...
- Timer 控件
1. 设置属性 Enable = true 或调用 start方法后, *_Tick 方法不会立即执行,会先等待一个时间间隔 2.timer1不管你上次的事情是否做完,它都会每个一个时间间隔做它应该 ...
- ASP.NET MVC4 新手入门教程之七 ---7.向电影模式和表中添加新字段
在这一节中,您将使用实体框架代码第一次迁移,迁移到模型类的一些变化,所以该更改应用于数据库. 默认情况下,当您使用实体框架代码优先将自动创建一个数据库,像你那样早些时候在本教程中,代码第一次添加一个表 ...