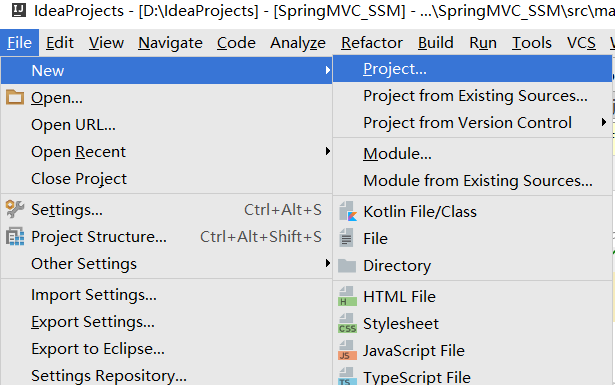
使用intellij idea搭建MAVEN+SSM(Spring+SpringMVC+MyBatis)框架
基本概念
使用SSM(Spring,SpringMVC和Mybatis)
1.1、Spring
Spring是一个开源框架,Spring是于2003 年兴起的一个轻量级的Java 开发框架,由Rod Johnson 在其著作Expert One-On-One J2EE Development and Design中阐述的部分理念和原型衍生而来。它是为了解决企业应用开发的复杂性而创建的。Spring使用基本的JavaBean来完成以前只可能由EJB完成的事情。然而,Spring的用途不仅限于服务器端的开发。从简单性、可测试性和松耦合的角度而言,任何Java应用都可以从Spring中受益。 简单来说,Spring是一个轻量级的控制反转(IoC)和面向切面(AOP)的容器框架。
1.2、SpringMVC
Spring MVC属于SpringFrameWork的后续产品,已经融合在Spring Web Flow里面。Spring MVC 分离了控制器、模型对象、分派器以及处理程序对象的角色,这种分离让它们更容易进行定制。
1.3、MyBatis
MyBatis 本是apache的一个开源项目iBatis, 2010年这个项目由apache software foundation 迁移到了google code,并且改名为MyBatis 。MyBatis是一个基于Java的持久层框架。iBATIS提供的持久层框架包括SQL Maps和Data Access Objects(DAO)MyBatis 消除了几乎所有的JDBC代码和参数的手工设置以及结果集的检索。MyBatis 使用简单的 XML或注解用于配置和原始映射,将接口和 Java 的POJOs(Plain Old Java Objects,普通的 Java对象)映射成数据库中的记录。
二、根据图来理解使用SSM添加数据
1、首先使用idea创建一个maven项目
2.在弹出的窗体中选择maven,然后勾选要建的maven模板--这里选webApp

3.然后填入相应的maven项目组信息(这个是比较随意的)

这里填写自己的maven本地仓库路径


maven会自动创建需要的一些配置信息以及目录结构,在这段时间里我们可以查找需要的jar包并在maven配置文件pom.xml里面进行配置,见下面步骤:
这里如果不知道要用到什么jar包就去百度SpringMVC需要的jar包,然后在maven的官方链接单独查找jar包来配置pom.xml,实例如下(这里我示范去maven官网查找xml配置的部分,具体需要的jar包去我后面展示的pom.xml里面查找):
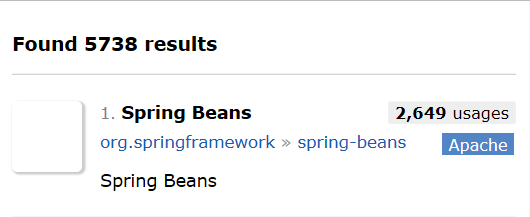
登录http://mvnrepository.com/ 示例查找spring-beans

点击查找结果
这里可以看到最新版以及使用人数最多的版本,自己选择--配置文件里面的jar包版本最好选择同一个版本避免版本冲突;

我们选择第一个进入网页,里面可以看到maven的配置pom.xml文件写法,点击代码直接复制(自动复制);

然后将复制的代码拷贝到pom.xml文件中去即可,maven会自动下载所需要的jar包,我们不需要理会
maven pom.xml,maven会自动到库里面下载需要的jar包到maven仓库
<project xmlns="http://maven.apache.org/POM/4.0.0" xmlns:xsi="http://www.w3.org/2001/XMLSchema-instance"

  xsi:schemaLocation="http://maven.apache.org/POM/4.0.0 http://maven.apache.org/maven-v4_0_0.xsd">

  <modelVersion>4.0.0</modelVersion>

  <groupId>cn.jpp</groupId>

  <artifactId>SpringMVC_SSM</artifactId>

  <packaging>war</packaging>

  <version>1.0-SNAPSHOT</version>

  <name>SpringMVC_SSM Maven Webapp</name>

  <url>http://maven.apache.org</url>

  <dependencies>

    <dependency>

      <groupId>junit</groupId>

      <artifactId>junit</artifactId>

      <version>3.8.1</version>

      <scope>test</scope>

    </dependency>

    <dependency>

      <groupId>javaee</groupId>

      <artifactId>javaee-api</artifactId>

      <version>5</version>

    </dependency>

    <dependency>

      <groupId>org.springframework</groupId>

      <artifactId>spring-core</artifactId>

      <version>4.2.2.RELEASE</version>

    </dependency>

    <dependency>

      <groupId>org.springframework</groupId>

      <artifactId>spring-beans</artifactId>

      <version>4.2.2.RELEASE</version>

    </dependency>

    <dependency>

      <groupId>org.springframework</groupId>

      <artifactId>spring-context</artifactId>

      <version>4.2.2.RELEASE</version>

    </dependency>

    <dependency>

      <groupId>org.springframework</groupId>

      <artifactId>spring-tx</artifactId>

      <version>4.1.9.RELEASE</version>

    </dependency>

    <dependency>

      <groupId>org.springframework</groupId>

      <artifactId>spring-aspects</artifactId>

      <version>4.2.1.RELEASE</version>

    </dependency>

    <dependency>

      <groupId>org.springframework</groupId>

      <artifactId>spring-context-support</artifactId>

      <version>4.1.9.RELEASE</version>

    </dependency>

    <dependency>

      <groupId>org.springframework</groupId>

      <artifactId>spring-jdbc</artifactId>

      <version>4.2.3.release</version>

    </dependency>

    <dependency>

      <groupId>org.springframework</groupId>

      <artifactId>spring-test</artifactId>

      <version>4.1.9.RELEASE</version>

    </dependency>

    <dependency>

      <groupId>org.springframework</groupId>

      <artifactId>spring-web</artifactId>

      <version>4.2.3.RELEASE</version>

    </dependency>

    <dependency>

      <groupId>org.springframework</groupId>

      <artifactId>spring-webmvc</artifactId>

      <version>4.1.9.RELEASE</version>

    </dependency>

    <dependency>

      <groupId>org.mybatis</groupId>

      <artifactId>mybatis</artifactId>

      <version>3.2.2</version>

    </dependency>

    <dependency>

      <groupId>org.mybatis</groupId>

      <artifactId>mybatis-spring</artifactId>

      <version>1.3.0</version>

    </dependency>

    <dependency>

      <groupId>org.javassist</groupId>

      <artifactId>javassist</artifactId>

      <version>3.17.1-GA</version>

    </dependency>

    <dependency>

      <groupId>cglib</groupId>

      <artifactId>cglib</artifactId>

      <version>2.2.2</version>

    </dependency>

    <dependency>

      <groupId>c3p0</groupId>

      <artifactId>c3p0</artifactId>

      <version>0.9.1.2</version>

    </dependency>

    <dependency>

      <groupId>com.oracle</groupId>

      <artifactId>ojdbc6</artifactId>

      <version>11.2.0.1.0</version>

    </dependency>

  </dependencies>

  <build>

    <finalName>SpringMVC_SSM</finalName>

  </build>

</project>

等系统构建完成以后,我们就可以看到目录结构

不全的可以按照需求来补全文件结构,maven项目中的文件结构分为Sources,Tests,Resources,Test Resources,Excluded几种,我们需要详细区分各个文件夹的类型:

配置SpringMVC
一切就绪后接下来我们继续配置SpringMVC的具体信息:
首先需要配置Web.xml这个不必多说,网站项目运行第一个加载的就是web.xml,进入
src->main->webapp->WEB-INF->web.xml
<web-app xmlns="http://xmlns.jcp.org/xml/ns/javaee"

         xmlns:xsi="http://www.w3.org/2001/XMLSchema-instance"

         xsi:schemaLocation="http://xmlns.jcp.org/xml/ns/javaee http://xmlns.jcp.org/xml/ns/javaee/web-app_3_1.xsd"

         version="3.1">

  <!-- 1.针对Spring配置:读取配置文件 -->

  <context-param>

    <param-name>contextConfigLocation</param-name>

    <param-value>classpath:applicationContext.xml</param-value>

  </context-param>

  <!-- 注册ServletContext监听器,创建容器对象,并且将ApplicationContext对象放到Application域中 -->

  <listener>

    <listener-class>org.springframework.web.context.ContextLoaderListener</listener-class>

  </listener>

  <!-- 针对SpringMVC的配置::::::中央调度器:本质上一个serlvet            配置的关于SpringmVC组件 -->

  <servlet>

    <servlet-name>springmvc</servlet-name>

    <servlet-class>org.springframework.web.servlet.DispatcherServlet</servlet-class>

    <init-param>

      <param-name>contextConfigLocation</param-name>

      <param-value>classpath:applicationContext.xml</param-value>

    </init-param>

    <load-on-startup>1</load-on-startup>

  </servlet>

  <servlet-mapping>

    <servlet-name>springmvc</servlet-name>

    <url-pattern>*.do</url-pattern>

  </servlet-mapping>

  <!-- 解决乱码的过滤器 -->

  <filter>

    <filter-name>CharacterEncodingFilter</filter-name>

    <filter-class>org.springframework.web.filter.CharacterEncodingFilter</filter-class>

    <init-param>

      <param-name>encoding</param-name>

      <param-value>utf-8</param-value>

    </init-param>

    <init-param>

      <param-name>forceEncoding</param-name>

      <param-value>true</param-value>

    </init-param>

  </filter>

  <filter-mapping>

    <filter-name>CharacterEncodingFilter</filter-name>

    <url-pattern>/*</url-pattern>

  </filter-mapping>

</web-app>
然后在Resources资源文件夹下新建applicationContext.xml

<?xml version="1.0" encoding="UTF-8"?>

<beans xmlns="http://www.springframework.org/schema/beans"

    xmlns:xsi="http://www.w3.org/2001/XMLSchema-instance"

    xmlns:aop="http://www.springframework.org/schema/aop"

    xmlns:context="http://www.springframework.org/schema/context"

    xmlns:p="http://www.springframework.org/schema/p"

    xmlns:tx="http://www.springframework.org/schema/tx"

    xsi:schemaLocation="

        http://www.springframework.org/schema/beans

        http://www.springframework.org/schema/beans/spring-beans.xsd

         http://www.springframework.org/schema/aop

         http://www.springframework.org/schema/aop/spring-aop-4.1.xsd

         http://www.springframework.org/schema/tx

         http://www.springframework.org/schema/tx/spring-tx-4.1.xsd

           http://www.springframework.org/schema/context

         http://www.springframework.org/schema/context/spring-context-4.1.xsd  " >

   <!-- 01.配置数据源 -->

   <bean id="dataSource" class="com.mchange.v2.c3p0.ComboPooledDataSource">

        <property name="driverClass" value="${jdbc.driverClass}"></property>

         <property name="jdbcUrl" value="${jdbc.jdbcUrl}"></property>

         <property name="user" value="${jdbc.user}"></property>

         <property name="password" value="${jdbc.password}"></property>

   </bean>

   <!-- 1.1 关联jdbc.properties -->

  <context:property-placeholder location="classpath:jdbc.properties"/>

   <!-- 02.配置SessionFactory -->

 <bean id="sessionFactory" class="org.mybatis.spring.SqlSessionFactoryBean">

      <property name="configLocation" value="classpath:mybatis-config.xml"></property>

       <property name="dataSource" ref="dataSource"></property>

   </bean>

   <!-- 03.生成dao代理對象 -->

    <bean class="org.mybatis.spring.mapper.MapperScannerConfigurer">

       <property name="sqlSessionFactoryBeanName" value="sessionFactory"></property>

       <property name="basePackage" value="cn.jpp.dao"></property>

    </bean>

    <!--04.配置service-->

     <bean id="userService" class="cn.jpp.service.UserInfoServiceImpl">

        <property name="dao" ref="IUserInfoDAO"></property>

    </bean>

    <!-- 05.配置action -->

     <bean id="/userAction.do" class="cn.jpp.controller.UserInfoController">

       <property name="service" ref="userService"></property>

    </bean>

    <!-- 06.配置事务管理器 -->

    <bean id="transactionManager" class="org.springframework.jdbc.datasource.DataSourceTransactionManager">

      <property name="dataSource" ref="dataSource"></property>

    </bean>

    <!-- 07.配置开启事务操作 -->

   <tx:advice id="txAdvice" transaction-manager="transactionManager">

     <tx:attributes>

     <!--指定在连接方法上应用的事务属性 -->

        <tx:method name="add*" isolation="DEFAULT" propagation="REQUIRED"/>

     </tx:attributes>

   </tx:advice>

   <!-- aop配置 -->

  <aop:config>

     <aop:pointcut expression="execution(* *..service.*.*(..))" id="stockPointcut"/>

     <aop:advisor advice-ref="txAdvice" pointcut-ref="stockPointcut"/>

  </aop:config>

 </beans>
jdbc.properties
jdbc.driverClass=oracle.jdbc.driver.OracleDriver

jdbc.jdbcUrl=jdbc\:oracle\:thin\:@localhost\:1521\:orcl

jdbc.user=system

jdbc.password=1
mybatis-config.xml
<?xml version="1.0" encoding="UTF-8" ?>

<!DOCTYPE configuration

PUBLIC "-//mybatis.org//DTD Config 3.0//EN"

"http://mybatis.org/dtd/mybatis-3-config.dtd">

<configuration>

  <typeAliases>

     <package name="cn.jpp.entity"/>

  </typeAliases>

     <mappers>

         <!--<mapper resource="cn/happy/entity/IUserInfoDAO.xml" /> -->

         <package name="cn.jpp.dao"/>

    </mappers>

</configuration>
配置实体
package cn.jpp.entity;

/**

 * Created by 景佩佩 on 2017/1/16.

 */

public class UserInfo {

    private Integer id;

    private String name;

    private Integer age;

    public Integer getId() {

        return id;

    }

    public void setId(Integer id) {

        this.id = id;

    }

    public String getName() {

        return name;

    }

    public void setName(String name) {

        this.name = name;

    }

    public Integer getAge() {

        return age;

    }

    public void setAge(Integer age) {

        this.age = age;

    }

}
配置实体的小配置(Mybatis的配置)
<?xml version="1.0" encoding="UTF-8" ?>

<!DOCTYPE mapper

        PUBLIC "-//mybatis.org//DTD Mapper 3.0//EN"

        "http://mybatis.org/dtd/mybatis-3-mapper.dtd">

<mapper namespace="cn.jpp.dao.IUserInfoDAO">

    <select id="add" parameterType="UserInfo">

        insert into userinfo values(SEQ_NUM.nextval,#{name},#{age})

    </select>

</mapper>
创建dao接口
package cn.jpp.dao;

import cn.jpp.entity.UserInfo;

/**

 * Created by 景佩佩 on 2017/1/16.

 */

public interface IUserInfoDAO {

    public void add(UserInfo info);

}
提醒:不需要dao的实现类,通过代理生成
创建service
ServiceDao接口
package cn.jpp.service;

import cn.jpp.entity.UserInfo;

/**

 * Created by 景佩佩 on 2017/1/16.

 */

public interface IUserInfoService {

    public void add(UserInfo info);

}
ServiceDaoImpl实现
package cn.jpp.service;

import cn.jpp.dao.IUserInfoDAO;

import cn.jpp.entity.UserInfo;

/**

 * Created by 景佩佩 on 2017/1/16.

 */

public class UserInfoServiceImpl implements IUserInfoService{

    private IUserInfoDAO dao;

    public void add(UserInfo info) {

        dao.add(info);

    }

    public IUserInfoDAO getDao() {

        return dao;

    }

    public void setDao(IUserInfoDAO dao) {

        this.dao = dao;

    }

}
配置Controller
package cn.jpp.controller;

import cn.jpp.entity.UserInfo;

import cn.jpp.service.IUserInfoService;

import org.springframework.web.servlet.ModelAndView;

import org.springframework.web.servlet.mvc.Controller;

import javax.servlet.http.HttpServletRequest;

import javax.servlet.http.HttpServletResponse;

/**

 * Created by 景佩佩 on 2017/1/16.

 */

public class UserInfoController implements Controller {

    private IUserInfoService service;

    public ModelAndView handleRequest(HttpServletRequest request,

                                      HttpServletResponse response) throws Exception {

        String uname=request.getParameter("name");

        Integer uage=Integer.valueOf(request.getParameter("age"));

        UserInfo info=new UserInfo();

        info.setAge(uage);

        info.setName(uname);

        service.add(info);

        return new ModelAndView("/welcome.jsp");

    }

    public IUserInfoService getService() {

        return service;

    }

    public void setService(IUserInfoService service) {

        this.service = service;

    }

}
配置页面
<%@ page language="java" import="java.util.*" pageEncoding="utf-8"%>

<%

    String path = request.getContextPath();

    String basePath = request.getScheme()+"://"+request.getServerName()+":"+request.getServerPort()+path+"/";

%>

<!DOCTYPE HTML PUBLIC "-//W3C//DTD HTML 4.01 Transitional//EN">

<html>

<head>

    <base href="<%=basePath%>">

    <style type="text/css">

        form{

            margin:0px auto;

            width:500px;

            padding:20px;

        }

    </style>

    <title></title>

</head>

<body>

<h1>SSM整合</h1>

<form action="${pageContext.request.contextPath }/userAction.do" method="post">

    用户名:<input name="name"/> <br/>

    用户年龄<input name="age"/><br/>

    <input type="submit" value="save"/>

</form>

</body>

</html>
1.配置Maven的环境变量

将该变量添加到Path中

如果想要修改Maven的本地仓库位置,则可以直接在Maven的安装目录下找到conf文件下的setting配置文件中,设置localRepository为本地仓库位置
重新打开命令提示符cmd(管理员),输入mvn --version ,如图所示,则说明安装成功

首先我们也要有Oracle数据库,将Oracle装载到本地仓库
我们先找到F:\app\happy\product\11.2.0\dbhome_1\jdbc\lib

并在pox.xml在配置Oracle

并且创建Oracle表
-- Create table

create table USERINFO

(

  ID   NUMBER not null,

  NAME NVARCHAR2(32) not null,

  AGE  NUMBER not null

)
可能还会报一个序列不存在的错,创建序列
-- Create sequence

create sequence SEQ_Num

minvalue 1

maxvalue 9999999999999999999999999999

start with 81

increment by 1

cache 20;
得跟实体的配置的系列一致

全部之后呢,加入到Tomact中
运行后,在浏览器地址栏输入:http://localhost:8080/SSM


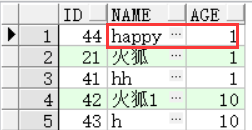
数据库数据
使用intellij idea搭建MAVEN+SSM(Spring+SpringMVC+MyBatis)框架的更多相关文章
- SSM(Spring+SpringMVC+Mybatis)框架环境搭建(整合步骤)(一)
1. 前言 最近在写毕设过程中,重新梳理了一遍SSM框架,特此记录一下. 附上源码:https://gitee.com/niceyoo/jeenotes-ssm 2. 概述 在写代码之前我们先了解一下 ...
- SSM(Spring +SpringMVC + Mybatis)框架搭建
SSM(Spring +SpringMVC + Mybatis)框架的搭建 最近通过学习别人博客发表的SSM搭建Demo,尝试去搭建一个简单的SSMDemo---实现的功能是对用户增删改查的操作 参考 ...
- SSM(Spring,SpringMVC,Mybatis)框架整合项目
快速上手SSM(Spring,SpringMVC,Mybatis)框架整合项目 环境要求: IDEA MySQL 8.0.25 Tomcat 9 Maven 3.6 数据库环境: 创建一个存放书籍数据 ...
- SSM(Spring + Springmvc + Mybatis)框架面试题
JAVA SSM框架基础面试题https://blog.csdn.net/qq_39031310/article/details/83050192 SSM(Spring + Springmvc + M ...
- SSM:spring+springmvc+mybatis框架中的XML配置文件功能详细解释(转)
原文:https://blog.csdn.net/yijiemamin/article/details/51156189# 这几天一直在整合SSM框架,虽然网上有很多已经整合好的,但是对于里面的配置文 ...
- 0927-转载:SSM:spring+springmvc+mybatis框架中的XML配置文件功能详细解释
这篇文章暂时只对框架中所要用到的配置文件进行解释说明,而且是针对注解形式的,框架运转的具体流程过两天再进行总结. spring+springmvc+mybatis框架中用到了三个XML配置文件:web ...
- SSM:spring+springmvc+mybatis框架中的XML配置文件功能详细解释
这几天一直在整合SSM框架,虽然网上有很多已经整合好的,但是对于里面的配置文件并没有进行过多的说明,很多人知其然不知其所以然,经过几天的搜索和整理,今天总算对其中的XML配置文件有了一定的了解,所以拿 ...
- 基于Maven的ssm(spring+springMvc+Mybatis)框架搭建
前言 本demo是在idea下搭建的maven项目,数据库使用Mysql,jdk版本是1.8.0_171,ideal:2017.3.5 一.新建项目 1.file->new->porjec ...
- SSM Spring SpringMVC Mybatis框架整合Java配置完整版
以前用着SSH都是老师给配好的,自己直接改就可以.但是公司主流还是SSM,就自己研究了一下Java版本的配置.网上大多是基于xnl的配置,但是越往后越新的项目都开始基于JavaConfig配置了,这也 ...
随机推荐
- 持续集成、持续交付、持续部署、Jkens、git
一 持续集成.持续交付.持续部署 1. 持续集成 持续集成指的是,频繁地(一天多次)将代码集成到主干.持续集成的目的,就是让产品可以快速迭代,同时还能 保持高质量.它的核心措施是,代码集成到主干之前 ...
- 对接京东jos遇到的坑 记录一下。方便查询
坑很多,有一些忘记了.文档乱的很,有问题可以私信我一下我看能不能想起来. 坑一.添加商品接口. {"error_response": {"code":" ...
- pycharm安装与使用
python是一门解释性编程语言,所以一般把写python的工具叫解释器.写python脚本的工具很多,小编这里推荐pycharm,是小编用过最好用的一个工具.比较顺手的一个.而且可以跨平台,在mac ...
- solr6.6教程-基础环境搭建(一)
目前网上关于solr6.+的安装教程很少,有些6.0之前的教程在应用到6.+的版本中出现很多的问题,所以特别整理出来这一片文章,希望能给各位码农一些帮助! 很少写些文章,如有不对的地方,还希望多多指导 ...
- [转]【Oracle Database 12c新特性】32k varchar2 max_string_size
本文转自:https://blogs.oracle.com/askmaclean/entry/oracle_database_12c%E6%96%B0%E7%89%B9%E6%80%A7_32k_va ...
- show_space1
CREATE OR REPLACE PROCEDURE show_space1(p_segname IN VARCHAR2, p_owner IN VARCHAR2 DEFAULT 'NTSUSER0 ...
- Centos 从零开始 (二)
因为我是搞 nodejs的 所以以后会安装一些依赖于node的 比如mongodb数据库等. 6:安装nodejs 安装的时候遇到个小问题.yum install nodejs 报错 说没有这个包.然 ...
- log4js日志
安装log4js:npm install log4js express中配置log4js中间件: var log = require("./modules/utils/logUtil.js& ...
- mac 好用软件地址存储
Navicat Premium 12.0.24 for mac已破解中文 https://www.52pojie.cn/thread-727433-1-1.html sublime 破解方法https ...
- Object.preventExtensions()使用技巧
Object.preventExtensions() 方法让一个对象变的不可扩展,也就是永远不能再添加新的属性. // Object.preventExtensions将原对象变的不可扩展,并且返回原 ...