Bechmarksql
使用方法
1、配置JDK环境
JDK最好是1.5以上的版本
JAVA_HOME=/usr/java/jdk1.6.0_22
PATH=$PATH:$JAVA_HOME/bin
2.准备工作
把要测试的数据库的JDBC DRIVER放到./BenchmarkSQL-2.3.2/lib目录下
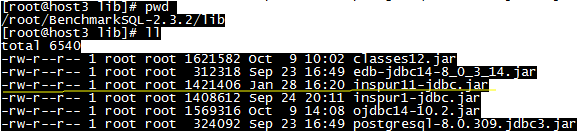
在run/目录下的 runSQL.sh 、 loadData.sh 、 runBenchmark.sh三个文件中加入要测试的数据库的JDBC DRIVER的位置,如下图所示:


3.测试步骤
(1)配置数据库的JDBC连接信息
[root@host3 run]# cp oracle.properties kdbnew.properties
[root@host3 run]# vi kdbnew.properties
driver=com.inspur.jdbc.KdDriver
conn=jdbc:inspur:thin:@localhost:8629:kdb
user=sys
password=kdb
(2)创建初始表
[root@host3 run]# ./runSQL.sh kdbnew.properties sqlTableCreates
(3)添加初始数据
./loadData.sh tibero.properties numWarehouses= 10
注意:等号与后面的数字之间一定要添加一个空格
10warehouse=1G
numWarehouse指的是仓库数(具体含义见上篇博文),默认为1,导入9张表的数据大小大概70多M,当 numWarehouse为10时,数据大小可以近似当作1GB数据。
(4)创建索引
./runSQL.sh kdbnew.properties sqlIndexCreates
(5)开始测试
./runBenchmark.sh kdbnew.properties
在没有建索引的情况下不会产生tpmc值,太慢了
注意:在执行此命令之前,先用root用户执行xhost +,普通用户才可能显示图形界面
不要忘记设置图形界面的仓库数时要与第3步中设置的数量相符;此外,测试的结果报告除了显示在图形界面有显示以外,还在run/reports目录下有备份,随时可以查阅
如果图形化界面无法显示:
[root@host3 ~]# cd /etc/ssh
[root@host3 ssh]# ls
moduli sshd_config ssh_host_dsa_key.pub ssh_host_key.pub ssh_host_rsa_key.pub
ssh_config ssh_host_dsa_key ssh_host_key ssh_host_rsa_key
[root@host3 ssh]# more sshd_config
# The default is to check both .ssh/authorized_keys and .ssh/authorized_keys2
# but this is overridden so installations will only check .ssh/authorized_keys
AuthorizedKeysFile .ssh/authorized_keys
#AllowAgentForwarding yes
#AllowTcpForwarding yes
#GatewayPorts no
X11Forwarding yes
#X11DisplayOffset 10
#X11UseLocalhost yes
#PrintMotd yes
#PrintLastLog yes
#TCPKeepAlive yes
#UseLogin no
UsePrivilegeSeparation sandbox # Default for new installations.
# no default banner path
#Banner none
# override default of no subsystems
Subsystem sftp /usr/libexec/openssh/sftp-server
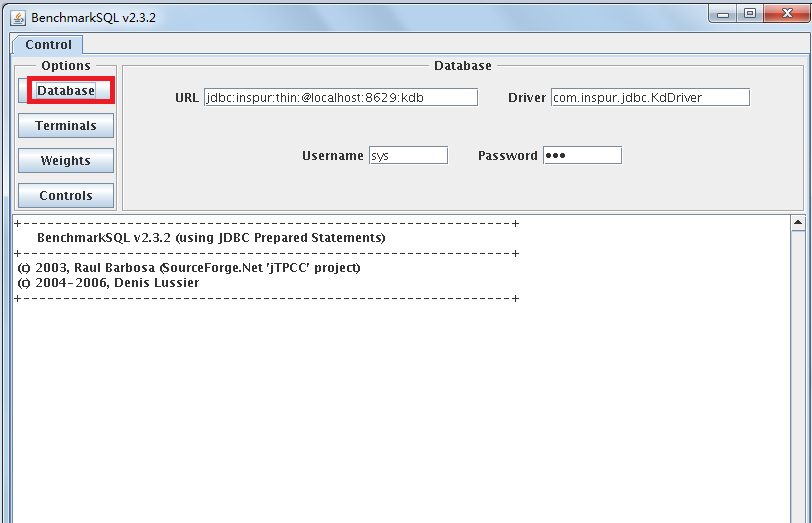
Control-Database:配置所要链接的数据库,默认会读取之前我们修改的配置文件,故此处不用动
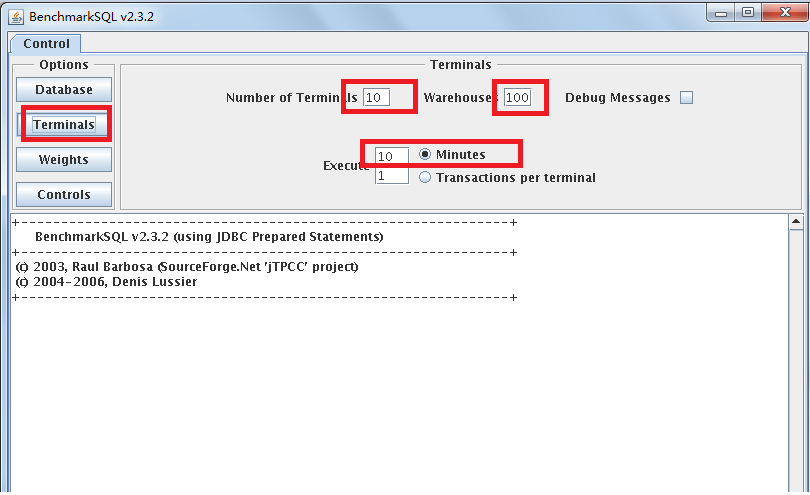
Control-Terminals:配置终端数,仓库数,是否显示Debug信息,选择执行是分钟还是每终端事务数
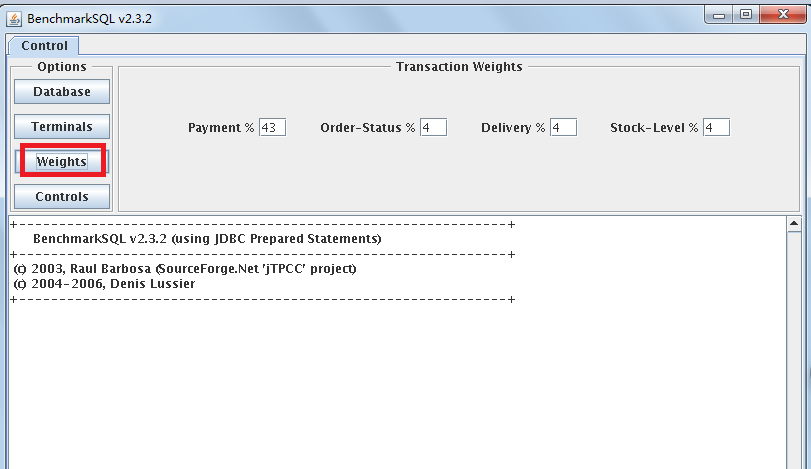
Control-Weights:配置TPC-C测试中五种事务的比重(界面中只要配置4种),一般按默认比例测试即可
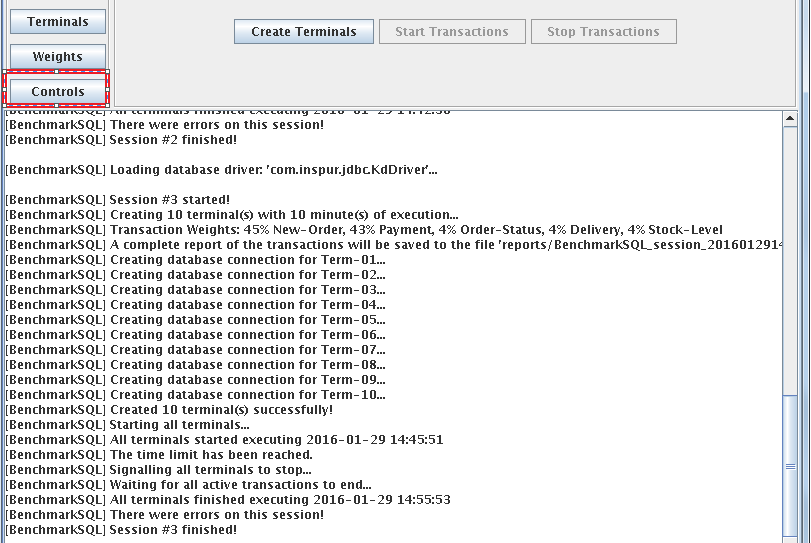
[BenchmarkSQL] Session #1 started!
[BenchmarkSQL] Creating 10 terminal(s) with 10 minute(s) of execution...
[BenchmarkSQL] Transaction Weights: 45% New-Order, 43% Payment, 4% Order-Status, 4% Delivery, 4% Stock-Level
[BenchmarkSQL] A complete report of the transactions will be saved to the file 'reports/BenchmarkSQL_session_20160129150651.txt'
[BenchmarkSQL] Creating database connection for Term-01...
[BenchmarkSQL] Creating database connection for Term-02...
[BenchmarkSQL] Creating database connection for Term-03...
[BenchmarkSQL] Creating database connection for Term-04...
[BenchmarkSQL] Creating database connection for Term-05...
[BenchmarkSQL] Creating database connection for Term-06...
[BenchmarkSQL] Creating database connection for Term-07...
[BenchmarkSQL] Creating database connection for Term-08...
[BenchmarkSQL] Creating database connection for Term-09...
[BenchmarkSQL] Creating database connection for Term-10...
[BenchmarkSQL] Created 10 terminal(s) successfully!
[BenchmarkSQL] Starting all terminals...
[BenchmarkSQL] All terminals started executing 2016-01-29 15:06:54
[BenchmarkSQL] The time limit has been reached.
[BenchmarkSQL] Signalling all terminals to stop...
[BenchmarkSQL] Waiting for all active transactions to end...
[BenchmarkSQL] All terminals finished executing 2016-01-29 15:16:54
[BenchmarkSQL] There were errors on this session!
[BenchmarkSQL] Session #1 finished!
run/reports下的后面的截取:
Measured tpmC =60000*149708/600157
Session Start 2016-01-29 15:06:54
Session End 2016-01-29 15:16:54
Transaction Count 333804
注意:
1. 测试完后在界面下方会显示简要的测试结果,包括平均tpmC值(每分钟执行的事务数),当前tpmC值,内存使用情况等等;出结果以后尽量记录下来,因为之后如果乱点界面按钮的话,测试结果将会被重写(感觉是一个bug);
2.运行过程中如果想要修改终端数等参数,最好关闭GUI界面,重新运行runBenchmark.bat
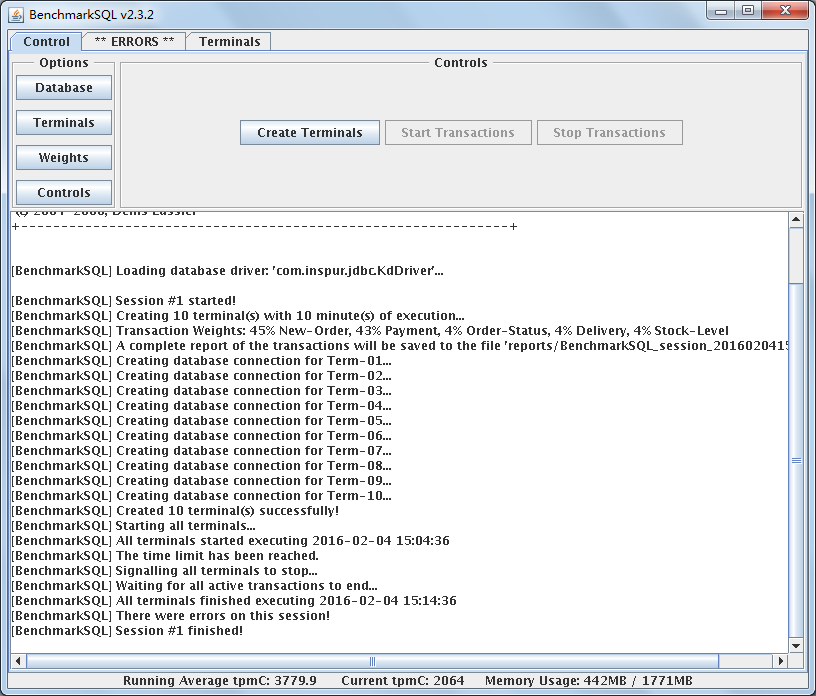
tpmc值越高说明联机处理事务能力越强
导入数据后如果再用原来的导入数据的方法追加数据的话,数据会被覆盖
Bechmarksql的更多相关文章
随机推荐
- python---权限管理和菜单生成
一:表结构(共八张表) from django.db import models # Create your models here. class User(models.Model): userna ...
- VS项目属性的一些配置项的总结(important)
以下内容为“原创”+“转载” 首先,解决方案和项目文件夹包含关系(c++项目): VS解决方案和各个项目文件夹以及解决方案和各个项目对应的配置文件包含关系,假设新建一个项目ssyy,解决方案起名fan ...
- bzoj千题计划136:bzoj3931: [CQOI2015]网络吞吐量
http://www.lydsy.com/JudgeOnline/problem.php?id=3931 在最短路网络上跑最大流 #include<queue> #include<c ...
- c#+js 使用formdata上传文件
如果不是使用form表单submit的形式,我们可以手动通过formdata传值(针对文件上传等) 比如: <html> <head> <meta name=" ...
- python学习笔记3-函数的递归
递归就是指自己函数的自我调用 #递归 #自己调用自己,函数的循环 def test1(): num = int(input('please enter a number:')) if num%2==0 ...
- Vue 的style绑定显示background-image
data () { return { img: require('你的json资源路径') } } :style="{backgroundImage: 'url(' + img + ')'} ...
- Java并发编程原理与实战十五:手动实现一个可重入锁
package com.roocon.thread.ta1; public class Sequence { private MyLock lock = new MyLock(); private ...
- Java8 新特性 Streams map() 示例
在Java 8中stream().map(),您可以将对象转换为其他对象.查看以下示例: 1.大写字符串列表 1.1简单的Java示例将Strings列表转换为大写. TestJava8.java p ...
- [转]extern与头文件(*.h)的区别和联系
用#include可以包含其他头文件中变量.函数的声明,为什么还要extern关键字? 如果我想引用一个全局变量或函数a,我只要直接在源文件中包含#include<xxx.h> (xxx. ...
- spring-boot Test for Controller
spring-boot controller 测试示例: 单元测试类 package com.zzhi; import com.fasterxml.jackson.databind.ObjectMa ...