Ionic2 快速入门
本文原创版权归 博客园 yan_xiaodi 所有,转载请自觉于篇头位置显示标明原创作者及出处,这是您对作者劳动果实的自觉尊重!!
作者:yan_xiaodi
原文:http://www.cnblogs.com/yanxiaodi/p/6060123.html
电子书:https://www.gitbook.com/book/yanxiaodi/ionic2-guide/details
3.快速上手
完成 Ionic 安装后,你可以创建第一个App了。本章内容将指导你新建一个App,添加一个页面,并且实现页面间的导航。
3.1.创建项目
打开 Node 命令行,首先 cd 到项目目录,使用 start 命令来创建一个新App:
ionic start MyIonic2Project tutorial --v2
这个命令将下载项目模板,安装 npm modules,设置 Cordova 的相关信息。
tutorial参数的意思是下载 tutorial 模板来初始化项目,如果不指定这个参数的话,比如:
ionic start MyIonic2Project --v2
默认会使用 tabs 模板。
当然你也可以加一个
blank参数,这样就是一个空项目。
--v2的参数必须要加,不然会建立 v1.x 版本的项目。
如果失败,有可能会出现以下信息:
Creating Ionic app in folder E:\Workspaces\Ionic2\MyIonic2Project based on tutorial project

Downloading: https://github.com/driftyco/ionic2-app-base/archive/master.zip

[=============================] 100% 0.0s

Downloading: https://github.com/driftyco/ionic2-starter-tutorial/archive/master.zip

[=============================] 100% 0.0s

Installing npm packages...

Error with start undefined

Error Initializing app: There was an error with the spawned command: npminstall

There was an error with the spawned command: npminstall

Caught exception:

 undefined

Mind letting us know? https://github.com/driftyco/ionic-cli/issues
这说明 npm 安装的时候失败了,可以 cd 到项目目录,使用之前设置过的 cnpm 命令:
E:\Workspaces\Ionic2>cd MyIonic2Project

E:\Workspaces\Ionic2\MyIonic2Project>cnpm install
直到最后输出类似以下信息:
All packages installed (319 packages installed from npm registry, use 2m, speed 37.49kB/s, json 659(4MB), tarball 1.07MB)
说明 npm modules 安装成功。
3.2.在浏览器中运行
现在 cd 到项目目录,使用 serve 命令来快速浏览项目:
E:\Workspaces\Ionic2>cd MyIonic2Project

E:\Workspaces\Ionic2\MyIonic2Project>ionic serve
接下来 CLI 会编译项目,输出类似下面的内容:
> ionic-app-base@ watch E:\Workspaces\Ionic2\MyIonic2Project

> ionic-app-scripts watch

[14:38:58] ionic-app-scripts 0.0.36

[14:38:58] watch started ...

[14:38:58] build dev started ...

[14:38:58] clean started ...

[14:38:58] clean finished in 1 ms

[14:38:58] copy started ...

[14:38:58] transpile started ...

[14:38:58] lint started ...

[14:39:17] lint finished in 18.68 s

[14:39:19] transpile finished in 21.32 s

[14:39:19] bundle started ...

[14:39:23] copy finished in 25.39 s

[14:39:49] bundle finished in 29.75 s

[14:39:49] sass started ...

[14:39:53] sass finished in 4.10 s

[14:39:53] build dev finished in 55.20 s

[14:39:54] watch ready in 55.95 s

Running live reload server: http://localhost:35729

Watching: www/**/*, !www/lib/**/*

√ Running dev server: http://localhost:8100

Ionic server commands, enter:

 restart or r to restart the client app from the root

 goto or g and a url to have the app navigate to the given url

 consolelogs or c to enable/disable console log output

 serverlogs or s to enable/disable server log output

 quit or q to shutdown the server and exit

ionic $
接着浏览器会打开一个地址为 http://localhost:8100 的窗口,端口号根据当前PC的实际情况可能会有变化,如果8100被占用了会使用8101等。
你可以看到运行效果: 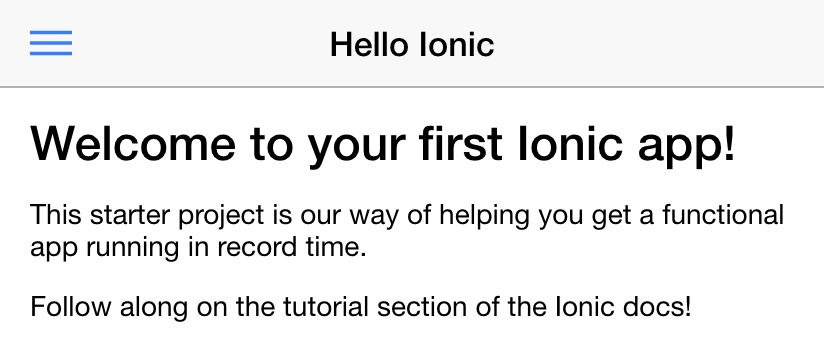
3.3.项目结构
现在来看一下一个 Ionic 2 App 的结构。这是一个标准的 Cordova 项目结构。
./src/index.html
./src/index.html 是App的主要入口,设置脚本和CSS,运行整个App。我们不会花费太多时间在这个文件上,你可以看到HTML代码里有一个 <ion-app> 标签,像下面这样:
<ion-app></ion-app>
在底部还有以下的脚本:
<script src="cordova.js"></script>

<script src="build/main.js"></script>
build/main.js是自动生成的,实际上是把TypeScript转成了普通的JavaScript。
cordova.js在本地开发的时候在浏览器中浏览会报404错误,这个文件会在Cordova打包的时候自动加到项目里。
./src/
在src目录里我们会找到原始的没有经过编译的代码,这也是我们的主要工作目录。当我们运行ionic serve命令的时候,在src/目录下的文件会被转译成正确的浏览器能够解释的JavaScript版本(当前是ES5)。这意味着我们可以使用高级的TypeScript,但是会编译回浏览器需要的老版本的JavaScript。 src/app/app.module.ts是App的入口。
在文件底部我们会看到以下的代码:
@NgModule({

 declarations: [MyApp,HelloIonicPage, ItemDetailsPage, ListPage],

 imports: [IonicModule.forRoot(MyApp)],

 bootstrap: [IonicApp],

 entryComponents: [MyApp,HelloIonicPage,ItemDetailsPage,ListPage],

 providers: []

})

export class AppModule {}
每个App都有一个root module来控制应用中其他的部分。如果你用过Ionic1和Angular1的话,有点类似ng-app。这也是我们使用ionicBootstrap来启动应用的地方。
./src/app/app.html
src/app/app.html是主要的模板文件:
<ion-menu [content]="content">

 <ion-header>

     <ion-toolbar>

         <ion-title>Pages</ion-title>

     </ion-toolbar>

 </ion-header>

 <ion-content>

     <ion-list>

         <button ion-item *ngFor="let p of pages" (click)="openPage(p)">

             {{p.title}}

         </button>

     </ion-list>

 </ion-content>

</ion-menu>

<ion-nav id="nav" [root]="rootPage" #content swipeBackEnabled="false"></ion-nav>
在这个模板中,我们使用了ion-menu来作为菜单,使用ion-nav组件当做主要的内容区域。ion-menu的[content]属性被绑定到ion-nav的本地变量content上,所以它能够知道要显示什么。
下面我们来看如何来创建新页面并实现基本的导航。
3.4.添加页面
现在我们对Ionic 2 App的布局有了一个基本的认识,继续来实现添加和导航页面的功能。
看一下src/app/app.html,在底部会看到以下代码:
<ion-nav id="nav" [root]="rootPage" #content swipeBackEnabled="false"></ion-nav>
注意root属性的绑定。对于ion-nav组件来说,这是第一个或者说是“根”页面。当ion-nav组件载入时,组件引用的rootPage变量将会作为根页面被载入。
在src/app/app.component.ts,MyApp组件在构造函数里指定了这个变量:
...

import {HelloIonicPage} from '../pages/hello-ionic/hello-ionic';

...

export class MyApp {

 ...

 // make HelloIonicPage the root (or first) page

 rootPage: any = HelloIonicPage;

 pages: Array<{title: string, component: any}>;

 constructor(

   private platform: Platform,

   private menu: MenuController

 ) {

 ...

 }

 ...

}
我们看到rootPage被设置为HelloIonicPage,所以HelloIonicPage将是nav controller第一个载入的页面。
创建一个页面
接下来,我们看一下我们导入的HelloIonicPage页面。在src/pages/hello-ionic/目录下,打开hello-ionic.ts。
你可以注意到每个页面都有自己的目录,每个目录中都可以看到具有相同名字的
.html和.scss文件。例如在hello-ionic/目录我们可以看到有hello-ionic.ts,hello-ionic.html, 和hello-ionic.scss。虽然这种模式不是必须的,但这有助于项目文件的良好组织。
接下来我们看到HelloIonicPage这个类。这个类创建了一个Page,即Angular中的Component(组件),并且会载入Ionic的导航系统。注意因为Page是被动态载入的,所以他们不需要selector:
import {Component} from '@angular/core';

@Component({

 templateUrl: 'build/pages/hello-ionic/hello-ionic.html'

})

export class HelloIonicPage {}
所有的Page都是一个类,并且关联到对应的模板文件上。看一下src/pages/hello-ionic/hello-ionic.html,即这个页面的模板文件:
<ion-header>

 <ion-navbar>

   <button menuToggle>

    <ion-icon name="menu"></ion-icon>

   </button>

   <ion-title>Hello Ionic</ion-title>

 </ion-navbar>

</ion-header>

<ion-content padding class="getting-started">

 <h3>Welcome to your first Ionic app!</h3>

   <p>

     This starter project is our way of helping you get a functional app running in record time.

   </p>

   <p>

     Follow along on the tutorial section of the Ionic docs!

   </p>

   <p>

   <button primary menuToggle>Toggle Menu</button>

 </p>

</ion-content>
<ion-navbar>是navigation bar的模板。当我们导航到页面时,navigation bar的按钮和页面标题将会作为整个页面动画的一部分展现出来。
模板其余的部分是标准的Ionic代码,设置了内容区域和输出我们的欢迎信息。
创建一个新页面
创建这个新页面,我们并不需要做很多配置,只需要确保设置好navigation bar要展示的标题就可以了。
看一下src/pages/list/list.ts的内容,这里定义了一个新页面:
import { Component } from '@angular/core';

import { NavController, NavParams } from 'ionic-angular';

import { ItemDetailsPage } from '../item-details/item-details';

@Component({

    templateUrl: 'list.html'

})

export class ListPage {    selectedItem: any;    icons: string[];    items: Array<{title: string, note: string, icon: string}>;

    constructor(public navCtrl: NavController, public navParams: NavParams) {

        // If we navigated to this page, we will have an item available as a nav param

        this.selectedItem = navParams.get('item');

        this.icons = ['flask', 'wifi', 'beer', 'football', 'basketball', 'paper-plane', 'american-football', 'boat', 'bluetooth', 'build'];

        this.items = [];

        for(let i = 1; i < 11; i++) {

            this.items.push({

            title: 'Item ' + i,

            note: 'This is item #' + i,

            icon: this.icons[Math.floor(Math.random() * this.icons.length)]

        });

    }

 }

    itemTapped(event, item) {

        this.navCtrl.push(ItemDetailsPage, {

            item: item

        });

    }}
这个页面将会创建一个基本的列表页面,包含一些数字。
大致上这个页面跟我们之前看的HelloIonicPage非常类似。接下来我们看一下如何导航到这个新页面。
3.5.导航到页面
回忆一下上个章节,我们在ListPage类里有一些下面的代码:
itemTapped(event, item) {

    this.navCtrl.push(ItemDetailsPage, {

        item: item

    });

}
你也许注意到我们引用了ItemDetailPage。我们用以下的代码将其import到app/pages/list/list.ts里:
import {ItemDetailsPage} from '../item-details/item-details';
当保存文件后,ionic serve进程会自动重新编译以应用新的更改,并自动刷新浏览器。重新看一下浏览器中的页面,当点击一个项时,它将会导航到详情页面。注意菜单按钮被一个返回按钮代替了,这是Ionic遵循的一种原生App的导航方式,当然这是可以被配置的。
工作原理
Ionic 2的导航像一个简单的栈,我们使用push方法来导航到新页面,将其放在栈的顶部,并显示一个返回按钮。对于返回,我们使用pop方法将其从栈中移除。因为我们在构造函数中设置了this.navCtrl属性,我们可以调用this.navCtrl.push()方法,来导航到一个新的页面。我们还可以将一个object传递给将要导航过去的页面。使用push方法导航到新页面非常简单,但Ionic的导航系统是非常灵活的。可以从导航文档处获得更详细的导航示例。
对于
Url,Ionic 2与Ionic 1是不同的。我们要确保我们可以返回到某个Page,所以一般不使用Url来进行导航。当然我们在必要的时候还是有办法来使用Url导航的。
接下来
你已经掌握了Ionic 2的入门知识。你可以继续学习Ionic 2的各种Component,和关于硬件的Native APIs。
Ionic2 快速入门的更多相关文章
- Web Api 入门实战 (快速入门+工具使用+不依赖IIS)
平台之大势何人能挡? 带着你的Net飞奔吧!:http://www.cnblogs.com/dunitian/p/4822808.html 屁话我也就不多说了,什么简介的也省了,直接简单概括+demo ...
- SignalR快速入门 ~ 仿QQ即时聊天,消息推送,单聊,群聊,多群公聊(基础=》提升)
SignalR快速入门 ~ 仿QQ即时聊天,消息推送,单聊,群聊,多群公聊(基础=>提升,5个Demo贯彻全篇,感兴趣的玩才是真的学) 官方demo:http://www.asp.net/si ...
- 前端开发小白必学技能—非关系数据库又像关系数据库的MongoDB快速入门命令(2)
今天给大家道个歉,没有及时更新MongoDB快速入门的下篇,最近有点小忙,在此向博友们致歉.下面我将简单地说一下mongdb的一些基本命令以及我们日常开发过程中的一些问题.mongodb可以为我们提供 ...
- 【第三篇】ASP.NET MVC快速入门之安全策略(MVC5+EF6)
目录 [第一篇]ASP.NET MVC快速入门之数据库操作(MVC5+EF6) [第二篇]ASP.NET MVC快速入门之数据注解(MVC5+EF6) [第三篇]ASP.NET MVC快速入门之安全策 ...
- 【番外篇】ASP.NET MVC快速入门之免费jQuery控件库(MVC5+EF6)
目录 [第一篇]ASP.NET MVC快速入门之数据库操作(MVC5+EF6) [第二篇]ASP.NET MVC快速入门之数据注解(MVC5+EF6) [第三篇]ASP.NET MVC快速入门之安全策 ...
- Mybatis框架 的快速入门
MyBatis 简介 什么是 MyBatis? MyBatis 是支持普通 SQL 查询,存储过程和高级映射的优秀持久层框架.MyBatis 消除 了几乎所有的 JDBC 代码和参数的手工设置以及结果 ...
- grunt快速入门
快速入门 Grunt和 Grunt 插件是通过 npm 安装并管理的,npm是 Node.js 的包管理器. Grunt 0.4.x 必须配合Node.js >= 0.8.0版本使用.:奇数版本 ...
- 【第一篇】ASP.NET MVC快速入门之数据库操作(MVC5+EF6)
目录 [第一篇]ASP.NET MVC快速入门之数据库操作(MVC5+EF6) [第二篇]ASP.NET MVC快速入门之数据注解(MVC5+EF6) [第三篇]ASP.NET MVC快速入门之安全策 ...
- 【第四篇】ASP.NET MVC快速入门之完整示例(MVC5+EF6)
目录 [第一篇]ASP.NET MVC快速入门之数据库操作(MVC5+EF6) [第二篇]ASP.NET MVC快速入门之数据注解(MVC5+EF6) [第三篇]ASP.NET MVC快速入门之安全策 ...
随机推荐
- 常见的APP性能测试指标
性能测试在软件的质量保证中起着重要的作用,它包括的测试内容丰富多样.中国软件评测中心将性能测试概括为三个方面:应用在客户端性能的测试.应用在网络上性能的测试和应用在服务器端性能的测试.通常情况下,三方 ...
- Opencv读取图片像素值
#include <iostream>#include <opencv2/opencv.hpp> using namespace std;using namespace cv; ...
- java的集合框架详解
前言:数据结构对程序设计有着深远的影响,在面向过程的C语言中,数据库结构用struct来描述,而在面向对象的编程中,数据结构是用类来描述的,并且包含有对该数据结构操作的方法. 在Java语言中,Jav ...
- C++ STL 全排列函数
C++ 全排列函数...一听名字就在<algorithm>中... 首先第一个说的是next_permutation: #include <algorithm> bool n ...
- C primer 编程练习 (不断更新)
目前在看<C Primer>,以后会经常在这篇博客里更新课后的编程练习题 第二章:编程练习 2.1 #include <stdio.h> int main(void) { pr ...
- Spring MVC @RequestMapping浅析
简介:@RequestMappingRequestMapping是一个用来处理请求地址映射的注解,可用于类或方法上.用于类上,表示类中的所有响应请求的方法都是以该地址作为父路径.RequestMapp ...
- 编写高质量代码改善C#程序的157个建议——建议123:程序集不必与命名空间同名
建议123:程序集不必与命名空间同名 程序集一般会和命名空间同名,但这并不是必须的.事实上,不同名的命名空间和程序集是很常见的. 程序集表示的是一种物理上的分组,而命名空间是逻辑上的分组,两者没有必然 ...
- 20169205实验二 Java面向对象程序设计
20169205实验二 Java面向对象程序设计 实验内容及步骤 (一)单元测试 1.三种代码 伪代码:以简洁的自然语言表明设计步骤: 产品代码:用以实现特定功能的程序或机器语言: 测试代码:用以对产 ...
- 淘宝IP地址库
淘宝官方ip地址库 http://ip.taobao.com/ 接口说明 1. 请求接口(GET): http://ip.taobao.com/service/getIpInfo.php?ip=[ip ...
- hdu2579之BFS
Dating with girls(2) Time Limit: 2000/1000 MS (Java/Others) Memory Limit: 32768/32768 K (Java/Oth ...