
2D轮播图
目录结构
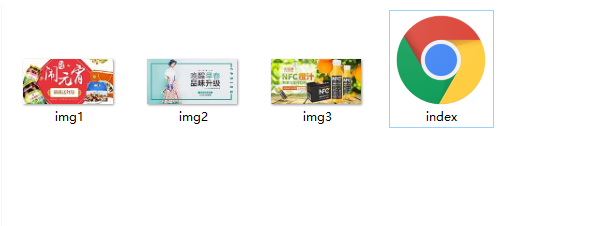
index.html
<!DOCTYPE html>
<html lang="en">
<head>
<meta charset="UTF-8">
<title>Document</title>
<style type="text/css">
.population{
width: 600px;
height: 300px;
background: white;
margin-left: auto;
margin-right: auto;
overflow: hidden;
position: relative;
}
.SlideBlock{
width: 600px;
height: 300px;
}
.controlButton{
width: 105px;
height: 20px;
position: absolute;
background:rgba(255,255,255,0.5);
border-radius: 15px 15px 15px 15px;
margin:270px 247px 20px 248px;
z-index: 99;
}
.controlButton ul{
width: 65px;
height: 20px;
margin: 0 auto;
padding: 0px;
}
.controlButtonEach{
background: #ff1d38;
width: 11px;
height: 11px;
border-radius: 50%;
list-style: none;
float: left;
margin-left: 10px;
margin-top: 2px;
cursor: pointer;
border: 2px rgba(255,255,255,1) solid;
}
.changeBlockBefore{
width: 600px;
height: 300px;
float: left;
position: absolute;
margin-left: 600px;
transition: 0.5s;
}
.changeBlockAfter{
width: 600px;
height: 300px;
float: left;
position: absolute;
margin-left: 0px;
transition: 0.5s;
}
.changeButton{
background: white;
width: 11px;
height: 11px;
border-radius: 50%;
list-style: none;
float: left;
margin-left: 10px;
margin-top: 2px;
cursor: pointer;
border: 2px #ff1d38 solid;
}
.LeftControl{
width: 20px;
height: 50px;
background: rgba(0,0,0,0.5);
line-height: 50px;
text-align: center;
float: left;
color: white;
margin:125px 560px 125px 0;
z-index: 99;
position: absolute;
opacity: 0;
transition: 0.5s;
}
.RightControl{
width: 20px;
height: 50px;
background: rgba(0,0,0,0.5);
line-height: 50px;
text-align: center;
float: left;
margin:125px 0 125px 580px;
color: white;
z-index: 99;
position: absolute;
opacity: 0;
transition: 0.5s;
}
</style>
</head>
<body>
<div class="population">
<div class="LeftControl"><</div>
<div class="RightControl">></div>
<div class="controlButton">
<ul>
<li style="margin-left: 0px;" class="changeButton"></li>
<li class="controlButtonEach"></li>
<li class="controlButtonEach"></li>
</ul>
</div>
<div class="SlideBlock">
<div class="changeBlockAfter" style="background-color: red;"><img src="img1.jpg"/></div>
<div class="changeBlockBefore" style="background-color: gray;"><img src="img2.jpg"/></div>
<div class="changeBlockBefore" style="background-color: green;"><img src="img3.jpg"/></div>
</div>
</div>
</body>
<script type="text/javascript">
var childPopulation = document.getElementsByClassName('population')[0];
var childBlock = document.getElementsByClassName('SlideBlock')[0];
var childControlButton = document.getElementsByClassName('controlButton')[0];
var eachBlock = childBlock.getElementsByTagName('div');
var eachButton = childControlButton.getElementsByTagName('li');
var childLeft = document.getElementsByClassName('LeftControl')[0];
var childRight = document.getElementsByClassName('RightControl')[0];
childPopulation.onmousemove = function(){
childLeft.style.opacity = '1';
childRight.style.opacity = '1';
childPopulation.style.cursor = 'pointer';}
childPopulation.onmouseout = function(){
childLeft.style.opacity = '0';
childRight.style.opacity = '0';}
for (var i = 0; i < 3; i++) {
eachButton[i].index = i;
eachButton[i].onmousemove = function(){
num = this.index;
for (var j = 0; j < 3; j++) {
eachBlock[j].className = 'changeBlockBefore';
eachButton[j].className = "controlButtonEach";
}
this.className = 'changeButton';
eachBlock[num].className = 'changeBlockAfter';
}}
var num = 0;
childRight.onclick = function(){
clearInterval(AutoId);
num += 1;
if(num >= 3){
num = 0;
}
for (var j = 0; j < 3; j++) {
eachBlock[j].className = 'changeBlockBefore';
eachButton[j].className = "controlButtonEach";
}
eachButton[num].className = 'changeButton';
eachBlock[num].className = 'changeBlockAfter';}
childRight.onmousemove = function(){
childRight.style.background = 'rgba(0,0,0,0.8)'
}
childRight.onmouseout = function(){
childRight.style.background = 'rgba(0,0,0,0.5)'
clearInterval(AutoId);
AutoPlay();};
childLeft.onclick = function(){
clearInterval(AutoId);
num -= 1;
if(num <= -1){
num = 2;
}
for (var j = 0; j < 3; j++) {
eachBlock[j].className = 'changeBlockBefore';
eachButton[j].className = "controlButtonEach";
}
eachButton[num].className = 'changeButton';
eachBlock[num].className = 'changeBlockAfter';;};
childLeft.onmousemove = function(){
childLeft.style.background = 'rgba(0,0,0,0.8)'
}
childLeft.onmouseout = function(){
childLeft.style.background = 'rgba(0,0,0,0.5)'
clearInterval(AutoId);
AutoPlay();}
var AutoChange = function (){
num ++;
if(num > 2){
num = 0;
}
for (var k = 0; k < 3; k++) {
eachButton[k].className = "controlButtonEach";
eachBlock[k].className = 'changeBlockBefore';
}
eachButton[num].className = "changeButton";
eachBlock[num].className = 'changeBlockAfter';}
function AutoPlay(){
AutoId = setInterval(AutoChange,2500);
};
AutoPlay();
childBlock.onmousemove = function(){
clearInterval(AutoId);
}
childBlock.onmouseout = function(){
clearInterval(AutoId);
AutoPlay();
}
</script>
</html>
运行结果

2D轮播图的更多相关文章
- bootstrap轮播图--兼容IE7
<!DOCTYPE html> <html> <head> <title>Bootstrap轮播</title> <meta char ...
- mobile_轮播图_transform 版本_transform 读写二合一
轮播图_transform 版本 关键点: 2D 变换 transform 不会改变 元素 在 文档流 中的位置 定位 position 会改变 元素 在 文档流 中的位置 语句解析太快,使用 set ...
- JavaScript+HTML+CSS 无缝滚动轮播图的两种方式
第一种方式 在轮播图最后添加第一张,一张重复的图片. 点击前一张,到了第一张,将父级oList移动到最后一张(也就是添加的重复的第一张),在进行后续动画. 点击下一张,到了最后一张(也就是添加的重复的 ...
- js 基础篇(点击事件轮播图的实现)
轮播图在以后的应用中还是比较常见的,不需要多少行代码就能实现.但是在只掌握了js基础知识的情况下,怎么来用较少的而且逻辑又简单的方法来实现呢?下面来分析下几种不同的做法: 1.利用位移的方法来实现 首 ...
- 实现下来ScrollView放大轮播图
创建工程,创建一个UIScrollView属性,并遵循其协议: #define kWidth self.view.frame.size.width//屏幕宽 #define kHeight self. ...
- ViewPager轮播图
LoopViewPagerLayout无限轮播 项目地址:https://github.com/why168/LoopViewPagerLayout 支持三种动画: 支持修改轮播的速度: 支持修改滑动 ...
- CSS-用伪类制作小箭头(轮播图的左右切换btn)
先上学习地址:http://www.htmleaf.com/Demo/201610234136.html 作者对轮播图左右按钮的处理方法一改往常,不是简单地用btn.prev+btn.next的图片代 ...
- phpcms首页实现轮播图
1.在你想要加轮播图的位置加入以下 <div id="flowDiagram" > <div id="button"> <span ...
- React视角下的轮播图
天猫购物网站最显眼的就是轮播图了.我在学习一样新js库,一个新框架或新的编程思想的时候,总是感叹"入门必做选项卡,进阶须撸轮播图."作为一个React组件,它是状态操控行为的典型, ...
随机推荐
- MyEclipse开发秘籍——使用DevStyle Icon Designer(一)
[MyEclipse CI 2019.4.0安装包下载] DevStyle主题包括一个Icon Designer,允许您自定义图标.Icon Designer包含在DevStyle主题中,可作为Ecl ...
- yaml格式介绍
一.简介 YAML 语言(发音 /ˈjæməl/ )的设计目标,就是方便人类读写.它实质上是一种通用的数据串行化格式. 它的基本语法规则如下. 大小写敏感 使用缩进表示层级关系 缩进时不允许使用Tab ...
- CSS currentColor 变量
㈠currentColor定义及理解 来自MDN的解释:currentColor代表了当前元素被应用上的color颜色值. 使用它可以将当前这个颜色值应用到其他属性上,或者嵌套元素的其他属性上. 你这 ...
- C# 5.0
序言 异步成员 但是 async 和 await 才是此版本真正的主角. C# 在 2012 年推出这些功能时,将异步引入语言作为最重要的组成部分,另现状大为改观. 如果你以前处理过冗长的运行操作以及 ...
- Tarjan求强连通分量、求桥和割点模板
Tarjan 求强连通分量模板.参考博客 #include<stdio.h> #include<stack> #include<algorithm> using n ...
- 20175215 2018-2019-2 第七周java课程学习总结
第八章 常用实用类 8.1 String类 Java专门提供了用来处理字符序列的String类.String类在java.lang包中,由于java.lang包中的类被默认引入,因此程序可以直接使用S ...
- 详讲KMP算法
两个字符串: 模式串:ababcaba 文本串:ababcabcbababcabacaba KMP算法作用:快速在文本串中匹配到模式串 如果是穷举法的方式: 大家有发现,这样比效率很低的. 所以就需要 ...
- 【python】小型神经网络的搭建
import numpy as np def sigmoid(x): # Sigmoid activation function: f(x) = 1 / (1 + e^(-x)) return 1 / ...
- Java 8:用Stream来循环集合
本文由 ImportNew - 进林 翻译自 deadcoderising.欢迎加入翻译小组.转载请见文末要求. 正如我之前所写的,Java 8中的新功能特性改变了游戏规则.对Java开发者来说这是一 ...
- yum源相关
yum软件仓库默认配置文件/etc/yum.conf,此文件定义了yum在线下载的rpm包存放位置及下载后是否保存. [root@localhost ~]# head /etc/yum.conf[ma ...