微调Inception V3网络-对Satellite分类
这篇博客主要是使用Keras框架微调Inception V3模型对卫星图片进行分类,并测试;
1. 流程概述
微调Inception V3对卫星图片进行分类;整个流程可以大致分成四个步骤,如下:
- (1)Satellite数据集准备;
- (2)搭建Inception V3网络;
- (3)进行训练;
- (4)测试;
2. 准备数据集
2.1 Satellite数据集介绍
用于实验训练与测试的数据集来自于《21个项目玩转深度学习:基于Tensorflow的实践详解》第三章中提供的实验卫星图片数据集;
Satellite数据集目录结构如下:
# 其中共6类卫星图片,训练集总共4800张,每类800张;验证集共1200张,每类200张;

Satellite/

	train/

    	glacier/

        rock/

        urban/

        water/

        wetland/

        wood/

    validation/

    	glacier/

        rock/

        urban/

        water/

        wetland/

        wood/
3. Inception V3网络
待补充;
4. 训练
4.1 基于Keras微调Inception V3网络
from keras.application.incepiton_v3 import InceptionV3, preprocess_input

from keras.layers import GlobalAveragePooling2D, Dense

#  基础Inception_V3模型,不包含全连接层

base_model = InceptionV3(weights='imagenet', include_top=False)

#  增加新的输出层

x = base_model.output

x = GlobalAveragePooling2D()(x) # 添加Global average pooling层

x = Dense(1024, activation='relu')(x)

predictions = Dense(6, activation='softmax')(x)
4.2 Keras实时生成批量增强数据
# keras实时生成批量增强数据

train_datagen = ImageDataGenerator(

    preprocessing_function=preprocess_input,  # 将每一张图片归一化到[-1,1];数据增强后执行;

    rotation_range=30,

    width_shift_range=0.2,

    height_shift_range=0.2,

    shear_range=0.2,

    zoom_range=0.2,

    horizontal_flip=True,

)

val_datagen = ImageDataGenerator(

    preprocessing_function=preprocess_input,

    rotation_range=30,

    width_shift_range=0.2,

    height_shift_range=0.2,

    shear_range=0.2,

    zoom_range=0.2,

    horizontal_flip=True,

)

#  指定数据集路径并批量生成增强数据

train_generator = train_datagen.flow_from_directory(directory='satellite/data/train',

                                  target_size=(299, 299),#Inception V3规定大小

                                  batch_size=64)

val_generator = val_datagen.flow_from_directory(directory='satellite/data/validation',

                                target_size=(299,299),

                                batch_size=64)
4.3 配置transfer learning & finetune
from keras.optimizers import Adagrad

# transfer learning

def setup_to_transfer_learning(model,base_model):#base_model

    for layer in base_model.layers:

        layer.trainable = False

    model.compile(optimizer='adam', loss='categorical_crossentropy', metrics=['accuracy'])  # 配置模型,为下一步训练

# finetune

def setup_to_fine_tune(model,base_model):

    GAP_LAYER = 17  # max_pooling_2d_2

    for layer in base_model.layers[:GAP_LAYER+1]:

        layer.trainable = False

    for layer in base_model.layers[GAP_LAYER+1:]:

        layer.trainable = True

    model.compile(optimizer=Adagrad(lr=0.0001), loss='categorical_crossentropy', metrics=['accuracy'])
4.4 执行训练
# Step 1: transfer learning

setup_to_transfer_learning(model,base_model)

history_tl = model.fit_generator(generator=train_generator,

                    steps_per_epoch=75,  # 800

                    epochs=10,

                    validation_data=val_generator,

                    validation_steps=64,  # 12

                    class_weight='auto'

                    )

model.save('satellite/train_dir/satellite_iv3_tl.h5')

# Step 2: finetune

setup_to_fine_tune(model,base_model)

history_ft = model.fit_generator(generator=train_generator,

                                 steps_per_epoch=75,

                                 epochs=10,

                                 validation_data=val_generator,

                                 validation_steps=64,

                                 class_weight='auto')

model.save('satellite/train_dir/satellite_iv3_ft.h5')
5. 测试
5.1 对单张图片进行测试
# *-coding: utf-8 -*

"""

使用h5模型文件对satellite进行测试

"""

# ================================================================

import tensorflow as tf

import numpy as np

from skimage import io

from keras.models import load_model

def normalize(array):

    """对给定数组进行归一化

    Argument:

        array: array

            给定数组

    Return:

        array_norm: array

            归一化后的数组

    """

    array_flatten = array.flatten()

    array_mean = np.mean(array_flatten)

    mx = np.max(array_flatten)

    mn = np.min(array_flatten)

    array_norm = [(float(i) - array_mean) / (mx - mn) for i in array_flatten]

    return np.reshape(array_norm, array.shape)

def img_preprocess(image_path):

    """根据图片路径,对图片进行相应预处理

    Argument:

        image_path: str

            输入图片路径

    Return:

        image_data: array

            预处理好的图像数组

    """

    img_array = io.imread(image_path)

    img_norm = normalize(img_array)

    size = img_norm.shape

    image_data = np.reshape(img_norm, (1, size[0], size[1], 3))

    return image_data

def index_to_label(index):

    """将标签索引转换成可读的标签

    Argument:

        index: int

            标签索引位置

    Return:

        human_label: str

            人可读的标签

    """

    labels = ["glacier", "rock", "urban", "water", "wetland", "wood"]

    human_label = labels[index]

    return human_label

def classifier_satellite_byh5(image_path, model_file_path):

    """对给定单张图片使用训练好的模型进行分类

    Argument:

        image_path: str

            输入图片路径

        model_file_path: str

            训练好的h5模型文件名称

    Return:

        human_label: str

            人可读的图片标签

    """

    image_data = img_preprocess(image_path)

    # 加载模型文件

    model = load_model(model_file_path)

    predictions = model.predict(image_data)

    human_label = index_to_label(np.argmax(predictions))

    return human_label

def classifier_satellite_byh5_hci(image_path):

    """用于对从交互界面传来的图片进行分类

    Argument:

        image_path: str

    Return:

        human_label: str

            人可读的图片标签

    """

    # 模型文件,如果有新的模型需要修改

    model_file_path = "satellite/train_dir/models/satellite_iv3_ft.h5"

    image_data = img_preprocess(image_path)

    # 加载模型文件

    model = load_model(model_file_path)

    predictions = model.predict(image_data)

    human_label = index_to_label(np.argmax(predictions))

    return human_label

# 测试单张图片

if __name__ == "__main__":

    image_path = "satellite/data/train/glacier/40965_91335_18.jpg"

    model_file_path = "satellite/train_dir/models/satellite_iv3_ft.h5"

    human_label = classifier_satellite_byh5(image_path, model_file_path)

    print(human_label)
6. 可视化分类界面
6.1 交互界面设计
# encoding: utf-8

"""

交互界面:使用训练好的模型对卫星图片进行分类;

"""

from tkinter import *

import tkinter

import tkinter.filedialog

import os

import tkinter.messagebox

from PIL import Image, ImageTk

import test_satellite_bypb

# 窗口属性

root = tkinter.Tk()

root.title('Satellite图像分类')

root.geometry('800x600')

formatImg = ['jpg']

def resize(w, h, w_box, h_box, pil_image):

  # 对一个pil_image对象进行缩放,让它在一个矩形框内,还能保持比例

  f1 = 1.0*w_box/w # 1.0 forces float division in Python2

  f2 = 1.0*h_box/h

  factor = min([f1, f2])

  width = int(w*factor)

  height = int(h*factor)

  return pil_image.resize((width, height), Image.ANTIALIAS)

def showImg():

    img1 = entry_imgPath.get()  # 获取图片路径地址

    pil_image = Image.open(img1)    # 打开图片

    # 期望显示大小

    w_box = 400

    h_box = 400

    # 获取原始图像的大小

    w, h = pil_image.size

    pil_image_resized = resize(w, h, w_box, h_box, pil_image)

    # 把PIL图像对象转变为Tkinter的PhotoImage对象

    tk_image = ImageTk.PhotoImage(pil_image_resized)

    img = tkinter.Label(image=tk_image, width=w_box, height=h_box)

    img.image = tk_image

    img.place(x=50, y=150)

def choose_file():

    text_showClass.delete(0.0, END) # 清空输出结果文本框,在再次选择图片文件之前清空上次结果;

    selectFileName = tkinter.filedialog.askopenfilename(title='选择文件')  # 选择文件

    if selectFileName[-3:] not in formatImg:

        tkinter.messagebox.askokcancel(title='出错', message='未选择图片或图片格式不正确')   # 弹出错误窗口

        return

    else:

        e.set(selectFileName)  # 设置变量

        showImg()   # 显示图片

def ouputOfModel():

    # 完成识别,显示类别

    # 图片文件路径

    text_showClass.delete(0.0, END) # 清空上次结果文本框

    img_path = entry_imgPath.get()  # 获取所选择的图片路径地址

    # 判断是否存在改图片

    if not os.path.exists(img_path):

        tkinter.messagebox.askokcancel(title='出错', message='未选择图片文件或图片格式不正确')

    else:

        # 得到输出结果,以及相应概率

        human_label = test_satellite_bypb.classifier_satellite_img(img_path)

        # 通过训练的模型,计算得到相对应输出类别

        # 清空文本框中的内容,写入识别出来的类别

        text_showClass.config(state=NORMAL)

        text_showClass.insert('insert', '%s\n' % (human_label))

##################

# 窗口部件

##################

e = tkinter.StringVar() # 字符串变量

# label : 选择文件

label_selectImg = tkinter.Label(root, text='选择图片:')

label_selectImg.grid(row=0, column=0)

# Entry: 显示图片文件路径地址

entry_imgPath = tkinter.Entry(root, width=80, textvariable=e)

entry_imgPath.grid(row=0, column=1)

# Button: 选择图片文件

button_selectImg = tkinter.Button(root, text="选择", command=choose_file)

button_selectImg.grid(row=0, column=2)

# Button: 执行识别程序按钮

button_recogImg = tkinter.Button(root, text="开始识别", command=ouputOfModel)

button_recogImg.grid(row=0, column=3)

# Text: 显示结果类别文本框

text_showClass = tkinter.Text(root, width=20, height=1, font='18',)

text_showClass.grid(row=1, column=1)

text_showClass.config(state=DISABLED)

root.mainloop()
6.2 后台核心代码:模型加载并分类
# *-coding: utf-8 -*

"""

使用h5模型文件对satellite进行测试

"""

# ================================================================

import tensorflow as tf

import numpy as np

from skimage import io

from keras.models import load_model

def normalize(array):

    """对给定数组进行归一化

    Argument:

        array: array

            给定数组

    Return:

        array_norm: array

            归一化后的数组

    """

    array_flatten = array.flatten()

    array_mean = np.mean(array_flatten)

    mx = np.max(array_flatten)

    mn = np.min(array_flatten)

    array_norm = [(float(i) - array_mean) / (mx - mn) for i in array_flatten]

    return np.reshape(array_norm, array.shape)

def img_preprocess(image_path):

    """根据图片路径,对图片进行相应预处理

    Argument:

        image_path: str

            输入图片路径

    Return:

        image_data: array

            预处理好的图像数组

    """

    img_array = io.imread(image_path)

    img_norm = normalize(img_array)

    size = img_norm.shape

    image_data = np.reshape(img_norm, (1, size[0], size[1], 3))

    return image_data

def index_to_label(index):

    """将标签索引转换成可读的标签

    Argument:

        index: int

            标签索引位置

    Return:

        human_label: str

            人可读的标签

    """

    labels = ["glacier", "rock", "urban", "water", "wetland", "wood"]

    human_label = labels[index]

    return human_label

def classifier_satellite_byh5(image_path, model_file_path):

    """对给定单张图片使用训练好的模型进行分类

    Argument:

        image_path: str

            输入图片路径

        model_file_path: str

            训练好的h5模型文件名称

    Return:

        human_label: str

            人可读的图片标签

    """

    image_data = img_preprocess(image_path)

    # 加载模型文件

    model = load_model(model_file_path)

    predictions = model.predict(image_data)

    human_label = index_to_label(np.argmax(predictions))

    return human_label

def classifier_satellite_byh5_hci(image_path):

    """用于对从交互界面传来的图片进行分类

    Argument:

        image_path: str

    Return:

        human_label: str

            人可读的图片标签

    """

    # 模型文件,如果有新的模型需要修改

    model_file_path = "satellite/train_dir/models/satellite_iv3_ft.h5"

    image_data = img_preprocess(image_path)

    # 加载模型文件

    model = load_model(model_file_path)

    predictions = model.predict(image_data)

    human_label = index_to_label(np.argmax(predictions))

    return human_label

# 测试单张图片

if __name__ == "__main__":

    image_path = "satellite/data/train/glacier/40965_91335_18.jpg"

    model_file_path = "satellite/train_dir/models/satellite_iv3_ft.h5"

    human_label = classifier_satellite_byh5(image_path, model_file_path)

    print(human_label)
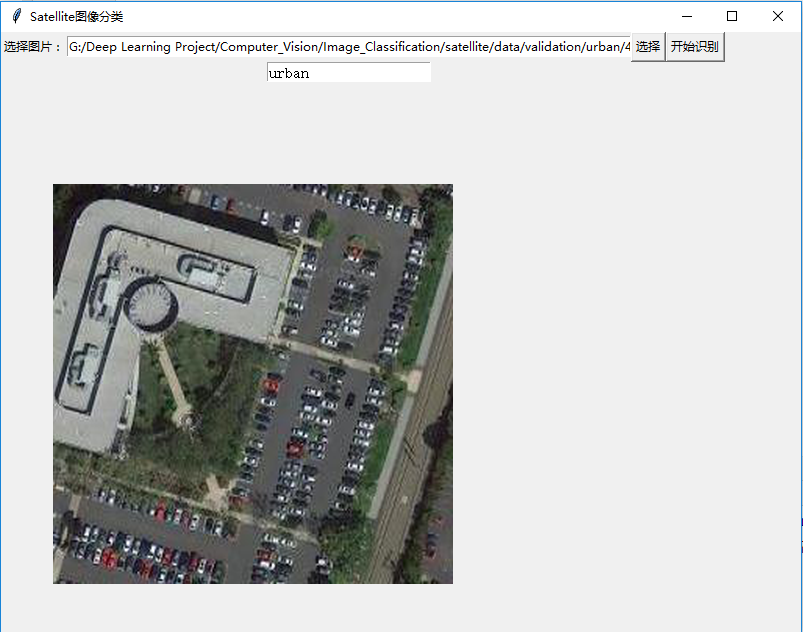
6.3 交互界面效果
微调Inception V3网络-对Satellite分类的更多相关文章
- 源码分析——迁移学习Inception V3网络重训练实现图片分类
1. 前言 近些年来,随着以卷积神经网络(CNN)为代表的深度学习在图像识别领域的突破,越来越多的图像识别算法不断涌现.在去年,我们初步成功尝试了图像识别在测试领域的应用:将网站样式错乱问题.无线领域 ...
- 脸型分类-Face shape classification using Inception v3
本文链接:https://blog.csdn.net/u011961856/article/details/77984667函数解析github 代码:https://github.com/adoni ...
- 经典分类CNN模型系列其五:Inception v2与Inception v3
经典分类CNN模型系列其五:Inception v2与Inception v3 介绍 Inception v2与Inception v3被作者放在了一篇paper里面,因此我们也作为一篇blog来对其 ...
- 1、VGG16 2、VGG19 3、ResNet50 4、Inception V3 5、Xception介绍——迁移学习
ResNet, AlexNet, VGG, Inception: 理解各种各样的CNN架构 本文翻译自ResNet, AlexNet, VGG, Inception: Understanding va ...
- Inception V3 的 tensorflow 实现
tensorflow 官方给出的实现:models/inception_v3.py at master · tensorflow/models · GitHub 1. 模型结构 首先来看 Incept ...
- 网络结构解读之inception系列四:Inception V3
网络结构解读之inception系列四:Inception V3 Inception V3根据前面两篇结构的经验和新设计的结构的实验,总结了一套可借鉴的网络结构设计的原则.理解这些原则的背后隐藏的 ...
- 从GoogLeNet至Inception v3
从GoogLeNet至Inception v3 一.CNN发展纵览 我们先来看一张图片: 1985年,Rumelhart和Hinton等人提出了后向传播(Back Propagation,BP)算法( ...
- 基于Caffe ResNet-50网络实现图片分类(仅推理)的实验复现
摘要:本实验主要是以基于Caffe ResNet-50网络实现图片分类(仅推理)为例,学习如何在已经具备预训练模型的情况下,将该模型部署到昇腾AI处理器上进行推理. 本文分享自华为云社区<[CA ...
- 深度学习面试题29:GoogLeNet(Inception V3)
目录 使用非对称卷积分解大filters 重新设计pooling层 辅助构造器 使用标签平滑 参考资料 在<深度学习面试题20:GoogLeNet(Inception V1)>和<深 ...
随机推荐
- 洛谷2483 k短路([SDOI2010]魔法猪学院)
题目请戳这里 一句话题意: 给你一张n个节点,m条单向边的图,求1到n第k短的路. emmm,纪念第一个黑题(我是真的菜啊!!) 这题目还是很难的,本蒟蒻只会被洛谷卡掉的A(所以就愉快地特判了),首先 ...
- ubuntu16.04下安装wordpress
安装过程 http://blog.topspeedsnail.com/archives/4635 http://blog.topspeedsnail.com/archives/4646 碰到的问题 1 ...
- 使用C语言解析URL
1. [代码]容易写成自己输入URL,这里测试一个例子 #include <stdio.h>#include <stdlib.h>#include <string ...
- 详解Java异常Throwable、Error、Exception、RuntimeException的区别
在Java中,根据错误性质将运行错误分为两类:错误和异常. 在Java程序的执行过程中,如果出现了异常事件,就会生成一个异常对象.生成的异常对象将传递Java运行时系统,这一异常的产生和提交过程称为抛 ...
- Centos6.4 相关配置记录
1.手动开启eth0网卡 在虚拟机里装完CentOS6.4之后,使用NAT模式,输入ifconfig发现没有IP地址,查找了一下资料,原来是: 在CentOS 6.x的版本中,默认网卡是不开启的,需要 ...
- 从TS流到PAT和PMT
转自:https://blog.csdn.net/rongdeguoqian/article/details/18214627 一 从TS流开始 最近开始学习数字电视机顶盒的开发,从MPEG-2到DV ...
- 开机时遇到grub rescue无法进入系统的解决方法
装双系统(win10和elementary os),elementary os是ubuntu的一个分支.在win10中合并了一块空白磁盘分区,再开机的时候出问题了. 遇到filesystem unkn ...
- linux 下errno各个值的意义(转) errno.h
strerror(errno):获取errno对应的错误 查看错误代码errno是调试程序的一个重要方法.当linux C api函数发生异常时,一般会将errno变量(需include errno. ...
- [acm]HDOJ 1200 To and Fro
题目连接: http://acm.hdu.edu.cn/showproblem.php?pid=1200 简单字符串处理,找规律 /* 11509672 2014-08-21 11:32:55 Acc ...
- Confd 配置指导
Quick Start Guide Before we begin be sure to download and install confd. Select a backend confd supp ...