【React Native】React Native项目设计与知识点分享
闲暇之余,写了一个React Native的demo,可以作为大家的入门学习参考。
GitHub:https://github.com/xujianfu/ElmApp.git
GitHub:https://github.com/xujianfu/React-Native-CarProject.git
项目截图如下:
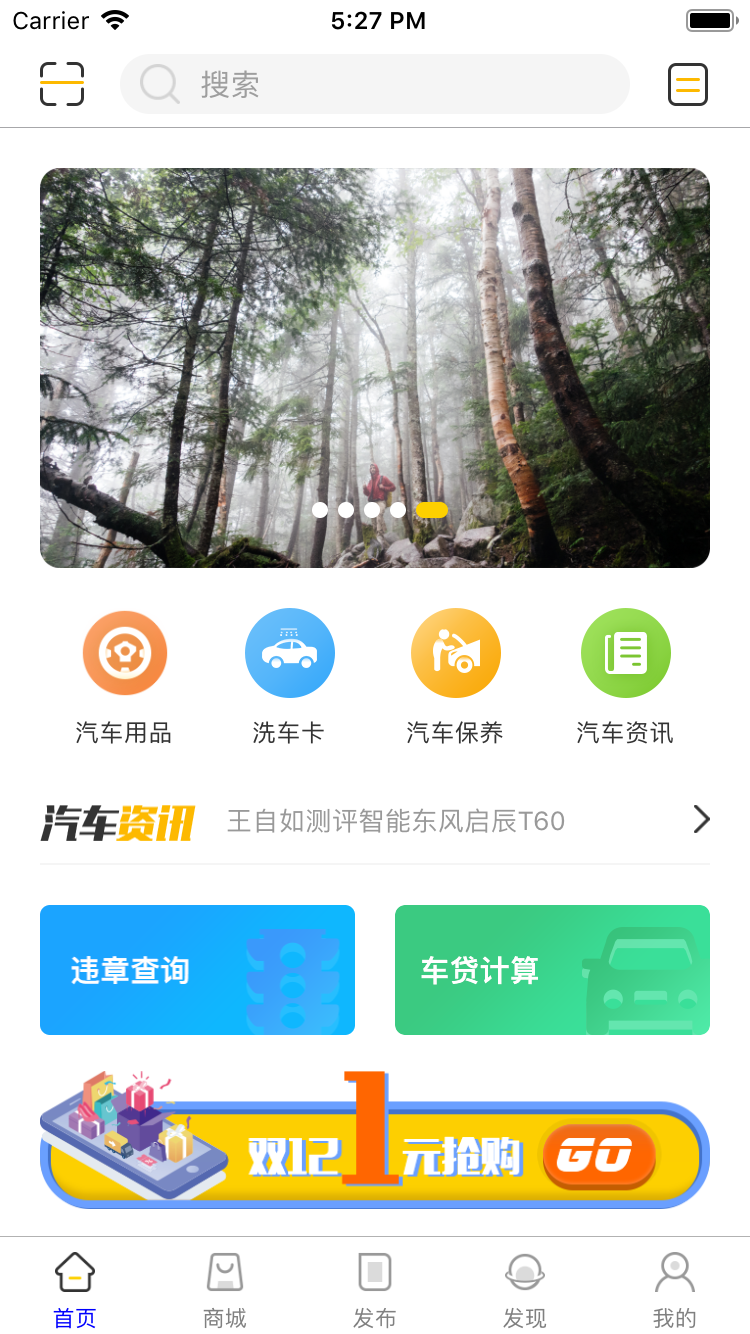


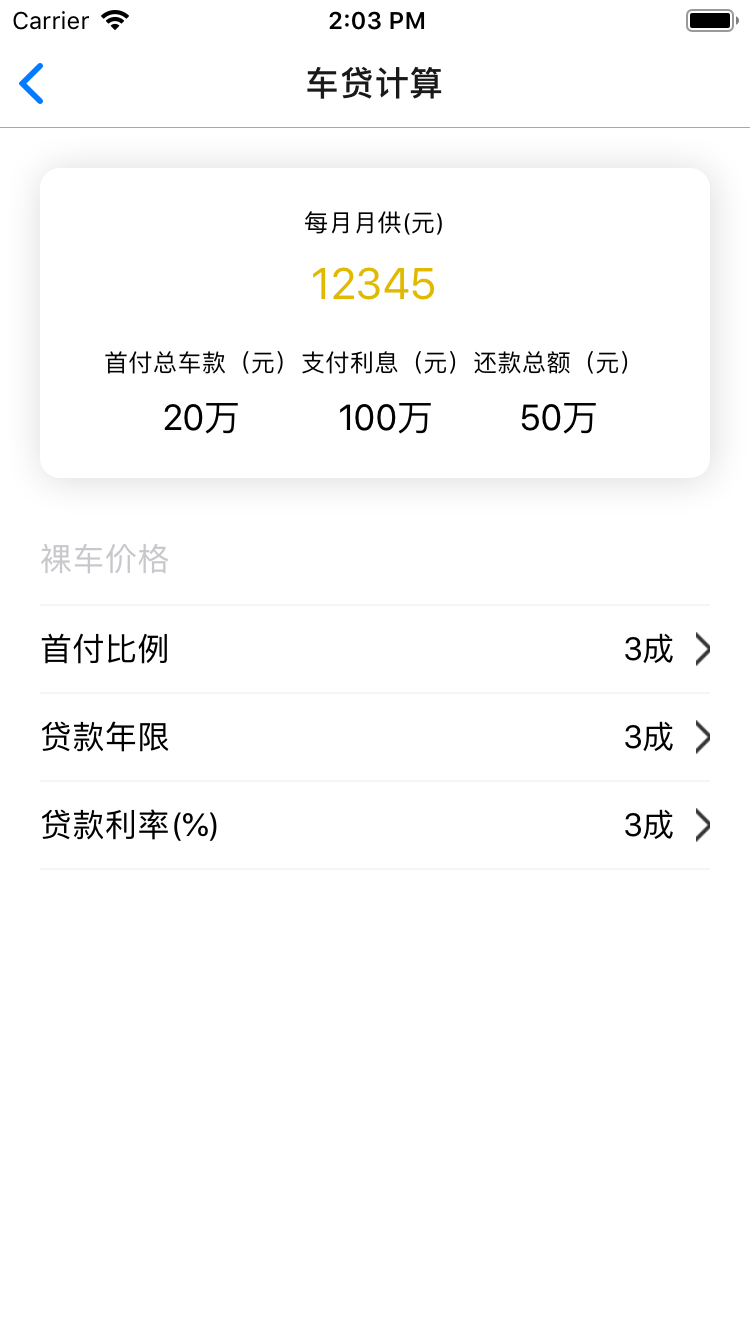


一、项目界面设计
1、React Navigation的应用
React Navigation 源于 React Native 社区对一个可扩展且易于使用的导航解决方案的需求,它完全使用 JavaScript 编写(因此你可以阅读并理解所有源码)。支持iOS/Android.
1、如何在项目进行使用?
yarn add react-navigation
# or with npm
# npm install --save react-navigation
然后,安装 react-native-gesture-handler。 如果你正在使用 Expo managed workflow,那么你什么都不需要做, SDK 中已经包含了这些. 否则:
yarn add react-native-gesture-handler
# or with npm
# npm install --save react-native-gesture-handler
最后进行Link 所有的原生依赖
react-native link react-native-gesture-handler
2、路由配置
为某个模块创建StackNavigator导航
const HomeStack = createStackNavigator(
    {
        Home:{
            screen:HomeScreen,
            navigationOptions:()=>({
                headerBackTitle: null,
            })
        },
         //添加多个路由
        CarLoans:CarLoansScreen,
        CheckRules:CheckRulesScreen,
    },
)

......
将多个模块添加到TabNavigator上
const TabNavigator = createBottomTabNavigator(
    {
        Home:{
            screen:HomeStack,
            navigationOptions:({navigation}) => ({
                tabBarLabel:'首页',
                tabBarIcon:({focused}) => (
                    <Image source={{uri:focused ? 'ic_tab_home_h':'ic_tab_home_n.png'}} style={styles.iconStyle}/>
                ),
            }),
        },
        Mall:{
            screen:MallStack,
            navigationOptions:({navigation}) => ({
                tabBarLabel:'商城',
                tabBarIcon:({focused}) => (
                    <Image source={{uri:focused ? 'ic_tab_mall_h':'ic_tab_mall_n.png'}} style={styles.iconStyle}/>
                )
            }),
        },
        Publish:{
            screen:PublishStack,
            navigationOptions:({navigation}) => ({
                tabBarLabel:'发布',
                tabBarIcon:({focused}) => (
                    <Image source={{uri:focused ? 'ic_tab_release_h':'ic_tab_release_n.png'}} style={styles.iconStyle}/>
                )
            }),
        },
        Discover:{
            screen:DiscoverStack,
            navigationOptions:({navigation}) => ({
                tabBarLabel:'发现',
                tabBarIcon:({focused}) => (
                    <Image source={{uri:focused ? 'ic_tab_find_h':'ic_tab_find_n.png'}} style={styles.iconStyle}/>
                )
            }),
        },
        Mine:{
            screen:MineStack,
            navigationOptions:({navigation}) => ({
                tabBarLabel:'我的',
                tabBarIcon:({focused}) => (
                    <Image source={{uri:focused ? 'ic_tab_my_h':'ic_tab_my_n.png'}} style={styles.iconStyle}/>
                )
            }),
        },
    },
    {
        defaultNavigationOptions: ({ navigation }) => {
            let tabBarVisible = true;
            if (navigation.state.index > 0) {
                tabBarVisible = false;
            }
            return {
                tabBarVisible,
            };
        },
        tabBarPosition:'bottom',
        tabBarOptions: {
            activeTintColor: 'blue', //选中tabbar的文字颜色
            inactiveTintColor: 'gray',
            showIcon:true,

        },

    }
);

export default  createAppContainer(TabNavigator);
2、选择相册照片或视频,或进行拍照
(1)引入react-native-image-picker
yarn add react-native-image-picker
react-native link react-native-image-picker
(2)在项目中使用react-native-image-picker
import ImagePicker from 'react-native-image-picker';

//选择图片
    selectPhotoTapped() {
        const options = {
            // 弹窗标题
            title: '选择图片',
            cancelButtonTitle: '取消',
            takePhotoButtonTitle: '拍照',
            chooseFromLibraryButtonTitle: '选择照片',
            // 自定义按钮
            customButtons: [
                {name: 'fb', title: 'Choose Photo from Facebook'},
            ],
            // 相机类型'front' 或者 'back'
            cameraType: 'back',
            // 图片或视频:'photo','video'
            mediaType: 'photo',
            // 视频质量
            videoQuality: 'high',
            //最大视频录制时间
            durationLimit: 10,
            //最长宽
            maxWidth: 300,
            //最长高,
            maxHeight: 300,
            //图片质量
            quality: 0.8,
            angle: 0,
            //是否可以编辑
            allowsEditing: false,
            //如果为真,则禁用data生成的base64字段
            noData: false,
            // 如果提供此密钥,该图像将被保存在Documents iOS 应用程序的目录中,或者保存在PicturesAndroid上的应用程序目录(而不是临时目录)
            storageOptions: {
                skipBackup: true
            }
        };

        ImagePicker.showImagePicker(options, (response) => {
            console.log('Response = ', response);

            if (response.didCancel) {
                console.log('User cancelled photo picker');
            }
            else if (response.error) {
                console.log('ImagePicker Error: ', response.error);
            }
            else if (response.customButton) {
                console.log('User tapped custom button: ', response.customButton);
            }
            else {
                let source = { uri: response.uri };

                // You can also display the image using data:
                // let source = { uri: 'data:image/jpeg;base64,' + response.data };

                this.setState({
                    avatarSource: source
                });
            }
        });
    }

    //选择视频
    selectVideoTapped() {
        const options = {

            title: '选择视频',
            cancelButtonTitle: '取消',
            takePhotoButtonTitle: '录制视频',
            chooseFromLibraryButtonTitle: '选择视频',
            mediaType: 'video',
            videoQuality: 'medium'
        };

        ImagePicker.showImagePicker(options, (response) => {
            console.log('Response = ', response);

            if (response.didCancel) {
                console.log('User cancelled video picker');
            }
            else if (response.error) {
                console.log('ImagePicker Error: ', response.error);
            }
            else if (response.customButton) {
                console.log('User tapped custom button: ', response.customButton);
            }
            else {
                this.setState({
                    videoSource: response.uri
                });
            }
        });
    }
3、创建切换选项卡
导入react-native-scrollable-tab-view
npm install react-native-scrollable-tab-view --save
项目中引入
//引用插件
import ScrollableTabView, { ScrollableTabBar, DefaultTabBar } from 'react-native-scrollable-tab-view';

<ScrollableTabView
                    initialPage={0}
                    renderTabBar={() => <ScrollableTabBar style={{borderBottomWidth: 0,height: 44}}/>}
                    tabBarTextStyle={{fontSize:16}}
                    tabBarActiveTextColor={'#fdd000'}
                    tabBarInactiveTextColor={'#999999'}
                    tabBarUnderlineStyle={{backgroundColor:'#fdd000'}}
                >
                    {
                        label.map((item,index) =>{
                            if (index === 0) {
                                return <AllBusinessScreen tabLabel={item} key={index}/>
                            } else {
                                return <NearByBusinessScreen tabLabel={item} key={index}/>
                            }
                        })
                    }
                </ScrollableTabView>
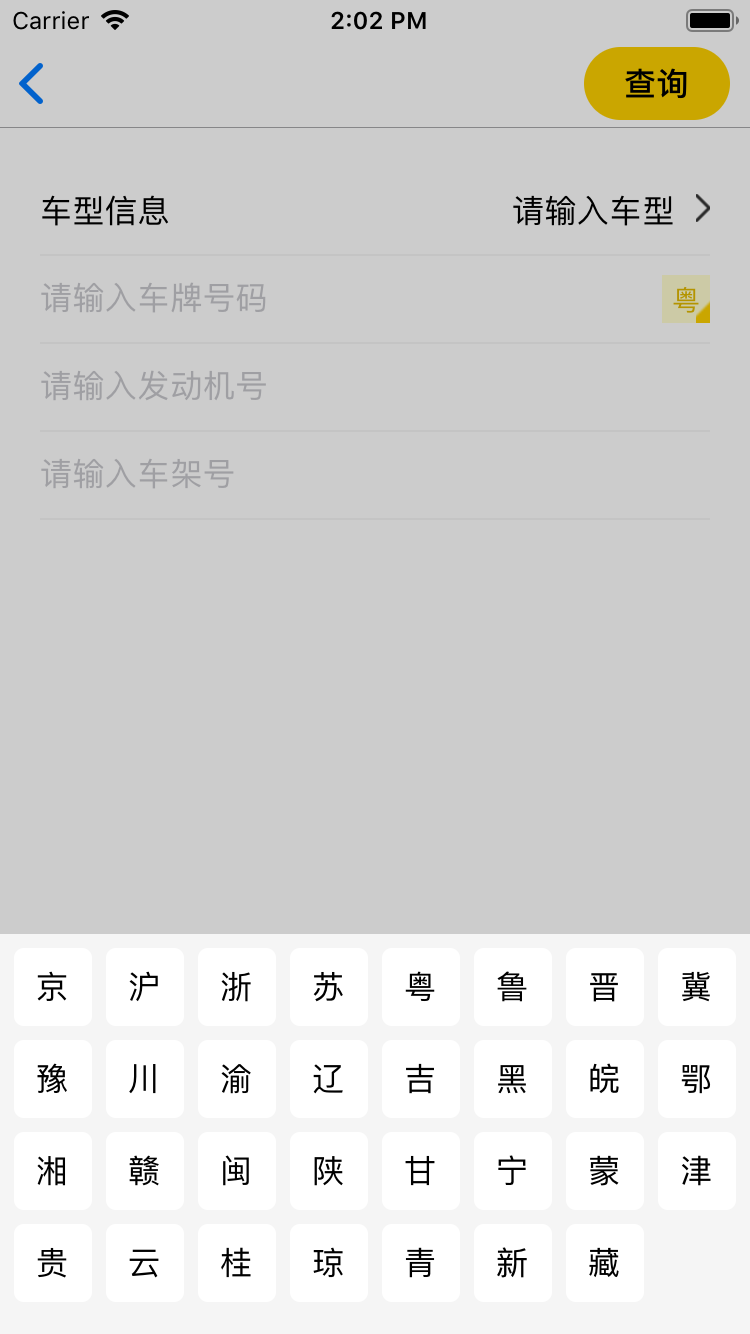
4、使用Modal组件
Modal组件可以用来覆盖包含React Native根视图的原生视图(如UIViewController,Activity)。在嵌入React Native的混合应用中可以使用Modal。Modal可以使你应用中RN编写的那部分内容覆盖在原生视图上显示。
<Modal
                    animationType={"slide"}
                    transparent={true}
                    visible={this.state.modalVisible}
                    onRequestClose={()=>{alert('modal has been closed')}}
                >
                        <View style={styles.modalStyle}>
                            <View style={styles.coverStyle}>
                                {this.renderItem()}
                            </View>
                        </View>

                </Modal>

......

renderItem(){
        let itemTitleArr = ['京','沪','浙','苏','粤','鲁','晋','冀',
            '豫','川','渝','辽','吉','黑','皖','鄂',
            '湘','赣','闽','陕','甘','宁','蒙','津',
            '贵','云','桂','琼','青','新','藏'];;
        var itemArr = [];
        for (var i = 0; i < itemTitleArr.length; i++) {
            itemArr.push(
                <TouchableHighlight onPress={this.callBack.bind(this,itemTitleArr[i])} key={i}>
                    <View style={styles.chooseItemStyle} >
                        <Text style={styles.chooseTitleStyle}>{itemTitleArr[i]}</Text>
                    </View>
                </TouchableHighlight>

            )
        }
        return itemArr;
    }
5、下拉列表实现
import React, {Component} from 'react';
import {View, Text, Image, TouchableOpacity, ScrollView, Animated, Easing, StyleSheet} from 'react-native';
import PropTypes from 'prop-types';

class DropdownMenu extends Component {

    constructor(props, context) {
        super(props, context);

        var selectIndex = new Array(this.props.data.length);
        for (var i = 0; i < selectIndex.length; i++) {
            selectIndex[i] = 0;
        }
        this.state = {
            activityIndex: -1,
            selectIndex: selectIndex,
            rotationAnims: props.data.map(() => new Animated.Value(0))
        };

        this.defaultConfig = {
            bgColor: '#f5f5f5',
            tintColor: '#fdd000',
            activityTintColor: "red",
            arrowImg: 'ic_nav_down',
            checkImage: 'ic_nav_down'
        };

    }

    renderChcek(index, title) {
        var activityIndex = this.state.activityIndex;
        if (this.state.selectIndex[activityIndex] === index) {
            var checkImage = this.props.checkImage ? this.props.checkImage : this.defaultConfig.checkImage;
            return (
                <View style={{flex: 1, justifyContent: 'space-between', alignItems: "center", paddingHorizontal: 15, flexDirection: 'row'}} >
                    <Text
                        style={[
                            styles.item_text_style,
                            this.props.optionTextStyle,
                            {color: this.props.activityTintColor ? this.props.activityTintColor : this.defaultConfig.activityTintColor}
                        ]} >
                        {title}
                    </Text>
                    <Image
                        source={checkImage}
                        style={{tintColor: this.props.activityTintColor ? this.props.activityTintColor : this.defaultConfig.activityTintColor}} />
                </View>
            );
        } else {
            return (
                <View style={{flex: 1, justifyContent: 'space-between', alignItems: "center", paddingHorizontal: 15, flexDirection: 'row'}} >
                    <Text style={[
                        styles.item_text_style,
                        this.props.optionTextStyle,
                        {color: this.props.tintColor ? this.props.tintColor : this.defaultConfig.tintColor}
                    ]} >{title}</Text>
                </View>
            );
        }
    }

    renderActivityPanel() {
        if (this.state.activityIndex >= 0) {

            var currentTitles = this.props.data[this.state.activityIndex];

            var heightStyle = {};
            if (this.props.maxHeight && this.props.maxHeight < currentTitles.length * 44) {
                heightStyle.height = this.props.maxHeight;
            }

            return (
                <View style={{position: 'absolute', left: 0, right: 0, top: 40, bottom: 0}}>
                    <TouchableOpacity onPress={() => this.openOrClosePanel(this.state.activityIndex)} activeOpacity={1} style={{position: 'absolute', left: 0, right: 0, top: 0, bottom: 0}}>
                        <View style={{opacity: 0.4, backgroundColor: 'black', flex: 1 }} />
                    </TouchableOpacity>

                    <ScrollView style={[{position: 'absolute', top: 0, left: 0, right: 0, backgroundColor: 'white'}, heightStyle]} >
                        {
                            currentTitles.map((title, index) =>
                                <TouchableOpacity key={index} activeOpacity={1} style={{flex: 1, height: 44}} onPress={this.itemOnPress.bind(this, index)} >
                                    {this.renderChcek(index, title)}
                                    <View style={{backgroundColor: '#F6F6F6', height: 1, marginLeft: 15}} />
                                </TouchableOpacity>
                            )
                        }
                    </ScrollView>
                </View>
            );
        } else {
            return (null);
        }
    }

    openOrClosePanel(index) {

        this.props.bannerAction ? this.props.bannerAction() : null;

        // var toValue = 0.5;
        if (this.state.activityIndex == index) {
            this.closePanel(index);
            this.setState({
                activityIndex: -1,
            });
            // toValue = 0;
        } else {
            if (this.state.activityIndex > -1) {
                this.closePanel(this.state.activityIndex);
            }
            this.openPanel(index);
            this.setState({
                activityIndex: index,
            });
            // toValue = 0.5;
        }
        // Animated.timing(
        //   this.state.rotationAnims[index],
        //   {
        //     toValue: toValue,
        //     duration: 300,
        //     easing: Easing.linear
        //   }
        // ).start();
    }

    openPanel(index) {
        Animated.timing(
            this.state.rotationAnims[index],
            {
                toValue: 0.5,
                duration: 300,
                easing: Easing.linear
            }
        ).start();
    }

    closePanel(index) {
        Animated.timing(
            this.state.rotationAnims[index],
            {
                toValue: 0,
                duration: 300,
                easing: Easing.linear
            }
        ).start();
    }

    itemOnPress(index) {
        if (this.state.activityIndex > -1) {
            var selectIndex = this.state.selectIndex;
            selectIndex[this.state.activityIndex] = index;
            this.setState({
                selectIndex: selectIndex
            });
            if (this.props.handler) {
                this.props.handler(this.state.activityIndex, index);
            }
        }
        this.openOrClosePanel(this.state.activityIndex);
    }

    renderDropDownArrow(index) {
        var icon = this.props.arrowImg ? this.props.arrowImg : this.defaultConfig.arrowImg;
        return (
            <Animated.Image
                source={{uri:icon}}
                style={{
                    width:6,
                    height:4,
                    marginLeft: 8,
                    tintColor: (index === this.state.activityIndex) ? (this.props.activityTintColor ? this.props.activityTintColor : this.defaultConfig.activityTintColor) : (this.props.tintColor ? this.props.tintColor : this.defaultConfig.tintColor),
                    transform: [{
                        rotateZ: this.state.rotationAnims[index].interpolate({
                            inputRange: [0, 1],
                            outputRange: ['0deg', '360deg']
                        })
                    }]
                }} />
        );
    }

    render() {

        return (
            <View style={{flexDirection: 'column', flex: 1}} >
                <View style={{
                    flexDirection: 'row',
                    backgroundColor: this.props.bgColor ? this.props.bgColor : this.defaultConfig.bgColor}} >
                    {
                        this.props.data.map((rows, index) =>
                            <TouchableOpacity
                                activeOpacity={1}
                                onPress={this.openOrClosePanel.bind(this, index)}
                                key={index}
                                style={{flex: 1, height: 48, alignItems: "center", justifyContent: "center"}} >
                                <View style={{flexDirection: 'row', alignItems: "center", justifyContent: "center"}} >
                                    <Text
                                        style={[
                                            styles.title_style,
                                            this.props.titleStyle,
                                            {color: (index === this.state.activityIndex) ?
                                                    (this.props.activityTintColor ? this.props.activityTintColor : this.defaultConfig.activityTintColor)
                                                    :
                                                    (this.props.tintColor ? this.props.tintColor : this.defaultConfig.tintColor)}
                                        ]} >
                                        {rows[this.state.selectIndex[index]]}
                                    </Text>
                                    {this.renderDropDownArrow(index)}
                                </View>
                            </TouchableOpacity>
                        )
                    }
                </View>
                {this.props.children}

                {this.renderActivityPanel()}

            </View>
        );
    }

}

DropdownMenu.propTypes = {
    bgColor: PropTypes.string,
    tintColor: PropTypes.string,
    activityTintColor: PropTypes.string,
    arrowImg: PropTypes.number,
    checkImage: PropTypes.number,
    data: PropTypes.array,
    bannerAction: PropTypes.func,
    optionTextStyle: PropTypes.object,
    titleStyle: PropTypes.object,
    maxHeight: PropTypes.number
}

const styles = StyleSheet.create({
    title_style: {
        fontSize: 16
    },
    item_text_style: {
        color: '#fdd000',
        fontSize: 16
    }
});

export default DropdownMenu;
下拉列表封装
如何使用?
render() {
        var data = [["分类", "分类", "分类", "分类"], ["价格", "价格"], ["筛选", "筛选"]];
        return (
            <View style={{flex: 1}}>
                <View style={styles.dropMenu}/>
                <DropMenu
                    style={{flex:1}}
                    bgColor={'white'}
                    tintColor={'#666666'}
                    activityTintColor={'#fdd000'}
                    // arrowImg={}
                    // checkImage={}
                    // optionTextStyle={{color: '#333333'}}
                    // titleStyle={{color: '#333333'}}
                    // maxHeight={300}
                    handler={(selection, row) => this.setState({text: data[selection][row]})}
                    data={data}
                >

                    <ListView
                        style={styles.listViewStyle}
                        dataSource={this.state.dataSource}
                        renderRow={this.renderRow}
                    />

                </DropMenu>
            </View>
        );
    }
下拉列表的使用
6、React Native项目中“A+ListView”或“ListView + B”的界面搭建
项目中ScrollView嵌套ListView会造成手势滑动冲突,可以使用“A+ListView”或“ListView + B”的样式进行搭建,
通过:ListView的header或footer来实现。
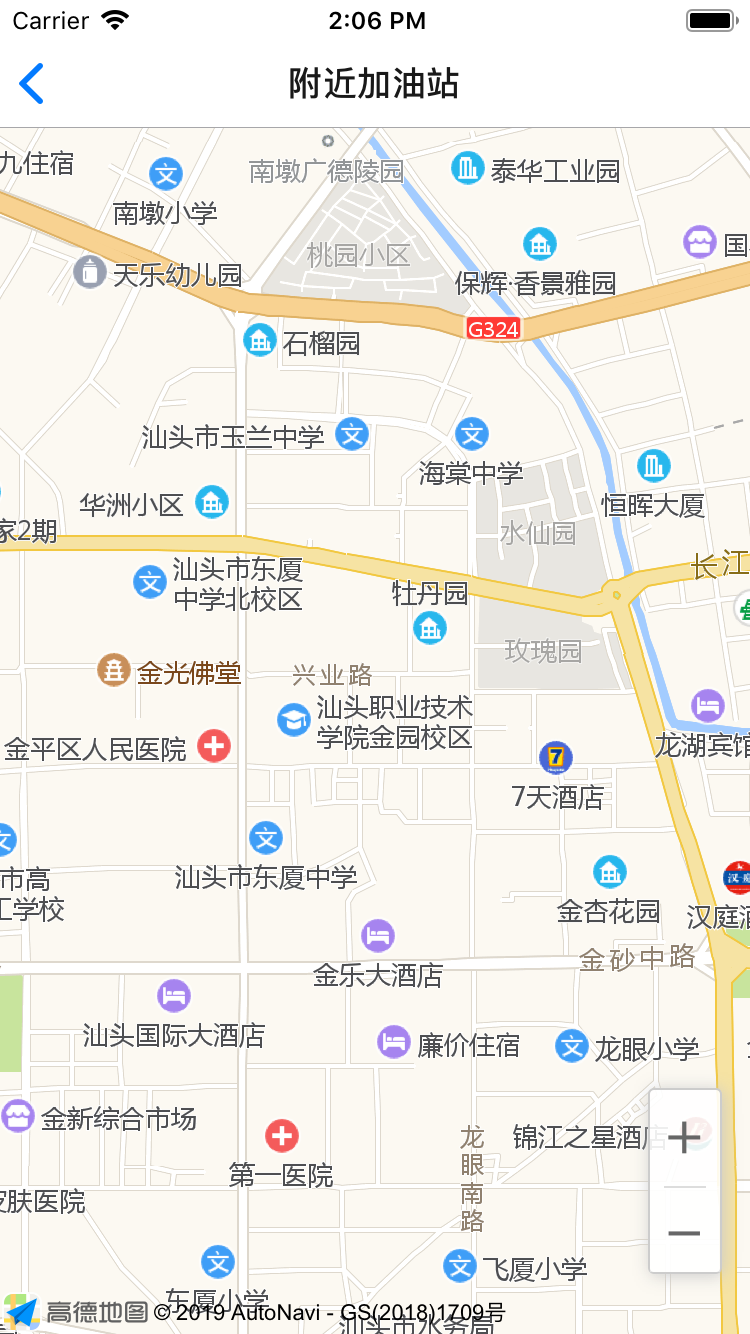
7、地图展示
项目中使用的通过jsp API接入到高德地图。
二、技术难点
1、组件化思想
React Native是React在移动端的跨平台方案。如果想更快地理解和掌握React Native开发,就必须先了解React。
React是FaceBook开源的一个前端框架,它起源于 Facebook 的内部项目,并于 2013 年 5 月开源。因为React 拥有较高的性能,代码逻辑非常简单,所以越来越多的人已开始关注和使用它,目前该框架在Github上已经有7万+star。
React采用组件化的方式开发,通过将view构建成组件,使得代码更加容易得到复用,能够很好的应用在大项目的开发中。有一句话说的很形象:在React中,构建应用就像搭积木一样。
React认为一个组件应该具有以下特征:
- 可组合:一个组件易于和其他组件一起使用,或者嵌套在另一个组件内部。如果一个组件内部创建了另外一个组件,那么父组件拥有它创建的子组件,通过这个特性,一个复杂的UI可以拆分成多个简单的UI组件;
- 可重用:每个组件都是具有独立功能的,它可以被使用在多个UI场景;
- 可维护:每个小的组件仅仅包含自身的逻辑,更容易被理解和维护。
2、组件的属性与状态
在React Native里,组件所持有的数据分为两种:
1、属性(props):组件的props是不可变的,它只能从其他的组件(例如父组件)传递过来。
2、状态(state):组建的state是可变的,它负责处理与用户的交互。在通过用户点击事件等操作以后,如果使得当前组件的某个state发生了改变,那么当前组件就会触发render()方法刷新自己。
props:
由于props是从其父组件传递过来的,那么可想而知,props的声明应该是当前组件的父组件来做。
3、组件的生命周期
请参考组件的生命周期
4、搭建APP的框架:Tab Navigator 和 Stack Navigator
请参考学习:React Navigation的应用
5、组件间通信
组件间通信分为两大类;
1、有直接关系或间接关系的组件之间通信
2、无直接关系或间接关系的组件之间通信
【React Native】React Native项目设计与知识点分享的更多相关文章
- 《React Native 精解与实战》书籍连载「React 与 React Native 简介」
此文是我的出版书籍<React Native 精解与实战>连载分享,此书由机械工业出版社出版,书中详解了 React Native 框架底层原理.React Native 组件布局.组件与 ...
- React 与 React Native 底层共识:React 是什么
此系列文章将整合我的 React 视频教程与 React Native 书籍中的精华部分,给大家介绍 React 与 React Native 结合学习的方法,此小节主要介绍 React 的底层原理与 ...
- 一次掌握 React 与 React Native 两个框架
此系列文章将整合我的 React 视频教程与 React Native 书籍中的精华部分,给大家介绍 React 与 React Native 结合学习的方法. 1. 软件开发语言与框架的学习本质 我 ...
- Flutter vs React Native vs Native:深度性能比较
老孟导读:这是老孟翻译的付费文章,文章所有权归原作者所有. 欢迎加入老孟Flutter交流群,每周翻译2-3篇付费文章,精彩不容错过. 原文地址:https://medium.com/swlh/flu ...
- 小谈React、React Native、React Web
React有三个东西,React JS 前端Web框架,React Native 移动终端Hybrid框架,React Web是一个源码转换工具(React Native 转 Web,并之所以特别提出 ...
- React的React Native
React的React Native React无疑是今年最火的前端框架,github上的star直逼30,000,基于React的React Native的star也直逼20,000.有了React ...
- H5、React Native、Native应用对比分析
每日更新关注:http://weibo.com/hanjunqiang 新浪微博!iOS开发者交流QQ群: 446310206 "存在即合理".凡是存在的,都是合乎规律的.任何新 ...
- React Navigation & React Native & React Native Navigation
React Navigation & React Native & React Native Navigation React Navigation https://facebook. ...
- H5、React Native、Native性能区别选择
“存在即合理”.凡是存在的,都是合乎规律的.任何新事物的产生总要的它的道理:任何新事物的发展总是有着取代旧事物的能力.React Native来的正是时候,一则是因为H5发展到一定程度的受限:二则是移 ...
随机推荐
- JS基础:正则表达式
简介 正则表达式 (regular expression) 描述了一种字符串匹配的模式,可以用来检查一个字符串是否含有某种子串.将匹配的子串做替换或者从某个字符串中取出符合某个条件的子串等.在 JS ...
- 详解SpringBoot 添加对JSP的支持(附常见坑点)
序言: SpringBoot默认不支持JSP,如果想在项目中使用,需要进行相关初始化工作.为了方便大家更好的开发,本案例可直接作为JSP开发的脚手架工程 SpringBoot+War+JSP . 常见 ...
- hash存储结构【六】
一.概述: 我们可以将Redis中的Hashes类型看成具有String Key和String Value的map容器.所以该类型非常适合于存储值对象的信息.如Username.Password和Ag ...
- ***jQuery使用总结(原创)
Q: jquery选择器为变量时是怎么办 A: 一个变量我知道可以这样写:$("#"+id) Q: 如何清除单选框的checked属性 A: $("input[type= ...
- 洛谷 P3984 高兴的津津
P3984 高兴的津津 题目描述 津津上高中了.她在自己的妈妈的魔鬼训练下,成为了一个神犇,每次参加一次OI比赛必拿Au虐全场.每次她拿到一个Au后就很高兴.假设津津不会因为其它事高兴,并且她的高兴会 ...
- [Spring] Bean Scope Singleton cs Prototype
We can define a class to be Singleton or Prototype. If the class was defined as Prototype, then ever ...
- 何时、怎样开启 MySql 日志?
假如你是一名 web 开发者.假设你想调试你的应用或提升其性能的话,那你须要去參考各种日志文件.日志是開始故障排除最好的选择.就著名的 MySql 数据库server而言,你须要參考下面日志文件: 错 ...
- Eclipse或SVN—怎样在Eclipse中安装SVNclient插件
1.下载SVN插件,下载地址:http://download.csdn.net/download/wangshuxuncom/7638615 2.解压下载下来的压缩文件然后依据里面名为"使用 ...
- 【Struts2五】ValueStack以及ognl表达式二(经常使用标签)
Ognl经常使用标签: 1.s:debug 假设把该标签放入到s:iterator中能够看到当前正在迭代的元素的状态 2.s:property 1.输出 ...
- JMeter快捷键图标制作 去掉cmd命令窗口
使用jmeter时: 如果使用默认的jmeter.bat启动的话,会出现一个CMD命令窗口之后再会启动jmeter工作界面 直接启用ApacheJMeter.jar文件即可跳过CMD命令窗口启动jme ...