[Xamarin] 客製化的ListView之章 (转帖)
上次我們說到簡單的的SimpleExpandableListItem1 來做選單
老闆不會因為這樣而滿足的,因為總是希望一個獨一無二,而且漂亮的List 選單 這篇我們來看看如何實作最後結果為自訂每一個ListItem的選單
1.首先我們先制定我們需要的物件模型,假設每一個UserInfo 都會有這些資料,我們就先建立好物件模型 UserInfo.cs
namespace SimpleTextList
{
public class UserInfo
{
public string Title { get; set; }
public string Desc { get; set; }
public string Image { get; set; }
}
}
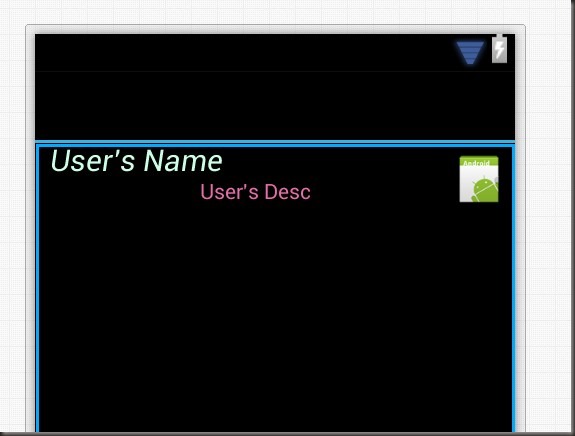
再來其中每一個ListItem我們都建立一個對應的Layout( 範例檔名:UserListItemLayout.axml ,這當然是自己設計的)
<?xml version="1.0" encoding="utf-8"?>
<RelativeLayout xmlns:android="http://schemas.android.com/apk/res/android"
android:orientation="vertical"
android:layout_width="fill_parent"
android:layout_height="fill_parent">
<LinearLayout
android:id="@+id/linearContainer"
android:orientation="vertical"
android:layout_width="wrap_content"
android:layout_height="wrap_content"
android:paddingLeft="10dip">
<TextView
android:id="@+id/tvName"
android:layout_width="wrap_content"
android:layout_height="wrap_content"
android:textColor="#CDFFE7"
android:textSize="20dip"
android:textStyle="italic"
android:text="User's Name" />
<TextView
android:id="@+id/tvDesc"
android:layout_width="wrap_content"
android:layout_height="wrap_content"
android:textSize="14dip"
android:textColor="#E76DA9"
android:paddingLeft="100dip"
android:text="User's Desc" />
</LinearLayout>
<ImageView
android:id="@+id/imgUser"
android:layout_width="48dp"
android:layout_height="48dp"
android:padding="5dp"
android:src="@drawable/Icon"
android:layout_alignParentRight="true" />
</RelativeLayout>
預覽:
2.再來我們需要寫一個Class 其為ListAdapter 其繼承為 BaseAdapter ,簡單的說他就是在Android 中,你要處理這種貌似於List的Layout 因為框架問題,而且他已經預設幫你處理好render跟很多手勢等問題,所以直接繼承來使用,該範例我取名為 UserListAdapter.cs
using System.Collections.Generic;
using System.Net;
using Android.App;
using Android.Graphics;
using Android.Views;
using Android.Widget;
namespace SimpleTextList
{
class UserListAdapter : BaseAdapter<UserInfo>
{
/// <summary>
/// 所有UserInof 的資料
/// </summary>
List<UserInfo> items;
Activity context;
public UserListAdapter(Activity context, List<UserInfo> items)
: base()
{
this.context = context;
this.items = items;
}
public override long GetItemId(int position)
{
return position;
}
public override UserInfo this[int position]
{
get { return items[position]; }
}
public override int Count
{
get { return items.Count; }
}
/// <summary>
/// 系統會呼叫 並且render.
/// </summary>
/// <param name="position"></param>
/// <param name="convertView"></param>
/// <param name="parent"></param>
/// <returns></returns>
public override View GetView(int position, View convertView, ViewGroup parent)
{
var item = items[position];
var view = convertView;
if (view == null)
{
//使用自訂的UserListItemLayout
view = context.LayoutInflater.Inflate(Resource.Layout.UserListItemLayout, null);
}
view.FindViewById<TextView>(Resource.Id.tvName).Text = item.Title;
view.FindViewById<TextView>(Resource.Id.tvDesc).Text = item.Desc;
var imageBitmap = GetImageBitmapFromUrl(item.Image);
view.FindViewById<ImageView>(Resource.Id.imgUser).SetImageBitmap(GetImageBitmapFromUrl(item.Image));
return view;
}
/// <summary>
/// 因為圖片是網址,所以將其圖片download回來後轉為bitmap
/// Get IamgeBitmap form url.
/// code reference : http://forums.xamarin.com/discussion/4323/image-from-url-in-imageview
/// </summary>
/// <param name="url"></param>
/// <returns></returns>
private Bitmap GetImageBitmapFromUrl(string url)
{
Bitmap imageBitmap = null;
using (var webClient = new WebClient())
{
var imageBytes = webClient.DownloadData(url);
if (imageBytes != null && imageBytes.Length > 0)
{
imageBitmap = BitmapFactory.DecodeByteArray(imageBytes, 0, imageBytes.Length);
}
}
return imageBitmap;
}
}
}
其中除了GetImageBitmapFromUrl 其他function 因為繼承關係都是必須要實作的,因為我設定的圖片是從網路上面來,所以附上一支可以從網路抓圖下來轉bitmap的function ,也因為沒做cache 的關係,所以會慢一點,在這class 我們發現,他將我步驟1 的 UserInfo 以及 UserListItemLayout 產生綁定,並且render 出 View 讓android 系統去畫~
3.現在Adapter做好了我們就來呼叫 首先我們產生一個Layout 來放一個ListView來render UserListItemLatout ChooseUserLayout.axml :
<?xml version="1.0" encoding="utf-8"?>
<LinearLayout xmlns:android="http://schemas.android.com/apk/res/android"
android:orientation="vertical"
android:layout_width="fill_parent"
android:layout_height="fill_parent"
android:minWidth="25px"
android:minHeight="25px">
<ListView
android:minWidth="25px"
android:minHeight="25px"
android:layout_width="fill_parent"
android:layout_height="fill_parent"
android:id="@+id/listViewMain" />
</LinearLayout>
接下來,就是他搭配的Activity 部分 ChooseUserActivity.cs :
using System.Collections.Generic;
using Android.App;
using Android.OS;
using Android.Widget;
namespace SimpleTextList
{
[Activity(Label = "請選擇用戶")]
public class ChooseUserActivity : Activity
{
private List<UserInfo> datas;
ListView listView;
protected override void OnCreate(Bundle bundle)
{
base.OnCreate(bundle);
SetContentView(Resource.Layout.ChooseUserLayout);
listView = FindViewById<ListView>(Resource.Id.listViewMain);
//載入假資料
datas = new List<UserInfo>();
datas.Add(new UserInfo { Title = "Donma", Desc = "當麻許,業餘的code generator", Image = "http://graph.facebook.com/donma.hsu/picture" });
datas.Add(new UserInfo { Title = "Tony Stark", Desc = "Genius, billionaire, playboy, philanthropist.", Image = "http://graph.facebook.com/tonystarkpage/picture" });
datas.Add(new UserInfo { Title = "Black Widow", Desc = "Real Name - Natalia Alianovna", Image = "http://graph.facebook.com/blackwidowmovie/picture" });
listView.Adapter = new UserListAdapter(this, datas);
listView.ItemClick += listView_ItemClick;
}
/// <summary>
/// 點選item 後的事件
/// </summary>
/// <param name="sender"></param>
/// <param name="e"></param>
void listView_ItemClick(object sender, AdapterView.ItemClickEventArgs e)
{
Toast.MakeText(this, "你選擇了 " + datas[e.Position].Title, ToastLength.Short).Show();
}
}
}
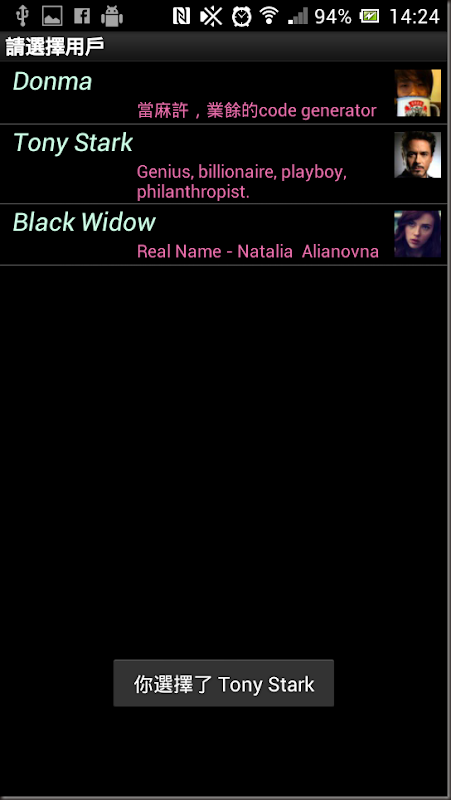
在這裡,我們放入三筆假資料,並且指定說其主ListView 使用的Adapter 為 UserListAdapter(來自於步驟2),並且指定其點擊後toast 其UserInfo的Title
4.接下來就是主Activity 將步驟3的 ChooseUserActivity給叫起
var btnUserList = FindViewById<Button>(Resource.Id.btnUserList);
btnUserList.Click += delegate
{
StartActivity(typeof(ChooseUserActivity));
};
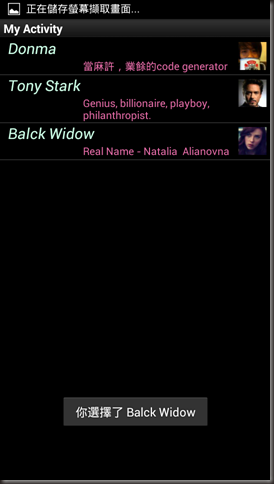
結果:
Source code:
參考文件:
http://developer.android.com/reference/android/widget/BaseAdapter.html
[Xamarin] 客製化的ListView之章 (转帖)的更多相关文章
- Xamarin.Android 入门之:Listview和adapter
一.引言 不管开发什么软件,列表的使用是必不可少的,而本章我们将学习如何使用Xamarin去实现它,以及如何使用自定义适配器.关于xamarin中listview的基础和适配器可以查看官网https: ...
- Dynamics AX 2012 R2 客制化RDP报表参数对话框
当我们在使用RDP报表时,AX会根据Data Contract,自动生成报表参数对话框上的字段控件.一般情况下,该对话框能够满足我们的需求,但是如果有较为复杂或特殊的需求,就要我们对该对话框进行客制化 ...
- BEvent_客制化BusinessEvent通过PLSQL Procedurer接受消息传递(案例)
2014-06-27 Created By BaoXinjian
- Form_通过Zoom客制化跳转页面功能(案例)
2012-09-08 Created By BaoXinjian
- [Learn Android Studio 汉化教程]第四章 : Refactoring Code
[Learn Android Studio 汉化教程]第四章 : Refactoring Code 第四章 Refactoring Code 重构代码 在Android Studio中开发,解决 ...
- [Learn Android Studio 汉化教程]第三章:使用 Android Studio 编程
[Learn Android Studio 汉化教程]第三章:使用 Android Studio 编程 本章包含如何在 Android Studio 中书写或生成代码. Android Studio ...
- 转:FORM:客制化Form的菜单栏和右鍵菜單
Oracle EBS还允许客制化Form的菜单栏. 用户最多可以定义45个form-level的trigger,名称必须为SPECIALn, 其中SPECIAL1 to SPECIAL15属于Tool ...
- Android MTK6580 客制化关机充电动画
1.客制化关机充电图片 vendor/mediatek/proprietary/bootable/bootloader/lk/dev/logo/xxx 找到对应分辨率替换 2.调整显示图片位置.大小 ...
- Xamarin.Forms: 无限滚动的ListView(懒加载方式)
说明 在本博客中,学习如何在Xamarin.Forms应用程序中设计一个可扩展的无限滚动的ListView.这个无限滚动函数在默认的Xamarin.Forms不存在,因此我们需要为此添加插件.在这里我 ...
随机推荐
- SQL SERVER 2008 字段值合并
/** * 通过 FOR XML PATH 语句,可以将字段的值进行合并. **/ CREATE TABLE tb_child ( name ), hobby ) ) go INSERT INTO t ...
- position:absolute和float会隐式的改变display类型
position:absolute和float会隐式的改变display类型,不论之前是什么类型的元素(display:none除外),只要设置了position:absolute或float,都会让 ...
- Mysql错误信息汇总
目录: 1. Every derived table must have its own alias 内容: 1. Every derived table must have its own alia ...
- Get the Uniqueid of Action Originate in the AMI
[asterisk-users] Get the Uniqueid of Action Originate in the AMI Adolphe Cher-Aime acheraime at gmai ...
- Dynamic CRM2016在一台本地服务器安装部署
在本地单独一台服务器上安装部署CRM2016时需要提前安装好CRM软件需要的必备软件,具体需要安装的组件如下截图:其中required为必须具备的安装组件.license可以采用微软官网的90天测试版 ...
- 爬虫---request+++urllib
网络爬虫(又被称为网页蜘蛛,网络机器人,在FOAF社区中间,更经常的称为网页追逐者),是一种按照一定的规则,自动地抓取万维网信息的程序或者脚本.另外一些不常使用的名字还有蚂蚁.自动索引.模拟程序或者蠕 ...
- PHP--字符串处理函数
字符串的声明 1. 2. 3. [注]单引号与双引号声明字符串的区别: 1.strlen():获取字符串长度 2.substr():截取字符串 3.strpos():查找字符串在指定字符串中的位置 4 ...
- Tableview的更新和删除某一行
.tableView的刷新 > 数据刷新的总体步骤 * 修改模型数据 * 刷新表格(刷新界面) > 刷新表格(刷新界面)的方法 * 全局刷新(每一行都会重新刷新) - (void)relo ...
- Daily Scrum 12.10
今日完成任务: 终于修复了大部分的异常,感觉顿时松了一口气.重新在服务器上部署了webservice接口服务以及学霸网站.资源的上传下载功能正在逐渐完善. 遇到困难: 在本地运行正常,部署到服务器上运 ...
- js获取文件大小
var file = urlBox.doc.activeElement.files[0]||urlBox.files[0] ; if (file) { var fileSize = 0; if (fi ...