
MariaDB数据库服务
一、初始化mariaDB服务程序:
yum install mariadb mariadb-server //安装mariaDB
systemctl start mariadb //启动mariadb
systemctl enable mariadb //添加到开机启动项中
初始化数据库服务程序:
[root@mysql-server ~]# mysql_secure_installation
NOTE: RUNNING ALL PARTS OF THIS SCRIPT IS RECOMMENDED FOR ALL MariaDB
SERVERS IN PRODUCTION USE! PLEASE READ EACH STEP CAREFULLY!
In order to log into MariaDB to secure it, we'll need the current
password for the root user. If you've just installed MariaDB, and
you haven't set the root password yet, the password will be blank,
so you should just press enter here.
Enter current password for root (enter for none):当前数据库密码为空,直接回车
OK, successfully used password, moving on...
Setting the root password ensures that nobody can log into the MariaDB
root user without the proper authorisation.
Set root password? [Y/n] y 设置root用户的数据库密码
New password:
Re-enter new password:
Password updated successfully!
Reloading privilege tables..
... Success!
By default, a MariaDB installation has an anonymous user, allowing anyone
to log into MariaDB without having to have a user account created for
them. This is intended only for testing, and to make the installation
go a bit smoother. You should remove them before moving into a
production environment.
Remove anonymous users? [Y/n] y 删除匿名账号
... Success!
Normally, root should only be allowed to connect from 'localhost'. This
ensures that someone cannot guess at the root password from the network.
Disallow root login remotely? [Y/n] y 禁止root用户从远程登陆
... Success!
By default, MariaDB comes with a database named 'test' that anyone can
access. This is also intended only for testing, and should be removed
before moving into a production environment.
Remove test database and access to it? [Y/n] y 删除test库,并取消对其的访问权限
- Dropping test database...
... Success!
- Removing privileges on test database...
... Success!
Reloading the privilege tables will ensure that all changes made so far
will take effect immediately.
Reload privilege tables now? [Y/n] y 刷新授权表,让初始化后的设定立即生效
... Success!
Cleaning up...
All done! If you've completed all of the above steps, your MariaDB
installation should now be secure.
Thanks for using MariaDB!
设置防火墙对数据库服务的允许策略:
[root@mysql-server ~]# firewall-cmd --permanent --add-service=mysql
success
[root@mysql-server ~]# firewall-cmd --reload
success
使用root用户登陆到数据库中:
[root@mysql-server ~]# mysql -u root -p
Enter password:
Welcome to the MariaDB monitor. Commands end with ; or \g.
Your MariaDB connection id is 15
Server version: 5.5.52-MariaDB MariaDB Server
Copyright (c) 2000, 2016, Oracle, MariaDB Corporation Ab and others.
Type 'help;' or '\h' for help. Type '\c' to clear the current input statement.
MariaDB [(none)]>
MariaDB [(none)]> set password = password('123456'); //修改当前用户的数据库密码
二、管理数据库与表单数据:
1、创建一个新的数据库用户::CREATE USER 用户名@主机名 IDENTIFIED BY '密码';
MariaDB [(none)]> create user cw@localhost IDENTIFIED BY '123456';
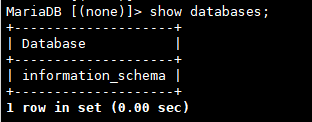
MariaDB [mysql]> show databases; //查看数据库
MariaDB [(none)]> use mysql; //进入到mysql数据库
MariaDB [mysql]> select host,user,password from user where user='cw';
//查看新创建的用户名、主机、姓名与密码信息
2、修改新建用户权限:(默认权限只能访问)
数据库GRANT命令的授权操作常用方案:
|
命令 |
作用 |
|
GRANT 权限 ON 数据库.表单名称 TO 用户名@主机名 |
对某个特定数据库中的特定表单给予授权。 |
|
GRANT 权限 ON 数据库.* TO 用户名@主机名 |
对某个特定数据库中的所有表单给予授权。 |
|
GRANT 权限 ON *.* TO 用户名@主机名 |
对所有数据库及所有表单给予授权。 |
|
GRANT 权限 1,权限 2 ON 数据库.* TO 用户名@主机名 |
对某个数据库中的所有表单给予多个授权。 |
|
GRANT ALL PRIVILEGES ON *.* TO 用户名@主机名 |
对所有数据库及所有表单给予全部授权 |
举例:
MariaDB [(none)]> GRANT SELECT,UPDATE,DELETE,INSERT on mysql.user to cw@localhost;
//给予cw用户对mysql数据库的user表单查询、更新、删除、插入权限;
MariaDB [(none)]> show grants for cw@localhost;
//查看cw用户当前的授权
MariaDB [(none)]> revoke SELECT,UPDATE,DELETE,INSERT on mysql.user from cw@localhost;
//移除cw用户对musql数据库的user表单查询、更新、删除、插入权限
3、创建数据库与表单
常用的数据库表单管理命令:
|
用法 |
作用 |
|
CREATE database 数据库名称; |
创建新的数据库 |
|
DESCRIBE 表单名称; |
描述表单 |
|
UPDATE 表单名称 SET attribute=新值 WHERE attribute>原始值; |
更新表单中的数据 |
|
USE 数据库名称; |
指定使用的数据库 |
|
SHOW databases; |
显示当前已有的数据库 |
|
SHOW tables; |
显示当前数据库中的表单 |
|
SELECT * FROM 表单名称; |
从表单中选中某个记录值。 |
|
DELETE FROM 表单名 WHERE attribute=值; |
从表单中删除某个记录值 |
MariaDB [mysql]> create database linuxprobe;
MariaDB [mysql]> use linuxprobe;
MariaDB [linuxprobe]> create table mybook(name char(15),price int,pages int);
MariaDB [linuxprobe]> describe mybook; //查看mybook表头信息
+-------+----------+------+-----+---------+-------+
| Field | Type | Null | Key | Default | Extra |
+-------+----------+------+-----+---------+-------+
| name | char(15) | YES | | NULL | |
| price | int(11) | YES | | NULL | |
| pages | int(11) | YES | | NULL | |
+-------+----------+------+-----+---------+-------+
3 rows in set (0.00 sec)
4、管理表单数据:
向表单中插入新的书籍数据:
MariaDB [linuxprobe]> INSERT INTO
mybook(name,price,pages) VALUES('linuxprobe','60',518);
MariaDB [linuxprobe]> select *
from mybook; //查看表中数据
+------------+-------+-------+
| name | price | pages |
+------------+-------+-------+
| linuxprobe | 60 |
518 |
+------------+-------+-------+
1 row in set (0.01 sec)
MariaDB [linuxprobe]> update mybook
set price=55; //将价格修改为55元;
MariaDB [linuxprobe]> delete from
mybook; //删除书籍表单中的内容;
5、where命令用于数据库匹配查询:
|
参数 |
作用 |
|
= |
相等 |
|
<>或!= |
不相等 |
|
> |
大于 |
|
< |
小于 |
|
>= |
大于或等于 |
|
<= |
小于或等于 |
|
BETWEEN |
在某个范围内 |
|
LIKE |
搜索一个例子 |
|
IN |
在列中搜索多个值 |
MariaDB [linuxprobe]> select *
from mybook;
+-------------+-------+-------+
| name | price | pages |
+-------------+-------+-------+
| linuxprobe1 | 55 |
518 |
| linuxprobe2 | 60 |
518 |
| linuxprobe3 | 70 |
518 |
| linuxprobe4 | 75 |
518 |
| linuxprobe5 | 80 |
518 |
+-------------+-------+-------+
5 rows in set (0.00 sec)
查看价格大于75的书籍:
MariaDB [linuxprobe]> select *
from mybook where price>75;
搜索价格不等于80的书籍:
MariaDB [linuxprobe]> select *
from mybook where price<>80;
MariaDB [linuxprobe]> select *
from mybook where price!=80;
6、数据库备份与恢复:
mysqldump命令用于备份数据库数量,格式为“mysqldump [参数] [数据库名称]”。
|
参数 |
作用 |
|
-u |
数据库的用户名称 |
|
-p |
密码提示符 |
|
--no-data |
至备份数据库的描述结构,而不要数据 |
|
--local-all-tables |
备份完成后将不再允许修改数据 |
将书籍数据库文件导出到家目录:
[root@mysql-server ~]# mysqldump
-uroot -p123456 linuxprobe > /root/linuxprobeDB_bak.sql
删除书籍数据库:
MariaDB [(none)]> drop database
linuxprobe;
创建一个空的数据库:
MariaDB [(none)]> create database
linuxprobe_bak;
导入刚刚备份的数据库至linuxprobe_bak库中:
[root@mysql-server ~]# mysql -uroot
-p123456 linuxprobe_bak < /root/linuxprobeDB_bak.sql
MariaDB数据库服务的更多相关文章
- fedora中使用 mariadb数据库建库和建表-- mariadb数据库服务无法启动?
/proc(进程, 过程等含义) 文件系统是一个虚拟文件系统,通过它可以使用一种新的方法在 Linux® 内核空间(内核)和用户空间(用户)之间进行通信.在 /proc 文件系统中,我们可以将对虚拟文 ...
- 解决mariadb数据库服务无法开启
我的系统Manjaro linux,安装的数据库为mariadb 10.1 1.安装数据库 pacman -S mariadb 2.配置数据库启动环境: mysql_install_db --user ...
- 【Ubuntu16】apt-get安装MariaDB
一.Mysql背景信息 Mysql在互联网早期就流行了,追求速度.简单.坚持开源.几乎支持所有操作系统.完全支持多用户.多线程,支持海量数据存储,采用MyISAM.InnoDB两大存储引擎优势互补.但 ...
- mysql和mariadb备份工具xtrabackup和mariabackup(mariadb上版本必须用这个)
简介 xtraBackup(PXB) 工具是 Percona 公司用 perl 语言开发的一个用于 MySQL 数据库物理热备的备份工具,支持 MySQl(Oracle).Percona Server ...
- Linux-基础学习(五)-mariadb主从复制以及redis学习
开始今日份整理 1.mariadb的主从复制 主从复制大致图示: 1.1 mysql基本命令复习 linux下的操作 .启动mysql systemctl start mariadb .linux客户 ...
- mysql/mariadb主从复制
主从复制简介 MySQL数据库的主从复制方案,是其自带的功能,并且主从复制并不是复制磁盘上的数据库文件,而是通过binlog日志复制到需要同步的从服务器上. MySQL数据库支持单向.双向.链式级联, ...
- Mariadb主从复制
前戏: mysql的基本命令复习 .启动mysql systemctl start mariadb .linux客户端连接自己 mysql -uroot -p -h 127.0.0.1 .远程链接my ...
- CentOS 7 源码编译MariaDB
下载源码包 安装 SCL devtoolset-7 SCL(Software Collections)可以让你在同一个操作系统上安装和使用多个版本的软件,而不会影响整个系统的安装包.SCL为社区的以 ...
- 【Ubuntu 16.04.3 LTS】apt-get 安装MariaDB
一.Mysql背景信息 Mysql在互联网早期就流行了,追求速度.简单.坚持开源.几乎支持所有操作系统.完全支持多用户.多线程,支持海量数据存储,采用MyISAM.InnoDB两大存储引擎优势互补.但 ...
随机推荐
- 杂谈spring、springMVC
一.背景 目前项目组都在用SSM(spring+springMVC+mybatis)开发项目 大家基本都停留在框架的基本使用阶段,对框架的职责并不清晰,导致配置文件出现了不少问题 在这简单讲解一下sp ...
- Android应用开发基础之五:网络编程(二)
HttpClient 发送get请求 创建一个客户端对象 HttpClient client = new DefaultHttpClient(); 创建一个get请求对象 HttpGet hg = n ...
- asyncio标准库7 Producer/consumer
使用asyncio.Queue import asyncio import random async def produce(queue, n): for x in range(1, n + 1): ...
- Flask入门模板过滤器与测试器(五)
1 模板引擎之过滤器 概念 : 过滤器本质上是个转换函数,第一个参数是待过滤的变量.如果它有第二个参数,模板中就必须传进去. 过滤器使用管道符| 放在{{ }} Jinja2模板引擎提供了丰富的内置过 ...
- sqlserver 带输出参数的存储过程
--创建存储过程create procedure proc_stu@sname varchar(20),@pwd varchar(50),@flag bit outputasif exists(sel ...
- 自动驾驶self driving知识点mark
C++, algorithm, RTOS,TX2, CAN, 标准, car model,
- codis学习
一.codis-proxy 结构 1.Topology 2.Slots 3.ServerGroup 4.Server 二.codis-proxy 启动过程 1.初始化ProxyInfo Id ...
- POJ 3233 Matrix Power Series 【经典矩阵快速幂+二分】
任意门:http://poj.org/problem?id=3233 Matrix Power Series Time Limit: 3000MS Memory Limit: 131072K To ...
- <jsp:include>和<%@include file=""%>的区别(简单了解)
简单了解 include指令是编译阶段的指令,即include所包含的文件的内容是编译的时候插入到JSP文件中,JSP引擎在判断JSP页面未被修改,否则视为已被修改.由于被包含的文件是在编译时才插入的 ...
- WebSocket消息推送(实现进行聊天)和WebSocket简介
WebSocket简介 WebSocket是HTML5开始提供的一种浏览器与服务器间进行全双工通讯的网络技术.依靠这种技术可以实现客户端和服务器端的长连接,双向实时通信.特点:事件驱动异步使用ws或者 ...