django中ckeditor富文本编辑器使用
1.安装模块
(pillow是python的一个图像处理库)
pip install django-ckeditor
pip install pillow
2.编辑seetings.py配置文件
INSTALLED_APPS = [
'ckeditor',#富文本编辑器
'ckeditor_uploader'#富文本编辑器上传图片模块
] #媒体文件配置
MEDIA_URL = "/media/"
MEDIA_ROOT = os.path.join(BASE_DIR, "media")
CKEDITOR_UPLOAD_PATH = "images" # 上传图片保存路径,如果没有图片存储或者使用自定义存储位置,那么则直接写 ' ' ,如果是使用django本身的存储方式,那么你就指名一个目录用来存储即可。 # 富文本编辑器ckeditor配置
CKEDITOR_CONFIGS = {
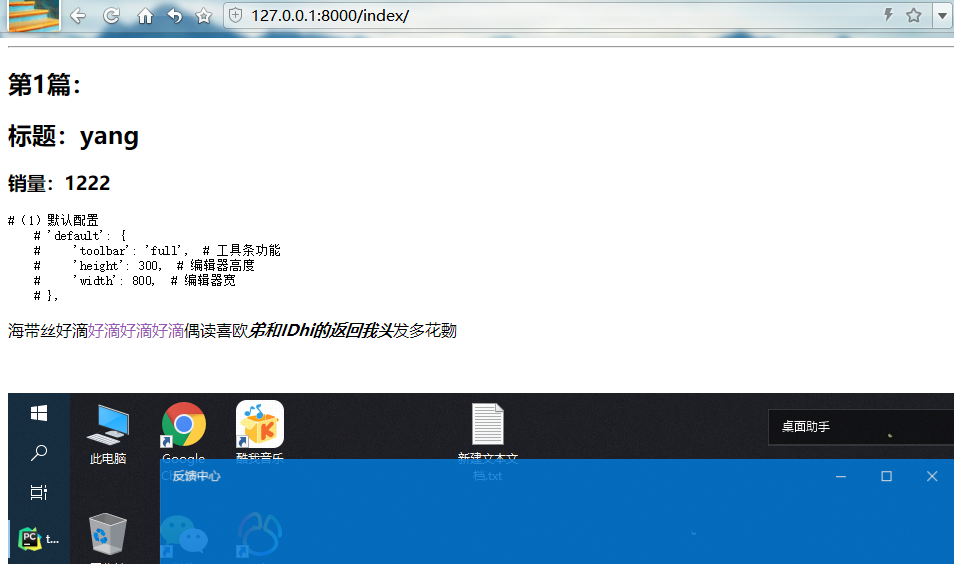
#(1)默认配置
# 'default': {
# 'toolbar': 'full', # 工具条功能
# 'height': 300, # 编辑器高度
# 'width': 800, # 编辑器宽
# }, #(3)自定义配置带代码块显示
'default': {
'toolbar': (
['div', 'Source', '-', 'Save', 'NewPage', 'Preview', '-', 'Templates'],
['Cut', 'Copy', 'Paste', 'PasteText', 'PasteFromWord', '-', 'Print', 'SpellChecker', 'Scayt'],
['Undo', 'Redo', '-', 'Find', 'Replace', '-', 'SelectAll', 'RemoveFormat'],
['Form', 'Checkbox', 'Radio', 'TextField', 'Textarea', 'Select', 'Button', 'ImageButton', 'HiddenField'],
['Bold', 'Italic', 'Underline', 'Strike', '-', 'Subscript', 'Superscript'],
['NumberedList', 'BulletedList', '-', 'Outdent', 'Indent', 'Blockquote'],
['JustifyLeft', 'JustifyCenter', 'JustifyRight', 'JustifyBlock'],
['Link', 'Unlink', 'Anchor'],
['Image', 'Flash', 'Table', 'HorizontalRule', 'Smiley', 'SpecialChar', 'PageBreak'],
['Styles', 'Format', 'Font', 'FontSize'],
['TextColor', 'BGColor'],
['Maximize', 'ShowBlocks', '-', 'About', 'pbckcode'],
['Blockquote', 'CodeSnippet'],
),
'width': 'auto',
# 添加按钮在这里
'toolbar_Custom': [
['NumberedList', 'BulletedList'],
['Blockquote', 'CodeSnippet'],
],
# 插件
'extraPlugins': ','.join(['codesnippet', 'widget', 'lineutils', ]),
},
}
seetings.py
3.编辑urls.py路由
from django.conf.urls import url, include

from django.contrib import admin

from django.conf.urls.static import static

from django.conf import settings

from editer import views

urlpatterns = [

                  url(r'^admin/', admin.site.urls),

                  url(r'^ckeditor/', include('ckeditor_uploader.urls')),

                  url(r'^index/', views.index),#测试获取后台编辑的内容用的

              ] + static(settings.MEDIA_URL, document_root=settings.MEDIA_ROOT)  ## 没有这一句无法显示上传的图片
urls.py
4.app应用的models.py中的应用
from django.db import models

from ckeditor.fields import RichTextField

from ckeditor_uploader.fields import RichTextUploadingField

class SPUModel(models.Model):

    '''这是spu表格'''

    name = models.CharField(max_length=32, verbose_name='商品名')

    sales = models.CharField(max_length=20, verbose_name='销售量')

    desc_pack = RichTextUploadingField(default='', verbose_name='商品详情')

    def __str__(self):

        return self.name

    class Meta:

        verbose_name = '商品表'

        db_table = verbose_name

        verbose_name_plural = verbose_name
models.py
5.数据库迁移指令
makemigrations
migrate
6.创建admin超级用户
createsuperuser
7.app应用的admin.py文件中注册表
from django.contrib import admin

from editer import models

# Register your models here.

admin.site.register(models.SPUModel)
admin.py
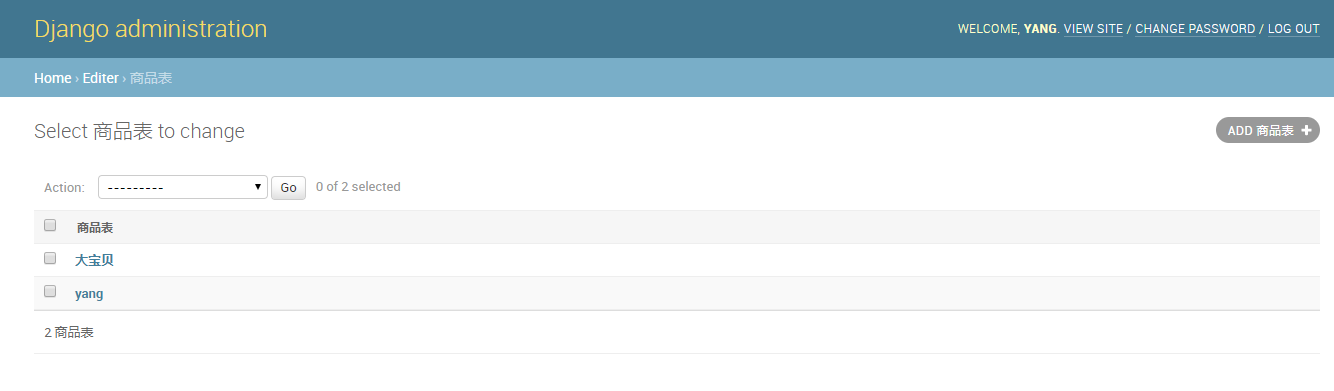
8.启动项目,进入admin后台管理编辑即可

9.在templates文件夹中编写测试url返回页面index.html
<!DOCTYPE html>
<html lang="en">
<head>
<meta charset="UTF-8">
<title>CKEditorTest</title>
</head>
<body>
<div>
{% for obj in all %}
<hr>
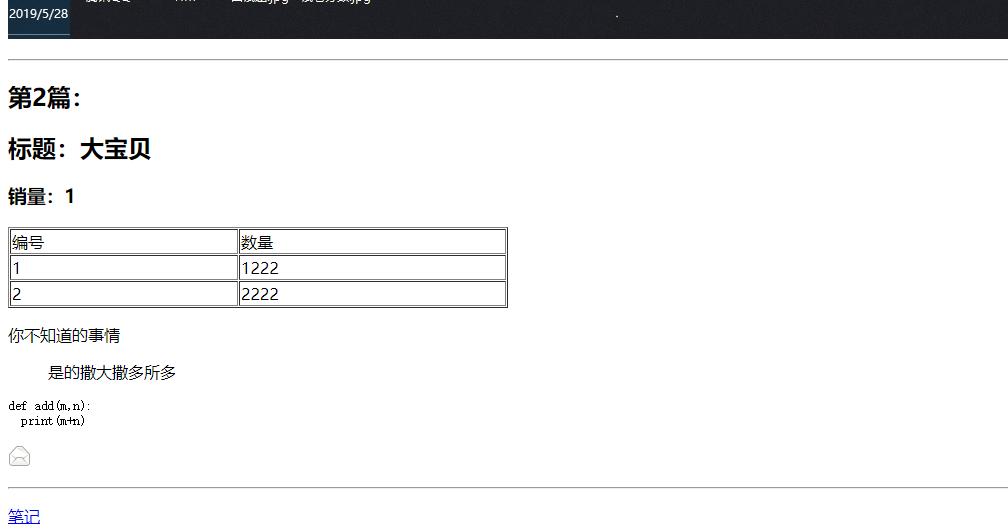
<h2>第{{ forloop.counter }}篇:</h2>
<h2>标题:{{ obj.name }}</h2>
<h3>销量:{{ obj.sales }}</h3>
{{ obj.desc_pack | safe }} {% endfor %} </div>
</body>
</html>
index.html
10.app应用的views.py文件中编写测试url对应的视图函数
from django.shortcuts import render

from editer import models

# Create your views here.

def index(request):

    all_obj = list(models.SPUModel.objects.all().all().values('name','sales','desc_pack'))

    return render(request, 'index.html', {'all': all_obj})
views.py
11.重启项目,浏览器测试http://127.0.0.1:8000/index/
参考博客:https://blog.csdn.net/weixin_43158056/article/details/93911844
django中ckeditor富文本编辑器使用的更多相关文章
- Django中CKEditor富文本编译器的使用
CKEditor富文本编辑器 1. 安装 pip install django-ckeditor 2. 添加应用 在INSTALLED_APPS中添加 INSTALLED_APPS = [ ... ' ...
- Django添加ckeditor富文本编辑器
源码 https://github.com/django-ckeditor/django-ckeditor 通过pip安装. pip3 install django-ckeditor pip3 ins ...
- Django中添加富文本编辑器
使用的是CKeditor这个模块 1.安装: pip install django-ckeditor 2.将ckeditor注册到settings.py文件中, 并添加ckeditor的url到你项目 ...
- Django项目中添加富文本编辑器django-ckeditor
django-ckeditor库的使用步骤: 1.在命令行下安装django-ckeditor这个库: 命令:pip install django-ckeditor 2.安装成功后,配置Django项 ...
- CKEditor富文本编辑器
CKEditor 富文本即具备丰富样式格式的文本.在运营后台,运营人员需要录入课程的相关描述,可以是包含了HTML语法格式的字符串.为了快速简单的让用户能够在页面中编辑带格式的文本,我们引入富文本编辑 ...
- day82:luffy:课程详情页面显示&章节和课时显示&视频播放组件&CKEditor富文本编辑器
目录 1.初始课程详情页面 2.视频播放组件 3.课程详情页面后端接口实现 4.课程详情页面-前端 5.CKEditor富文本编辑器 6.课程章节和课时显示-后端接口 7.课程章节和课时显示-前端 1 ...
- Django中使用富文本编辑器Uedit
Uedit是百度一款非常好用的富文本编辑器 一.安装及基本配置 官方GitHub(有详细的安装使用教程):https://github.com/zhangfisher/DjangoUeditor 1. ...
- 项目页面集成ckeditor富文本编辑器
步骤一.引入ckeditor.js (注:本实例以ThinkPHP3.2框架为载体,不熟悉ThinkPHP的朋友请自行补习,ckeditor文件代码内容也请去ckeditor官网自行下载) 作为程序员 ...
- web项目中nicedit富文本编辑器的使用
web项目中nicedit富文本编辑器的使用 一.为什么要用富文本编辑器? 先说什么是富文本编辑器吧,普通的html中input或textarea标签只能进行简单的输入,而做不到其他的文本调整功能,甚 ...
随机推荐
- wx.request出现400 bad request的问题
wx.request({ url: 'test.php', //仅为示例,并非真实的接口地址 data: { x: '' , y: '' }, header: { 'content-type': 'a ...
- 微软的 Sysinternals 系统管理工具包,例如可找出自动启动的流氓软件
作者:Kenny链接:https://www.zhihu.com/question/52157612/answer/153886419来源:知乎著作权归作者所有.商业转载请联系作者获得授权,非商业转载 ...
- Nginx四层代理
Nginx支持四层代理 http://nginx.org/en/docs/stream/ngx_stream_core_module.html 该ngx_stream_core_module模块自1. ...
- 引入OpenCV导致私有内存巨大
引入OpenCV导致私有内存巨大 opencvC++VS2015 说明 在调试程序的时候 发现自己的程序在VS的调试窗口占用很高, 花时间关注了一下这个问题, 手动写了小的程序复现这个问题,最终确定了 ...
- Android Studio快捷键动态演示
Android Studio出来很久了,大部分已经转过来了,相对于Eclipse又是毋庸置疑,更好的使用快捷键必定达到事半功倍的效果. 友情提示:某些电脑按F1-F12键需要先按住FN,比如我的Mac ...
- 《高性能Linux服务器构建实战》——第1章轻量级HTTP服务器Nginx
第1章 轻量级HTTP服务器Nginx本章主要介绍Nginx的配置管理和使用.作为一个轻量级的HTTP服务器,Nginx与Apache相比有以下优势:在性能上,它占用很少的系统资源,能支持更多的并发连 ...
- Intellij IDEA 使用Spring-boot-devTools
转载地址:https://blog.csdn.net/u013938484/article/details/77541050 转载于:https://blog.51cto.com/881206524/ ...
- 在 AutoLayout 和 Masonry 中使用动画
动画是 iOS 中非常重要的一部分,它给用户展现出应用灵气的一面. 在动画块中修改 Frame 在原来使用 frame 布局时,在 UIView 的 animate block 中对 view 的布局 ...
- C++编程入门题目--No.2
题目:企业发放的奖金根据利润提成.利润(I)低于或等于10万元时,奖金可提10%:利润高 于10万元,低于20万元时,低于10万元的部分按10%提成,高于10万元的部分,可可提 成7.5%:20万到4 ...
- Blazor一个简单的示例让我们来起飞
Blazor Blazor他是一个开源的Web框架,不,这不是重点,重点是它可以使c#开发在浏览器上运行Web应用程序.它其实也简化了SPA的开发过程. Blazor = Browser + Razo ...