Azure Cosmos DB (三) EF Core 操作CURD
一,引言
接着上一篇使用 EF Core 操作 Azure CosmosDB 生成种子数据,今天我们完成通过 EF Core 实现CRUD一系列功能。EF Core 3.0 提供了CosmosDB 数据库提供程序的第一个可用的版本,今天我们使用 EF Core 3.1在尝试使用Cosmos DB 来存储和构建 Asp.NET Core 应用程序时,可能还有一些差异。
1,CosmosDB 不会生成唯一的主键,Cosmos DB不会像SQL数据库那样创建主键。如果需要添加到 Cosmos DB中,则可能会使用类似GUID 字符串的名称。
2,Cosmos DB 不支持EF Core 迁移
--------------------我是分割线--------------------
1,Azure Cosmos DB (一) 入门介绍
2,Azure Cosmos DB (二) SQL API 操作
3,Azure Cosmos DB (三) EF Core 操作CURD
二,正文
1,Repository 基类仓储实现类
将之前创建好的UserContext 注入基类仓储中


 1     /// <summary>

 2     /// 基类仓储

 3     /// </summary>

 4     public abstract class Repository<TEntity> : IRepository<TEntity> where TEntity : class,new()

 5     {

 6         protected DbContext Db;

 7

 8         public async virtual Task<TEntity> GetById(string partitionKey)

 9         {

10             return await Db.Set<TEntity>().FindAsync( partitionKey);

11         }

12

13         public async virtual Task<TEntity> Add(TEntity entity)

14         {

15             await Db.AddAsync<TEntity>(entity);

16             return entity;

17         }

18

19         public virtual bool Update(TEntity entity)

20         {

21             Db.Add(entity);

22             Db.Entry(entity).State = EntityState.Modified;

23             return true;

24         }

25

26         public virtual bool Remove(TEntity entity)

27         {

28             Db.Set<TEntity>().Remove(entity);

29             return true;

30         }

31

32         public virtual IEnumerable<TEntity> GetAll()

33         {

34             return Db.Set<TEntity>();

35         }

36

37         public virtual IEnumerable<TEntity> Find(Expression<Func<TEntity, bool>> conditions)

38         {

39             return Db.Set<TEntity>().Where(conditions);

40         }

41

42         public async Task<int> SaveChangesAsync()

43         {

44             return await Db.SaveChangesAsync();

45         }

46

47         public int SaveChanges()

48         {

49             return  Db.SaveChanges();

50         }

51

52         public void Dispose()

53         {

54             Db.Dispose();

55             GC.SuppressFinalize(this);

56         }

57     }
Repository.cs
 1 public interface IRepository<TEntity> : IDisposable where TEntity : class

 2     {

 3         /// <summary>

 4         /// 根据Id获取对象

 5         /// </summary>

 6         /// <param name="partitionKey"></param>

 7         /// <returns></returns>

 8         Task<TEntity> GetById(string partitionKey);

 9

10         /// <summary>

11         /// 添加

12         /// </summary>

13         /// <param name="entity"></param>

14         Task<TEntity> Add(TEntity entity);

15

16         /// <summary>

17         /// 更新

18         /// </summary>

19         /// <param name="entity"></param>

20         bool Update(TEntity entity);

21

22         /// <summary>

23         /// 删除

24         /// </summary>

25         /// <param name="entity"></param>

26         bool Remove(TEntity entity);

27

28         /// <summary>

29         /// 查询全部

30         /// </summary>

31         /// <returns></returns>

32         IEnumerable<TEntity> GetAll();

33

34         /// <summary>

35         /// 查询根据条件

36         /// </summary>

37         /// <param name="conditions"></param>

38         /// <returns></returns>

39         IEnumerable<TEntity> Find(Expression<Func<TEntity, bool>> conditions);

40

41

42         /// <summary>

43         /// 保存

44         /// </summary>

45         /// <returns></returns>

46         Task<int> SaveChangesAsync();

47

48

49         /// <summary>

50         /// 保存

51         /// </summary>

52         /// <returns></returns>

53         int SaveChanges();

54     }
IRepository.cs
1     /// <summary>

2     /// IUserRepository接口

3     /// </summary>

4     public interface IUserRepository : IRepository<UserModel>

5     {

6         //一些UserModel独有的接口

7         Task<UserModel> GetByName(string name);

8     }
IUserRepository.cs
 1 public class UserRepository : Repository<UserModel>, IUserRepository

 2     {

 3         public UserRepository(UserContext context)

 4         {

 5             Db = context;

 6         }

 7

 8         #region 01,获取用户根据姓名+async Task<UserModel> GetByName(string name)

 9         /// <summary>

10         /// 获取用户根据姓名

11         /// </summary>

12         /// <param name="name">姓名</param>

13         /// <returns></returns>

14         public async Task<UserModel> GetByName(string name)

15         {

16             //返回一个新查询,其中返回的实体将不会在 System.Data.Entity.DbContext 中进行缓存

17             return await Db.Set<UserModel>().AsNoTracking().FirstOrDefaultAsync(c => c.Name == name);

18         }

19         #endregion

20     }
UserRepository.cs
注意,在更新操作中,有个小坑
每个项目都必须具有 id 给定分区键唯一的值。默认情况下,EF Core通过使用“ |”将区分符和主键值连接起来来生成该值。作为分隔符。仅当实体进入 Added 状态时才生成键值。如果实体 id 在.NET类型上没有属性来存储值,则在附加实体时可能会出现问题。
将实体标记为首先添加,然后将其更改为所需状态,我这里将状态改为 “Modified”
public virtual bool Update(TEntity entity)

{

     Db.Add(entity);

     Db.Entry(entity).State = EntityState.Modified;

     return true;

}
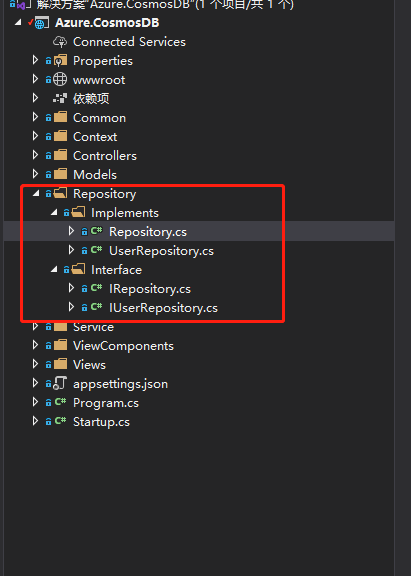
以下是整个仓储层的结构
2,实现业务层 Service 方法
2.1,这里我们的业务层的模型视图为 “UserViewModel”,但是我们的仓储使用的是实体数据模型 "UserModel",这里我引用 Automapper,进行对象转化 。
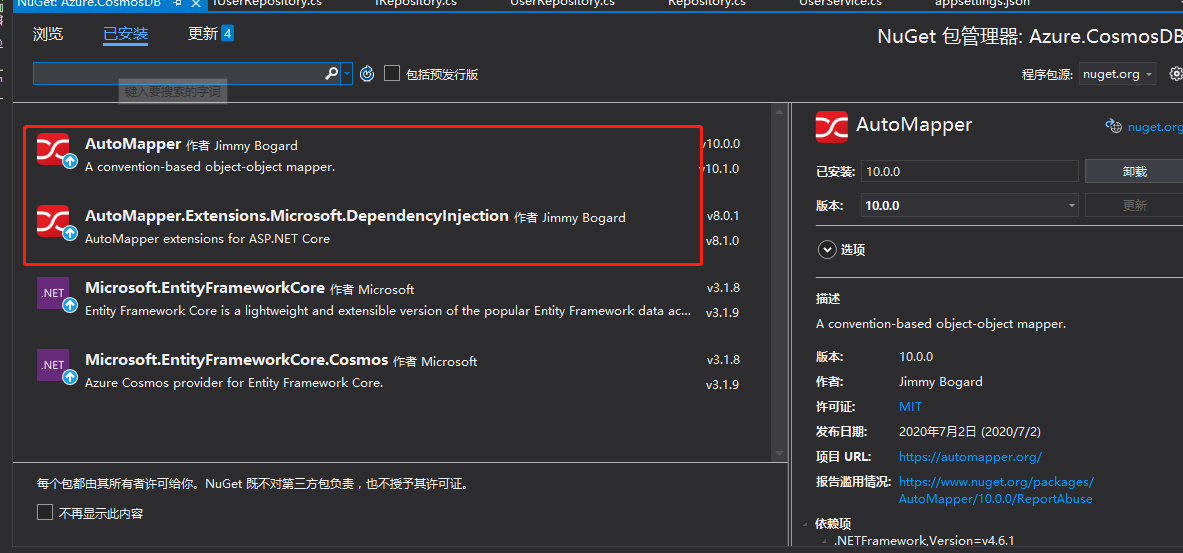
使用程序包管理控制台进行安装
Install-Package AutoMapper -Version 10.0.0
Install-Package AutoMapper.Extensions.Microsoft.DependencyInjection -Version 8.0.1
2.2,配置构建函数,用来创建关系映射
public DomainToViewModelMappingProfile()

{

     CreateMap<UserModel, UserViewModel>();

}
public ViewModelToDomainMappingProfile()

{

            //手动进行配置

            CreateMap<UserViewModel, UserModel>();

}
全局 AutoMapper 配置文件
/// <summary>

/// 静态全局 AutoMapper 配置文件

/// </summary>

public class AutoMapperConfig

{

    public static MapperConfiguration RegisterMappings()

    {

        //创建AutoMapperConfiguration, 提供静态方法Configure,一次加载所有层中Profile定义

        //MapperConfiguration实例可以静态存储在一个静态字段中,也可以存储在一个依赖注入容器中。 一旦创建,不能更改/修改。

        return new MapperConfiguration(cfg =>

        {

            //这个是领域模型 -> 视图模型的映射,是 读命令

            cfg.AddProfile(new DomainToViewModelMappingProfile());

            //这里是视图模型 -> 领域模式的映射,是 写 命令

            cfg.AddProfile(new ViewModelToDomainMappingProfile());

        });

    }

}
2.3,创建UserService 实现类,IApplicationService、IUserService 接口
 1 /// <summary>

 2     /// UserService 服务接口实现类,继承 服务接口

 3     /// </summary>

 4     public class UserService : IUserService

 5     {

 6         private readonly IUserRepository _UserRepository;

 7         // 用来进行DTO

 8         private readonly IMapper _mapper;

 9

10         public void Dispose()

11         {

12             GC.SuppressFinalize(this);

13         }

14

15         public UserService(

16             IUserRepository userRepository,

17             IMapper mapper)

18         {

19             _UserRepository = userRepository;

20             _mapper = mapper;

21         }

22

23         public IEnumerable<UserViewModel> GetAll()

24         {

25             //第一种写法 Map

26             return _mapper.Map<IEnumerable<UserViewModel>>(_UserRepository.GetAll());

27         }

28

29         public UserViewModel GetById(string partitionKey)

30         {

31             return _mapper.Map<UserViewModel>(_UserRepository.GetById(partitionKey).Result);

32         }

33

34         public async Task<int> Register(UserViewModel userViewModel)

35         {

36             var partitionKey = _UserRepository.GetAll().Max(x => int.Parse(x.PartitionKey));

37             userViewModel.PartitionKey = (++partitionKey).ToString();

38             await _UserRepository.Add(_mapper.Map<UserModel>(userViewModel));

39             return await _UserRepository.SaveChangesAsync();

40         }

41

42         public void Remove(string partitionKey)

43         {

44

45             _UserRepository.Remove(_mapper.Map<UserModel>(_UserRepository.GetById(partitionKey).Result));

46             _UserRepository.SaveChangesAsync();

47         }

48

49         public int Update(UserViewModel userViewModel)

50         {

51             _UserRepository.Update(_mapper.Map<UserModel>(userViewModel));

52             return _UserRepository.SaveChanges();

53         }

54     }
UserService.cs
 1 public interface IApplicationService<T> where T : class, new()

 2     {

 3         /// <summary>

 4         /// 获取全部数据

 5         /// </summary>

 6         /// <returns></returns>

 7         IEnumerable<T> GetAll();

 8

 9         /// <summary>

10         /// 获取单个数据

11         /// </summary>

12         /// <param name="partitionKey"></param>

13         /// <returns></returns>

14         T GetById(string partitionKey);

15

16         /// <summary>

17         /// 更新数据

18         /// </summary>

19         /// <param name="viewmodel"></param>

20         int Update(T viewmodel);

21

22         /// <summary>

23         /// 删除数据

24         /// </summary>

25         /// <param name="partitionKey"></param>

26         void Remove(string partitionKey);

27     }
IApplicationService.cs
1 public interface IUserService:IApplicationService<UserViewModel>

2     {

3         /// <summary>

4         /// 注册

5         /// </summary>

6         /// <param name="userViewModel"></param>

7         Task<int> Register(UserViewModel userViewModel);

8     }
IUserService.cs
3,创建 UserController 的CRUD 方法及页面
3.1,用户列表,用户详情控制器方法
// GET: User

public ActionResult Index()

{

    return View(_userService.GetAll());

}

// GET: User/Details/5

public ActionResult Details(string partitionKey)

{

   try

    {

        // TODO: Add insert logic here

        // 执行查询方法

        var userViewModel= _userService.GetById(partitionKey);

        return View(userViewModel);

    }

    catch

    {

        return View();

    }

}
3.2 用户列表,用户信息详细页面
Index.cshtml(用户列表)
@model IEnumerable<Azure.CosmosDB.Models.UserViewModel>

@{

    ViewData["Title"] = "Index";

}

<h1>Index</h1>

<p>

    <a asp-action="Create">Create New</a>

</p>

<table class="table">

    <thead>

        <tr>

            <th>

                @Html.DisplayNameFor(model => model.Id)

            </th>

            <th>

                @Html.DisplayNameFor(model => model.Name)

            </th>

            <th>

                @Html.DisplayNameFor(model => model.Age)

            </th>

            <th>

                @Html.DisplayNameFor(model => model.Address)

            </th>

            <th></th>

        </tr>

    </thead>

    <tbody>

        @foreach (var item in Model)

        {

            <tr>

                <td>

                    @Html.DisplayFor(modelItem => item.Id)

                </td>

                <td>

                    @Html.DisplayFor(modelItem => item.Name)

                </td>

                <td>

                    @Html.DisplayFor(modelItem => item.Age)

                </td>

                <td>

                    @Html.DisplayFor(modelItem => item.Address)

                </td>

                <td>

                    @Html.ActionLink("Edit", "Edit", new { partitionKey = item.PartitionKey }) |

                    @Html.ActionLink("Details", "Details", new { partitionKey = item.PartitionKey }) |

                    @Html.ActionLink("Delete", "Delete", new { partitionKey = item.PartitionKey })

                </td>

            </tr>

        }

    </tbody>

</table>
Details.cshtml(用户详情)
@model Azure.CosmosDB.Models.UserViewModel

@{

    ViewData["Title"] = "Details";

    Layout = "~/Views/Shared/_Layout.cshtml";

}

<h1>Details</h1>

<div>

    <h4>UserViewModel</h4>

    <hr />

    <dl class="row">

        <dt class = "col-sm-2">

            @Html.DisplayNameFor(model => model.PartitionKey)

        </dt>

        <dd class = "col-sm-10">

            @Html.DisplayFor(model => model.PartitionKey)

        </dd>

        <dt class = "col-sm-2">

            @Html.DisplayNameFor(model => model.Id)

        </dt>

        <dd class = "col-sm-10">

            @Html.DisplayFor(model => model.Id)

        </dd>

        <dt class = "col-sm-2">

            @Html.DisplayNameFor(model => model.Name)

        </dt>

        <dd class = "col-sm-10">

            @Html.DisplayFor(model => model.Name)

        </dd>

        <dt class = "col-sm-2">

            @Html.DisplayNameFor(model => model.Age)

        </dt>

        <dd class = "col-sm-10">

            @Html.DisplayFor(model => model.Age)

        </dd>

        <dt class = "col-sm-2">

            @Html.DisplayNameFor(model => model.Address)

        </dt>

        <dd class = "col-sm-10">

            @Html.DisplayFor(model => model.Address)

        </dd>

    </dl>

</div>

<div>

    @Html.ActionLink("Edit", "Edit", new { partitionKey = Model.PartitionKey }) |

    <a asp-action="Index">Back to List</a>

</div>
4,依赖注入仓储,服务模型以及AutoMap 配置等
// 注入 应用层Application

services.AddScoped<IUserService, UserService>();

// 注入 基础设施层 - 数据层

services.AddScoped<IUserRepository, UserRepository>();

//添加服务

services.AddAutoMapper(typeof(AutoMapperConfig));

//启动配置

AutoMapperConfig.RegisterMappings();
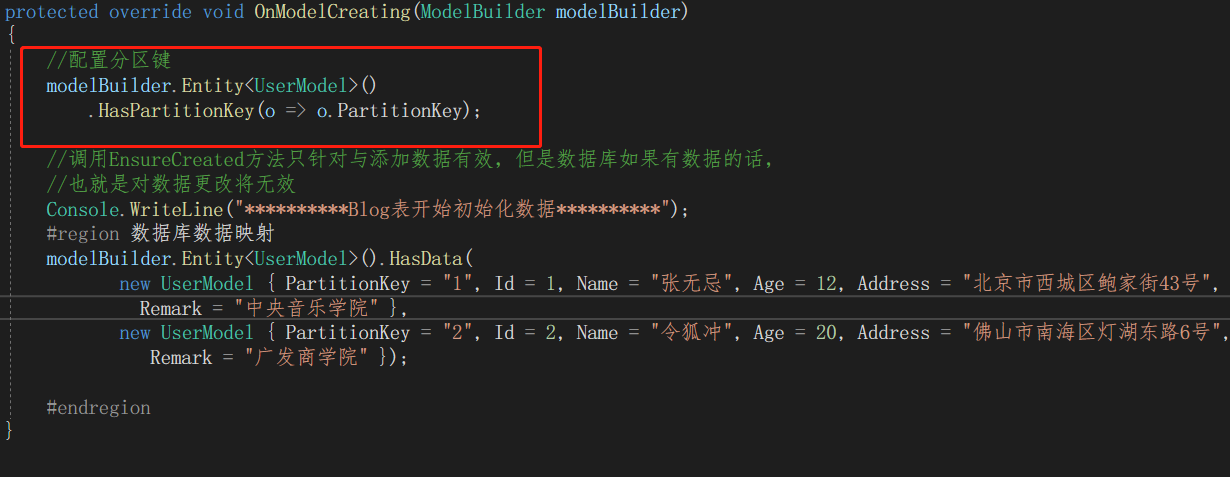
5,配置分区键(分区键属性可以是任何类型,只要将其转换为string)
默认情况下,EF Core将在创建分区时将分区键设置为的容器 "_partitionkey" 而不为其提供任何值。但是要充分利用 Azure Cosmos 的性能,应使用经过精心选择的分区键。可以通过调用HasPartitionKey进行配置:
//配置分区键

modelBuilder.Entity<UserModel>()

.HasPartitionKey(o => o.PartitionKey);
运行项目,可以看到用户列表信息,同时点击数据的 “Details” 可以看到用户数据详情信息。
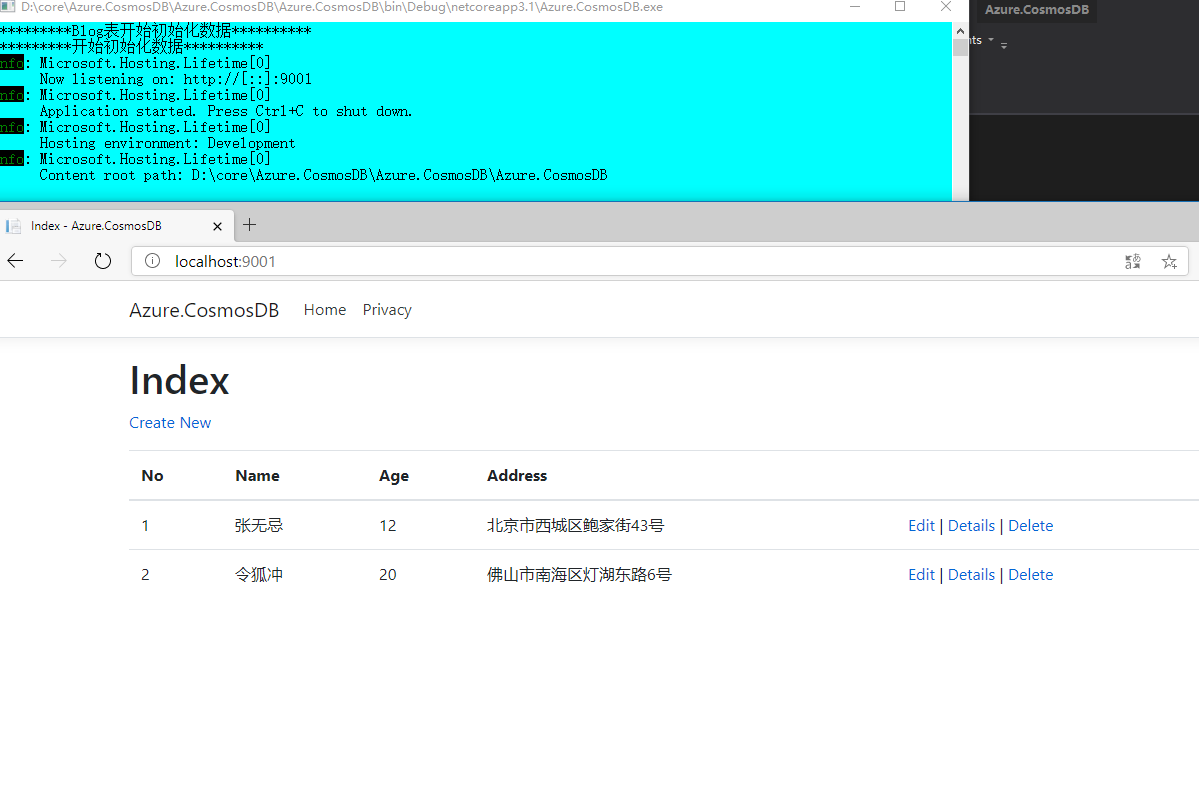
ok,这里就不再演示运行后,测试各个增删改查的方法,大家可以下载代码,配置本地环境,运行代码进行测试
撒花,今天的分析到此结束。
三,结尾
写这篇文章,花了我比预期更长的时间,主要耗时用在写Demo 上,查文档,写测试等。希望对大家有用。当然也可以加深我们对Cosmos DB可以做什么以及EF Core 3.1 如何操作 Cosmos DB 数据库所提供程序的有进一步的了解。
如果没有大家没有条件在Azure 上创建Cosmos DB 进行测试,学习,可以使用 “Azure Cosmos DB 仿真器”,仿真器在本地运行,并使用localdb存储结果。它还带有一个不错的界面,用于查看/编辑数据。
github:https://github.com/yunqian44/Azure.CosmosDB.git
作者:Allen
版权:转载请在文章明显位置注明作者及出处。如发现错误,欢迎批评指正。
Azure Cosmos DB (三) EF Core 操作CURD的更多相关文章
- Azure Cosmos DB (五) .Net Core 控制台应用
一,引言 之前在讲Azure CosmosDB Core(SQL)核心的时候,使用了EF Core 的方式,引用了 "Microsoft.EntityFrameworkCore.Cosmos ...
- Azure Cosmos DB (二) SQL API 操作
一,引言 还记得国庆期间,我们学习了一下关于Azure Cosmos DB 的一些基础知识以及Azure Cosmos DB 的几种支持数据库类型.今天就开始分享一些实战操作,如何通过Azure Po ...
- Azure Cosmos DB (四) 使用EF的SQL API 异地冗余
一,引言 上一篇文章中,我们介绍到使用了EF Core 与Cosmos DB SQL API 进行结合开发.同时,大家在开发过程中一定要记得EF Core 不支持Cosmos DB 的迁移.今天我们启 ...
- Azure Cosmos DB (一) 入门介绍
一,引言 今天是国庆.中秋双节房价的第三天,今天抽时间分享一篇关于使用Azure 提供的一项NoSql 服务-----Azure Cosmos DB.就有人问了,我听说过 MongoDB.Redis ...
- NCF 的Azure Cosmos DB 演示案例
简介 NCF想必看过我之前发的NCF的文章的同学们都已经很熟悉了 今天我们要来聊一聊的是NCF遇到Azure Cosmos DB后会碰撞出什么样的火花,让我们一起往下看 我们先来说说什么是Azure ...
- Asp.Net Core 2.0 项目实战(4)ADO.NET操作数据库封装、 EF Core操作及实例
Asp.Net Core 2.0 项目实战(1) NCMVC开源下载了 Asp.Net Core 2.0 项目实战(2)NCMVC一个基于Net Core2.0搭建的角色权限管理开发框架 Asp.Ne ...
- Azure Cosmos DB 使用费用参考
之前在学习Cosmos DB 中SQL API(DocumentDB) 的时候,也就是之前做的一些笔记,看到有使用费用的一些介绍,就有兴趣的去了解了下,做了一下简单的总结. 想了解更多或是购买使用的还 ...
- Azure Cosmos DB介绍及演示
Azure Cosmos DB 是 Microsoft 提供的全球分布式多模型数据库服务.Cosmos DB是一种NoSql数据库,但是它兼容多种API.它支持SQL, MongoDB.Cassand ...
- Azure CosmosDB (10) Azure Cosmos DB体系结构
<Windows Azure Platform 系列文章目录> Azure Cosmos DB的体系结构分为以下几个部分: 1.Database Accounts Database Acc ...
随机推荐
- kali命令大全
arch 显示机器的处理器架构(1)uname -m 显示机器的处理器架构(2)uname -r 显示正在使用的内核版本dmidecode -q 显示硬件系统部件 - (SMBIOS / DMI)hd ...
- leetcode刷题-47全排列2
题目 给定一个可包含重复数字的序列,返回所有不重复的全排列. 思路 其思路与46题完全一致,但是需要与组合总和2题一般,在同一层取出重复元素.因此可以在每一层设置一个set()类型,将访问过的元素放入 ...
- Git进阶之路:配置git同时推送github和gitee仓库
1. 进入工程根目录打开.git文件夹(需要显示隐藏文件夹) 2. 打开.git文件夹下的config文件进行编辑添加github和gitee仓库地址 3. 推送验证 github提交记录 gitee ...
- 对比 Redis 中 RDB 和 AOF 持久化
概念 Redis 是内存数据库,数据存储在内存中,一旦服务器进程退出,数据就丢失了,所以 Redis 需要想办法将存储在内存中的数据持久化到磁盘. Redis 提供了两种持久化功能: RDB (Red ...
- python字符串和列表小案例
python 目录 python 一.字符串 1.给定一个字符串,利用切片将字符串反转 2.给定一个字符串,将空格替换为逗号 3.给定一个字符串,大写改为小写 4.str = '' ,li = ['l ...
- Cloudera Manager和CDH安装部署
本次安装采用离线安装的方式,需要提前下载好需要的包. 1. 准备工作 1.1 环境说明 操作系统:RedHat企业级Linux6.5 64-bit Cloudera Manager:5.8.4 CDH ...
- NoSuchMethodError: org.springframework.beans.factory.config.BeanDefinition.getResolvableType
spring整合Mybatis报错: 解决方法: 检查maven依赖中的spring-jdbc和spring-webmvc是否版本一致 以下均为5.2.0.RELEASE版本 除此之外再检查是否有其他 ...
- k8s架构分析(二)
master节点 k8s的集群由master和node组成,节点上运行着若干k8s服务. master节点之上运行着的后台服务有kube-apiserver .kube-scheduler.kube- ...
- 云计算openstack——维护(15)
- 数据库:drop、truncate、delete的区别
近日在删除数据时,发现除了常用的Delete & Drop语句之外,还有Truncate也是与删除数据相关的,针对上述三种有进行简单的比较与整理 用法 drop 用法:drop table 表 ...