Redux教程2:链接React
通过前面的教程,我们有了简单的环境,并且可以运行Redux的程序,也对 如何编写Redux示例 有了初步的印象;
掌握了 使用Redux控制状态转移 ,继而驱动 React 组件发生改变,这才是学习Redux的初衷。
本篇我们将 Redux 和 React 联合起来,着重讲解redux-react模块的使用;
1、编写红绿灯React组件
在原有的基础上,我们编写红绿灯组件:
touch components/light/index.js components/light/index.less
在 components/light/index.js 中写React代码,其结构非常简单:
import React, { PropTypes, Component } from 'react'

import { render } from 'react-dom'

import classnames from 'classnames'

import './index.less'

class Light extends Component{

    render(){

        let color = this.props.light.color;

        return(

            <div className="traffic-light">

                <span className={classnames('light',color)} />

            </div>

        )

    }

}

Light.propTypes = {

    light: PropTypes.object.isRequired

}

Light.defaultProps = {

    light : {color:'red',time:'4'}

}

export default Light
根据更改样式类名('red'、'green'、'yellow'),从而移动 sprite图 产生灯变换的效果:
.traffic-light{

  .light{

    display: inline-block;

    background: url(//lh3.googleusercontent.com/-YWLqWZXDYHU/VmWC7GHoAuI/AAAAAAAACgk/nXvEmSWAhQU/s800/light.png) no-repeat 0 0;

    background-size: auto 100%;

    overflow: hidden;

    width:140px / 2;

    height:328px / 2;

    &.red{

      background-position: 0,0;

    }

    &.yellow{

      background-position: -78px , 0;

    }

    &.green{

      background-position: -156px , 0;

    }

  }

}
修改 components/light/demo.js 文件代码为:
import React, {Component, PropTypes} from 'react'

import {render} from 'react-dom'

import Light from './index'

var color = 'red';

render(

    <div id="traffic">

        <Light color={color}/>

    </div>,

    document.getElementById('demo')

)
这样就能通过 http://localhost:3000/light/demo 预览这个组件了;

2、链接React和redux
有了React和之前的Redux,现在就要将两者链接起来了。我们的目标是让红绿灯运行起来,就好比平时在十字路口看到的那样;
2.1、创建示例文件
再创建一个示例文件,就不叫demo了,叫做redux好了:
touch components/light/redux.js
之所以示例文件名称为
demo.js或redux.js,是因为我在 webpack.config.js 中配置了,如果想用其他的文件名,只要依样画葫芦就可以;
首先在 components/light/redux.js 中输入最基本的脚手架代码,引入所需要的组件或模块:
import React, {Component, PropTypes} from 'react'

import {render} from 'react-dom'

import { Provider, connect } from 'react-redux'

import { bindActionCreators } from 'redux'

import * as LightActions from '../../actions/light/'

import lightStore from '../../stores/light/'

import Light from './index'

// 声明store

let store = lightStore();
2.2、创建容器React
继而创建一个 App React类 ,作为总的容器,将上述的 Light 组件放入其中:
import React, {Component, PropTypes} from 'react'

import {render} from 'react-dom'

import { Provider, connect } from 'react-redux'

import { bindActionCreators } from 'redux'

import * as LightActions from '../../actions/light/'

import lightStore from '../../stores/light/'

import Light from './index'

// 声明store

let store = lightStore();

class App extends Component{

    _bind(...methods){

        methods.forEach((method)=>this[method] = this[method].bind(this));

    }

    constructor(){

        super();

        this._bind('autoChange','handleClick');

        this.state = {

            count : 0,

            timeId : null

        }

    }

    autoChange(){ // 自动更改红绿灯

        var _self = this;

        // 这里放置逻辑代码

        this.state.timeId = setTimeout(function(){

            // 递归调用,实现 setInterval 方法

            _self.autoChange();

        },1000);

    }

    handleClick(e){  // 用点击模拟红路灯

        if(this.state.timeId){

            clearTimeout(this.state.timeId);

            this.state.timeId = null;

        } else {

            this.autoChange();

        }

    }

    render(){

        // 通过connect 注入 redux 的 dispatch 方法

        return (

            <div id="traffic" onClick={this.handleClick}>

                <Light light={'yellow'}/>

            </div>

        )

    }

}
上面的代码还是个半成品,看不到效果;简单描述一下上面的代码做了什么:
- 定义
App容器,将 Light 组件放在其render方法中 - constructor 方法引用了 _bind 方法,方便一次性绑定
this上下文,该方法来自文章Refactoring React Components to ES6 Classes - handleClick 方法是纯粹是为了演示,当用户点击红绿灯的时候,红绿灯调用 autoChange方法 开始自动变换,用户再次点击的时候就停止变换;
- autoChange 方法用于红绿灯状态自动转换的,这里占位;本质是使用
setTimeout代替setInterval实现;
2.3、链接React组件和Redux类
这是最为关键的一个步骤,
class App extends Component{

    ...

}

// 声明 connect 连接

// 将 redux 中的 state传给 App

function mapStateToProps(state){

    return{

        light:state

    }

}

function mapDispatchToProps(dispatch){

    return{

        actions : bindActionCreators(LightActions,dispatch)

    }

}

// 声明 connect 连接

App = connect(mapStateToProps,mapDispatchToProps)(App);

// 真正的连接

render(

    <Provider store={store}>

        <App />

    </Provider>,

    document.getElementById('demo')

)
这里使用 react-redux 提供connect的方法 链接React组件和Redux类 :
// 声明 connect 连接

App = connect(mapStateToProps,mapDispatchToProps)(App);
- connect 方法不会改变原来的组件类,反而返回一个新的 已与 Redux store 连接的 组件类。注意这里并没有注入
store对象,真正store对象的注入靠最后的<Provider store>组件;(更多说明请参考 [react-redux 的 API][1]) - 传入 connect 的 mapStateToProps方法 ,正如其名,是将 Redux 的状态 映射到 React组件的props属性。任何时候,只要 Redux store 发生改变,mapStateToProps 函数就会被调用。这里返回对象是
{light:state},这样确保 Redux 中的 state 发生改变时,组件的 props.light 都是最新的 Redux state。 - mapDispatchToProps方法 则是将 Store 中的 dispatch方法 直接封装成对象的一个属性,一般会用到 Redux 的辅助函数bindActionCreators();这里将
dispatch绑定到action属性,这样在红绿灯组件内让其变成红灯的时候,不需要dispatch(changeRed())这么调用,直接使用actions.changeRed(),语义化更好;(更多说明请参考 [react-redux 的 API][1]) - 最后的
<Provider store>使组件层级中的 connect() 方法都能够获得 Redux store ,这里才真正注入store变量,之前的只是声明而已(之前的好比store是个形参,到了这一步store就是实参了)。(更多说明请参考 [react-redux 的 API][1])
经过上面的语句,Redux就将 state属性 、 (store 的)dispatch方法与 React 组件的 props 绑定在一起,凡是更改 redux 的 states,就会更新所连接组件的props属性。
react-redux 中的 connect 方法就算是HOC(High Order Component,高阶组件)了,具体原理可参考文章初识React中的High Order Component,这是因为如果使用ES6 写React组件的话,mixin是不支持的,因此使用High Order Component代替;
2.4、利用redux驱动react
理解了最为困难的部分,之后的事情就水到渠成了;
现在,只要记住 在App中可以直接使用Redux中的一切了 就行了
我们回过头来,完善App组件的代码,完善 autoChange 方法:
class App extends Component{

    _bind(...methods){

        methods.forEach((method)=>this[method] = this[method].bind(this));

    }

    constructor(){

        super();

        this._bind('changeColor','handleClick','autoChange');

        this.state = {

            count : 0,

            timeId : null

        }

    }

    changeColor(light,actions){ // 红路灯变换规则

        switch(light.color){

            case 'red':

                actions.changeGreen();

                break;

            case 'green':

                actions.changeYellow();

                break;

            case 'yellow':

                actions.changeRed();

                break;

            default:

                actions.changeRed();

        }

    }

    autoChange(){ // 自动更改红绿灯

        const { light, actions } = this.props;

        let _self = this;

        let curCount = ++this.state.count;

        // console.log('xx,',curCount);

        if(this.state.count > +light.time){

            curCount = 0;

            this.changeColor(light,actions);

        }

        // 自动更改

        this.state.timeId = setTimeout(function(){

            _self.setState({count:curCount});

            _self.autoChange();

        },1000);

    }

    handleClick(e){  // 用点击模拟红路灯

        if(this.state.timeId){

            clearTimeout(this.state.timeId);

        } else {

            this.autoChange();

        }

    }

    render(){

        // 通过connect 注入 redux 的 dispatch 方法

        const { light, actions } = this.props;

        return (

            <div id="traffic" onClick={this.handleClick.bind(this)}>

                <Light light={light}/>

            </div>

        )

    }

}
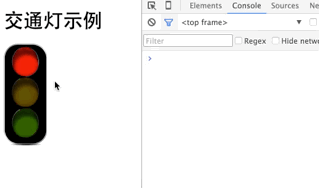
至此已经完成本节示例,通过npm start开启服务, 在 http://localhost:3000/light/redux 中查看。
在这个示例里,通过点击红绿灯,每隔若干秒红绿灯就会变换颜色,这说明两者已经链接起来;
(这个是gif图,如果没动画请点击在新窗口打开)
在后一篇文章,将示例如何处理多个Redux、React的情形;
[1]http://camsong.github.io/redux-in-chinese/docs/react-redux/api.html
Redux教程2:链接React的更多相关文章
- 【前端,干货】react and redux教程学习实践(二)。
前言 这篇博文接 [前端]react and redux教程学习实践,浅显易懂的实践学习方法. ,上一篇简略的做了一个redux的初级demo,今天深入的学习了一些新的.有用的,可以在生产项目中使用的 ...
- react+redux教程(五)异步、单一state树结构、componentWillReceiveProps
今天,我们要讲解的是异步.单一state树结构.componentWillReceiveProps这三个知识点. 例子 这个例子是官方的例子,主要是从Reddit中请求新闻列表来显示,可以切换reac ...
- react+redux教程(四)undo、devtools、router
上节课,我们介绍了一些es6的新语法:react+redux教程(三)reduce().filter().map().some().every()....展开属性 今天我们通过解读redux-undo ...
- react+redux教程(二)redux的单一状态树完全替代了react的状态机?
上篇react+redux教程,我们讲解了官方计数器的代码实现,react+redux教程(一).我们发现我们没有用到react组件本身的state,而是通过props来导入数据和操作的. 我们知道r ...
- redux 介绍及配合 react开发
前言 本文是 Redux 及 Redux 配合 React 开发的教程,主要翻译自 Leveling Up with React: Redux,并参考了 Redux 的文档及一些博文,相对译文原文内容 ...
- Redux教程1:环境搭建,初写Redux
如果将React比喻成士兵的话,你的程序还需要一位将军,去管理士兵(的状态),而Redux恰好是一位好将军,简单高效: 相比起React的学习曲线,Redux的稍微平坦一些:本系列教程,将以" ...
- react,react-router,redux+react-redux 构建一个React Demo
创建初始化应用 加速我们的npm. npm install -g cnpm --registry=https://registry.npm.taobao.org 利用create-react-app ...
- Redux管理你的React应用
使用Redux管理你的React应用 因为redux和react的版本更新的比较频繁,博客园这里用的redux版本是1.0.1,如果你关心最新版本的使用技巧,欢迎来我的Github查看(https ...
- react+redux教程(八)连接数据库的redux程序
前面所有的教程都是解读官方的示例代码,是时候我们自己写个连接数据库的redux程序了! 例子 这个例子代码,是我自己写的程序,一个非常简单的todo,但是包含了redux插件的用法,中间件的用法,连接 ...
随机推荐
- c a header file realize of multiple .c file
//I write a few variables declaration,then include this head-file in multiple realization-c-file,the ...
- 关于Java占用内存的研究
最近对程序占用内存方面做了一些优化,取得了不错的效果,总结了一些经验简要说一下,相信会对大家写出优质的程序有所帮助下面的论述针对32位系统,对64位系统不适用,后叙 经常你写了一个程序,一测试,功能没 ...
- CSUOJ_1001
/* * Title : A+B(II) * Data : 2016/11/09 * Author : Andrew */ #include <iostream> #include < ...
- OpenLayers图形与列表互动
项目上遇到这样一种需求:查询数据库后得到结果(带地理位置的)列表,每个结果在地图上都是一个四边形,四边形之间有交叉,有重叠,需要实现地图上的四边形和结果列表的互动.抛开其他逻辑功能,互动需求可以表示为 ...
- 深入学习 celery
一.amqp交换 参考链接: http://www.cnblogs.com/ajianbeyourself/p/4950758.html
- 老王讲自制RPC框架.(一.前言与技术选型)
(#)背景 随着互联网的发展,网站应用的规模不断扩大,常规的垂直应用架构已无法应对,分布式服务架构以及流动计算架构势在必行,亟需一个治理系统确保架构有条不紊的演进. 单一应用架构 当网站流量很小时,只 ...
- es5 and es6
es5学习地址:http://www.zhangxinxu.com/wordpress/2013/04/es5%E6%96%B0%E5%A2%9E%E6%95%B0%E7%BB%84%E6%96%B9 ...
- webpack ,gulp/grunt的介绍
http://www.jianshu.com/p/42e11515c10f# bfc的概念block formatting context http://www.cnblogs.com/dojo-lz ...
- 使用scrapy创建工程
前提:先创建一个文件夹用来存放爬虫工程 创建项目命令: scrapy startproject <project_name> 例子: scrapy startproject myproje ...
- PE文件学习系列二 DOS头分析
合肥程序员群:49313181. 合肥实名程序员群 :128131462 (不愿透露姓名和信息者勿加入)Q Q:408365330 E-Mail:egojit@qq.com PE文件结 ...