05: 使用axios/vue-resource发送HTTP请求
1.1 axios 简介与安装
1、axios简介
1. vue本身不支持发送AJAX请求,需要使用vue-resource、axios等插件实现
2. axios是一个基于Promise的HTTP请求客户端,用来发送请求,也是vue2.0官方推荐的,同时不再对vue-resource进行更新和维护
3. 参考:GitHub上搜索axios,查看API文档:https://github.com/axios/axios
2、安装axios
1. npm install axios -S # 也可直接下载axios.min.js文件
2. 下载后即到 C:\Users\tom\node_modules\axios\dist 路径下找到 axios.min.js 文件
1.2 axios 基本用法
1、 axios最基本使用
<!DOCTYPE html>

<html lang="en">

<head>

  <meta charset="UTF-8">

  <title>发送AJAX请求</title>

</head>

<body>

<div id="itany">

  <button @click="sendGet">GET方式发送AJAX请求</button>

</div>

<script src="js/vue.js"></script>

<script src="js/axios.min.js"></script>

<script src="js/qs.js"></script>

<script>

  window.onload=function(){

    new Vue({

      el:'#itany',

      data:{

        uid:''

      },

      methods:{

        sendGet(){

          // 1、发送get请求

          axios({

            url: 'http://127.0.0.1:8000/data/',                 //1、请求地址

            method: 'get',                                        //2、请求方法

            params: {ids: [1,2,3],type: 'admin'},                //3、get请求参数

          })

          // 2、回调函数

          .then(resp => {

            console.log(resp.data);

          })

          // 3、捕获异常

          .catch(err => {

            console.log('请求失败:'+err.status+','+err.statusText);

          });

        }

      }

    });

  }

</script>

</body>

</html>
get: axios最基本get请求参数
<!DOCTYPE html>

<html lang="en">

<head>

  <meta charset="UTF-8">

  <title>发送AJAX请求</title>

</head>

<body>

<div id="itany">

  <button @click="sendPost">POST方式发送AJAX请求</button>

</div>

<script src="js/vue.js"></script>

<script src="js/axios.min.js"></script>

<script src="js/qs.js"></script>

<script>

  window.onload=function(){

    new Vue({

      el:'#itany',

      data:{

        uid:''

      },

      methods:{

        sendPost(){

          // 1、发送post请求

          axios({

            url: 'http://127.0.0.1:8000/data/',             //1、请求地址

            method: 'post',                                  // 2、请求方法

            data: {ids: [1,2,3],type: 'admin'},              //3、提交数据

            transformRequest:[                               //4、在发送请求前可以改变要传的数据

              function(data){

                let params='';

                for(let index in data){

                  params+=index+'='+data[index]+'&';         //5、拼接成:name=alice&age=20& 的字符串

                }

                return params;

              }

            ]

        })

        // 2、回调函数

        .then(resp => {

          console.log(resp.data);

        })

        // 3、捕获异常

        .catch(err => {

          console.log('请求失败:'+err.status+','+err.statusText);

        });

        }

      }

    });

  }

</script>

</body>

</html>
post: axios发送最基本post请求参数
2、axios借助Qs对提交数据进行序列化
axios参考博客:https://www.jianshu.com/p/68d81da4e1ad
https://www.cnblogs.com/yiyi17/p/9409249.html
<!DOCTYPE html>

<html lang="en">

<head>

  <meta charset="UTF-8">

  <title>发送AJAX请求</title>

</head>

<body>

<div id="itany">

  <button @click="sendGet">GET方式发送AJAX请求</button>

</div>

<script src="js/vue.js"></script>

<script src="js/axios.min.js"></script>

<script src="js/qs.js"></script>

<script>

  window.onload=function(){

    new Vue({

      el:'#itany',

      data:{

        uid:''

      },

      methods:{

        sendGet(){

          // 1、发送get请求

          axios({

            url: 'http://127.0.0.1:8000/data/',                 //1、请求地址

            method: 'get',                                        //2、请求方法

            params: {ids: [1,2,3],type: 'admin'},                //3、get请求参数

            paramsSerializer: params => {                          //4、可选函数、序列化`params`

              return Qs.stringify(params, { indices: false })

            },

            responseType: 'json',                                //5、返回默认格式json

            headers: {'authorization': 'xxxtokenidxxxxx'},     //6、认证token

          })

          // 2、回调函数

          .then(resp => {

            console.log(resp.data);

          })

          // 3、捕获异常

          .catch(err => {

            console.log('请求失败:'+err.status+','+err.statusText);

          });

        }

      }

    });

  }

</script>

</body>

</html>
get:axios发送get请求
<!DOCTYPE html>

<html lang="en">

<head>

  <meta charset="UTF-8">

  <title>发送AJAX请求</title>

</head>

<body>

<div id="itany">

  <button @click="sendPost">POST方式发送AJAX请求</button>

</div>

<script src="js/vue.js"></script>

<script src="js/axios.min.js"></script>

<script src="js/qs.js"></script>

<script>

  window.onload=function(){

    new Vue({

      el:'#itany',

      data:{

        uid:''

      },

      methods:{

        sendPost(){

          // 1、发送post请求

          axios({

            url: 'http://127.0.0.1:8000/data/',             //1、请求地址

            method: 'post',                                  // 2、请求方法

            data: Qs.stringify(                               //3、可选函数、序列化`data`

              {ids: [1,2,3],type: 'admin'},                  //4、提交数据

              { indices: false }                             // indices: false

            ),

            responseType: 'json',                           //5、返回默认格式json

            headers: {'authorization': 'xxxtokenidxxxxx'},//6、身份验证token

        })

        // 2、回调函数

        .then(resp => {

          console.log(resp.data);

        })

        // 3、捕获异常

        .catch(err => {

          console.log('请求失败:'+err.status+','+err.statusText);

        });

        }

      }

    });

  }

</script>

</body>

</html>
post: axios发送post请求
def data(request):

    if request.method == 'GET':

        token_id = request.META.get('HTTP_AUTHORIZATION')  # header中的tokenid

        print(request.GET.getlist('ids'))                   # 获取get请求中列表

        data = {

            'id':1,

            'name': 'zhangsan'

        }

        return HttpResponse(json.dumps(data))

    elif request.method == 'POST':

        token_id = request.META.get('HTTP_AUTHORIZATION')  # header中的tokenid

        print(request.POST.getlist('ids'))                  # 获取post请求中的列表

        data = {

            'id':1,

            'name': 'zhangsan',

            'method': 'POST'

        }

        return HttpResponse(json.dumps(data))
views.py后端测试接口
#1、qs用途:  在 axios中,利用QS包装data数据

#2、安 装:    npm install qs -S

#3、常见用法:

'''

import Qs from 'qs';

Qs.stringify(data);

Qs.parse(data)

'''
3、vuejs借助axios发送ajax请求(同级目录下创建以下两个文件)
{

    "id":1001,

    "name":"秋香",

    "age":18

}
user.json
<!DOCTYPE html>

<html lang="en">

<head>

    <meta charset="UTF-8">

    <title>发送AJAX请求</title>

</head>

<body>

    <div id="itany">

        <button @click="send">发送AJAX请求</button>

    </div>

    <script src="js/vue.js"></script>

    <script src="js/axios.min.js"></script>

    <script>

        window.onload=function(){

            new Vue({

                el:'#itany',

                data:{

                    user:{

                        // name:'alice',

                        // age:19

                    },

                    uid:''

                },

                methods:{

                    send(){

                        axios({

                            method:'get',

                            url:'user.json'

                        }).then(function(resp){        // 请求成功调用此函数

                            console.log(resp.data);    // {id: 1001, name: "秋香", age: 18}

                        }).catch(resp => {              // 请求失败调用此函数

                            console.log('请求失败:'+resp.status+','+resp.statusText);

                        })

                    }

                }

            });

        }

    </script>

</body>

</html>
index.html
<!DOCTYPE html>

<html lang="en">

<head>

    <meta charset="UTF-8">

    <title>发送AJAX请求</title>

</head>

<body>

    <div id="itany">

        GitHub ID: <input type="text" v-model="uid">

        <button @click="getUserById(uid)">获取指定GitHub账户信息并显示</button>

        <br>

        姓名:{{user.name}} <br>

        头像:<img :src="user.avatar_url" alt="">

        <hr>

    </div>

    <script src="js/vue.js"></script>

    <script src="js/axios.min.js"></script>

    <script>

        window.onload=function(){

            new Vue({

                el:'#itany',

                data:{

                    user:{

                        name:'alice',

                        age:19

                    },

                    uid:''

                },

                methods:{

                    getUserById(uid){

                        axios.get(`https://api.github.com/users/${uid}`)

                        .then(resp => {

                            // console.log(resp.data);

                            this.user=resp.data;

                        });

                    },

                }

            });

        }

    </script>

</body>

</html>
例2:发送get请求,输入GitHub用户id获取用户名和头像
4、vuejs借助axios发送get请求
<?php

    //获取参数

    $name=$_POST['name'];

    $age=$_POST['age'];

    //响应数据

    echo '姓名:',$name,',年龄:',$age;

?>
server.php
<!DOCTYPE html>

<html lang="en">

<head>

    <meta charset="UTF-8">

    <title>发送AJAX请求</title>

</head>

<body>

    <div id="itany">

        <button @click="sendGet">GET方式发送AJAX请求</button>

    </div>

    <script src="js/vue.js"></script>

    <script src="js/axios.min.js"></script>

    <script>

        window.onload=function(){

            new Vue({

                el:'#itany',

                data:{

                    user:{

                        // name:'alice',

                        // age:19

                    },

                    uid:''

                },

                methods:{

                    sendGet(){                        // axios.get('server.php?name=tom&age=23')

                        axios.get('server.php',{

                            params:{

                                name:'alice',

                                age:19

                            }

                        })

                        .then(resp => {

                            console.log(resp.data);

                        }).catch(err => {

                            console.log('请求失败:'+err.status+','+err.statusText);

                        });

                    },

                }

            });

        }

    </script>

</body>

</html>
index.html
5、vuejs借助axios发送post请求
1. axios默认发送数据时,数据格式是Request Payload,并非我们常用的Form Data格式,
2. 所以参数必须要以键值对形式传递,不能以json形式传参
3. 传参方式:
1. 自己拼接为键值对
2. 使用transformRequest,在请求发送前将请求数据进行转换
3. 如果使用模块化开发,可以使用qs模块进行转换
<?php

    //获取参数

    $name=$_POST['name'];

    $age=$_POST['age'];

    //响应数据

    echo '姓名:',$name,',年龄:',$age;

?>
server.php
<!DOCTYPE html>

<html lang="en">

<head>

    <meta charset="UTF-8">

    <title>发送AJAX请求</title>

</head>

<body>

    <div id="itany">

        <button @click="sendPost">POST方式发送AJAX请求</button>

    </div>

    <script src="js/vue.js"></script>

    <script src="js/axios.min.js"></script>

    <script>

        window.onload=function(){

            new Vue({

                el:'#itany',

                data:{

                    user:{

                        name:'alice',

                        age:19

                    },

                    uid:''

                },

                methods:{

                    sendPost(){

                        // axios.post('server.php',{     // 这个是官方给出的post请求,但是后天无法收到

                        //         name:'alice',

                        //         age:19

                        // })

                        // axios.post('server.php','name=alice&age=20&') //方式1

                        axios.post('server.php',this.user,{

                            transformRequest:[                 // 在发送请求前可以改变要传的数据

                                function(data){

                                    let params='';

                                    for(let index in data){

                                        params+=index+'='+data[index]+'&';   // 拼接成:name=alice&age=20& 的字符串

                                    }

                                    return params;

                                }

                            ]

                        })

                        .then(resp => {

                            console.log(resp.data);

                        })

                        .catch(err => {

                            console.log('请求失败:'+err.status+','+err.statusText);

                        });

                    },

                }

            });

        }

    </script>

</body>

</html>
vuejs借助axios发送post请求
1.3 使用vue-resource发送跨域请求
1、安装vue-resource并引入
1. cnpm install vue-resource -S
2. 参考:GitHub上搜索 vue-resource ,查看API文档:https://github.com/pagekit/vue-resource
2、基本用法
使用this.$http发送请求
this.$http.get(url, [options])
this.$http.head(url, [options])
this.$http.delete(url, [options])
this.$http.jsonp(url, [options])
this.$http.post(url, [body], [options])
this.$http.put(url, [body], [options])
this.$http.patch(url, [body], [options])
3、使用
<!DOCTYPE html>

<html lang="en">

<head>

    <meta charset="UTF-8">

    <title>发送AJAX请求</title>

</head>

<body>

    <div id="itany">

        <button @click="sendJSONP">向360搜索发送JSONP请求</button>

    </div>

    <script src="js/vue.js"></script>

    <script src="js/vue-resource.min.js"></script>

    <script>

        window.onload=function(){

            new Vue({

                el:'#itany',

                data:{

                    user:{

                        name:'alice',

                        age:19

                    },

                    uid:''

                },

                methods:{

                    sendJSONP(){

                        //https://sug.so.360.cn/suggest?callback=suggest_so&encodein=utf-8&encodeout=utf-8&format=json&fields=word&word=a

                        this.$http.jsonp('https://sug.so.360.cn/suggest',{

                            params:{

                                word:'python'            // 要查询的内容

                            }

                        }).then(resp => {

                            console.log(resp.data.s);    // 返回的查询结果

                            // ["python官网", "python视频教程", "python 培训", "python基础教程", "python下载", ]

                        });

                    },

                }

            });

        }

    </script>

</body>

</html>
向360搜索发送JSONP请求
<!DOCTYPE html>

<html lang="en">

<head>

    <meta charset="UTF-8">

    <title>发送AJAX请求</title>

</head>

<body>

    <div id="itany">

        <button @click="sendJSONP2">向百度搜索发送JSONP请求</button>

    </div>

    <script src="js/vue.js"></script>

    <script src="js/vue-resource.min.js"></script>

    <script>

        window.onload=function(){

            new Vue({

                el:'#itany',

                data:{

                    user:{

                        name:'alice',

                        age:19

                    },

                    uid:''

                },

                methods:{

                    sendJSONP2(){

                        //https://sp0.baidu.com/5a1Fazu8AA54nxGko9WTAnF6hhy/su?wd=a&json=1&p=3&sid=1420_21118_17001_21931_23632_22072&req=2&csor=1&cb=jQuery110208075694879886905_1498805938134&_=1498805938138

                        this.$http.jsonp('https://sp0.baidu.com/5a1Fazu8AA54nxGko9WTAnF6hhy/su',{

                            params:{

                                wd:'a'

                            },

                            jsonp:'cb' //百度使用的jsonp参数名为cb,所以需要修改

                        }).then(resp => {

                            console.log(resp.data.s);

                            // ["爱奇艺", "阿黛尔", "艾力绅", "阿里云", "阿里巴巴", "安居客", ]

                        });

                    }

                }

            });

        }

    </script>

</body>

</html>
向百度搜索发送JSONP请求
4、发送get请求,并将请求内容添加到插件中
get(url, option)
Url :表示请求地址
Option :表示请求配置
Params :定义query数据
<!DOCTYPE html>
<html lang="en">
<head>
<meta charset="UTF-8">
<meta http-equiv="x-ua-compatible" content="IE=edge">
<meta name="viewport" content="width=device-width, initial-scale=1">
<title>Title</title>
</head>
<body>
<div id="app">
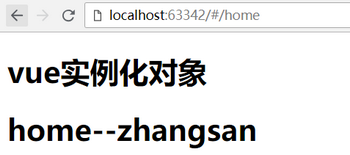
<h1>vue实例化对象</h1>
<router-view></router-view> <!--定义渲染容器-->
</div> <script type="text/javascript" src="vue.js"></script>
<script type="text/javascript" src="vue-router.js"></script>
<script type="text/javascript" src="vue-resource.min.js"></script>
<script>
var Home = {
template:'<h1>home--{{data}}</h1>',
data:function () {
return {
data:''
}
},
created:function () {
this.$http.get('demo.json?123',{
params:{
color:'red'
}
})
.then(function (res) {
this.data = res.data.name // res.data 是请求获取的内容
})
}
}; // 第一步:定义路由规则
var routes = [
{
path:'/home',
name:'home',
component:Home
},
]; // 第二步:实例化路由对象
var router = new VueRouter({
routes:routes
}); // 第三步:在vue实例化对象中注册路由
var app = new Vue({
el:'#app',
router:router
})
</script>
</body>
</html>
发送get请求
5、发送post请求
post(url, data, option)
Url :表示请求地址
Data :表示请求的数据
Option :表示请求的配置
Params :定义query数据
<!DOCTYPE html>

<html lang="en">

<head>

    <meta charset="UTF-8">

    <meta http-equiv="x-ua-compatible" content="IE=edge">

    <meta name="viewport" content="width=device-width, initial-scale=1">

    <title>Title</title>

</head>

<body>

    <div id="app">

        <h1>vue实例化对象</h1>

        <router-view></router-view>        <!--定义渲染容器-->

    </div>

    <script type="text/javascript" src="vue.js"></script>

    <script type="text/javascript" src="vue-router.js"></script>

    <script type="text/javascript" src="vue-resource.min.js"></script>

    <script>

        var Home = {

            template:'<h1>home--{{data}}</h1>',

            data:function () {

                return {

                    data:''

                }

            },

            created:function () {

                this.$http.post('demo.json?123',{'arg1':'price'},{

                    params:{

                        b:200

                    }

                })

                    .then(function (res) {

                        this.data = res.data.name  //  res.data 是请求获取的内容

                    })

            }

        };

        // 第一步:定义路由规则

        var routes = [

            {

                path:'/home',

                name:'home',

                component:Home

            },

        ];

        // 第二步:实例化路由对象

        var router = new VueRouter({

            routes:routes

        });

        // 第三步:在vue实例化对象中注册路由

        var app = new Vue({

            el:'#app',

            router:router

        })

    </script>

</body>

</html>
发送post请求
1.4 封装axios请求
1、初始化环境
vue init webpack deaxios
npm install axios –S
cnpm install vuex -S
2、封装axios(创建 src/api 文件夹)
export default {

  // api请求地址

  // API_URL: 'http://mup.dev.yiducloud.cn/'

  API_URL: 'http://1.1.1.3:8888'

}
config\urls.js 配置全局url变量
import Axios from 'axios'

import URLS from '../../config/urls'

//1、使用自定义配置新建一个 axios 实例

const instance = Axios.create({

  baseURL: URLS.API_URL,

  headers: {

    'Content-Type': 'application/json'

  }

});

//2、添加请求拦截器

instance.interceptors.request.use(

  config => {

    //发送请求前添加认证token

    config.headers.Authorization = sessionStorage.getItem('token')

    // console.log(sessionStorage.getItem('token'),11223344)

    return config

  },

  err => {

    return Promise.reject(err)

  });

//3、添加响应拦截器

instance.interceptors.response.use(function (response) {

  // 对响应数据处理

  if (response.status === 200 || response.status === 201 || response.status === 400) {

    const data = response.data

    if (data.code === 200 || data.code === 201) {

      return data

    }

  }

  return Promise.reject(response)

}, function (error) {

  if (error.response) {

    switch (error.response.status) {

      case 400:

        return Promise.reject(error.response.data)

      case 401:

        window.location.href = '/login'

    }

  }

  // const errorData = error.response.data

  // if (errorData.code === 400) {

  //   return Promise.reject(errorData.desc)

  // }

  // return Promise.reject(errorData)

})

// export const getNodegroups = params => { return instance.get(`${base}/nodegroup/v1/nodegroups/list/`, params).then(res => res.data) }

// export const getNodegroups = params => { return instance.get(`/nodegroup/v1/nodegroups/list/`, params).then(res => res) }

export default instance
src\api\ajax.js
import URLS from '../../config/urls'

import ajax from './ajax'

let base = URLS.API_URL

// 用户相关

export const requestLogin = params => { return ajax.post(`${base}/users/v1/user/login/`, params).then(res => res) }
src\api\api.js
import * as api from './api'

export default api
src\api\index.js
3、使用vuex
import Vue from 'vue'

import Vuex from 'vuex'

import login from './modules/login/login'

Vue.use(Vuex);

export default new Vuex.Store({

  modules:{

    login

  }

});
src\store\index.js
import {

  requestLogin,

} from '../../../api/api'  // 导入封装后的axios请求

const state = {}

const getters = {}

const actions = {

  async loginMethod ({commit}, params) {

    return requestLogin(params).then(response => response)

  },

};

const mutations = {}

export default {

  state,

  getters,

  actions,

  mutations

}
src\store\modules\login\login.js
4、入口
// The Vue build version to load with the `import` command

// (runtime-only or standalone) has been set in webpack.base.conf with an alias.

import Vue from 'vue'

import App from './App'

import router from './router'

import store from './store/index'

Vue.config.productionTip = false

/* eslint-disable no-new */

new Vue({

  el: '#app',

  router,

  store,

  components: { App },

  template: '<App/>'

})
main.js 导入store
<template>

  <div id="app">

    <p @click="handleLogin">点击发送axiso请求</p>

    <router-view/>

  </div>

</template>

<script>

  import { mapActions } from 'vuex'

export default {

  name: 'App',

  methods: {

    ...mapActions(['loginMethod']),

    handleLogin () {

          var loginParams = { username: 'zhangsan', password: '123456' }

          this.loginMethod(loginParams).then(response => {

            // this.logining = false

            sessionStorage.setItem('token', response.data)

            // this.$router.push({ path: '/' })

          }).catch(error => {

            this.loading = false

            this.error(error.desc ? error.desc : '服务器异常')

          })

        }

    },

}

</script>

<style>

#app {

  font-family: 'Avenir', Helvetica, Arial, sans-serif;

  -webkit-font-smoothing: antialiased;

  -moz-osx-font-smoothing: grayscale;

  text-align: center;

  color: #2c3e50;

  margin-top: 60px;

}

</style>
App.vue 组件发送请求

5、封装axios作用
1. 我们在此将此项目所用到的所有接口调用方法都做了定义,这样既方便查看也利于管理。在
2. 我们需要调用接口方法的时候,我们只需要在对应vue文件中的标签里直接import想用的接口方法就行了
例如:import { getOptList,branchList,addOperator } from "../../api/index";
6、使用vuex发送get请求
import Vue from 'vue'

import Vuex from 'vuex'

import meeting from './modules/meeting/meeting'

Vue.use(Vuex)

export default new Vuex.Store({

  strict: process.env.NODE_ENV !== 'production',

  modules: {

    meeting

  }

})
src\store\index.js
import {

  getMeetingList

} from '../../../api/api'

import {getUrl} from "../../../utils/global/geturl";  // 导入封装后的axios请求

const state = {};

const getters = {};

const actions = {

  async getMeetingListMethod ({commit}, params) {

    return getMeetingList(getUrl(params)).then(response => response)

  },

};

const mutations = {};

export default {

  state,

  getters,

  actions,

  mutations

}
src/store/modules/meeting/meeting.js
<template>

</template>

<script>

  import { mapActions } from 'vuex'

  export default {

    data() {

      return {};

    },

    methods: {

      ...mapActions(['getMeetingListMethod']),

      // 获取会议室信息

      requestMeetingListMethod () {

        var parms = {};

        this.getMeetingListMethod(parms).then(response => {

          console.log(123456)

          console.log(response)

          // this.tableData = response.data.data_list

          // this.listQuery.total = response.data.total

          this.loading = false

        }).catch(error => {

          this.loading = false;

          this.error(error.desc ? error.desc : '服务器异常')

        })

      },

    },

    created(){

      this.requestMeetingListMethod();  // 获取会议室信息

    },

  };

</script>

<style scoped>

</style>
src/views/meeting/index.vue
05: 使用axios/vue-resource发送HTTP请求的更多相关文章
- vue resource 携带cookie请求 vue cookie 跨域
vue resource 携带cookie请求 vue cookie 跨域 1.依赖VueResource 确保已安装vue-resource到项目中,找到当前项目,命令行输入: npm instal ...
- Vue中发送ajax请求——axios使用详解
axios 基于 Promise 的 HTTP 请求客户端,可同时在浏览器和 node.js 中使用 功能特性 在浏览器中发送 XMLHttpRequests 请求 在 node.js 中发送 htt ...
- vue使用resource发送ajax请求
<script type="text/javascript"> new Vue({ el:'#app', created:function(){ var url=&qu ...
- vue resource 携带cookie请求 vue cookie 跨域(六)
1.依赖VueResource 确保已安装vue-resource到项目中,找到当前项目,命令行输入: npm install vue-resource --save 在主方法添加 过滤 Vue.h ...
- Vue vue-resource发送Http请求
vue-resource 1.cnpm install vue-resource --save 2.在main.js中import VueResource from 'vue-resource' 3. ...
- Vue.js 第3章 axios&Vue过渡动画
promise 它将我们从回调地狱中解脱出来 创建和使用 var fs = require('fs') // 创建promise // reslove表示执行成功后调用的回调函数 // reject表 ...
- Vue.js使用-http请求
Vue.js使用-ajax使用 1.为什么要使用ajax 前面的例子,使用的是本地模拟数据,通过ajax请求服务器数据. 2.使用jquery的ajax库示例 new Vue({ el: '#app' ...
- Ajax_axios发送ajax请求
Ajax_axios发送ajax请求 这篇笔记主要讲一下axios基本的发送ajax请求的方法 axios在当前的前端行业里面是用的比较热门的一个 下面给大家分享一下它axios的一个基本用法 这段代 ...
- vue 集成 axios 发送post请求 payload导致后台无法接收到数据问题
vue 集成axios之后,发送的post请求默认为payload 方式. 如果想改为正常的方式,需要增加headers头,并且将发送是数据json格式改为 querystring的方式. 安装依赖 ...
随机推荐
- javascript另类方法高效实现htmlencode()与htmldecode()函数
最常见的做法是采用正则表达式替换的方法,将特殊字符如 < > & 等进行替换,htmlencode的时候这样替换还比较容易,但发过来htmldecode的时候就不一定好用了,因为需 ...
- Python的Numpy库简述
numpy 是 python 的科学计算库import numpy as np 1.使用numpy读取txt文件 # dtype = "str":指定数据格式 # delimite ...
- SQLServer 里面的 DDL,DML,DCL,TCL(转)
1.DDL (Data Definition Language )数据库定义语言 statements are used to define the database structure or sch ...
- 关于double精确度的简单问题
(1)测试TestDouble.java结果 结果:如图,使用double类型的数据进行运算时结果是不准确的. 原因:double类型的数值占用64bit,即64个二进制数,除去最高位表示正负符号的位 ...
- Browsersync结合gulp和nodemon实现express全栈自动刷新
Browsersync能让浏览器实时.快速响应你的文件更改(html.js.css.sass.less等)并自动刷新页面.更重要的是 Browsersync可以同时在PC.平板.手机等设备下进项调试. ...
- Unity shader学习之逐顶点漫反射光照模型
公式如下: Cdiffuse = Clight * mdiffuse * max(0, dot(n,l)); 其中,n 为表面法线,l 为指向光源的单位向量,mdiffuse 为材质温反射颜色,Cdi ...
- [9]Windows内核情景分析 --- DPC
DPC不同APC,DPC的全名是'延迟过程调用'. DPC最初作用是设计为中断服务程序的一部分.因为每次触发中断,都会关中断,然后执行中断服务例程.由于关中断了,所以中断服务例程必须短小精悍,不能消耗 ...
- 7.线程id,优先级讲解
1.线程id可以通过Thread对象的getId()方法得到,在线程出了问题,为什么CPU占用这么高的时候,查的时候我们可以在堆栈信息中找到对应线程,然后干掉该线程就好! 2.而线程对象的getNam ...
- UML之通信图
通信图的概念:通信图(协作图)是表现对象交互关系的图,它展现了多个对象在协同工作达成共同目标的过程中互相通信的情况,通过对象和对象之间的链.发送的消息来显示参与交互的对象. 首先通信图一样是一种交互图 ...
- html5-css渐变色
div{ width: 300px; height: 100px; margin: 50px; padding: 50px; border:5px groove rgba ...