TextView和Button的学习
常用属性,界面跳转,按钮学习,按压颜色的变换,图片的插入学习等
工程目录:

MainActivity.java:
package com.example.revrse;

import androidx.appcompat.app.AppCompatActivity;

import android.content.Intent;

import android.os.Bundle;

import android.view.View;

import android.widget.Button;

public class MainActivity extends AppCompatActivity {

   private Button mBtnEditText;

   private Button mBtnTextView;

   private Button mBtnButton;

    @Override

    protected void onCreate(Bundle savedInstanceState) {

        super.onCreate(savedInstanceState);

        setContentView(R.layout.activity_main);

        mBtnTextView=findViewById(R.id.btn_textview);

        mBtnTextView.setOnClickListener(new View.OnClickListener(){

            @Override

            public void onClick(View v){

                //跳转到TextView演示界面

                Intent intent=new Intent(MainActivity.this,TextViewActivity.class);

                startActivity(intent);

            }

        });

        mBtnButton=findViewById(R.id.btn_button);

        mBtnButton.setOnClickListener(new View.OnClickListener(){

            @Override

            public void onClick(View v){

                //跳转到Button演示界面

                Intent intent=new Intent(MainActivity.this,ButtonActivity.class);

                startActivity(intent);

            }

        });

    }

}
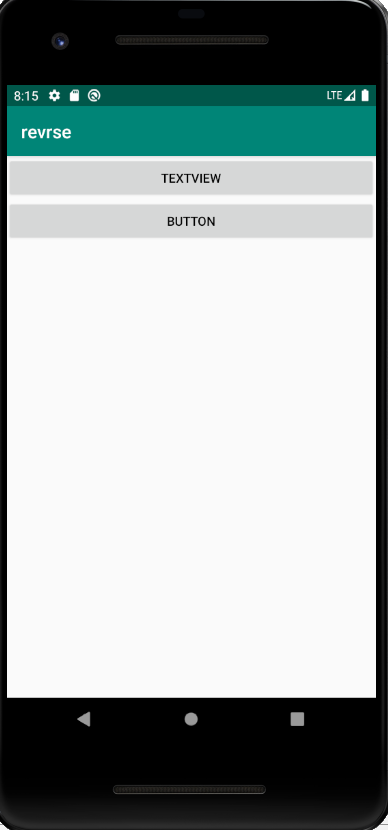
activity_main.xml:
<?xml version="1.0" encoding="utf-8"?>

<LinearLayout xmlns:android="http://schemas.android.com/apk/res/android"

    xmlns:app="http://schemas.android.com/apk/res-auto"

    xmlns:tools="http://schemas.android.com/tools"

    android:layout_width="match_parent"

    android:layout_height="match_parent"

    android:orientation="vertical"

    tools:context=".MainActivity">

    <Button

        android:id="@+id/btn_textview"

        android:layout_width="match_parent"

        android:layout_height="wrap_content"

        android:textColor="#000000"

        android:text="TextView"/>

    <Button

        android:id="@+id/btn_button"

        android:layout_width="match_parent"

        android:layout_height="wrap_content"

        android:textColor="#000000"

        android:text="Button"/>

</LinearLayout>
TextViewActivity.java:
package com.example.revrse; import androidx.appcompat.app.AppCompatActivity; import android.graphics.Paint;
import android.os.Bundle;
import android.widget.TextView; public class TextViewActivity extends AppCompatActivity {
private TextView mTv3;
@Override
protected void onCreate(Bundle savedInstanceState) {
super.onCreate(savedInstanceState);
setContentView(R.layout.activity_text_view);
mTv3=(TextView)findViewById(R.id.tv_3);
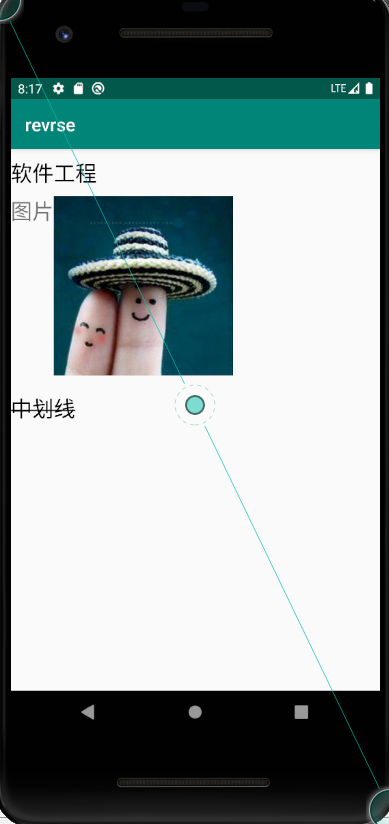
mTv3.getPaint().setFlags(Paint.STRIKE_THRU_TEXT_FLAG);//中划线
mTv3.getPaint().setAntiAlias(true);//去掉锯齿
}
}
activity_text_view.xml:
<?xml version="1.0" encoding="utf-8"?>

<LinearLayout xmlns:android="http://schemas.android.com/apk/res/android"

    xmlns:app="http://schemas.android.com/apk/res-auto"

    xmlns:tools="http://schemas.android.com/tools"

    android:layout_width="match_parent"

    android:layout_height="match_parent"

    android:orientation="vertical"

    tools:context=".TextViewActivity">

    <TextView

        android:id="@+id/tv_1"

        android:layout_width="100dp"

        android:layout_height="wrap_content"

        android:maxLines="1"

        android:ellipsize="end"

        android:text="软件工程"

        android:textColor="#000000"

        android:textSize="24sp"

        android:layout_marginTop="10dp"/>

    <TextView

        android:id="@+id/tv_2"

        android:layout_width="wrap_content"

        android:layout_height="wrap_content"

        android:text="图片"

        android:drawableRight="@drawable/picture"

        android:textSize="24sp"

        android:layout_marginTop="10dp" />

    <TextView

        android:id="@+id/tv_3"

        android:layout_width="wrap_content"

        android:layout_height="wrap_content"

        android:text="中划线"

        android:textColor="#000000"

        android:textSize="24sp"

        android:layout_marginTop="20dp"/>

        </LinearLayout>
ButtonActivity.java:
package com.example.revrse; import androidx.appcompat.app.AppCompatActivity; import android.os.Bundle;
import android.view.View;
import android.widget.Button;
import android.widget.Toast; public class ButtonActivity extends AppCompatActivity {
private Button mBtn2;
@Override
protected void onCreate(Bundle savedInstanceState) {
super.onCreate(savedInstanceState);
setContentView(R.layout.activity_button);
mBtn2=findViewById(R.id.btn_2);
mBtn2.setOnClickListener(new View.OnClickListener(){
@Override
//弹出语句框方法一
public void onClick(View v){
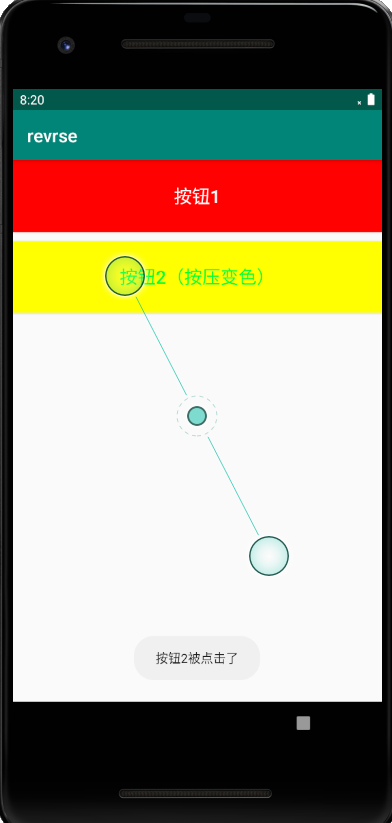
Toast.makeText(ButtonActivity.this,"按钮2被点击了",Toast.LENGTH_SHORT).show();
}
});
}
public void showToast(View view){
//弹出语句框
//Toast.makeText(this,"点击",Toast.LENGTH_SHORT).show();//方法二
}
}
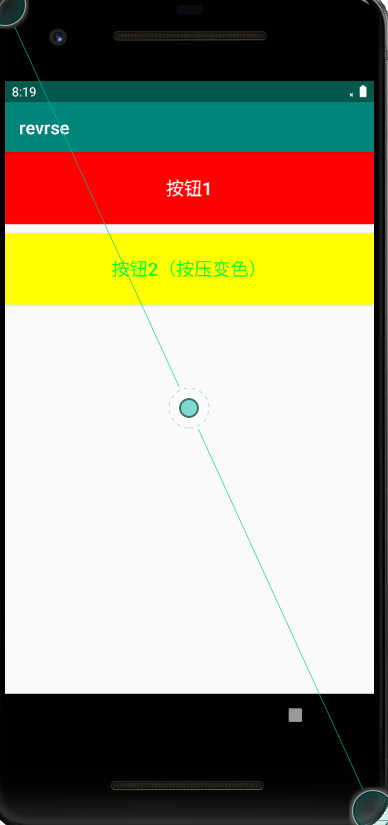
activity_button.xml:
<?xml version="1.0" encoding="utf-8"?>

<RelativeLayout xmlns:android="http://schemas.android.com/apk/res/android"

    xmlns:app="http://schemas.android.com/apk/res-auto"

    xmlns:tools="http://schemas.android.com/tools"

    android:layout_width="match_parent"

    android:layout_height="match_parent"

    tools:context=".ButtonActivity">

    <Button

        android:id="@+id/btn_1"

        android:layout_width="match_parent"

        android:layout_height="80dp"

        android:text="按钮1"

        android:textSize="20sp"

        android:textColor="#ffffff"

        android:background="#ff0000"/>

    <Button

        android:id="@+id/btn_2"

        android:layout_width="match_parent"

        android:layout_height="80dp"

        android:text="按钮2(按压变色)"

        android:textSize="20sp"

        android:textColor="#00ff33"

        android:background="#ffff00"

        android:layout_below="@+id/btn_1"

        android:onClick="showToast"

        android:layout_marginTop="10dp"

        tools:ignore="OnClick" />

</RelativeLayout>
.res.drawable
bg_button2.xml:(弹出语句框)
<?xml version="1.0" encoding="utf-8"?>

<selector xmlns:android="http://schemas.android.com/apk/res/android">

    <item android:state_pressed="true">

        <shape>

            <solid android:color="#ff9900"/>

            <corners android:radius="5dp"/>

        </shape>

    </item>

    <item android:state_pressed="false">

        <shape>

            <solid android:color="#ff9900"/>

            <corners android:radius="5dp"/>

        </shape>

    </item>

</selector>
运行截图:
TextView和Button的学习的更多相关文章
- android入门系列- TextView EditText Button ImageView 的简单应用
第一篇原创,其实自己就是一菜鸟,简单分享点基本知识吧.希望能有所帮助吧. TextView EditText Button ImageView 这几个控件可能是Android开发中最常用.最基本的几个 ...
- gridview里item是textView、Button单击事件相应,以及按下效果的取去除
1.响应事件的区别: gridview的item是textView的时候,gridview的itemonclick事件可以正常相应,但是换了Button后不能,原因如下: public class B ...
- Android开发8:UI组件TextView,EditText,Button
版本:Android4.3 API18 学习整理:liuxinming TextView 概述 TextView直接继承了View(EditText.Button两个UI组件类的父类) TextVie ...
- Android -- TextView、button方法详解(1)
1.TextView常规方法 TextView myTextView=null; //声明变量 myTextView=(TextView)findViewById(R.id.myTextView); ...
- android中给TextView或者Button的文字添加阴影效果
1在代码中添加文字阴影 TextView 有一个方法 /** * Gives the text a shadow of the specified radius and color, the ...
- Android -- TextView、button方法详解(2)
1. button按下状态的改变 Button bt1 = null; // 声明按钮对象 bt1 = (Button) findViewById(R.id.button1); // 获取按钮对象 b ...
- Android之TextView控件的学习
<TextView android:id="@+id/tv" //id号,指明这个TextView的唯一身份 android:autoLink=&qu ...
- Android开源项目发现---TextView,Button篇(持续更新)
android-flowtextview 文字自动环绕其他View的Layout 项目地址:https://code.google.com/p/android-flowtextview/ 效果图:ht ...
- 二、Android学习第二天——初识Activity(转)
(转自:http://wenku.baidu.com/view/af39b3164431b90d6c85c72f.html) 一. Android学习第二天——初识Activity 昨天程序搭建成功以 ...
随机推荐
- ArrayList与LindedList区别
1.ArrayList是实现了基于动态数组的数据结构,LinkedList基于链表的数据结构. 2.对于随机访问get和set,ArrayList觉得优于LinkedList,因为LinkedList ...
- netty权威指南学习笔记六——编解码技术之MessagePack
编解码技术主要应用在网络传输中,将对象比如BOJO进行编解码以利于网络中进行传输.平常我们也会将编解码说成是序列化/反序列化 定义:当进行远程跨进程服务调用时,需要把被传输的java对象编码为字节数组 ...
- jenkins打包iOS 报错:error: exportArchive: The data couldn’t be read because it isn’t in the correct format.
在执行ios 打包的时候,我们通过执行下面的指令来打包ipa: mkdir arch archive_path=arch/${app_name}.xcarchive workspace_name=HP ...
- jqGrid 添加 合计行 footDate
jQuery(table_id).jqGrid({ url : url,//组件创建完成之后请求数据的url datatype : "json",//请求数据返回的类型.可选jso ...
- Create Table操作
CREATE TABLE 语句 CREATE TABLE 语句用于创建数据库中的表. SQL CREATE TABLE 语法 CREATE TABLE 表名称 ( 列名称1 数据类型, 列名称2 数据 ...
- C# winform中ListView用法
this.listView1.GridLines = true; //显示表格线 this.listView1.View = View.Details;//显示表格细节 this.listView1. ...
- 细说 OLAP 与 OLTP
OLAP (Online analytical processing)[联机分析处理] 起源 数据库概念最初源于1962年Kenneth Iverson发表的名为"A Programming ...
- Docker PHP 例子
版权所有,未经许可,禁止转载 章节 Docker 介绍 Docker 和虚拟机的区别 Docker 安装 Docker Hub Docker 镜像(image) Docker 容器(container ...
- springmvc无法访问JS,CSS等文件
配置好web.xml中的dispatchservlet后,js,css,都不能正常显示 web.xml配置文件 <!-- 核心控制器 --> <servlet> <ser ...
- POJ 1426:Find The Multiple
Find The Multiple Time Limit: 1000MS Memory Limit: 10000KB 64bit IO Format: %I64d & %I64u Su ...