
linux非root用户安装4.0.14版本redis
先到官网https://redis.io/download下安装包,现在最新是5.0.5版本,可惜点击下载后被windows禁了,那就下4版本的,往下看Other versions的Old(4.0),点4版本最新4.0.14:
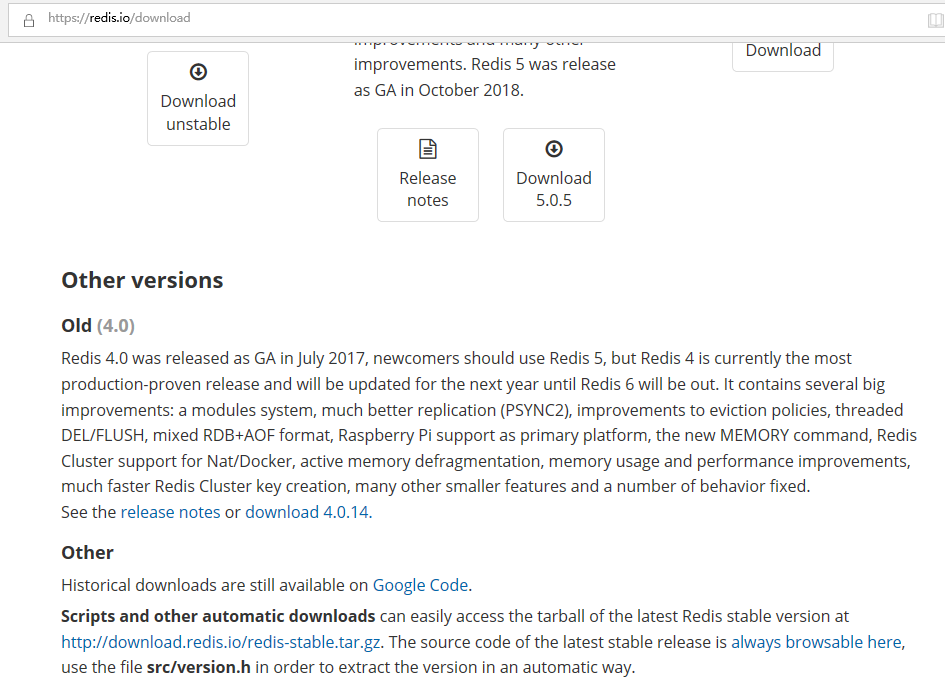
redis的优点之一就是安装包特别小,很快就能下好,点个赞。接下来进入linux的wlf用户,通过rz上传至soft目录,开始执行安装操作:
$ tar xzvf soft/redis-4.0..tar.gz

$ cd redis-4.0.

$ make
make构建结束后,也就安装结束了:
    LINK redis-server

    INSTALL redis-sentinel

    CC redis-cli.o

    LINK redis-cli

    CC redis-benchmark.o

    LINK redis-benchmark

    INSTALL redis-check-rdb

    INSTALL redis-check-aof

Hint: It's a good idea to run 'make test' ;)

make[]: Leaving directory `/home/wlf/redis-4.0./src'
启动redis前我们用vi改下配置文件redis.conf:
# By default, if no "bind" configuration directive is specified, Redis listens

# for connections from all the network interfaces available on the server.

# It is possible to listen to just one or multiple selected interfaces using

# the "bind" configuration directive, followed by one or more IP addresses.

#

# Examples:

#

# bind 192.168.1.100 10.0.0.1

# bind 127.0.0.1 ::

#

# ~~~ WARNING ~~~ If the computer running Redis is directly exposed to the

# internet, binding to all the interfaces is dangerous and will expose the

# instance to everybody on the internet. So by default we uncomment the

# following bind directive, that will force Redis to listen only into

# the IPv4 lookback interface address (this means Redis will be able to

# accept connections only from clients running into the same computer it

# is running).

#

# IF YOU ARE SURE YOU WANT YOUR INSTANCE TO LISTEN TO ALL THE INTERFACES

# JUST COMMENT THE FOLLOWING LINE.

# ~~~~~~~~~~~~~~~~~~~~~~~~~~~~~~~~~~~~~~~~~~~~~~~~~~~~~~~~~~~~~~~~~~~~~~~~

bind 127.0.0.1

# Protected mode is a layer of security protection, in order to avoid that

# Redis instances left open on the internet are accessed and exploited.

#

# When protected mode is on and if:

#

# ) The server is not binding explicitly to a set of addresses using the

#    "bind" directive.

# ) No password is configured.

#

# The server only accepts connections from clients connecting from the

# IPv4 and IPv6 loopback addresses 127.0.0.1 and ::, and from Unix domain

# sockets.

#

# By default protected mode is enabled. You should disable it only if

# you are sure you want clients from other hosts to connect to Redis

# even if no authentication is configured, nor a specific set of interfaces

# are explicitly listed using the "bind" directive.

protected-mode yes
在bind 127.0.0.1前加#注掉,将protected-mode yes改为protected-mode no去掉保护策略,这样就能支持远程连接了。
# By default Redis does not run as a daemon. Use 'yes' if you need it.

# Note that Redis will write a pid file in /var/run/redis.pid when daemonized.

daemonize no

# If a pid file is specified, Redis writes it where specified at startup

# and removes it at exit.

#

# When the server runs non daemonized, no pid file is created if none is

# specified in the configuration. When the server is daemonized, the pid file

# is used even if not specified, defaulting to "/var/run/redis.pid".

#

# Creating a pid file is best effort: if Redis is not able to create it

# nothing bad happens, the server will start and run normally.

pidfile /var/run/redis_6379.pid
默认redis不是在后台运行的,将daemonize no改为daemonize yes,另外当后台运行时默认生成的pid文件是在/var/run目录下,我们可以指定为自己的目录,如改为/home/wlf/redis-4.0.14/run/redis_6379.pid
保存好后启动redis:
$ src/redis-server redis.conf

:C  Sep ::56.153 # oO0OoO0OoO0Oo Redis is starting oO0OoO0OoO0Oo

:C  Sep ::56.153 # Redis version=4.0., bits=, commit=, modified=, pid=, just started

:C  Sep ::56.153 # Configuration loaded
看下进程,已经起来了:
$ netstat -nlp | grep

(Not all processes could be identified, non-owned process info

 will not be shown, you would have to be root to see it all.)

tcp               0.0.0.0:            0.0.0.0:*               LISTEN      /src/redis-ser

tcp6              :::                 :::*                    LISTEN      /src/redis-ser
我们克隆会话打开另一个窗口,进入wlf用户开启客户端:
$ cd redis-4.0./

$ src/redis-cli

127.0.0.1:> set wlf wumanshu

OK

127.0.0.1:> get wlf

"wumanshu"
如果我们想从客户端远程连接服务端,只需指定服务端ip即可,假如redis服务端ip是10.110.1.11,那么我在客户端机器使用命令需要加参数h(默认端口也是6379):
$ src/redis-cli -h 10.110.1.11
关闭客户端,同时也将关闭服务端:
$ src/redis-cli shutdown

$ netstat -nlp | grep

(Not all processes could be identified, non-owned process info

 will not be shown, you would have to be root to see it all.)
或者使用telnet也可以从远程机器连接到redis。不过因为以上设置,redis本身的安全机制已经荡然无存,此时很容被入侵,具体方法和安全防护措施参见redis支持远程接入的安全防护问题。
linux非root用户安装4.0.14版本redis的更多相关文章
- linux非root用户安装5.7.27版本mysql
先下安装包,到mysql官网https://dev.mysql.com/downloads/mysql/选好安装包版本.操作系统类型(默认是最新版本,点击右边链接Looking for previou ...
- 【tf.keras】Linux 非 root 用户安装 CUDA 和 cuDNN
TensorFlow 2.0 for Linux 使用时报错:(cuDNN 版本低了) E tensorflow/stream_executor/cuda/cuda_dnn.cc:319] Loade ...
- linux非root用户安装jdk1.8
如题,先到 Oracle 官方网站 下载1.8版本的 JDK 压缩包(jdk-8u221-linux-x64.tar.gz)到本地(如D盘的soft目录),然后开始进入linux的非root用户(如w ...
- linux非root用户安装ncurses-devel依赖
很明显,如果我们通过yum或rpm下载安装,始终无法绕开root用户,除非我们不用yum或rpm.嗯,我们直接用源码安装.下载源码包,到http://ftp.gnu.org/gnu/ncurses/我 ...
- Linux非root用户安装jdk和tomcat
转载自:http://blog.csdn.net/wuyigong111/article/details/17410661,进行部分修改 创建一个用户 sgmm,并在其用户目录里面安装 jdk和tom ...
- linux非root用户安装nginx
先到官网http://nginx.org/en/download.html下载最新稳定版源码包,目前是1.16.1: 下完后通过rz上传至wlf用户soft目录下,退回上一级目录解压: $ cd so ...
- linux非root用户安装rabbitmq
因为rabbitmq是用erlang语言写的,所以装rabbitmq前第一步得先装erlang. 我们到erlang官网https://www.erlang.org/downloads下载安装包,最新 ...
- linux 非root用户安装nginx
第一步:首先下载依赖包 下载地址 pcre(www.pcre.org),zlib(www.zlib.org),openssl(www.openssl.org) 第二步:上传那个nginx的安装包 下载 ...
- Linux 以非root用户安装zsh&配置on my zsh
此文章参考以下三篇文章,如有侵权请联系 Linux非root用户安装zsh, 并用oh-my-zsh进行配置 在没有sudo权限的Linux服务器下安装oh-my-zsh 不使用root权限安装zsh ...
随机推荐
- 原生Form 和 Form组件 Modelform
主要的文件:manage.py,url.py,views.py,settings.py,models.py manage.py:项目管理文件,一般不做修改. url.py:路由系统,配置views.p ...
- Longest Continuous Increasing Subsequence II
Description Given an integer matrix. Find the longest increasing continuous subsequence in this matr ...
- idea-git同步服务器代码后撤销操作
工具:IntelliJ IDEA 2019.2.1 x64 记录一次不小心同步代码后,如何撤销操作. 1.同步服务器代码,右击项目,点击Synchronize 'xxx',如下: 2.打开Versio ...
- Linux https认证原理
HTTPS在传输的过程中会涉及到三个密钥:服务器端的公钥和私钥,用来进行非对称加密客户端生成的随机密钥,用来进行对称加密一个HTTPS请求实际上包含了两次HTTP传输,可以细分为8步.1.客户端向服务 ...
- web实现大文件上传分片上传断点续传
需求:项目要支持大文件上传功能,经过讨论,初步将文件上传大小控制在500M内,因此自己需要在项目中进行文件上传部分的调整和配置,自己将大小都以501M来进行限制. 第一步: 前端修改 由于项目使用的是 ...
- 关于size
关于size它确实可以帮人算内存 但是: 在不会用到整个数组(尤其是在状压的时候) 不要用它,它只能算你申请了多少内存,但算不了会用多少!!! and 有人能告诉我,交题前不好好看看交的哪份代码是什么 ...
- Problem 6 二分
$des$有 $n$ 个物品,第 $i$ 个物品有两个属性 $k_i, b_i$ ,表示它在时刻 $x$ 的价值为 $k_i \times x + b_i$ .当前处于时刻 $0$ ,你可以选择不超过 ...
- 洛谷 P1056 排座椅 题解
P1056 排座椅 题目描述 上课的时候总会有一些同学和前后左右的人交头接耳,这是令小学班主任十分头疼的一件事情.不过,班主任小雪发现了一些有趣的现象,当同学们的座次确定下来之后,只有有限的 \(D\ ...
- 原创:C++实现的可排序的双向链表
学习C++有一周了,今天用C++设计了一个双向链表,这个链表有排序功能,默认按升序排列,接受的参数可以是数字,也可以是字符串.现在把自己写的代码,分享出来.如果链表中接受的对象为Lexeme,可以用于 ...
- LoadRunner学习目录
已更新: 未更新: 1.loadrunner 11破解版及破解包 2.如何录制一个LR脚本 3.自定义loadrunner脚本