【Vue】Re17 Router 第四部分(参数传递,守卫函数)
一、案例搭建
新建Profile组件
组件写好内容后配置路由
  {

    path : '/profile',

    component : () => import('../components/Profile')

  }
二、参数配置
App.vue配置profile
我们可以使用对象对to的url进行封装
path属性就是url
query属性就是我们的请求数据【给地址的请求参数】
<template>

  <div id="app">

    <router-link to="/home" tag="button" >去首页</router-link>

    <router-link to="/about" tag="button" >去关于</router-link>

    <router-link :to="/user/+username" tag="button" >用户管理</router-link>

    <router-link :to="ppp" tag="button" >profile</router-link>

<!--    <button @click="toHome">首页</button>-->

<!--    <button @click="toAbout">关于</button>-->

    <router-view></router-view>

  </div>

</template>

<script>

export default {

  name: 'App',

  data()  {

    return {

      username : 'aaa',

      ppp : {

        path : '/profile',

        query : {

          name : 'aaa',

          age : 22,

          gender : true

        }

      }

    }

  }

  // methods : {

  //   toHome () {

  //     this.$router.push('/home');

  //   },

  //   toAbout () {

  //     this.$router.push('/about');

  //   }

  // }

}

</script>

<style>

#app {

  font-family: 'Avenir', Helvetica, Arial, sans-serif;

  -webkit-font-smoothing: antialiased;

  -moz-osx-font-smoothing: grayscale;

  text-align: center;

  color: #2c3e50;

  margin-top: 60px;

}

</style>
可以看到参数这样传递过来了
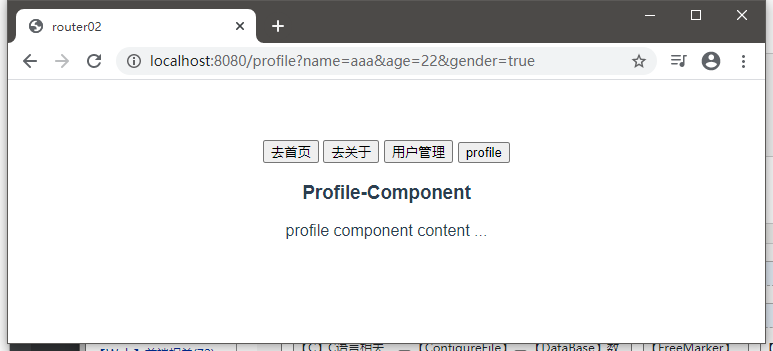
如果要取出请求参数,则可以这样:
写在方法里面获取,记得先从this对象引用
<template>

  <div>

    <h3>Profile-Component</h3>

    <p>

      profile component content ... <br>

      name -> {{$route.query.name}} <br>

      age -> {{$route.query.age}} <br>

      gender -> {{$route.query.gender}}

    </p>

  </div>

</template>

<script>

export default {

  name: "Profile"

}

</script>

<style scoped>

</style>
路由的代码写法:
<template>

  <div id="app">

    <router-link to="/home" tag="button" >去首页</router-link>

    <router-link to="/about" tag="button" >去关于</router-link>

    <router-link :to="/user/+username" tag="button" >用户管理</router-link>

<!--    <router-link :to="ppp" tag="button" >profile</router-link>-->

    <button @click="toProfile" >profile</button>

<!--    <button @click="toHome">首页</button>-->

<!--    <button @click="toAbout">关于</button>-->

    <router-view></router-view>

  </div>

</template>

<script>

export default {

  name: 'App',

  data()  {

    return {

      username : 'aaa',

      ppp : {

        path : '/profile',

        query : {

          name : 'aaa',

          age : 22,

          gender : true

        }

      }

    }

  },

  methods : {

    toHome () {

      this.$router.push('/home');

    },

    toAbout () {

      this.$router.push('/about');

    },

    toProfile() {

      this.$router.push(this.ppp);

    }

  }

}

</script>

<style>

#app {

  font-family: 'Avenir', Helvetica, Arial, sans-serif;

  -webkit-font-smoothing: antialiased;

  -moz-osx-font-smoothing: grayscale;

  text-align: center;

  color: #2c3e50;

  margin-top: 60px;

}

</style>
三、$route & $router的区别?
router是全局路由控制器对象
route是当前活跃的路由对象,是routes属性数组中的一个元素,也可以是router对象内部的一个属性对象
https://www.bilibili.com/video/BV15741177Eh?p=113
四、导航守卫方法
1、回顾Vue实例的生命周期
  created() {

    // todo ... Vue创建时调用此函数,

  },

  mounted() {

    // todo ... Vue实例开始挂载虚拟DOM时调用此函数

  },

  updated() {

    // todo ... ... 组件数据发生更新时调用

  },
点击不同的子组件,更换标签文本的需求:
每一次访问不同的组件都会调用created函数
所以可以:
created() {

  // todo ... Vue创建时调用此函数,

  document.title = '关于-About';

},
但是这样N个组件就要写N次了,都是路由跳转的方式进行的
那么只要在监听路由跳转,在那个时刻把title组件的某一个数据就行了
import Vue from 'vue';

import Router from 'vue-router';

Vue.use(Router);

/* 方式一 */

const Home = resolve => {

  require.ensure(

    ['../components/Home.vue'],

    () => resolve(require('../components/Home.vue'))

  )

}

/* 方式二 */

const About = resolve => {

  require(['../components/About.vue'],resolve);

}

/* 方式三 */

const User = () => import('../components/User.vue');

const News = () => import('../components/home/News');

const Messages = () => import('../components/home/Messages');

const routerList = [

  /* 重定向首页路由配置 */

  {

    path : '', /* 缺省值默认指向 '/' */

    redirect : '/home',

  },

  {

    path : '/home', /* 为什么这里是path不是url? 因为完整的url还包括 项目根url(协议头 + 域名(或者IP地址) + 端口号 + 项目根名称路径(可选))  */

    name : 'home', /* 名字可以不加 */

    component : Home, /* 使用懒加载后component这里高亮显示 */

    children : [ /* 设置子路由 */

      {

        path : '', /* 这个缺省默认/home */

        redirect : 'news',

      },

      {

        path : 'news', /* 等同于 /home + /news = /home/news 这里不需要再加斜杠了 */

        component : News,

        meta : {

          title : '新闻列表 - News'

        }

      },

      {

        path : 'messages',

        component : Messages,

        meta : {

          title : '消息列表 - Messages'

        }

      }

    ],

    meta : {

      title : '首页 - Home'

    }

  },

  {

    path : '/about',

    name : 'about',

    component : About,

    meta : {

      title : '关于 - About'

    }

  },

  {

    path : '/user/:username', /* 动态路径:冒号+字符 */

    name : 'user',

    component : User,

    meta : {

      title : '用户 - User'

    }

  },

  {

    path : '/profile',

    component : () => import('../components/Profile'),

    meta : {

      title : '档案 - Profile'

    }

  }

]

const router = new Router({

  routes : routerList,

  mode : 'history',

});

/* 在创建实例后调用 */

router.beforeEach((to, from, next) => {

  // 调用这个方法以为着重写,一定要调用 next方法, 否则路由无法跳转

  // from 来自于哪个路由对象

  // to 跳转到哪个路由对象

  // 按照案例的需求,就可以这样设置了 route就是一个个routes的元素对象

  // 可以设置一个meta属性对象,放入title属性和对应的值即可

  document.title = to.meta.title;

  // 但是子路由没有命名的话会早曾undefined显示,因为meta属性为空

  // 解决方案 document.title = to.matched[0].meta.title;

  // 跳转要放在最后,不然是跳完了再执行标签的文本更换

  next();

});

export default router;
afterEach守卫方法:
router.afterEach((to, from) => {

  // 因为是跳转之后调用,自然而然的不需要next函数了

  // TODO ... ...

});
上述的两个都是全局守卫方法,在路由配置中重写并调用
五、局部路由守卫
详细资料:
https://router.vuejs.org/guide/advanced/navigation-guards.html
You can define beforeEnter guards directly on a route's configuration object:
const router = new VueRouter({

  routes: [

    {

      path: '/foo',

      component: Foo,

      beforeEnter: (to, from, next) => {

        // ...

      }

    }

  ]

})
In-Component Guards
Finally, you can directly define route navigation guards inside route components (the ones passed to the router configuration) with the following options:
beforeRouteEnterbeforeRouteUpdatebeforeRouteLeave
const Foo = {

  template: `...`,

  beforeRouteEnter (to, from, next) {

    // called before the route that renders this component is confirmed.

    // does NOT have access to `this` component instance,

    // because it has not been created yet when this guard is called!

  },

  beforeRouteUpdate (to, from, next) {

    // called when the route that renders this component has changed.

    // This component being reused (by using an explicit `key`) in the new route or not doesn't change anything.

    // For example, for a route with dynamic params `/foo/:id`, when we

    // navigate between `/foo/1` and `/foo/2`, the same `Foo` component instance

    // will be reused (unless you provided a `key` to `<router-view>`), and this hook will be called when that happens.

    // has access to `this` component instance.

  },

  beforeRouteLeave (to, from, next) {

    // called when the route that renders this component is about to

    // be navigated away from.

    // has access to `this` component instance.

  }

}
【Vue】Re17 Router 第四部分(参数传递,守卫函数)的更多相关文章
- 四 Vue学习 router学习
index.js: 按需加载组件: const login = r => require.ensure([], () => r(require('@/page/login')), 'log ...
- vue之router钩子函数
模块一:全局导航钩子函数 1.vue router.beforeEach(全局前置守卫) beforeEach的钩子函数,它是一个全局的before 钩子函数, (before each)意思是在 每 ...
- Vue的路由动态重定向和导航守卫
一.重定向 重定向也是通过 routes 配置来完成,下面例子是从 /a 重定向到 /b: const router = new VueRouter({ routes: [ { path: '/a', ...
- 详解vue 路由跳转四种方式 (带参数)
详解vue 路由跳转四种方式 (带参数):https://www.jb51.net/article/160401.htm 1. router-link ? 1 2 3 4 5 6 7 8 9 10 ...
- Vue学习笔记-Vue.js-2.X 学习(四)===>脚手架Vue-CLI(基本工作和创建)
(五) 脚手架Vue-CLI 一 Vue-CLI前提(nodejs和webpack) 二 Vue学习-nodejs按装配置,Node.js 就是运行在服务端的 JavaScript. 1. 去nod ...
- 三、vue之router
三.vue之router 此时vue的脚手架.创建项目已经完成. ... vue的运行流程 index.html-->main.js-->App.vue-->router/index ...
- Vue中router两种传参方式
Vue中router两种传参方式 1.Vue中router使用query传参 相关Html: <!DOCTYPE html> <html lang="en"> ...
- Vue基础系列(四)——Vue中的指令(上)
写在前面的话: 文章是个人学习过程中的总结,为方便以后回头在学习. 文章中会参考官方文档和其他的一些文章,示例均为亲自编写和实践,若有写的不对的地方欢迎大家和我一起交流. VUE基础系列目录 < ...
- vue 中router.go;router.push和router.replace的区别
vue 中router.go:router.push和router.replace的区别:https://blog.csdn.net/div_ma/article/details/79467165 t ...
- 【vue】 router.beforeEach
import store from '@/store' const Vue = require('vue') const Router = require('vue-router') Vue.use( ...
随机推荐
- Vue 3 Teleport:掌控渲染的艺术
title: Vue 3 Teleport:掌控渲染的艺术 date: 2024/6/5 updated: 2024/6/5 description: 这篇文章介绍了Vue3框架中的一个创新特性--T ...
- vue单个插槽
当子组件模板只有一个没有属性的插槽时,父组件传入的整个内容片段将插入到插槽所在的 DOM 位置,并替换掉插槽标签本身. # 子组件 <div> <h2>我是子组件的标题< ...
- nodejs模块总结 gulp小结
1,内置模块 fs const fs = require('fs') fs.read ...
- 阿里也出手了!Spring CloudAlibaba AI问世了
写在前面 在之前的文章中我们有介绍过SpringAI这个项目.SpringAI 是Spring 官方社区项目,旨在简化 Java AI 应用程序开发, 让 Java 开发者想使用 Spring 开发普 ...
- SVG <pattern> 标签的用法和应用场景
通过使用 <pattern> 标签,可以在 SVG 图像内部定义可重复使用的任意图案.这些图案可以通过 fill 属性或 stroke 属性进行引用. 使用场景 例如我们要在 <sv ...
- 使用Microsoft.SemanticKernel基于本地运行的Ollama大语言模型实现Agent调用函数
大语言模型的发展日新月异,记得在去年这个时候,函数调用还是gpt-4的专属.到今年本地运行的大模型无论是推理能力还是文本的输出质量都已经非常接近gpt-4了.而在去年gpt-4尚未发布函数调用时,智能 ...
- VUE中watch的详细使用教程
1.watch是什么? watch:是vue中常用的侦听器(监听器),用来监听数据的变化 2.watch的使用方式如下 watch: { 这里写你在data中定义的变量名或别处方法名: { han ...
- Linux驱动:使用workqueue、tasklet处理中断
Linux驱动:使用workqueue.tasklet处理中断 背景 中断服务程序一般都是在中断请求关闭的条件下执行的,以避免嵌套而使中断控制复杂化.但是,中断是一个随机事件,它随时会到来,如果关中断 ...
- 使用Scrcpy 在电脑显示手机画面并控制安卓设备
使用Scrcpy 显示手机画面并控制手机 原文(有删改):https://www.iplaysoft.com/scrcpy.html 背景 本文适用于安卓开发人员,不针对普通安卓手机用户. 在安卓开发 ...
- javaApi,mapreduce,awk,scala四种方式实现词频统计
awk方式实现词频统计: 方式一: vi wordcount.awk { for (i = 1; i <=NF;i++) //NF 表示的是浏览记录的域的个数 freq[$i]++ } END{ ...