Windows Self Signed Driver
In particular, Microsoft® instituted a device driver certification process for its
Windows® desktop and server operating systems to ensure the drivers are
functional with their products.
INF (or Information) files are scripts which tell the Windows Operating System
how to install and configure peripheral hardware drivers (.SYS, .DLL and related files).
Once an INF file has been edited, its original digital signature is no longer valid.
Any attempt to load a driver package that includes a modified INF file
as a clean install will result in a warning window to appear
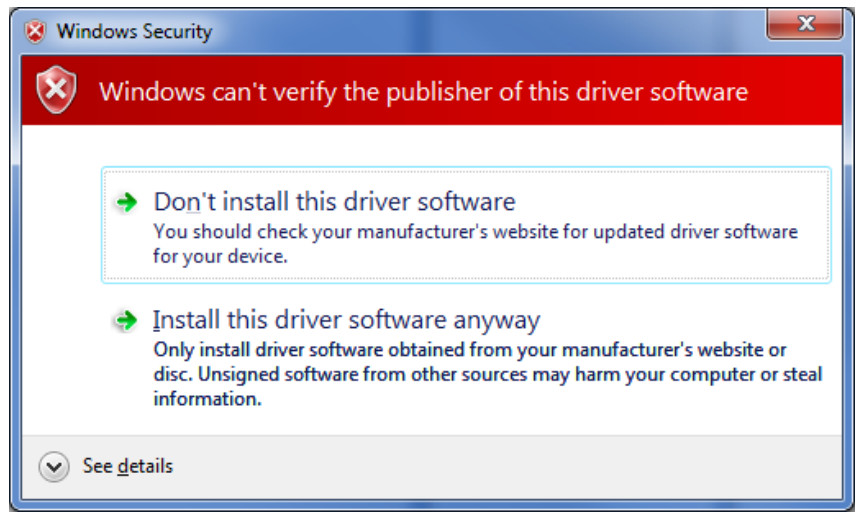
This warning is not fatal to the install, but many customers desire a more professional look and feel to the products
that they are distributing to their customers.
The Windows Hardware Certification process provides new “CAT” signature files for the modified device driver
and prevents the warning window from appearing.
With the release of Windows Vista 64-bit edition and Windows 7 64-bit editions, Microsoft require signed device drivers.
This requirement will carry forward to new future operating system releases as well.
A Windows Hardware Certified driver becomes eligible for automatic distribution
through the Microsoft Windows Update service, allowing plug and play driver installation.
Microsoft x64 bit operating systems (Vista and Windows 7) will not allow unsigned drivers to be installed by default.
This technical note will discuss some possible workarounds to allow for driver testing including
disabling the certification check in Windows and self certifying the driver.
Disabling the OS Certification Check

If the F8 key on the keyboard of a PC is held down while the OS is booting up the menu window appears.
The last item on this menu is to disable the driver certification check. Select this option before continuing Windows startup.
This will allow non-certified drivers to be loaded.
Note: This feature needs to be repeated every time the PC is rebooted but it does allow for developers to test customised drivers.
Alternative Solution – Self-Signed Driver
As noted above, 32-bit versions Microsoft Windows Vista and 7 allow driver installation of an unsigned driver
even though a warning is displayed.
At the time of publication of this application note, a “self-signed” driver may be installed on all 32-bit and 64-bit Windows versions.
When a self-signed driver is installed, Windows will display a warning indicating
that the source of the signature is unknown and give the option to continue.
It is important to note that although the drivers are not submitted to Microsoft, a current VeriSign Code Signing Certificate is necessary.
In addition, self-signed drivers are not eligible for distribution through Windows Update which may lead to a non-ideal end-user experience.
Primary Software: Driver Software>>NI-VISA
Primary Software Version: 5.2
Primary Software Fixed Version: N/A
Secondary Software: N/A
Problem:
How can I sign the INF file generated by the Driver Development Wizard so that it can be installed on a Windows 8 machine?
Solution:
It is possible to use the Driver Development Wizard (DDW) to generate INF files
that can be installed onto a machine to bind a given PCI/PXI device to NI-VISA.
After doing so, you can use NI-VISA to access the device.
The DDW generated INF file is not signed.
Windows 8 has made it mandatory for an INF to be signed before it can be installed onto a machine.
There are 4 distinct steps to follow before an INF that is generated by the DDW can be installed onto a Windows 8 machine.
1. Generate a catalog (.cat) from the INF.
This can be done by using the Inf2Cat tool that is provided by Microsoft via the Windows Driver Kit (WDK).
This tool is typically installed at: C:\Program Files (x86)\Windows Kits\8.0\bin\x86.
One of the parameters given to this tool is the list of OS’s the generated catalog will need to support.
Since earlier versions of this tool don't accept the Windows 8 specific values, the WDK v 8.0 (that supports Windows 8) is required.
Be sure to navigate to the directory containing the Inf2Cat tool from the command prompt.
Example syntax: cd C:\Program Files (x86)\Windows Kits\8.0\bin\x86.
Also, it is recommended to run the command prompt as an Administrator if possible.
Syntax: Inf2Cat /driver:<path> /os:<os1>[,<os2>]...
<path>: Path to the directory that contains the INF. The INF file must be in a directory (e.g. cannot be a stand-alone file in the C drive).
The INF already has the name of cat file to generate.
<osn>
For more information about the OS support, see External Link: Microsoft Dev Zone: Inf2Cat.
Output: If the <path> contains an *.inf file, this command will create a corresponding *.cat file next to it.
2. Obtain or create a certificate that can be used to sign the *.cat.
Ideally, you should contact a Certificate Authority (CA) to obtain a certificate that you can use to sign all your drivers and INF’s.
A certificate typically has a pair of keys, public and private.
The public key is distributed to clients who need to use the signed binary/INF.
The private key is only available to the owner of the certificate and is used to sign anything that needs to be signed.
The private key should be protected and not distributed. The public key has enough information to verify the certificate owner.
This process has a few drawbacks:
1. There is an annual fee that needs to be paid to the CA to obtain and use the certificate from them.
2. If you aren’t distributing the INF to your customers and only need to use it on your own machine,
this process is not feasible (unless you are buying the certificate for other reasons).
A workaround if you do not want to buy a certificate from a CA is for you to create a 'personal' certificate.
This certificate, along with the private key, can be installed on a development machine
where you will generate the *.cat file and sign it using that certificate.
Next, take the *.inf file, the signed *.cat file, and a copy of your public key (in the form of a certificate) to the deployment systems,
where you will first install the public certificate as a 'trusted' certificate and then install any *.inf file that has a *.cat file signed with that certificate.
These personal certificates (extension .pfx, in this case) can be generated using a variety of third party applications
such as Adobe Reader, the Java SDK, and openssl for Linux distributions.
3. Sign the .cat using the certificate.
Once the *.cat file is generated and the private certificate is installed on a development machine,
the *.cat file can be signed using that certificate.
Microsoft provides a tool to sign the INF’s, called SignTool.
This tool should be available with the WDK.
It is located in the same folder as the Inf2Cat tool: C:\Program Files (x86)\Windows Kits\8.0\bin\x86.
Please note that the WDK may require a certain version of Visual Studio to use the SignTool.
This requirement will be listed on the WDK download page.
This tool is also available from the Windows Platform SDK.
After installing the Windows 7 SDK, the tool will be located at:C:\Program Files (x86)\Microsoft SDKs\Windows\v7.0A\Bin.
To use SignTool, make sure to navigate to the directory containing the SignTool from the command prompt.
Example syntax: cd C:\Program Files (x86)\Windows Kits\8.0\bin\x86.
Syntax: signtool sign [options] <filename(s)>
Examples:
1. If the private/public key pair is in a file (in .pfx format):signtool sign /f C:\mycertificate.pfx /p mypfxpassword c:\mycatfile.cat2. If the key is installed on the dev machine:
signtool sign /n mycertificatename C:\mycatfile.cat
4. Install the public certificate onto the target Windows 8 machine before installing the INF.
Once the *.cat file is signed with the private key, the *.inf file, the signed *.cat file and the public certificate can be distributed together.
To install the *.inf file onto the machine the public certificate first needs to be installed.
If the certificate was obtained from a CA, it already has a trusted chain of certificates up to a 'Trusted Root CA'.
Otherwise, if it is a personal certificate, it needs to be installed as a 'Trusted Root'.
To install, right click the public certificate (*.cer created by third party application) and choose Install Certificate.
In the dialog that shows up, select Local Machine and press Next.
In the following dialog, choose Place all certificates in the following store, press the Browse button
and choose Trusted Root Certification Authorities from the list.
Press OK to go back to the import wizard and press Next.
Press Finish.
Press OK when prompted with the confirmation dialog.
Note: To view the certificates installed on the system:
a. Run mmc command to launch the Microsoft Management Console
b. From the menu, choose File » Add/Remove Snap-in...
c. In the dialog, Click on Certificates and press the Add button in the middle of the dialog.
d. In the dialog that shows up, choose the Computer account radio button and press Next and Finish.
e. Press OK.
In the MMC, now you can see the certificates installed for the current user.
The certificate that was imported needs to be under Trusted Root Certification Authorities.
If it is not, you can right click on the Certificates (Current User) and then choose to Find Certificates....
Once it is found, you can copy (or cut) and paste it under the Trusted Root Certification Authorities.
How do I create a self-signed certificate for code signing on Windows?
While you can create a self-signed code-signing (SPC) certificate in one go, I prefer to do the following:
Creating a self-signed Certificate Authority (CA)
makecert -r -pe -n "CN=My CA" -ss CA -sr CurrentUser ^

         -a sha256 -cy authority -sky signature -sv MyCA.pvk MyCA.cer
(^ = allow batch command-line to wrap line)
This creates a self-signed (-r) certificate, with an exportable private key (-pe). It's named "My CA",
and should be put in the CA store for the current user.
We're using the sha256 algorithm. The key is meant for signing (-sky).
The private key should be stored in the MyCA.pvk file, and the certificate in the MyCA.cer file.
Importing the CA Certificate
Because there's no point in having a CA certificate if you don't trust it,
you'll need to import it into the Windows certificate store.
You can use the Certificates MMC snapin, but from the command line:
certutil -user -addstore Root MyCA.cer
Creating a code-signing (SPC) Certificate
makecert -pe -n "CN=My SPC" -a sha256 -cy end ^

         -sky signature ^

         -ic MyCA.cer -iv MyCA.pvk ^

         -sv MySPC.pvk MySPC.cer
Pretty much the same as above, but we're providing an issuer key and certificate (the -ic and -iv switches).
We'll also want to convert the certificate and key into a PFX file:
pvk2pfx -pvk MySPC.pvk -spc MySPC.cer -pfx MySPC.pfx
If you want to protect the PFX file, add the -po switch, otherwise PVK2PFX creates a PFX file with no passphrase.
Using the certificate for signing code
signtool sign /v /f MySPC.pfx MyExecutable.exe
If you import the PFX file into the certificate store (you can use PVKIMPRT or the MMC snapin), you can sign code as follows:
signtool sign /v /n "Me" /s SPC /d http://www.me.me ^

              /t http://timestamp.url MyExecutable.exe
Some possible timestamp URLs for signtool /t are:
http://timestamp.verisign.com/scripts/timstamp.dllhttp://timestamp.globalsign.com/scripts/timstamp.dllhttp://timestamp.comodoca.com/authenticode
Full Microsoft Documentation
- signtool: http://msdn.microsoft.com/en-us/library/8s9b9yaz.aspx
- makecert: http://msdn.microsoft.com/en-us/library/bfsktky3.aspx
- pvk2pfx : http://msdn.microsoft.com/en-us/library/windows/hardware/ff550672(v=vs.85).aspx
How to Sign an Unsigned Driver for Windows 7 x64
4 steps to create free SSL certificate for development
Step 2:- Create the certificate
Step 3 :- Assign the certificate to the site
Step 5 :- Find a nice restaurant
libusbK, dpscat.exe
Creates self-signed .cat files from .inf files.
By default, dpscat.exe searches the working directory for all files matching the FileSpec *.inf.
USAGE: dpscat.exe [/PATH Path]
/PATH Path - Specifies an alternate .inf file search directory.
Windows Self Signed Driver的更多相关文章
- 显示器驱动程序 NVIDIA Windows Kernel Mode Driver Version 已停止响应 并且己成功恢复 解决方法
原文:http://news.160.com/?p=1890 在玩游戏中 经常 出现显示器驱动程序 NVIDIA Windows Kernel Mode Driver Version 已停止响应 并且 ...
- Windows Filesystem filter driver
参考:http://www.codeproject.com/Articles/43586/File-System-Filter-Driver-Tutorial 关键点: To perform atta ...
- [Windows驱动]驱动包(Driver Packages)
在windows下安装一个驱动,我们你需要把所有需要的软件打包-称为驱动包.驱动包里包括系统提供的给所有设备类使用的一般安装工具,还包括了设备商提供的设备特定的组件.下面我们就来看看驱动包里具体需要哪 ...
- windows设备驱动安装指南
高观点下的设备驱动安装(overview) 一.windows是怎样安装设备的? 第一步:新设备的识别 在给一个新设备安装驱动之前,总线或集线器(hub)驱动会为连接到PC上的设备分配一个硬件ID(h ...
- 【Windows】为节省系统资源,停掉不必要的服务
1.windows服务名称(注册表名称)和显示名称对照表如下: < 显示名称 状态 服务名称 Application Management demand AppMgmt ASP.NET Stat ...
- windows raid mode重新安装系统(win10)
常规安装模式: STEP 1 进入bios 将高级设置中,引导模式设置为传统(旧模式)模式,一般存在legacy (旧模式),uefi with csm ,uefi without csm 三个模式, ...
- How Do I Deploy a Windows 8 App to Another Device for Testing?
If your developing a new Windows 8 app and you want to test it on another device (e.g. Surface), you ...
- Windows漏洞利用与防护(2015.8)
Windows平台下的漏洞利用与防护 0x00 概述 在过去的二十几年,Windows作为网络安全的主战场之一,攻于防的较量从未停息过.内存破坏漏洞作为研究的重点之一,经历了很多的发展也沉淀了前辈们许 ...
- python 模块 wmi 远程连接 windows 获取配置信息
测试工具应用: https://ask.csdn.net/questions/247013 wmi连接不上报错问题集 https://blog.csdn.net/xcntime/article/det ...
随机推荐
- 仿Twitter登陆移动背景效果
有使用Twitter客户端的朋友应该有发现在登录的时候,屏幕上方和下方的云朵图片是不断移动着的,再加上Twitter那支可爱的小鸟在不停的动着,给人的感觉就好像是小鸟在飞翔一样,感觉效果很不错. 我也 ...
- Oracle自定义数据类型 2 (调用对象方法)
调用对象方法 调用对象方法基于类型创建表后,就可以在查询中调用对象方法 A. 创建基于对象的表语法: create table <表名> of <对象类型>意义 ...
- SoapUI Property
1. Test Suite(Case) Property 选择Test Suite(Case),switch to Custom properties 在request中的引用方式: ${[scope ...
- 闭包在python中的应用,translate和maketrans方法详解
python对字符串的处理是比较高效的,方法很多.maketrans和translate两个方法被应用的很多,但是具体怎么用常常想不起来. 让我们先回顾下这两个方法吧: 1.s.translate(t ...
- PIC和PIE
PIC指的是位置无关代码,用于生成位置无关的共享库,所谓位置无关,指的是共享库的代码断是只读的,存放在代码段,多个进程可同时公用这份代码段而不需要拷贝副本.库中的变量(全局变量和静态变量)通过GOT表 ...
- 捣蛋phpwind过滤器执行流程
从上一篇我们就大概就知道过滤器的定义和怎样去配置,这一节来说说执行流程 public function run($handlerAdapter = null) { $handlerAdapter != ...
- struts2传递List对象(复合对象)
1.前台jsp界面: <%@ page language="java" contentType="text/html; charset=utf-8" pa ...
- Sql group by 分组取时间最新的一条数据
with MiPriceTopOne as (select classid,max(dataTime) dataTime,max(id) as id from MiPrice group by cla ...
- c++一些问题总结
<span style="font-family: Arial, Helvetica, sans-serif; background-color: rgb(255, 255, 255) ...
- 【转】B树、B-树、B+树、B*树
B树 即二叉搜索树: 1.所有非叶子结点至多拥有两个儿子(Left和Right): 2.所有结点存储一个关键字: 3.非叶子结点的左指针指向小于其关键字的子树,右指针指向大于其关键字的子树: 如: B ...