
Transparency Tutorial with C# - Part 2
- Download Compositing Mode demo project - 24 Kb
- Download Compositing Mode source - 26 Kb
- Download Compositing Quality demo project - 185 Kb
- Download Compositing Quality source - 192 Kb
- Download ColorMatrix Single Color demo project - 9 Kb
- Download ColorMatrix Single Color source - 16 Kb
- Download ColorMatrix Images demo project - 30 Kb
- Download ColorMatrix Images source - 39 Kb
Introduction
As in the earlier tutorial, we consider the ‘what’ before the ‘how’. That is, a discussion is presented of the concepts behind the code, and then at the end, we look at the code behind the concepts.
Compositing Concepts
When you watch the TV weather person seeming to walk around inside a satellite image of the Earth, you are seeing a composite image. Compositing refers to superimposing one image over another. In the movie Lord Of The Rings Gollum (who should have won the Academy
Award for best actor - IMHO), was made of computer generated images compostited over live action images. GDI+ has two very limited compositing features: the CompositingMode and
theCompositingQuality enumerations.
CompositingMode is an enumeration that determines how alpha blending of a source will be done with the background. CompositingMode.SourceCopy essentially
turns off the alpha blending, whileCompositingMode.SourceOver turns it on.
Before you continue, I’ll give you my conclusion first – GDI+ compositing is useless in what I do, so feel free to skip this section.
I borrowed some code from MSDN and added two features to let us play with the various permutations of the mode and quality enumerations. The Compositing Mode & Quality demo, Figure 1, gives an example where, in the top row, we turn off the alpha blending for
the two ellipses by setting CompositingMode to SourceCopy and
drawing them to a bitmap which we then composite the results to the white background and to a second bitmap allowing the alpha to function. In the bottom row we allow alpha blending for the two ellipses and likewise composite the results with the white background
and to an image.
CompositingQuality is inversely related to compositing speed. Higher quality requires consideration of more surrounding
pixels than does lower quality compositing. Six members are defined that let the user make tradeoffs between rendering quality and speed. The Compositing Mode & Quality demo, Figure 1, gives an example where we can select each member of the enumeration and
see how it effects the rendering by moving the alpha slider.
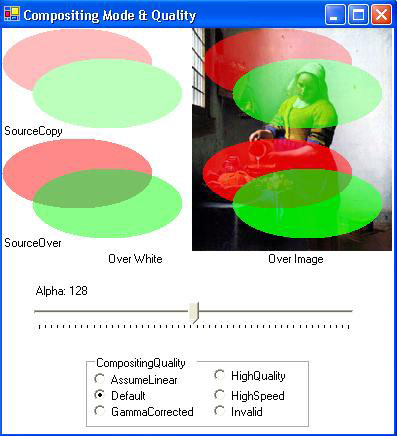
Figure 1 Compositing Mode & Quality Demo
Now maybe the quality enumeration makes a difference on a very slow computer or with a very large image, but I couldn’t see any effect on this little demo. I used the Windows Magnifier© to do a 5x enlargement of the MilkMaids elbow. Figure 2 shows some side-by-side
comparisons. Can you see any difference? I can’t.
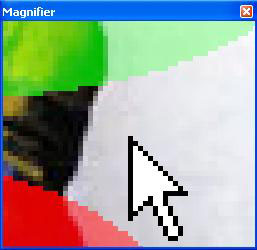
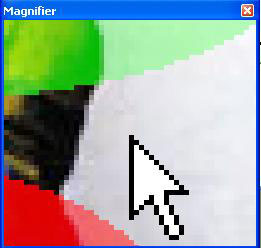
High Quality High Speed
Figure 2 Quality vs. Speed
So, I decided to give Microsoft© the benefit of the doubt and test the CompositingQuality with a big image over a complex
background and trap the time it takes to do each.
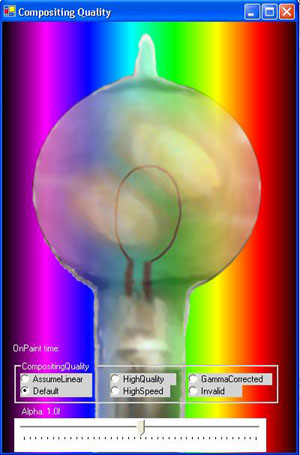
Figure 3 Compositing Quality Demo.
This is an image of Edison’s bulb done with a wide variety of alpha values drawn over a light spectrum. I observed some time differences. Usually HighSpeed clocked in at 40 to 50 ms and HighQuality at 50 to 60 ms (on a 2.0 GHz Celeron laptop). I used the Windows
Magnifier© to look for differences, Figure 4. The cursor is offset a little, but I still can’t see any differences.
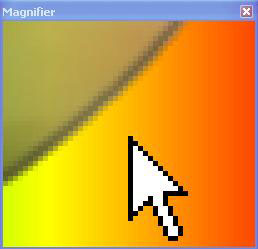
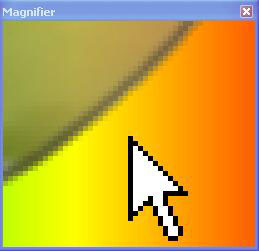
Figure 4 HighSpeed vs HighQuality.
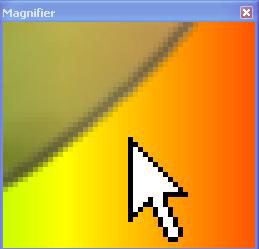
Figure 4 HighSpeed vs GammaCorrected.
I tried this on my antique Windows 98se© machine running a Pentium II© processor and got HighSpeed at 220 ms and HighQuality at 270ms, but this wasn’t consistent and likely as not they both ran at 220ms.
Okay, so I’m willing to state that CompositingMode and CompositingQuality aren’t
of much use in what I generally do. I’d guess that if someone wanted to write a game in GDI+ and it was pushing the system, then they might want to see if these enumerations can get them where they need to go. I’d personally move up to DirectDraw before messing
with GDI+ compositing again.
ColorMatrix and ImageAttributes Concepts
Unlike compositing in GDI+, ColorMatrix and ImageAttributes are
very useful. They allow you to make transparency changes on an entire image so that you don’t have to use GetPixel and PutPixel,
which for all but the smallest images will really slow you down.
The ColorMatrix is 5x5 with rows and columns for Red, Green, Blue, Alpha, and W. W is thrown in so that you can use the bottom row to make changes on all the parameters that are in the column above it.
Color transformations include:
Translation– adds a value to one or more of the color structure parameters.Scaling– multiplies one or more of the color structure parameters
by a value.Shearing- which increase the value of one color component proportional
to the value of another.Rotation– Rotates the four-dimensional color space (bizarre and useless
for colors - IMHO).
The discussion of ColorMatrix can get dense quickly. If you want to read something that is not only laughably obtuse, but seemingly useless (at least to me) look at the MSDN article on rotation with a ColorMatrix. You can do image rotations with matrices, which
is very useful, but why on Earth would one ever want to rotate colors? If anybody knows a good answer to that, other than ‘because you can’ I’d like to hear it.
I choose to assume that even if the reader hasn’t studied linear transformations using matrix algebra, he/she/it can get the gist of what’s going by playing with the matrix parameters. I generally don’t care how Microsoft© is doing something, I just want to
see the results and leave the operational guts in a blackbox where they belong.
When using ColorMatrix we need to change our way of looking at the color structure. Instead of each of the four elements: A, R, G, and B being represented by a byte integer, we will look at them as being a float between 0.00f and 1.00f.
To me the best way to learn is to play. I have been accused of being a hacker because I’d rather play with code and see what pops up than spend endless hours studying the manuals in hopes that one of the illiterates who wrote the thing will inadvertently be
clear enough to tell me how to do what needs to be done. So I wrote the ColorMatrix – Single Color demo, Figure 6, that allows me to play to my hearts content and get a good intuitive feel for how ColorMatrix works and how I might use it in my code.
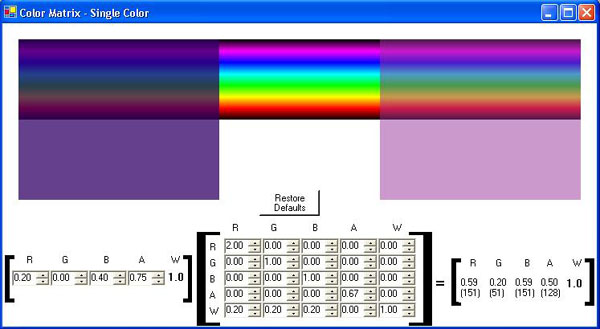
Figure 6 Color Matrix for a single color demonstration
The MSDN article ‘Using a Color Matrix to Transform a Single Color’ gives an example with the source color parameters for R, G, and B the same as in Figure 6, but they leave A = 1. I wrote this demo to show not just the color transformation, but also the alpha
transformation. The results are the same as in the MSDN article except that the alpha shows that a source alpha of 0.75 and a matrix value of .67 yield 2/3 of the original 0.75, or 0.5.
Technically, the 0.20’s in the W row are translating the color, adding 0.20 to each, and the 2.0 in RR and 0.67 in AA are scaling the color. You can test shearing, by changing BR to 0.50, which will increase the red by 50% of the blue value.
ColorMatrix and Images
I wrote the ColorMatrix – Images demo, Figure 7, to show the real power of a ColorMatrix, to transform all the colors in an image with a single operation.
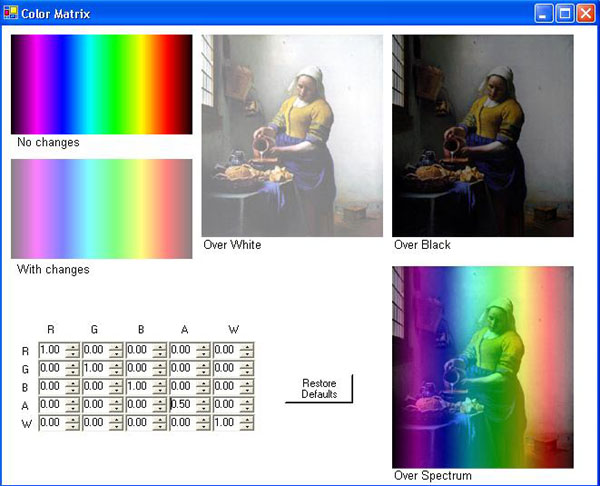
Figure 7 ColorMatrix - Images
Changes in the matrix affect the lower spectrum and the image; the upper image is left unchanged to help visually clarify what was changed. Vermeer’s Milkmaid is drawn over white, black, and a spectrum to help see the effects of the colors and alpha changes.
The Code
As mentioned in the first tutorial, we’ll only look at code that introduces new concepts.
ColorMatrix – Single Color
The ColorMatrix - SingleColor demonstration, Figure 6, is a take off (rip-off?) of code in the MSDN article ‘Using a Color Matrix to Transform a Single Color’ but with lots of added features to allow us to play with the various parameters.
The ColorMatrix class has 25 public properties, MatrixXY properties: Matrix00 through Matrix44 which allow the user to get or set the value for the X column and the Y row. We don’t use these in this application (we will in the third tutorial), choosing instead
to use the full array.
In the OnPaint event handler we add:
 Collapse | Copy
Code
// Create a points array

float[][] ptsArray =

{

new float[] { matrix00, matrix10, matrix20, matrix30, matrix40},

new float[] { matrix01, matrix11, matrix21, matrix31, matrix41},

new float[] { matrix02, matrix12, matrix22, matrix32, matrix42},

new float[] { matrix03, matrix13, matrix23, matrix33, matrix43},

new float[] { matrix04, matrix14, matrix24, matrix34, matrix44}

};
Next we create an instance of the ColorMatrix and ImageAttributes classes:
Collapse | CopyCode
// Create a ColorMatrix object using pts array

ColorMatrix clrMatrix =

  new ColorMatrix(ptsArray);

// Create an ImageAttributes object

ImageAttributes imgAttributes =

  new ImageAttributes();
Then we assign the ColorMatrix instance to the ImageAttributes SetColorMatrix property:
Collapse | CopyCode
// Set color matrix of imageAttributes

imgAttributes.SetColorMatrix(clrMatrix,

  ColorMatrixFlag.Default,

  ColorAdjustType.Bitmap);
ImageAttributes will be discussed in detail below.
No further new concepts are introduced in this demo, but I will mention that using Matrix33 ColorMatrix property to change alpha without worrying about the full array would be more efficient if you are only concerned with transparency.
ColorMatrix – Images
The ColorMatrix – Images demo, Figure 7, brings us to what I consider the real meat of these tutorials – images.
The only new concept is using two overloads of DrawImage in the OnPaint event
handler. I captured the LightSpectrum image drawn in the earlier tutorial as a JPEG image and draw that image to the form. I could have used the code, as before, which would have eliminated the need for the 7KB Spectrum.jpg file to do this, but I thought I’d
give this way a try. What’s 7KB anyway?
Collapse | CopyCode
// Draw the static Spectrum image and text

e.Graphics.DrawImage(Image.FromFile("Spectrum.jpg"),

         10, 10, 200, 110);
Vermeer’s MilkMaid is drawn with a different overload that uses the ImageAttributes instance to apply the changes in
the ColorMatrix to the image.
Collapse | CopyCode
// Draw the changeable painting image over white and text

e.Graphics.DrawImage(Image.FromFile("Vermeer milkmaid.jpg"),

        new Rectangle(220,10,200,223),

        0,0, 200, 223,

        GraphicsUnit.Pixel, imgAttributes);
In the next tutorial we’ll look at transparency in forms.
转自:http://www.codeproject.com/Articles/6504/Transparency-Tutorial-with-C-Part
Transparency Tutorial with C# - Part 2的更多相关文章
- Transparency Tutorial with C# - Part 1
Download demo project - 4 Kb Download source - 6 Kb Download demo project - 5 Kb Download source - 6 ...
- Transparency Tutorial with C# - Part 3
Download image fade demo - 4 Kb Download image fade source project- 7 Kb Download image fade images ...
- [翻译+山寨]Hangfire Highlighter Tutorial
前言 Hangfire是一个开源且商业免费使用的工具函数库.可以让你非常容易地在ASP.NET应用(也可以不在ASP.NET应用)中执行多种类型的后台任务,而无需自行定制开发和管理基于Windows ...
- Django 1.7 Tutorial 学习笔记
官方教程在这里 : Here 写在前面的废话:)) 以前学习新东西,第一想到的是找本入门教程,按照书上做一遍.现在看了各种网上的入门教程后,我觉得还是看官方Tutorial靠谱.书的弊端一说一大推 本 ...
- thrift 服务端linux C ++ 与客户端 windows python 环境配置(thrift 自带tutorial为例)
关于Thrift文档化的确是做的不好.摸索了很久才终于把跨linux与windows跨C++与python语言的配置成功完成.以下是步骤: 1) Linux下环境配置 ...
- Hive Tutorial(上)(Hive 入门指导)
用户指导 Hive 指导 Hive指导 概念 Hive是什么 Hive不是什么 获得和开始 数据单元 类型系统 内置操作符和方法 语言性能 用法和例子(在<下>里面) 概念 Hive是什么 ...
- Home / Python MySQL Tutorial / Calling MySQL Stored Procedures in Python Calling MySQL Stored Procedures in Python
f you are not familiar with MySQL stored procedures or want to review it as a refresher, you can fol ...
- Using FreeMarker templates (FTL)- Tutorial
Lars Vogel, (c) 2012, 2016 vogella GmbHVersion 1.4,06.10.2016 Table of Contents 1. Introduction to F ...
- Oracle Forms 10g Tutorial Ebook Download - Oracle Forms Blog
A step by step tutorial for Oracle Forms 10g development. This guide is helpful for freshers in Orac ...
随机推荐
- ZXing工具类v1.0
package com.jadyer.util; import java.awt.Graphics2D; import java.awt.image.BufferedImage; import jav ...
- WCF技术剖析之五:利用ASP.NET兼容模式创建支持会话(Session)的WCF服务
原文:WCF技术剖析之五:利用ASP.NET兼容模式创建支持会话(Session)的WCF服务 在<基于IIS的WCF服务寄宿(Hosting)实现揭秘>中,我们谈到在采用基于IIS(或者 ...
- 分布式消息系统jafka快速起步(转)
Jafka 是一个开源的/性能良好的分布式消息系统.在上一篇文章中有所简单介绍.下面是一篇简单的入门文档.更多详细的文档参考wiki. Step 1: 下载最新的安装包 完整的安装指南在这里.最新的发 ...
- RAC 11.2.0.4 安装 遇到 INS-06001
今天安装11.2.0.4的grid软件,在配置passwordless SSH的时候,点击setup 出现此错误 开始网上搜了一把.说什么的都有,什么系统bug啊什么的 但是我另外一套rac却很正常就 ...
- Cocos2dx3.1 获取当前系统时间
以下是获代替码 原文地址:http://blog.csdn.net/qqmcy/article/details/28233565 // // Tools.h // // // Created by 杜 ...
- 网页WEB打印控件
网页WEB打印控件制作 在WEB系统中,打印的确是比较烦人的问题,如果我们能制作一个属于自己的自定义的打印插件,那么我们在后续自定义打印的时候能随心所欲的控制打印,这样的效果对于程序员来说是非常开心的 ...
- Qt for Android 部署流程分析
原地址:http://blog.csdn.net/foruok/article/details/17796017 今天为了测试使用 Qt Creator 3.0.0 开发的纯 C 工程,利用了 Win ...
- vld(Visual Leak Detector) 内存泄露检测工具
初识Visual Leak Detector 灵活自由是C/C++语言的一大特色,而这也为C/C++程序员出了一个难题.当程序越来越复 杂时,内存的管理也会变得越加复杂,稍有不慎就会出现内存问题.内存 ...
- 14.10.2 File Space Management 文件空间管理:
14.10.2 File Space Management 文件空间管理: 数据文件 你定义在配置文件形成了InnoDB的系统表空间, 文件是逻辑连接形成表空间,没有条带化使用. 你不能定义你的表在表 ...
- android用canvas绘制两种波纹效果
波形效果有几种不同的呈现形式,比如从中间向四周散开的波形,也就是熟知的水涟漪:还有上下波动的曲线,像五线谱等.英文中可以称作Wave或者Ripple,所以暂且叫它们WaveView.WaveLayo ...