Spring框架整合Struts2框架的传统方法
1. 导入CRM项目的UI页面,找到添加客户的页面,修改form表单,访问Action
* 将menu.jsp中133行的新增客户的跳转地址改为:href="${pageContext.request.contextPath}/jsp/customer/add.jsp"
* 将jsp/customer下的add.jsp的提交页面的地址改为:action="${pageContext.request.contextPath }/customer_save"。当点击保存按钮之后,访问customer这个action中的save方法。
2. 创建包结构:
* ssh1
* com.huida.dao
* com.huida.domain
* com.huida.service
*com.huida.web
3. 在com.huida.web下创建action类CustomerAction。
在com.huida.service下创建接口:CustomerService,实现接口的类:CustomerServiceImpl。
CustomerService接口中的方法为:
package com.huida.service;

public interface CustomerService {

    public void save();

}
CustomerServiceImpl实现类的内容为:
package com.huida.service;

public class CustomerServiceImpl implements CustomerService {

    @Override

    public void save() {

        System.out.println("Service层中的save方法被执行了");

    }

}
4. 在applicationContext.xml中配置我们的service。配置内容为:
<?xml version="1.0" encoding="UTF-8"?>

<beans xmlns="http://www.springframework.org/schema/beans"

    xmlns:xsi="http://www.w3.org/2001/XMLSchema-instance"

    xmlns:context="http://www.springframework.org/schema/context"

    xmlns:aop="http://www.springframework.org/schema/aop"

    xmlns:tx="http://www.springframework.org/schema/tx"

    xsi:schemaLocation="http://www.springframework.org/schema/beans

    http://www.springframework.org/schema/beans/spring-beans.xsd

    http://www.springframework.org/schema/context

    http://www.springframework.org/schema/context/spring-context.xsd

    http://www.springframework.org/schema/aop

    http://www.springframework.org/schema/aop/spring-aop.xsd

    http://www.springframework.org/schema/tx

    http://www.springframework.org/schema/tx/spring-tx.xsd">

    <bean id="customerService" class="com.huida.service.CustomerServiceImpl">

    </bean>

</beans>
5.编写CustomerAction接收请求,在struts.xml中完成Action的配置
CustomerAction的接收请求为:
package com.huida.web;import com.huida.domain.Customer;

import com.huida.service.CustomerService;

import com.opensymphony.xwork2.ActionSupport;public class CustomerAction extends ActionSupport{

    /*

     * 保存客户的方法

     */

    public String save(){

        System.out.println("Action中执行了save方法");

        return NONE;

    }

}
在struts.xml中对Action的配置为:
<package name="crm" namespace="/" extends="struts-default">

        <action name="customer_*" class="com.huida.web.CustomerAction" method="{1}">

            <result name=""></result>

        </action>

</package>
6.在Action中获取到service(开发不会使用,因为麻烦)
* 可以通过 WebApplicationContextUtils.getWebApplicationContext(ServletActionContext.getServletContext()); 来获取,但是这种方式编写代码太麻烦了!!
代码如下:
ackage com.huida.web;

import org.apache.struts2.ServletActionContext;

import org.springframework.context.ApplicationContext;

import org.springframework.context.support.ClassPathXmlApplicationContext;

import org.springframework.web.context.WebApplicationContext;

import org.springframework.web.context.support.WebApplicationContextUtils;

import com.huida.domain.Customer;

import com.huida.service.CustomerService;

import com.opensymphony.xwork2.ActionSupport;

public class CustomerAction extends ActionSupport {

    /*

     * 保存客户的方法

     */

    public String save(){

        System.out.println("Action中执行了save方法");

        //传统的web工厂方法

        WebApplicationContext webApplicationContext=WebApplicationContextUtils.getRequiredWebApplicationContext(ServletActionContext.getServletContext());

        CustomerService customerService=(CustomerService) webApplicationContext.getBean("customerService");

        customerService.save();

        return NONE;

    }

}
* 还可以通过new ClassPathXmlApplicationContext("applicationContext.xml")来获取。
代码如下:
package com.huida.web;

import org.apache.struts2.ServletActionContext;

import org.springframework.context.ApplicationContext;

import org.springframework.context.support.ClassPathXmlApplicationContext;

import org.springframework.web.context.WebApplicationContext;

import org.springframework.web.context.support.WebApplicationContextUtils;

import com.huida.domain.Customer;

import com.huida.service.CustomerService;

import com.opensymphony.xwork2.ActionSupport;

import com.opensymphony.xwork2.ModelDriven;

public class CustomerAction extends ActionSupport {

    /*

     * 保存客户的方法

     */

    public String save(){

        System.out.println("Action中执行了save方法");

        //使用spring的工厂

        ApplicationContext ac=new ClassPathXmlApplicationContext("applicationContext.xml");

        CustomerService customerService=(CustomerService) ac.getBean("customerService");

        customerService.save();

        return NONE;

    }

}
通过这两种方法我们都可以实现从action中获取service。
7. 我们可以验证一下struts与spring整合是否成功。
启动服务器-->在浏览器中输入http://localhost:8080/ssh1-->在页面中点击客户管理-->新增客户-->点击保存按钮。在控制台上输出如下内容:
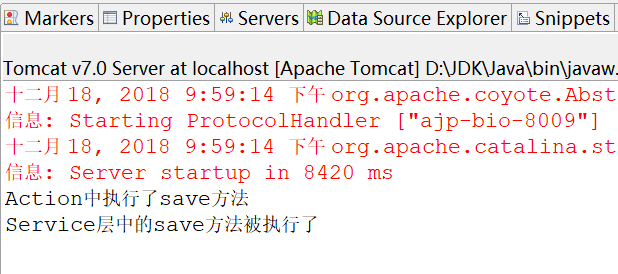
通过以上步骤我们便将struts与spring通过传统的方法整合起来了。但是这种整合很麻烦,所以在下一篇博文中我就对整合的常用方法进行总结。
Spring框架整合Struts2框架的传统方法的更多相关文章
- Spring 框架整合Struts2 框架和 Hibernate 框架
1. Spring 框架整合 Struts2 框架 // [第一种整合方式(不推荐)](http://www.cnblogs.com/linkworld/p/7718274.html) // 从 Se ...
- 整合Struts2框架和Spring框架
-----------------------siwuxie095 整合 Struts2 框架和 Spring 框架 1 ...
- Spring整合Struts2框架的第二种方式(Action由Spring框架来创建)(推荐大家来使用的)
1. spring整合struts的基本操作见我的博文:https://www.cnblogs.com/wyhluckdog/p/10140588.html,这里面将spring与struts2框架整 ...
- Spring整合Struts2框架的第一种方式(Action由Struts2框架来创建)。在我的上一篇博文中介绍的通过web工厂的方式获取servcie的方法因为太麻烦,所以开发的时候不会使用。
1. spring整合struts的基本操作见我的上一篇博文:https://www.cnblogs.com/wyhluckdog/p/10140588.html,这里面将spring与struts2 ...
- Maven项目整合Struts2框架
-------------------------siwuxie095 Maven 项目整合 Struts2 框架 1. ...
- Spring_day04--Spring框架整合hibernate框架
Spring框架整合hibernate框架 1 把hibernate核心配置文件中配置数据库信息,把数据库信息在spring进行配置 2 把hibernate里面的sessionFactory创建交给 ...
- shiro框架整合ssm框架
下面我通过一个web的maven项目来讲解如何将shiro整合ssm框架,具体结构如下图 一.引入依赖的jar包 <?xml version="1.0" encoding=& ...
- Spring笔记⑥--整合struts2
Spring如何在web应用里面用 需要额外加入的jar包 Spring-web-4.0.0 Spring-webmvc-4.0.0 Spring的配置文件,没什么不同 需要在web.xml下配置 ...
- Spring框架整合Struts2
1,用Spring架构,及Struts2-spring-plugin插件 导入Spring的dist全部所需的jar包 Struts2的spring插件 struts2-spring-plugin.X ...
随机推荐
- SparkStreaming 的编程模型
依赖管理 基本套路 Dstream输入源 ---input DStream Dstream输入源--- Receiver 内置的input Dstream : Basic Source 内置的inpu ...
- java中key-value数据有重复KEY如何存储
http://www.iteye.com/problems/87219 Map<Key, List<Value>>, 这个好 师兄厉害,给介绍了个神器:guava
- java中的URLConnection和HttpURLConnection有什么区别(因为我自己搜到别人写的区别看下来都没有什么区别)
今天看了一下公司同事的代码,如下 URLConnection connection = openConnection(localURL); HttpURLConnection httpURLConne ...
- 中国标准时间改为formatTime格式
1.toLocaleDateString (根据本地时间把Date 对象的日期部分转换为字符串): var time = new Date(); var formatTime = time.toLoc ...
- 随着firefox的迭代更新:FireBug不能用了?使用火狐Try Xpath插件替代Firebug和Firepath
本篇文章讲解如何在火狐中安装和使用Try Xpath(插件替代Firebug和Firepath). 在火狐中安装Try Xpath 1. 打开火狐浏览器 FireFox57以上的版本 2. 在火狐菜单 ...
- git 提交文件到gitee
1.新建文件夹 打开gitbash 初始化仓库 git.init 2.把要提交的文件copy到文件夹 3.git add. 4.git remote add master(分支) 远程仓库 5 ...
- Activity服务类-4 HistoryService服务类
一共个方法15个方法 用于查询历史工作流信息1.创建查询(7个方法)//创建一个新的编程查询来搜索{@link HistoricProcessInstance}.HistoricProcessInst ...
- 值得推荐的C/C++开源框架和库
值得推荐的C/C++开源框架和库 转自:http://www.cnblogs.com/lidabo/p/5514155.html - 1. Webbench Webbench是一个在Linux下 ...
- JSTL标签库学习记录2-fmt
fmt的标签为辅助性功能标签 设置编码 <fmt:requestEncoding value=""> 国际化相关 <fmt:setLocale value=&qu ...
- adb的一些常用的命令
如果在dos界面想要直接用adb的话,需要将anroidsdk安装目录下的tools和platform-tools以及加入到环境变量path中. 查看当前的设备(包括真机和模拟器):adb devic ...