SpringBoot整合SpringData和Mysql数据库
1.新建maven项目(具体的新建过程就不细说了)
2.添加maven依赖,也就是在pom.xml文件添加项目的依赖jar包:
<project xmlns="http://maven.apache.org/POM/4.0.0" xmlns:xsi="http://www.w3.org/2001/XMLSchema-instance"

  xsi:schemaLocation="http://maven.apache.org/POM/4.0.0 http://maven.apache.org/maven-v4_0_0.xsd">

  <modelVersion>4.0.0</modelVersion>

  <groupId>springboot-test</groupId>

  <artifactId>bootTest</artifactId>

  <packaging>war</packaging>

  <version>0.0.1-SNAPSHOT</version>

  <name>bootTest Maven Webapp</name>

  <url>http://maven.apache.org</url>

    <!-- SpringBoot版本(核心) -->

     <parent>

        <groupId>org.springframework.boot</groupId>

        <artifactId>spring-boot-starter-parent</artifactId>

        <version>1.4.0.RELEASE</version>

        <relativePath />

    </parent>

    <dependencies>

        <!-- web -->

        <dependency>

            <groupId>org.springframework.boot</groupId>

            <artifactId>spring-boot-starter-web</artifactId>

        </dependency>

        <!-- 持久层(SpringData) -->

        <dependency>

            <groupId>org.springframework.boot</groupId>

            <artifactId>spring-boot-starter-data-jpa</artifactId>

        </dependency>

        <!-- MySql -->

           <dependency>

            <groupId>mysql</groupId>

            <artifactId>mysql-connector-java</artifactId>

        </dependency>

        <!-- JDBC依赖 -->

        <dependency>

            <groupId>org.springframework.boot</groupId>

            <artifactId>spring-boot-starter-jdbc</artifactId>

        </dependency>

         <dependency>

            <groupId>org.springframework.boot</groupId>

            <artifactId>spring-boot-starter-test</artifactId>

            <scope>test</scope>

        </dependency>

        <!-- 模板(渲染HTML页面) -->

        <dependency>

           <groupId>org.springframework.boot</groupId>

           <artifactId>spring-boot-starter-thymeleaf</artifactId>

        </dependency>

    </dependencies>

        <build>

        <finalName>spring-boot-data-jpa</finalName>

        <plugins>

            <plugin>

                <groupId>org.apache.maven.plugins</groupId>

                <artifactId>maven-compiler-plugin</artifactId>

                <configuration>

                    <source>1.8</source>

                    <target>1.8</target>

                </configuration>

            </plugin>

        </plugins>

    </build>

</project>
3.在application.properties(放在resources目录下)中添加配置信息:
##JDBC Setting(Mysql的配置信息)

spring.datasource.driver-class-name=com.mysql.jdbc.Driver

spring.datasource.url=jdbc:mysql://127.0.0.1:3306/boottest?useUnicode=true&characterEncoding=utf-8

spring.datasource.username=root

spring.datasource.password=root

spring.datasource.max-idle=10

spring.datasource.max-wait=10000

spring.datasource.min-idle=5

spring.datasource.initial-size=5


##服务器的配置信息

server.port=8080

server.session.timeout=10

server.tomcat.uri-encoding=UTF-8

## SpringDataJPA Settings
#spring.jpa.generate-ddl:true ----->将这个属性设置为TRUE,就是设置数据库自动更新,即但数据库没有实体所对应的的表时,自动创建,有对应的表时执行更新,和hibernate的hbm2ddl.auto:updata功能差不多

spring.jpa.generate-ddl: true

spring.jpa.show-sql: true

spring.jpa.properties.hibernate.format_sql: false

#设置模板位置,即html文件的存放位置

spring.thymeleaf.prefix=classpath:/templates/
4.项目的文件目录

5.测试
5.1 实体类User
package com.yxl.springboot.entity;

import javax.persistence.Entity;

import javax.persistence.GeneratedValue;

import javax.persistence.Id;

import javax.persistence.Table;

@Entity

@Table(name = "user") //声明实体对应得表,如果没有则创建(前提是application.properties文件中有相应的配置)

public class User {

    @Id

    @GeneratedValue

    private int id;

    private String name;

    private String password;

    public User() {

        super();

        // TODO Auto-generated constructor stub

    }

    public User(int id, String name, String password) {

        super();

        this.id = id;

        this.name = name;

        this.password = password;

    }

    public int getId() {

        return id;

    }

    public void setId(int id) {

        this.id = id;

    }

    public String getName() {

        return name;

    }

    public void setName(String name) {

        this.name = name;

    }

    public String getPassword() {

        return password;

    }

    public void setPassword(String password) {

        this.password = password;

    }

}
5.2 Mapper(Dao)层
package com.yxl.springboot.mapper;

import org.springframework.data.jpa.repository.JpaRepository;

import com.yxl.springboot.entity.User;

//继承JpaRepository类

public interface UserMapper extends JpaRepository<User, Integer>{

    public User findByName(String name);

}
5.3 controller层
package com.yxl.springboot.controller;

import java.util.List;

import org.springframework.beans.factory.annotation.Autowired;

import org.springframework.stereotype.Controller;

import org.springframework.ui.Model;

import org.springframework.web.bind.annotation.RequestMapping;

import com.yxl.springboot.entity.User;

import com.yxl.springboot.mapper.UserMapper;

@Controller

public class SpringBootTestController {

    @Autowired

    private UserMapper userMapper;

    @RequestMapping(value = "/find")

    public String springBootTest(Model model) {

        User findByName = userMapper.findByName("test");

        model.addAttribute("user", findByName);

        return "test";

    }

    @RequestMapping(value = "/all")

    public String selectAll(Model model) {

         List<User> selectAll = userMapper.findAll();

         model.addAttribute("user", selectAll);

        return "test1";

    }

}
5.4 test.html
<!DOCTYPE html>

<html xmlns="http://www.w3.org/1999/xhtml" xmlns:th="http://www.thymeleaf.org"

      xmlns:sec="http://www.thymeleaf.org/thymeleaf-extras-springsecurity3">

<head>

<meta charset="UTF-8"></meta>

<title>Insert title here</title>

</head>

<body>

<h1>哈哈哈!成功了!</h1>

<!-- 模板渲染 -->

<p th:text="${user.name}"></p>

</body>

</html>
5.5 test1.html
<!DOCTYPE html>

<html xmlns="http://www.w3.org/1999/xhtml" xmlns:th="http://www.thymeleaf.org"

      xmlns:sec="http://www.thymeleaf.org/thymeleaf-extras-springsecurity3">

<head>

<meta charset="UTF-8"></meta>

<title>Insert title here</title>

</head>

<body>

<h1>哈哈哈!成功了!</h1>

<table>

    <thead>

        <tr>

            <td>编号</td>

            <td>姓名</td>

            <td>密码</td>

        </tr>

    </thead>

    <tbody>

        <!-- 循环遍历 -->

        <tr th:each = "user : ${user}">

            <td th:text = "${user.id}"></td>

            <td th:text = "${user.name}"></td>

            <td th:text = "${user.password}"></td>

        </tr>

    </tbody>

</table>

</body>

</html>
5.5 程序入口Application.java
package com.yxl.springboot;

import org.springframework.boot.SpringApplication;

import org.springframework.boot.autoconfigure.SpringBootApplication;

@SpringBootApplication

public class Application {

    public static void main(String[] args) {

         SpringApplication.run(Application.class, args);

    }

}
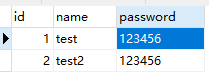
5.6 数据库数据
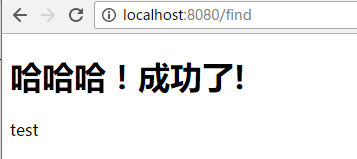
5.7 运行结果
test.html
test1.html

参考博客:http://blog.csdn.net/je_ge/article/details/53294949
http://blog.csdn.net/quuqu/article/details/52511933
SpringBoot整合SpringData和Mysql数据库的更多相关文章
- SpringBoot 整合 hibernate 连接 Mysql 数据库
前一篇搭建了一个简易的 SpringBoot Web 项目,最重要的一步连接数据库执行增删改查命令! 经过了一天的摸爬滚打,终于成功返回数据! 因为原来项目使用的 SpringMVC + Hibern ...
- springboot整合mybatis连接mysql数据库出现SQLException异常
在springboot整合mybatis连接数据库的时候,项目中遇到一个SQLException,我检查了properties配置文件,看数据源有没有配错,检查有没有打错字,在数据库中把sql语句查询 ...
- kotlin + springboot整合mybatis操作mysql数据库及单元测试
项目mybatis操作数据库参考: http://how2j.cn/k/springboot/springboot-mybatis/1649.html?p=78908 junit对controller ...
- freeswitch用户整合(使用mysql数据库的用户表)
转:freeswitch用户整合(使用mysql数据库的用户表) freeswitch是一款强大的voip服务器,可以语音和视频.但是它默认是采用/directory文件夹下的xml来配置用户的,对于 ...
- 如何用IDEA创建springboot(maven)并且整合mybatis连接mysql数据库和遇到的问题
一.New->Project 二.点击next 三.在Group栏输入组织名,Artifact就是项目名.选择需要的java版本,点击next 四.添加需要的依赖 在这里我们也可以添加sql方面 ...
- django整合原有的mysql数据库
虽然django适合从零开始构建一个项目,但有时候整合原有的数据库也在所难免,下面以django整合我的mysql作说明. mysql数据是我从京东上抓取的数据,数据表名为jd,演示如图 下面将jd整 ...
- springboot学习-springboot使用spring-data-jpa操作MySQL数据库
我们在上一篇搭建了一个简单的springboot应用,这一篇将介绍使用spring-data-jpa操作数据库. 新建一个MySQL数据库,这里数据库名为springboot,建立user_info数 ...
- SpringBoot配置JDBC连接MySql数据库的时候遇到了报错:HikariPool-1 - Exception during pool initialization
使用SpringBoot做JAVA开发时,JDBC连接MySql数据库的时候遇到了报错: ERROR 10392 --- [ main] com.zaxxer.hikari.pool.HikariPo ...
- Springboot+mybatis中整合过程访问Mysql数据库时报错
报错原因如下:com.mysql.cj.core.exceptions.InvalidConnectionAttributeException: The server time zone.. 产生这个 ...
随机推荐
- saas 系统租户自助网站
1. 原理 类似github 的自定义页面,使用jekyll 进行租户自助网站的生成,系统使用jenkins 进行租户的网站构建 同时结合租户的个性化域名系统,进行租户页面的发布管理 ...
- Attribute的妙用 ---- 拦截器(过滤器)
一.何为Attribute 下面是微软官方对Attribute的解释: 公共语言运行时允许你添加类似关键字的描述声明,叫做Attributes,它对程序中的元素进行标注,如类型.字段.方法和属性等.A ...
- C语言 数组排序法总结
//快速排序法 void QuickSort(int *a, int left, int right) { int i = left; int j = right; int k = a[left]; ...
- struts2学习(14)struts2文件上传和下载(4)多个文件上传和下载
四.多个文件上传: 五.struts2文件下载: 多个文件上传action com.cy.action.FilesUploadAction.java: package com.cy.action; i ...
- 【转】使用JMeter对数据库做压力测试
作为一名开发人员,大多情况下都会认真的做好功能测试,但是却常常忽略了软件开发之后的压力测试,尤其是在面向大量用户同时使用的Web应用系统的开发过程,压力测试往往是不够充分的.近期我在一个求职招聘型的网 ...
- Vue.js: temple
ylbtech-Vue.js: temple 1.返回顶部 2.返回顶部 3.返回顶部 4.返回顶部 5.返回顶部 6.返回顶部 7.返回顶部 8.返回顶部 9.返 ...
- 一张图看懂高通QC1.0-QC4.0快充进化之路!QC2.0跟QC3.0充电区别
快充技术日新月异,快充市场百家争鸣的今天,高通QC快充依然主导着市场.如今QC快充已发展到第四代,每一代都有着革命性的进步.从QC1.0到QC4.0更新换代时间之短,不免让广大人民群众抱怨. “啥?老 ...
- laravel 做图片的缩略图 踩坑
系统需求 PHP >= 5.3 Fileinfo Extension GD Library (>=2.0) … or … Imagick PHP extension (>=6.5.7 ...
- thinkphp中的配置与读取C方法详解
1.项目公共配置 Conf/config.php 内容如下 <?php /** *项目公共配置 *@package *@author **/ return array( 'LOAD_EXT_CO ...
- UUID是如何保证全局唯一的
UUID由以下几部分的组合: (1)当前日期和时间,UUID的第一个部分与时间有关,如果你在生成一个UUID之后,过几秒又生成一个UUID,则第一个部分不同,其余相同. 据说时间粒度很 ...