
Co-Debugging JNI with Android Studio and Visual Studio
Co-Debugging JNI with Android Studio and Visual Studio
Warning! This tutorial uses outdated versions of VisualGDB and Android Studio. Please follow the new Gradle Flavors tutorial to learn how to use VisualGDB 5.0 with Android Studio 1.3.
This tutorial shows how to debug a sample Android app with native code with both Android Studio and Visual Studio:
- Android Studio will be used to debug the Java part of the project
- Visual Studio will be used to debug the C/C++ part of the project
Both debuggers will be attached to the application at the same time without interfering with one another.
Before you begin, please install VisualGDB 4.3 or later and Android Studio.
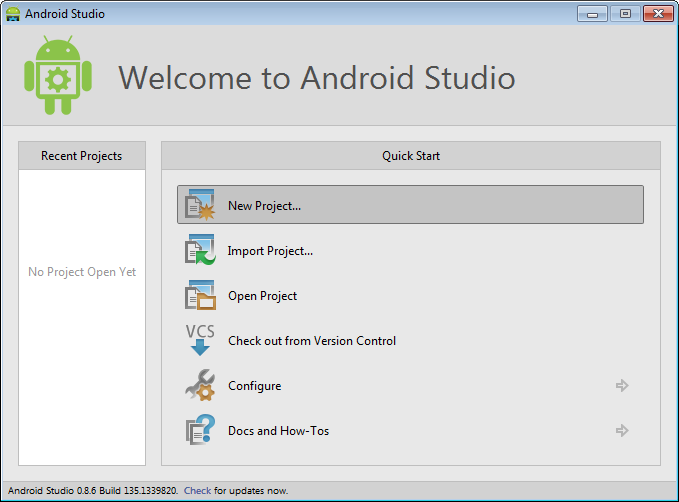
- Launch Android Studio. Begin creating a new project:
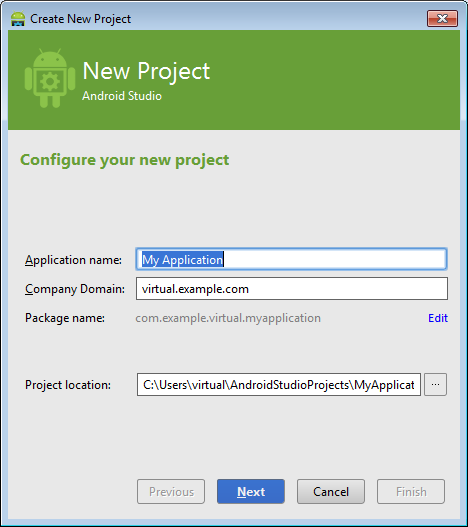
- Specify application name and domain:
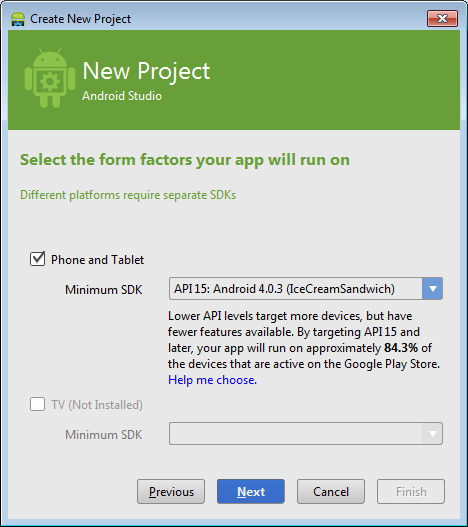
- On the next wizard page specify the platform:
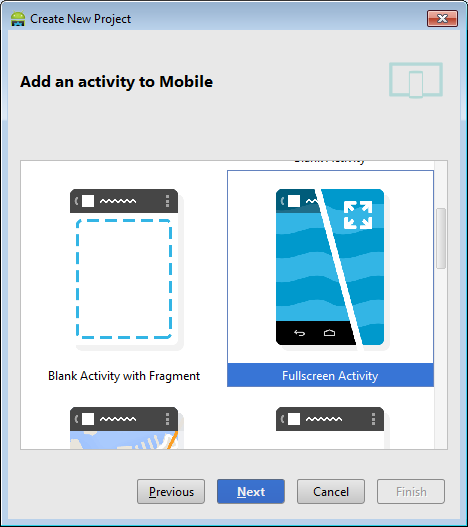
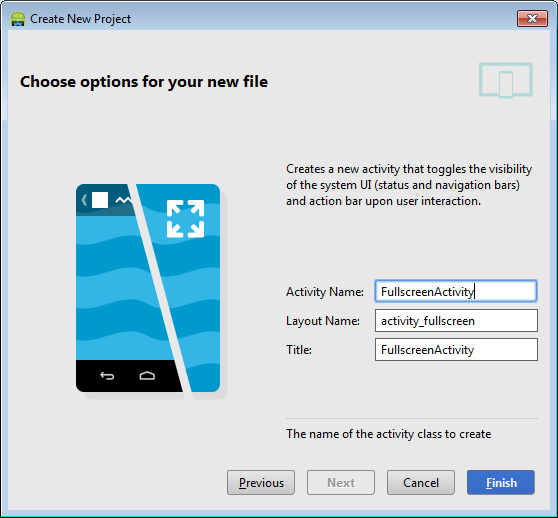
- On the activity selection page select “Fullscreen activity”:
- Proceed with the default activity name:
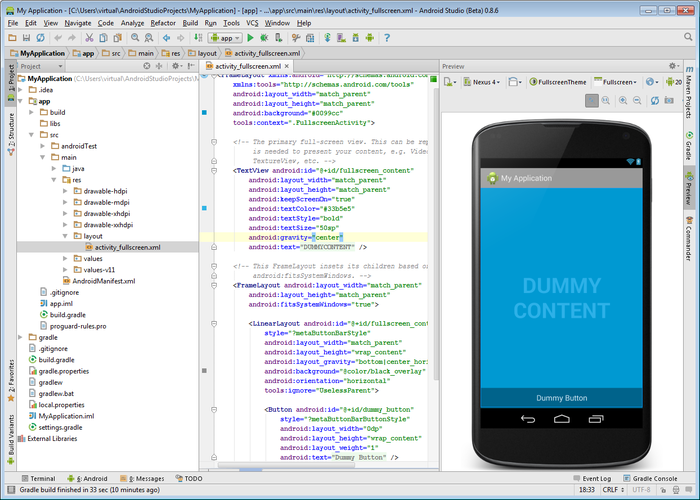
- Once you press “Finish”, Android Studio will create your project:
- Now it’s time to add some native code. Create a jni folder under the app folder (switch to the Project view from the Android view on the Project pane) and add 2 files with the following content:
- hello.c:
#include<string.h>
#include <jni.h>
#include<stdio.h>int s_ButtonPressCounter = 0;
jstring
Java_com_example_virtual_myapplication_FullscreenActivity_stringFromJNI(JNIEnv* env, jobject thiz)
{
char szBuf[512];
sprintf(szBuf, "%d", s_ButtonPressCounter++);jstring str = (*env)->NewStringUTF(env, szBuf);
return str;
}123456789101112131415#include<string.h>#include <jni.h>#include<stdio.h>int s_ButtonPressCounter = 0;jstringJava_com_example_virtual_myapplication_FullscreenActivity_stringFromJNI(JNIEnv* env, jobject thiz){char szBuf[512];sprintf(szBuf, "%d", s_ButtonPressCounter++);jstring str = (*env)->NewStringUTF(env, szBuf);return str;}Note that the name of the function should match the name of your package and activity!
- Android.mk:
LOCAL_PATH := $(call my-dir)
include $(CLEAR_VARS)
LOCAL_MODULE := HelloLibrary
#VisualGDBAndroid: AutoUpdateSourcesInNextLine
LOCAL_SRC_FILES := hello.c
include $(BUILD_SHARED_LIBRARY)1234567LOCAL_PATH := $(call my-dir)include $(CLEAR_VARS)LOCAL_MODULE := HelloLibrary#VisualGDBAndroid: AutoUpdateSourcesInNextLineLOCAL_SRC_FILES := hello.cinclude $(BUILD_SHARED_LIBRARY)
Ensure that the jni folder is on the same level as the src folder:
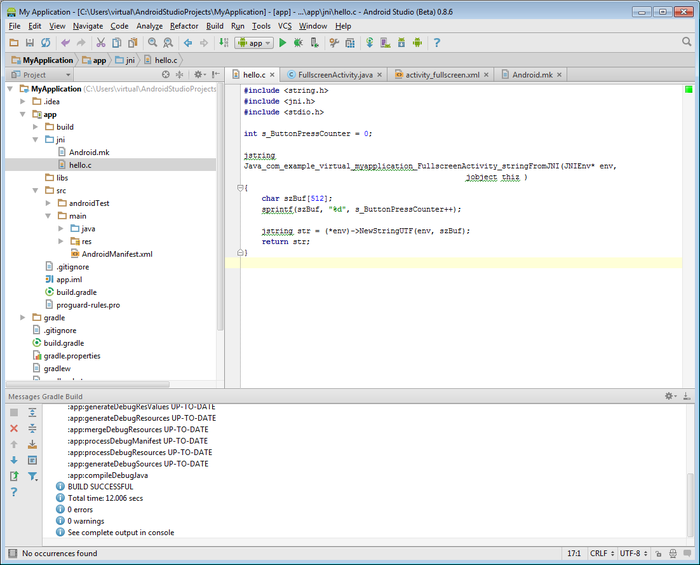 Do not use the default Android Studio’s JNI folder! As of version 1.0.1 the normal JNI integration is broken and will result in various build and debug problems. If you put your JNI folder on the same level as the src folder, VisualGDB will handle the JNI build and resolve all problems automatically.
 - hello.c:
- Add the following code to FullscreenActivity.java:
public native String stringFromJNI();
static {
System.loadLibrary("HelloLibrary");
}12345public native String stringFromJNI();static {System.loadLibrary("HelloLibrary");}and the following inside the onCreate() method:
final Button button = (Button)findViewById(R.id.dummy_button);
button.setOnClickListener(new View.OnClickListener() {
public void onClick(View v) {
String str = stringFromJNI();
button.setText( str);
}
});1234567final Button button = (Button)findViewById(R.id.dummy_button);button.setOnClickListener(new View.OnClickListener() {public void onClick(View v) {String str = stringFromJNI();button.setText( str);}});Then build your app and try debugging it:
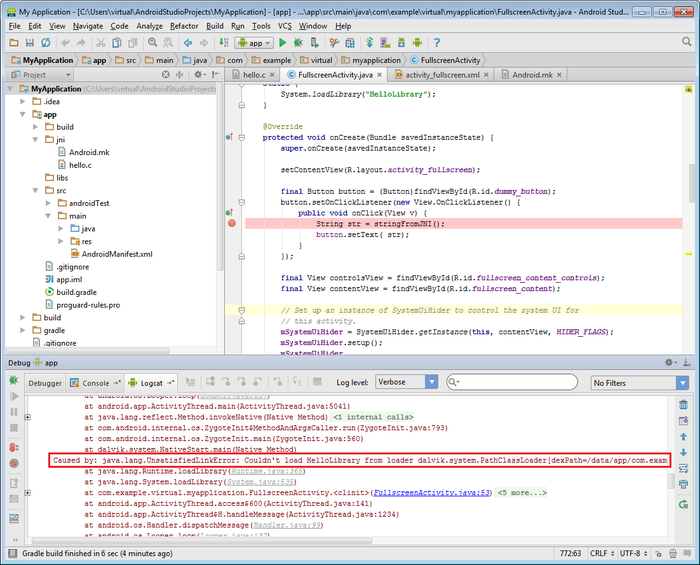 The loader will report a missing library. This happens because Android Studio (as of October 2014) does not build native libraries automatically. We will fix this in the next step.
 - Start Visual Studio and create a VisualGDB Android project:
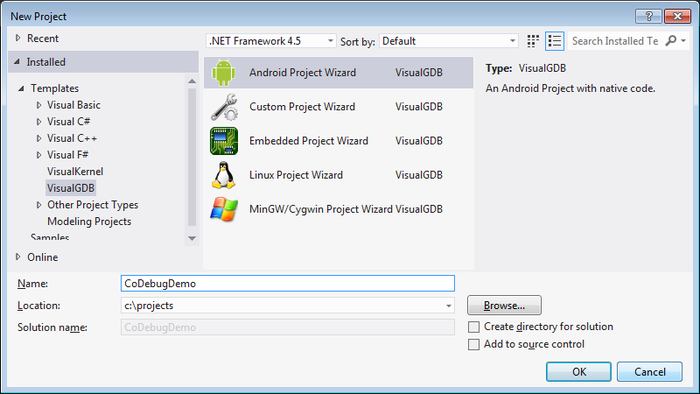
- Select “Import existing project”:
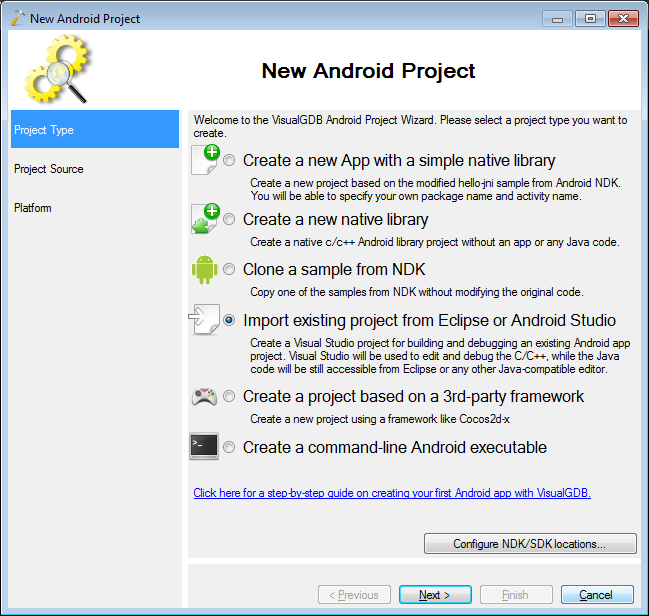
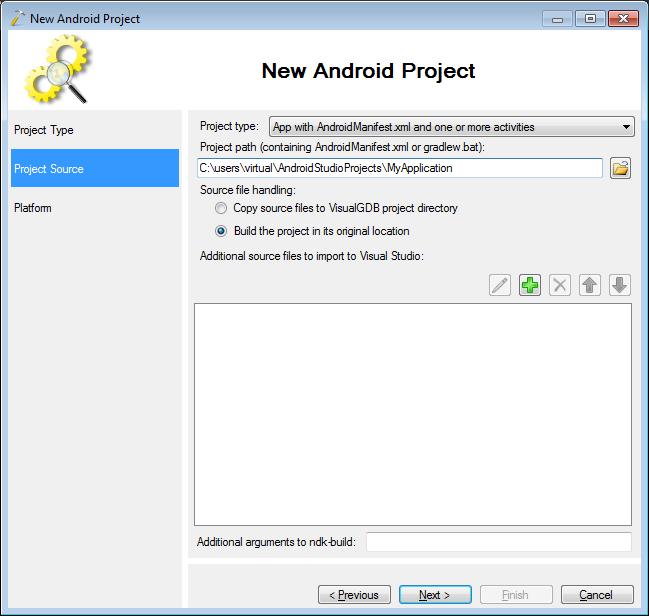
- Point the VisualGDB wizard to the location of your Android Studio project:
- Select the targeted platform:
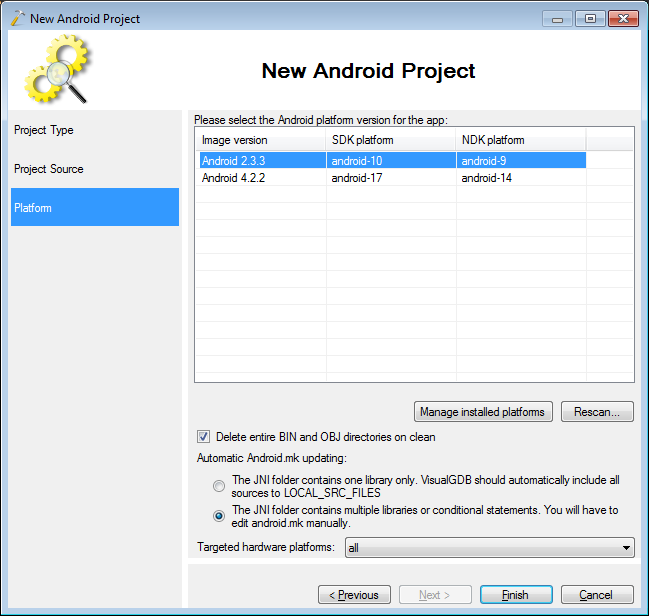
- Press “Finish”. VisualGDB will import your project into Visual Studio. Build it by pressing Ctrl-Shift-B:
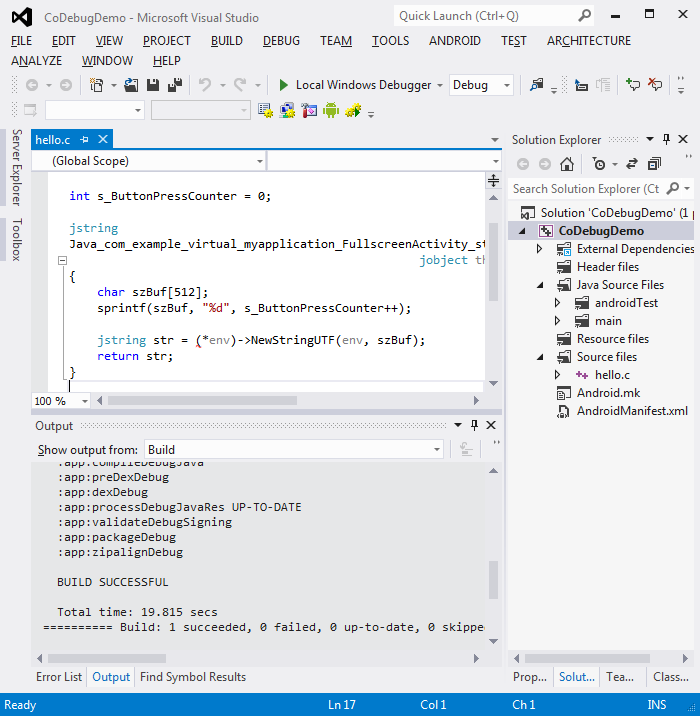
- Start an Android emulator or connect a physical device. Put a breakpoint inside the function in the .c file and press F5 to start debugging. Ensure that the “Debug app startup” feature is disabled while Android Studio is running in the background:

- Click the center of the screen so that the “dummy button” appears. Click the button. Your breakpoint will be triggered:
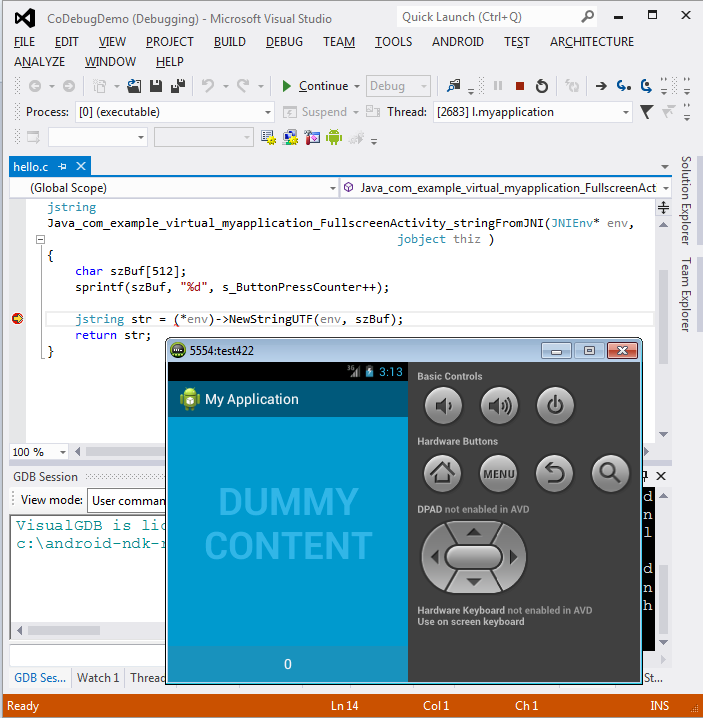
- With Visual Studio you can debug the C/C++ part of your app, but not the java part. We will now use Android Studio to debug the Java part simultaneously with the C/C++ debugging. Stop debugging by pressing Shift-F5. Go to Android studio, put a breakpoint on a call to stringFromJNI() and begin debugging:
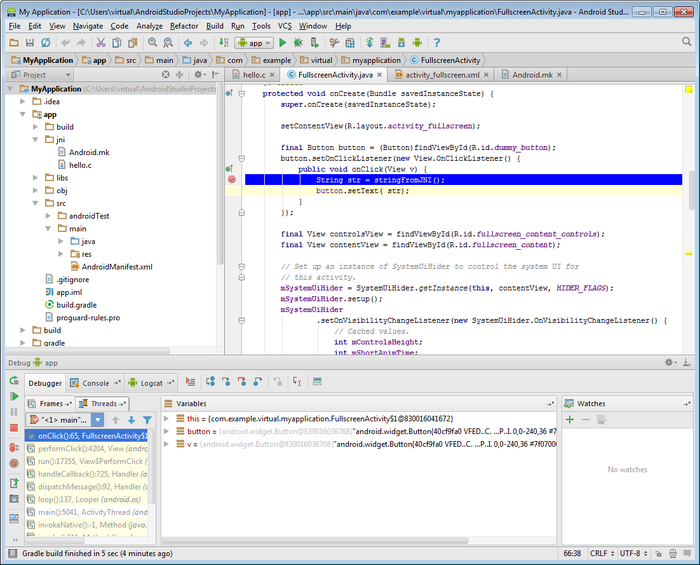
- Once the breakpoint triggers, go back to Visual
Studio and start debugging. VisualGDB will ask if you want
to attach to an existing instance. Select “attach” and set a
breakpoint on the sprintf() line: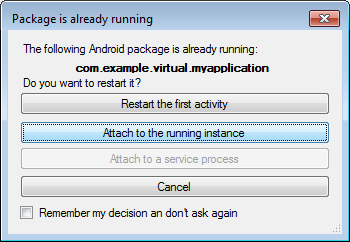
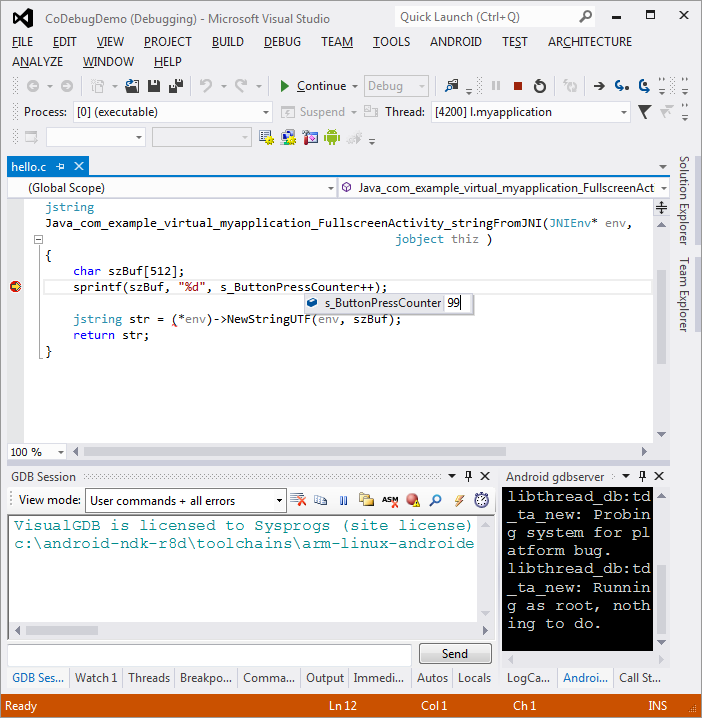
- Go to Android Studio and select ‘step over’ The VisualGDB breakpoint will trigger. Modify the value of the counter to 99:
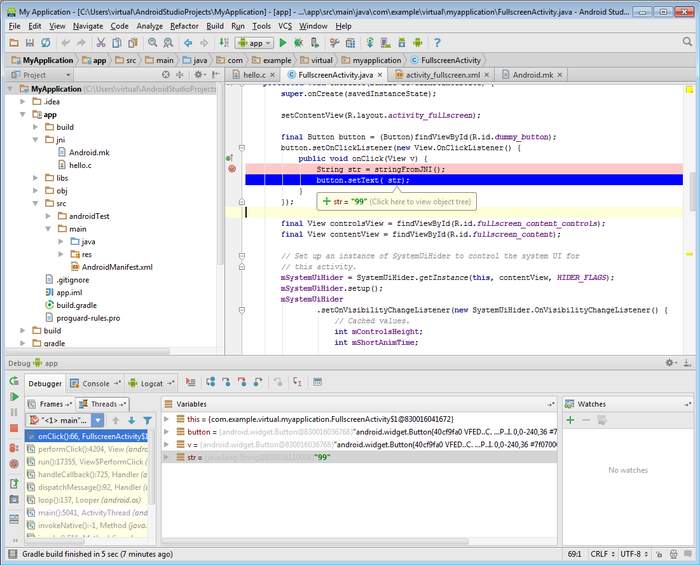
- Press F5 to continue debugging. Android Studio will step out of the C function showing the value we entered in Visual Studio:
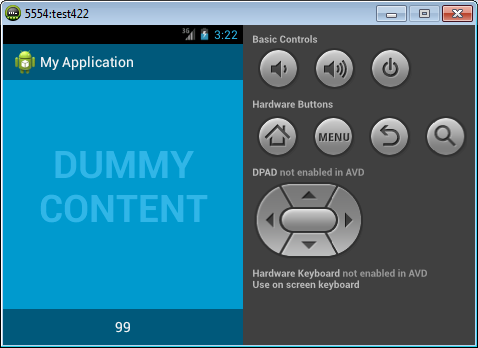
- Resume the execution of your app. See how the button text is updated with the value we set:
Co-Debugging JNI with Android Studio and Visual Studio的更多相关文章
- [Visual Studio]透过Visual Studio 2012的选择性贴上将XML与JSON直接转成对应的类别
原文:[Visual Studio]透过Visual Studio 2012的选择性贴上将XML与JSON直接转成对应的类别 在开发专案时若碰到要串接服务或是他人的API,常常避免不了都要面对XML或 ...
- 推荐SQL Server Management Studio以及Visual Studio下的免费的插件 ApexSQL Complete
SQL Server 并没有代码格式化的工具,对于处理他人编写的长SQL需要手工的格式化是一件麻烦的事情. 推荐SQL Server Management Studio以及Visual Studio下 ...
- visual studio 和visual studio code 的区别是什么?
区别有三: 区别一:含义不一样. Visual Studio(简称VS)是美国微软公司的开发工具包系列产品,是一个基本完整的开发工具集,它包括了整个软件生命周期中所需要的大部分工具,如UML工具.代码 ...
- 2.[WP Developer体验Andriod开发]Andriod Studio结合Visual Studio Emulator for Android调试Android App
0. 工欲善其事必先利其器 上一篇博客对比了一下Android和WinPhnoe的布局容器,后续篇章重点放在Android的开发上了. 说到开发就绕不开调试程序,调试Android App我们有2种选 ...
- 2.[Andriod]Andriod Studio结合Visual Studio Emulator for Android调试Android App
0. 工欲善其事必先利其器 上一篇博客对比了一下Android和WinPhnoe的布局容器,后续篇章重点放在Android的开发上了. 说到开发就绕不开调试程序,调试Android App我们有2种选 ...
- HoloLens开发手记 - 使用Visual Studio Using Visual Studio
不论你是否使用DirectX或Unity来开发全息应用,你都会使用Visual Studio 2015来进行调试和部署应用.在本部分,你将会学习以下内容: 如何通过Visual Studio将你的应用 ...
- [Visual Studio] 开启Visual Studio 2012通过右键菜单创建单元测试(Unit Test)
Visual Studio 2012可以说是迄今为止微软VS开发工具中用户体验最好的产品,无论是速度还是体验以及功能,都非常出色,但是,使用了一段时间后发现有一个之前版本VS都有的功能却在Visual ...
- 【Visual Studio】Visual Studio对CLR异常的特殊支持
Visual Studio 对异常进行了特殊的支持,它能够在进行了特殊设置后,使代码中的try catch块失效.也就是说,一个异常在正常情况下应该能够被某个特殊的try catch块捕获,但是Vis ...
- 【Visual Studio】Visual Studio 2010 "LNK1123: 转换到 COFF 期间失败: 文件无效或损坏" 的解决方法
1.将 项目|项目属性|配置属性|连接器|清单文件|嵌入清单 “是”改为“否”. 2.找到 C:\Windows\winsxs\x86_netfx-cvtres_for_vc_and_vb_b03f5 ...
随机推荐
- Rancher安装使用
官网 http://docs.rancher.com/rancher/latest/en/quick-start-guide/#add-hosts 安装步骤: 1 Start up a Linux m ...
- JQ N级导航
<!DOCTYPE html PUBLIC "-//W3C//DTD XHTML 1.0 Transitional//EN" "http://www.w3.org/ ...
- digitalocean优惠码30美元1G内存VPS免费使用两个月
著名的云主机服务商CloudWays送福利啦!CloudWays是一家云主机网站服务商,与Digitalocean和亚马逊AWS开展合作,新用户注册验证手机即可赠送价值30美元的免费VPS主机. 申请 ...
- $and $not null 正则表达式
查询MasterID大于1且MasterType等于TestType的文档: db.SysCore.find({$and:[{"MasterID":{$gt:1}},{" ...
- RHCE备考倒计时
2014年7月31日 周四 上海考试 认证RHCE6
- javaWEB总结(7):HttpServlet和HttpServletRequest
前言:HttpServletRequest对象封装了客户端进行HTTP协议请求时的所有信息,HttpServletRequest继承了ServletRequest,所以和ServletRequest一 ...
- HDU 5807 Keep In Touch
加维降复杂度 #pragma comment(linker, "/STACK:1024000000,1024000000") #include<cstdio> #inc ...
- 在线GET/POST API接口请求模拟测试工具
在前后端开发过程中经常需要对HTTP接口进行测试,推荐几款比较好用的测试工具 Postman https://www.getpostman.com/ 强大的HTTP请求测试工具 支持多平台 Advan ...
- php curl调用相关api
一.基本步骤 1.本次模拟是php的相关post请求,可通过CURLOPT_CUSTOMREQUEST设定相关POST.GET.PUT.DELETE相关适应REST API 2.相关重要的是curl_ ...
- SVN的学习以及使用!
什么是版本控制? 版本控制是记录一个或若干文件内容变化的系统.以便将来查阅特定版本修订情况. 版本控制,就像是一本历史书,记录了软件版本的迭代过程. 为什么需要"版本控制" 需要清 ...