微信小程序之使用wx:for遍历循环
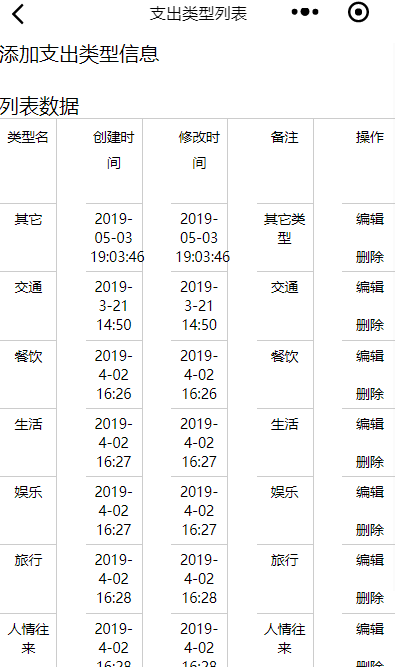
效果图如下:
实现代码如下:
type.js:
// pages/type/type.js

Page({

  /**

   * 页面的初始数据

   */

  data: {

    types: ""

  },

  editType: function (e) {

     var typeId =  e.currentTarget.dataset['id'];

     console.log("edit:"+typeId);

    wx.navigateTo({

      url: '../type_edit/type_edit?typeId=' + typeId

    })

  },

  delType:function(e){

    var typeId = e.currentTarget.dataset['id'];

    console.log("delete:"+typeId)

    wx.showModal({

      title: '提示',

      content: '确认要删除该支出类型?',

      success: function (res) {

        if (res.confirm) {

          console.log('用户点击确定')

          wx.request({

            url: getApp().globalData.urlPath + "spendingType/delete",

            method: "POST",

            data: {

              typeId: typeId

            },

            header: {

              "Content-Type": "application/x-www-form-urlencoded"

            },

            success: function (res) {

              console.log(res.data.code);

              if (res.statusCode == ) {

                //访问正常

                if (res.data.code == "") {

                  wx.showToast({

                    title: "删除成功,返回支出类型列表",

                    icon: 'success',

                    duration: ,

                    success: function () {

                      wx.navigateTo({

                        url: '../type/type'

                      })

                    }

                  })

                }

              } else {

                wx.showLoading({

                  title: '系统异常',

                  fail

                })

                setTimeout(function () {

                  wx.hideLoading()

                }, )

              }

            }

          })

        } else if (res.cancel) {

          console.log('用户点击取消')

        }

      }

    })

  },

  /**

   * 生命周期函数--监听页面加载

   */

  onLoad: function (options) {

    wx.setNavigationBarTitle({

      title: "支出类型列表"

    })

    var userCode = wx.getStorageSync('userId');

    var self = this

    wx.request({

      url: getApp().globalData.urlPath + "spendingType/types",//json数据地址

      data: {

        userCode: userCode

      },

      headers: {

        "Content-Type": "application/x-www-form-urlencoded"

      },

      success: function (res) {

        self.setData({

          types: res.data.data

        });//等同于

      }

    })

  },

  /**

   * 生命周期函数--监听页面初次渲染完成

   */

  onReady: function () {

  },

  /**

   * 生命周期函数--监听页面显示

   */

  onShow: function () {

  },

  /**

   * 生命周期函数--监听页面隐藏

   */

  onHide: function () {

  },

  /**

   * 生命周期函数--监听页面卸载

   */

  onUnload: function () {

  },

  /**

   * 页面相关事件处理函数--监听用户下拉动作

   */

  onPullDownRefresh: function () {

  },

  /**

   * 页面上拉触底事件的处理函数

   */

  onReachBottom: function () {

  },

  /**

   * 用户点击右上角分享

   */

  onShareAppMessage: function () {

  }

})
type.js没什么好说的,如果要说,只能说这个onLoad这里的onLoad就相当于js中的onload方法,当进入该视图时,默认全局加载一次。
type.wxml:
<view>

  <view>

    <navigator url="/pages/type_add/type_add" hover-class="navigator-hover">添加支出类型信息</navigator>

  </view>

  <view>

    <text>\n</text>

  </view>

  <view>

    <view>

      <text>列表数据</text>

      <text>\n</text>

    </view>

<view class="table">

        <view class="tr thead">

          <view class="td">类型名</view>

          <view class="td">创建时间</view>

          <view class="td ">修改时间</view>

          <view class="td">备注</view>

          <view class="td ">操作</view>

        </view>

        <block>

          <view class="tr" wx:for="{{types}}" wx:for-item="item">

            <view class="td">{{item.typeName}}</view>

            <view class="td">{{item.createDate}}</view>

            <view class="td">{{item.modifyDate}}</view>

            <view class="td">{{item.remark}}</view>

            <view class="td">

              <text bindtap='editType' data-id="{{item.typeId}}">编辑</text>

              <text>\n</text>

              <text>\n</text>

              <text bindtap='delType' data-id="{{item.typeId}}">删除</text>

            </view>

          </view>

        </block>

      </view>

  </view>

</view>
遍历循环主要使用的是wx:for。如果要类比的话,我觉得jstl跟这个神似。先来看看jstl,代码如下:
<c:forEach var="u" items="${user}">

        <tr>

                <td>${u.cid}</td>

                <td>${u.cname}</td>

                <td>${u.age }</td>

        </tr>

</c:forEach>
var相当于我可以任意定义一个简要字母来调用item(item相当于type.js中的data或self.setData存储的数据)。
如果你还不明白的话,可以联系到$.each,代码如下:
$.each(classroom_list, function(i, c) {

                    rows = rows + "<tr>";

                    rows = rows + "<td>" + c.id + "</td>";

                    rows = rows + "<td>" + c.nickname + "</td>";

                    rows = rows + "<td><a href='student_submit_info.html?userId="+c.id+"'>查看详情</a></td>";

                    rows = rows + "</tr>"

});
type.wxss:
.table {

  border: 1px solid #ccc;

  font-size: 28rpx;

  background: #fff;

  border-right: none;

}

.tr{

  display: flex;

  justify-content: space-between;

}

.td {

  text-align: center;

  border: 1px solid #ccc;

  display: inline-block;

  border-left: none;

  border-bottom: none;

  padding: 10rpx %;

  width: %;

}

.thead .td{

  border-top: none;

  height: 140rpx;

  line-height: 50rpx;

}
参考资料:
微信小程序之列表渲染
微信小程序之使用wx:for遍历循环的更多相关文章
- 微信小程序中在swiper-item中遍历循环添加多个数据内容(微信小程序交流群:604788754)
在小程序中为了实现一个<swiper-item>中添加多个内容重复的标签,那就需要使用wx:for循环.如果按小程序的简易教程,循环加在block中,而swiper-item放在里面.所有 ...
- 【微信小程序】调用wx.request接口需要注意的问题
写在前面 之前写了一篇<微信小程序实现各种特效实例>,上次的小程序的项目我负责大部分前端后台接口的对接,然后学长帮我改了一些问题.总的来说,收获了不少吧! 现在项目已经完成,还是要陆陆续续 ...
- 开发 | 微信小程序API-wx.setScreenBrightness/wx.getScreenBrightness
前言 最近接触了微信小程序 API - wx.setScreenBrightness .wx.getScreenBrightness 接口,调用该接口可以调节并显示手机屏幕亮度数据.对于喜欢腾讯新闻. ...
- 关于微信小程序遇到的wx.request({})问题
域名请求错误问题 当我们在编写小程序,要发送请求时,wx.request({})时或许会遇到如下的问题: 一:这是因为微信小程序的开发中,域名只能是https方式请求,所以我们必须在小程序微信公众平台 ...
- 微信小程序开发 [05] wx.request发送请求和妹纸图
1.wx.request 微信小程序中用于发起网络请求的API就是wx.request了,具体的参数太多,此处就不再一一详举了,基本使用示例如下: wx.request({ url: 'test.ph ...
- 微信小程序web-view之wx.miniProgram.redirectTo
17年微信小程序官方提供了web-view组件. 官方描述:web-view组件是一个可以用来承载网页的容器,会自动铺满整个小程序页面.个人类型与海外类型的小程序暂不支持使用. 这段时间研究了一下小程 ...
- 微信小程序网络请求wx.request请求
最近微信小程序开始开放测试了,小程序提供了很多api,极大的方便了开发者,其中网络请求api是wx.request(object),这是小程序与开发者的服务器实现数据交互的一个很重要的api. 百牛信 ...
- 一,前端---关于微信小程序遇到的wx.request({})问题
域名请求错误问题 当我们在编写小程序,要发送请求时,wx.request({})时或许会遇到如下的问题: 一:这是因为微信小程序的开发中,域名只能是https方式请求,所以我们必须在小程序微信公众平台 ...
- 微信小程序:使用wx.request()请求后台接收不到参数
问题描述: 微信小程序:wx.request()请求后台接收不到参数,我通过wx.request()使用POST方式调用请求,参数传递不到后台 解决方案: Content-Type': 'applic ...
随机推荐
- JavaScript变量存储浅析(二)
Hello,上一篇(http://www.cnblogs.com/souvenir/p/4969399.html)我们简单的分享了JS中的变量存储原理,但是并未结束,我们漏掉了什么. 对了,就是关于对 ...
- time的基本使用介绍
1.获取当前时间并格式化输出 import time t=time.gmtime() tplt='%Y-%m-%d %H:%M:%S' info=time.strftime(tplt,t) print ...
- zookeeper 事务日志查看
在version下的日志是二进制文件,查看需要转换 创建/data/middleware/zookeeper-3.4.14/translog.sh 脚本 格式化命令: java -classpath ...
- MySQL5.7应当注意的参数
简介: 本篇文章主要介绍 MySQL 初始化应当注意的参数,对于不同环境间实例迁移,这些参数同样应当注意. 注: 本文介绍的参数都是在配置文件 [mysqld] 部分. server_id 和 log ...
- MySQL MHA候选主库选择
MHA在选择新主库时,会将所有存活的从库分为下面几类: 存活从库数组:挑选所有存活的从库 最新从库数组: 挑选Master_Log_File+Read_Master_Log_Pos最高的从库 优选从库 ...
- Vi 和 Vim 编辑器详细使用方法
学习linux的一项必会技能,熟练使用vi/vim编辑器那便最重要的了.不过一堆操作看的也是太头疼了,以下整理了些常用到的命令. 工作模式 vi编辑界面有三种不同的工作模式,分别为命令模式.输入模式. ...
- RS232、RS485和TTL电平与串行通信
RS232.RS485和TTL 作为一个底层软件开发工程师,经常会碰到RS232.RS485和TTL这一类的问题. 之前总是碰到问题之后Google一下,把当下的问题解决了之后就不管了,过个一两天就忘 ...
- 算法笔记codeup-Contest100000566
ABCD太直接了就不放了 E 求一元二次方根 C语言 #include <stdio.h> #include <math.h> int main() { ; ; ; sca ...
- Triton 学习
介绍 Triton 是一款动态二进制分析框架,它支持符号执行和污点分析,同时提供了 pintools 的 python 接口,我们可以使用 python 来使用 pintools 的功能. Trito ...
- 关于mysql数据库utf-8问题
1.bug的出现 我们正常使用utf-8类型来给我们的字段的字符编码,对于正常的都没有问题,例如姓名呀,性别年龄等,但是会遇到一个问题就是如果存储表情emoji则无法存入utf-8编码的字段 2.my ...